Paypal (paypal.com) |
|
| Protocol | OAuth 2 |
| Returned Data | userId, name, email, birthday |
| Requires SSL? | No |
How to Set Up PayPal API for Magento
In this article, you will learn how to enable and configure your PayPal API in order to integrate PayPal login into Magento Social Login Pro plugin. Please follow the step-by-step instructions below.
Step-by-Step action:
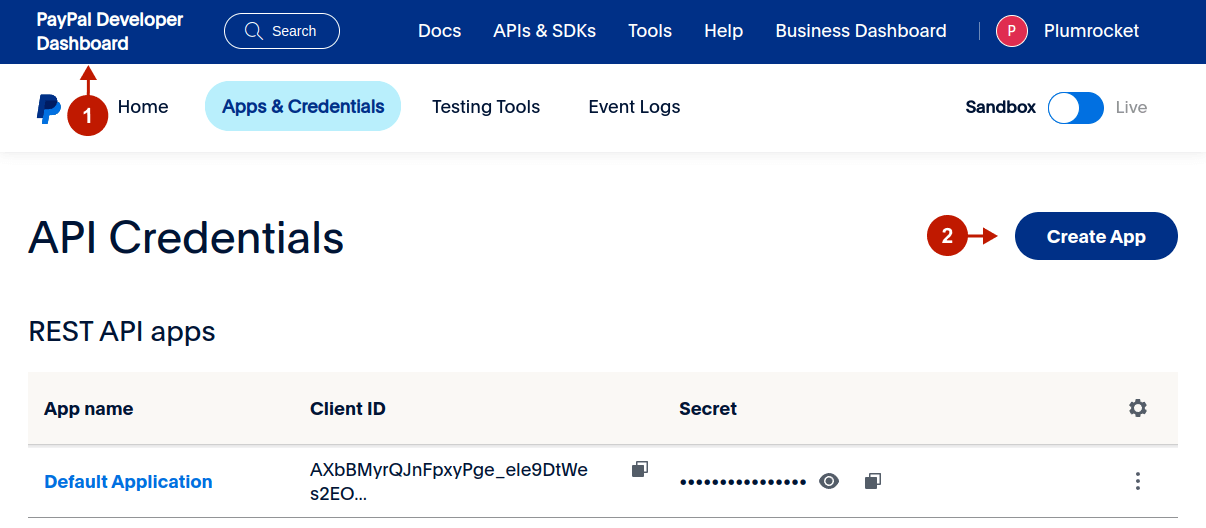
- Log into developer.paypal.com/developer/applications.
- Press “Create App” button to start creating you PayPal application.
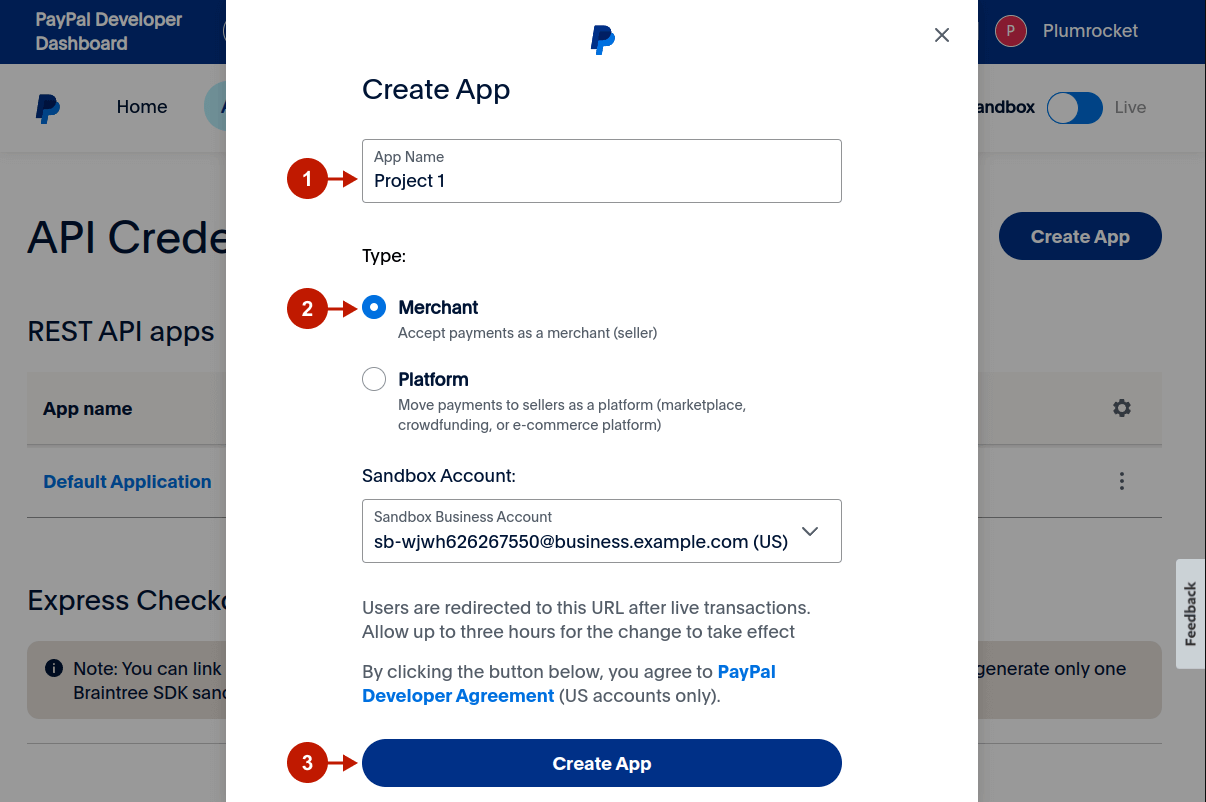
Step-by-Step action:
- Indicate the name of your application.
- Choose the “Merchant” type.
- Press “Create App” button.
After creating a new application, select the needed app under the App name column.
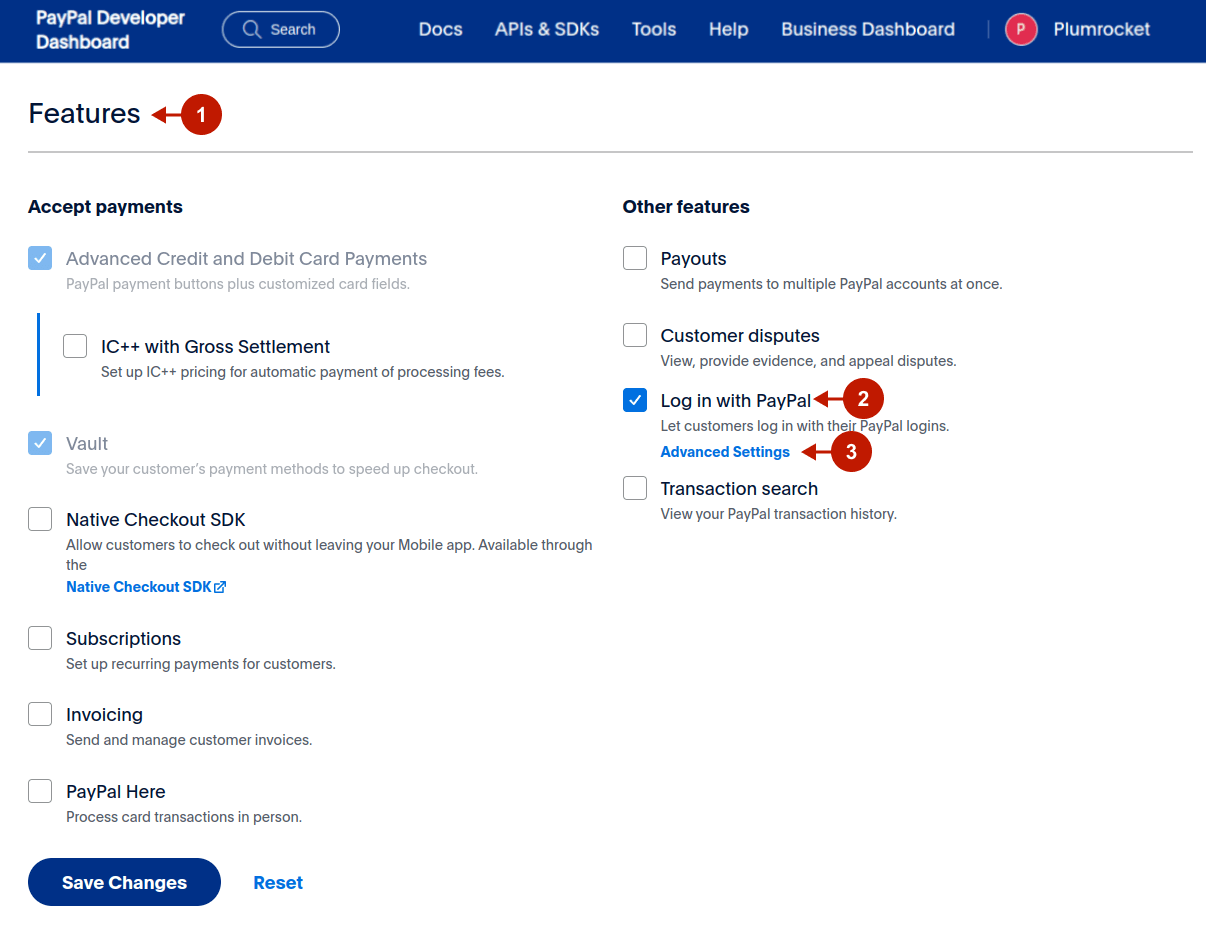
Step-by-Step action:
- Scroll down to the Features tab of your app.
- Check the “Log In with Pay Pal” checkbox.
- Click on the “Advanced Settings” link.
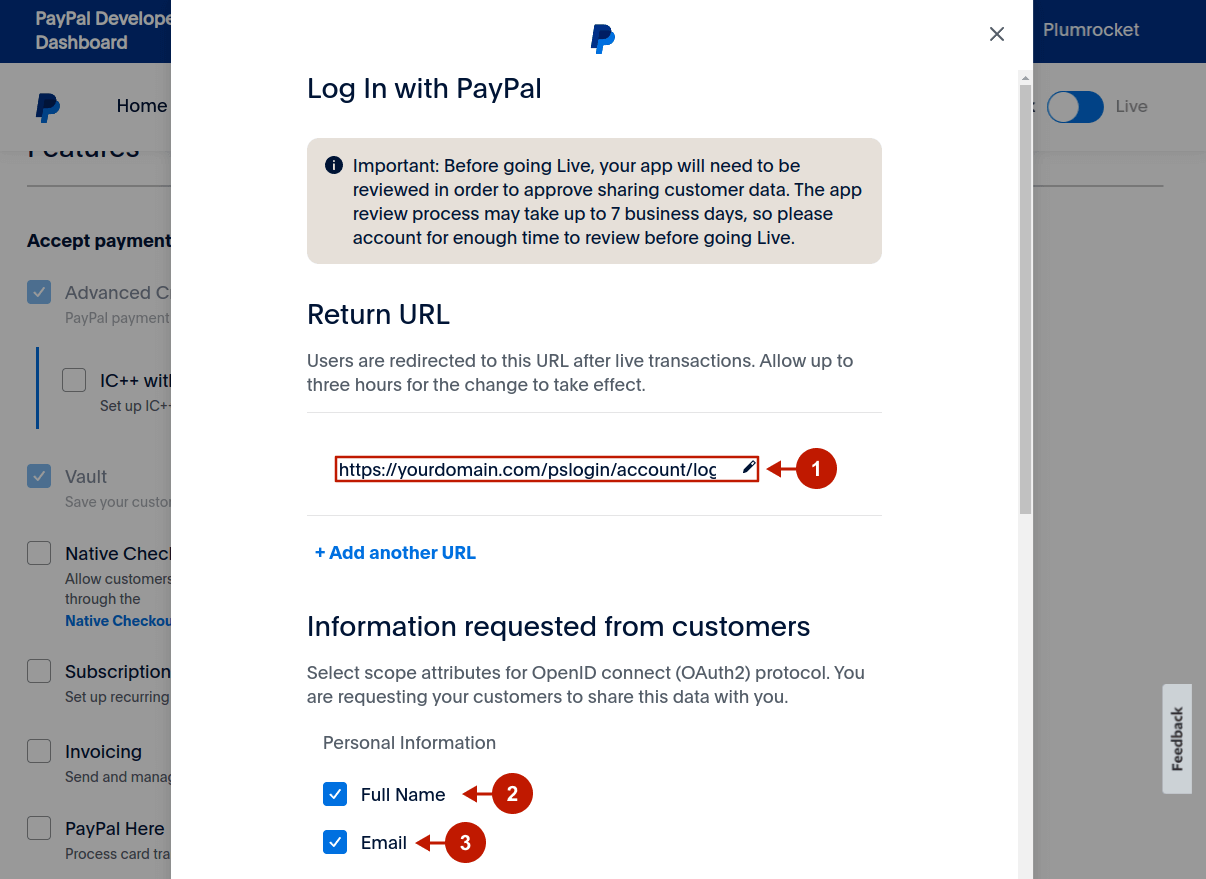
Step-by-Step action:
- Enter your Return URL
- Check the “Full Name” checkbox.
- Check the “Email” checkbox.
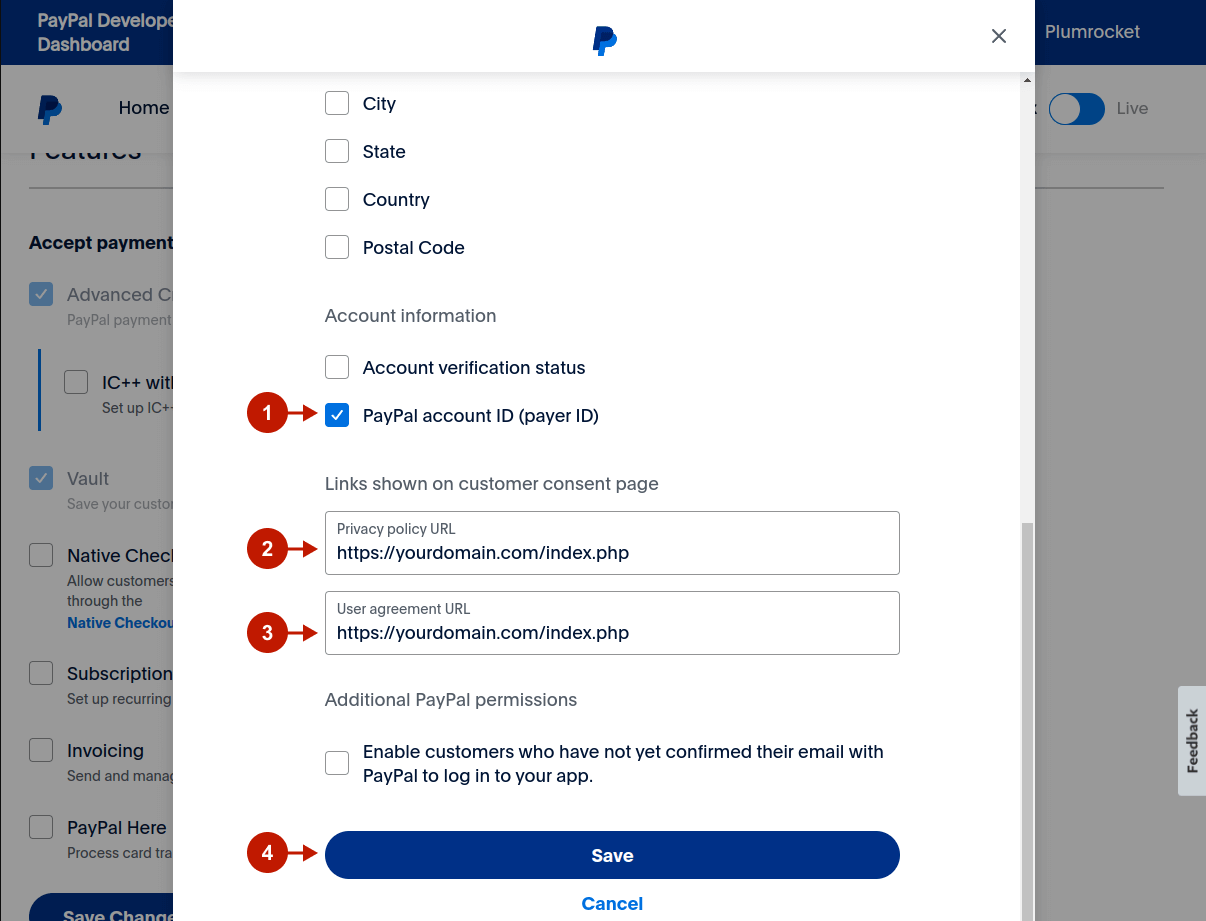
Step-by-step guide:
- Check the “PayPal account ID (payer ID)” checkbox.
- Enter the Privacy policy URL.
- Enter the User agreement URL.
- Click the “Save” button.
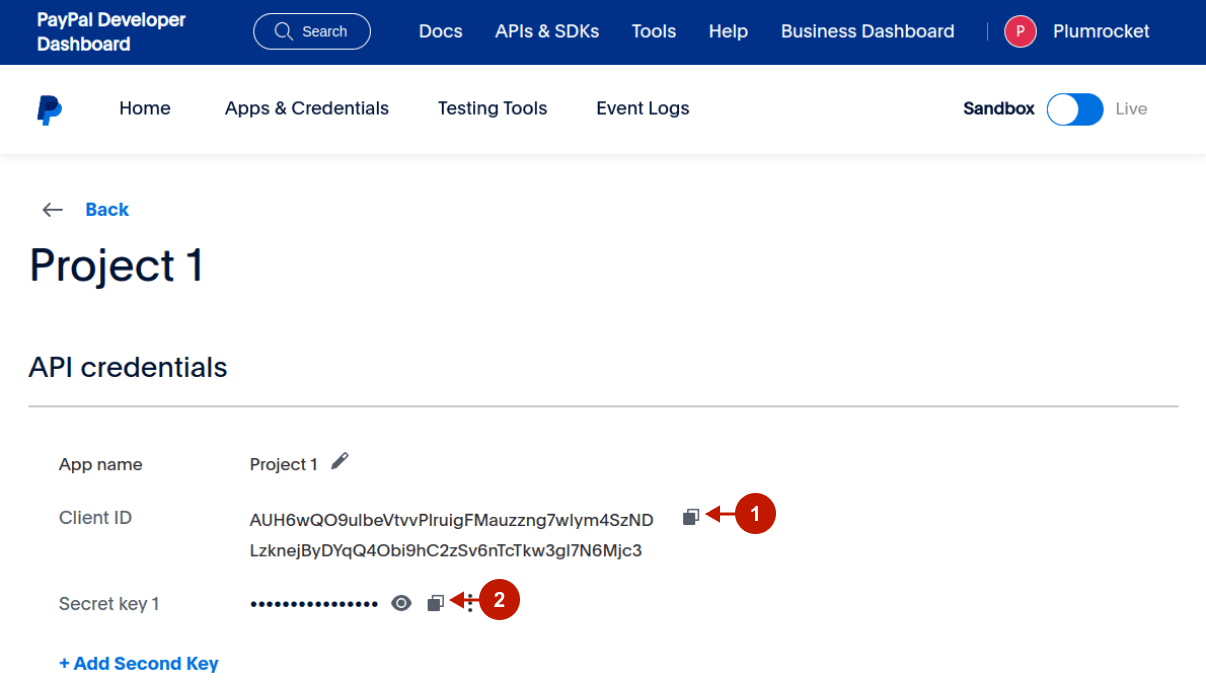
Step-by-step guide:
- Copy “Client ID” to your clipboard.
- Copy “Secret” key to your clipboard.
Configuring PayPal Integration in Magento Social Login Pro Extension
In this step you must update your Magento 2 Social Login Pro Extension configuration. In your magento 2 admin panel, go to “System” -> “Configuration” -> “Plumrocket Inc” -> “Social Login Pro” -> “PayPal” Tab.
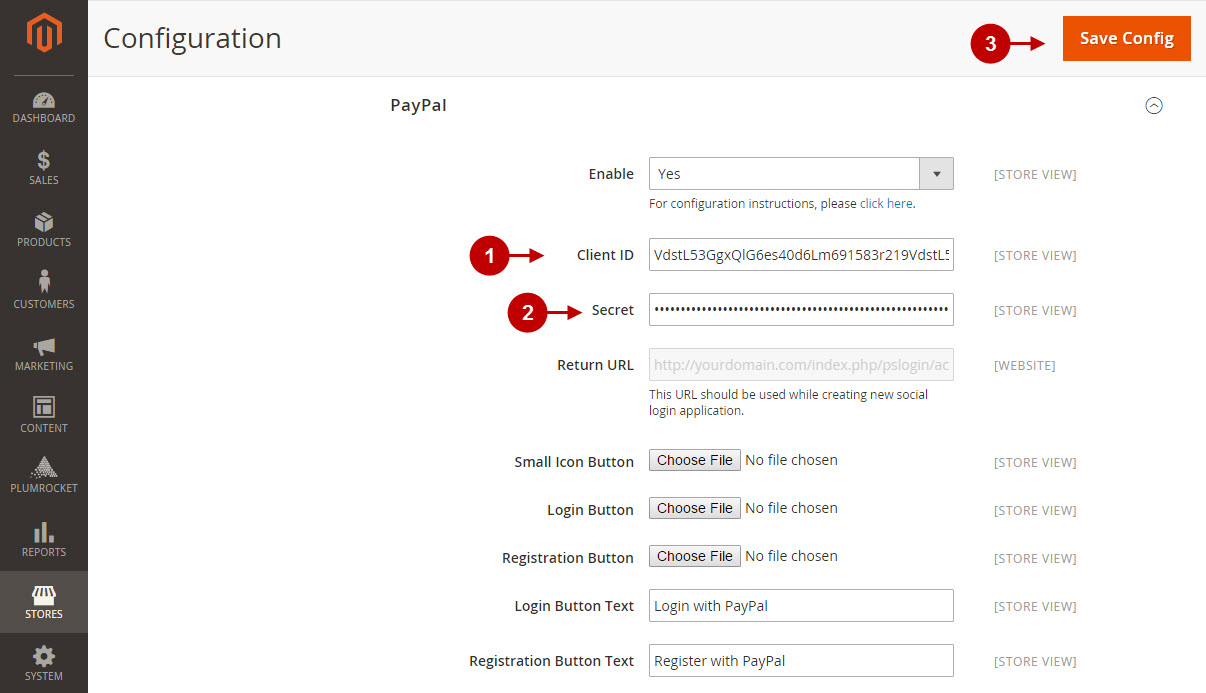
Step-by-Step action:
- Paste Client ID into the relevant field of your “PayPal” backend tab.
- Insert Secret key into the relevant field of your “PayPal” backend tab.
- Press “Save Config” button to save you settings.

Configuration of PayPal Magento Social Login application is now completed.
Configuring PayPal Integration in Magento 2 Social Login Pro Extension
In this step you must update your Magento 2 Social Login Pro Extension configuration. In your magento 2 admin panel, go to “Plumrocket” tab in the main menu -> “Social Login Pro” section -> “Configuration” -> “PayPal” Tab.
Step-by-Step action:
- Paste Client ID into the relevant field of your “PayPal” backend tab.
- Insert Secret key into the relevant field of your “PayPal” backend tab.
- Press “Save Config” button to save you settings.
Configuration of PayPal Magento 2 Social Login application is now completed.
Next Step > Return to Social Login Pro API Reference