In this article, you will learn how to set up and configure Telegram API in order to integrate Telegram login into Magento 2 Social Login Pro plugin. Please follow the step-by-step instructions below to set up the integration correctly.
How to Set Up Telegram API for Magento
In order to get Telegram API keys, you need to create and manage a Telegram bot. First, go to the Telegram Web or app on your device, and log into your Telegram account.
Step-by-step guide:
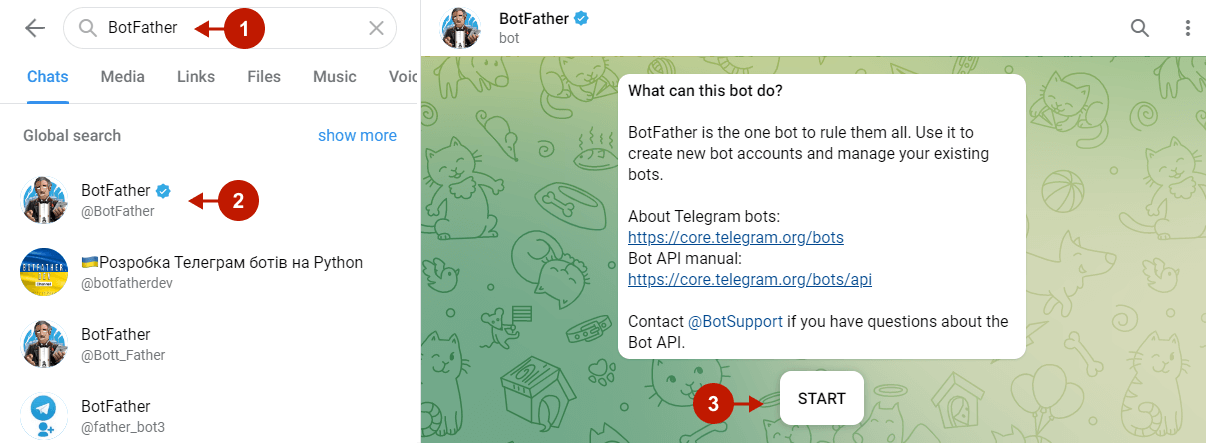
- Search for a
botfarthertelegram bot and select it. - Click Start to start this bot (or type
/start).

Step-by-step guide:
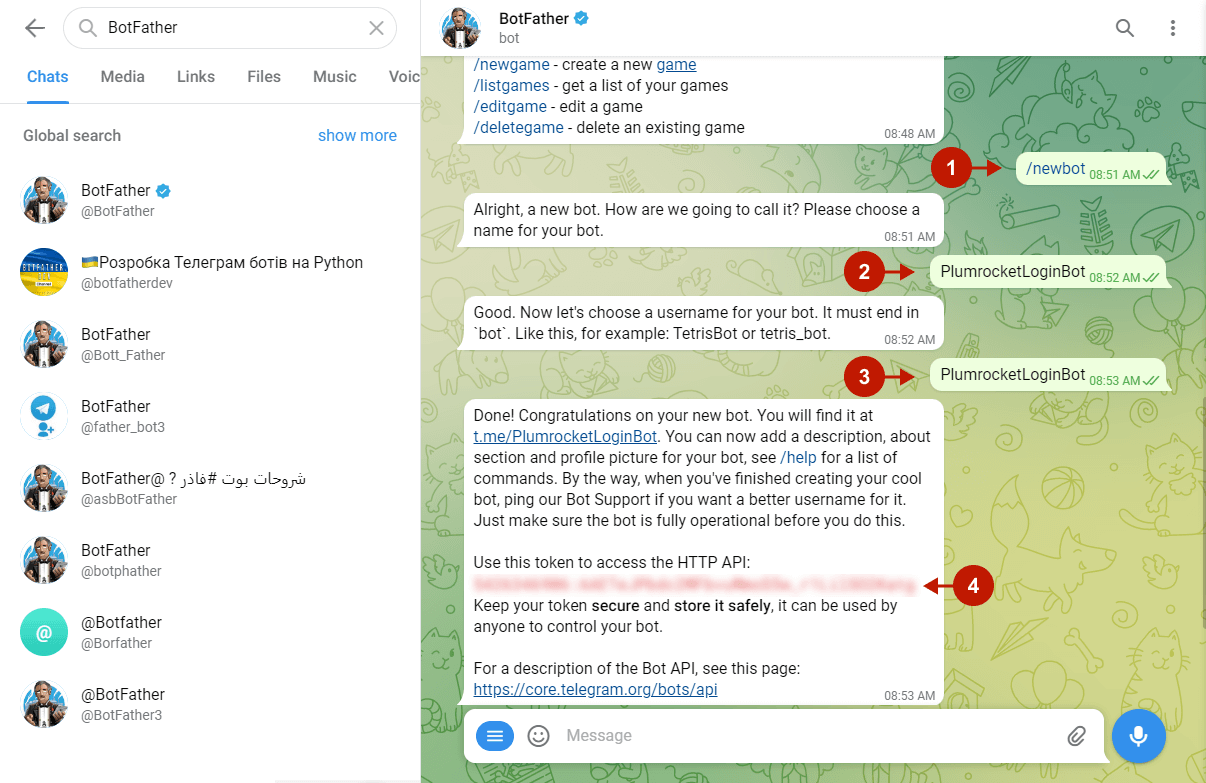
- Type /
newbotto create a new bot. - Provide the name of your new bot, e.g. PlumrocketLogin.
- Follow the instructions and type a unique username for your bot, which must be ended with “bot”.
- The bot is now successfully created. and you will get a message containing a token to access the API. Copy this token to paste in later in the Magento 2 Telegram login configurations.

Step-by-step guide:
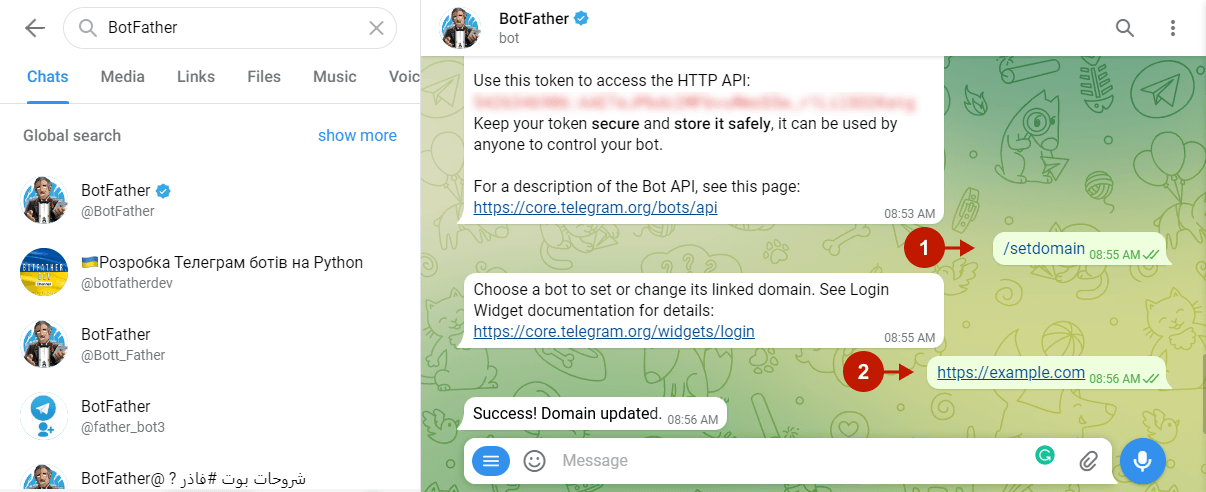
- For security purposes, Telegram also requires the bot to be linked to the site domain. You can do this by typing
/setdomain. - To complete the domain setup, send a link to your website where the Telegram login will be implemented.

The Telegram Login API is successfully set up. Next, set it up in the Magento configuration page.
Configuring Twitter Integration in Magento 2 Social Login Pro Extension
At this point, you should paste the created API keys into your Magento 2 Social Login Pro Extension configuration. In the main Magento menu, go to Plumrocket -> Social Login Pro -> Configuration -> Telegram, and perform the following steps:
Step-by-step guide:
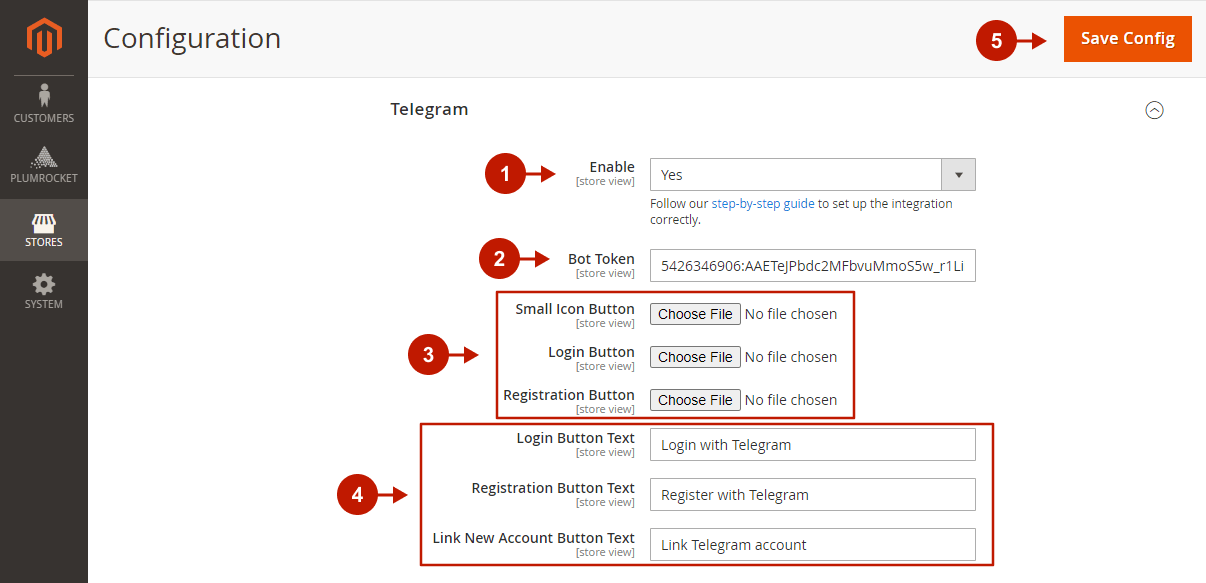
- Set the Enable option to Yes to enable Telegram Login on your Magento 2 website.
- Paste the Bot Token you got when setting up a Telegram bot.
- Skip this step to have the extension use the default icons for the Telegram login buttons, or select the files to use your own.
- Specify the text to be displayed on the Telegram login buttons.
- Click Save Config to save the configurations.

