
Google (google.com) |
|
| Protocol | OAuth 2 |
| Returned Data | userId, name, email, photo |
| Requires SSL? | No |
How to Set Up Google Login API for Magento
In this article, you will learn how to find your Google Login API and integrate Google Login into Magento Social Login Pro plugin. Please follow the step-by-step instructions below.
1. Create New Project
Step-by-step guide:
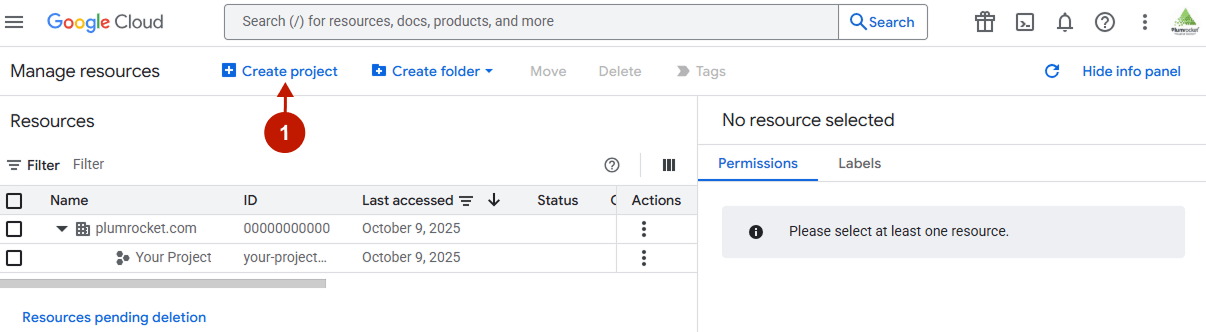
- Log in to cloud.google.com/console/project and press the Create project button.
Step-by-step guide:
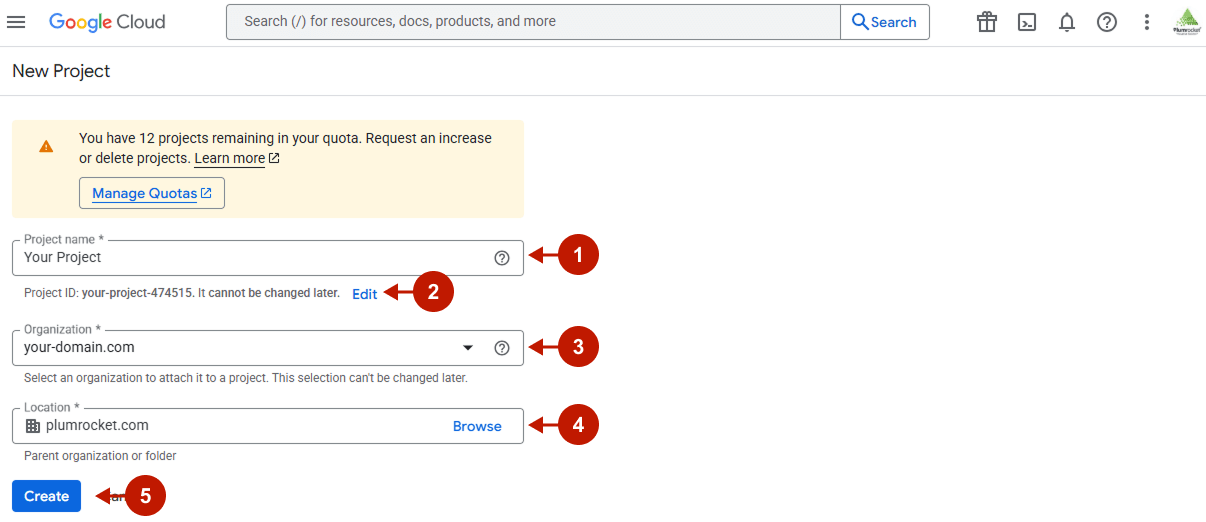
- Enter a descriptive name for your project in the Project Name field.
- Optionally, you can change the Project ID by clicking Edit. You cannot change it after the project is created.
- Click Organization and select your organization.
- In the Location field, click Browse to display locations for your project, click a location, and then click Select.
- After all fields are completed, click Create. The console navigates you to the Dashboard page, and your project is created within a few minutes.
Step-by-step guide:
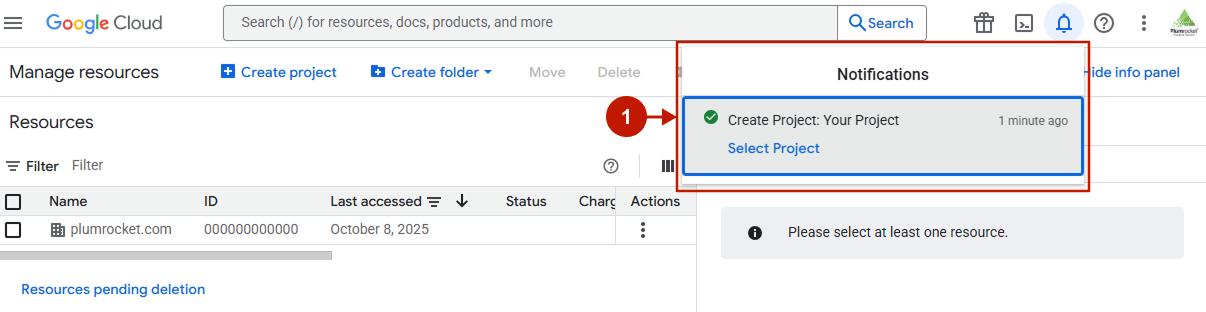
- After the project is created, you will receive a Notification confirming the success.
2. Creating an OAuth client ID
Step-by-step guide:
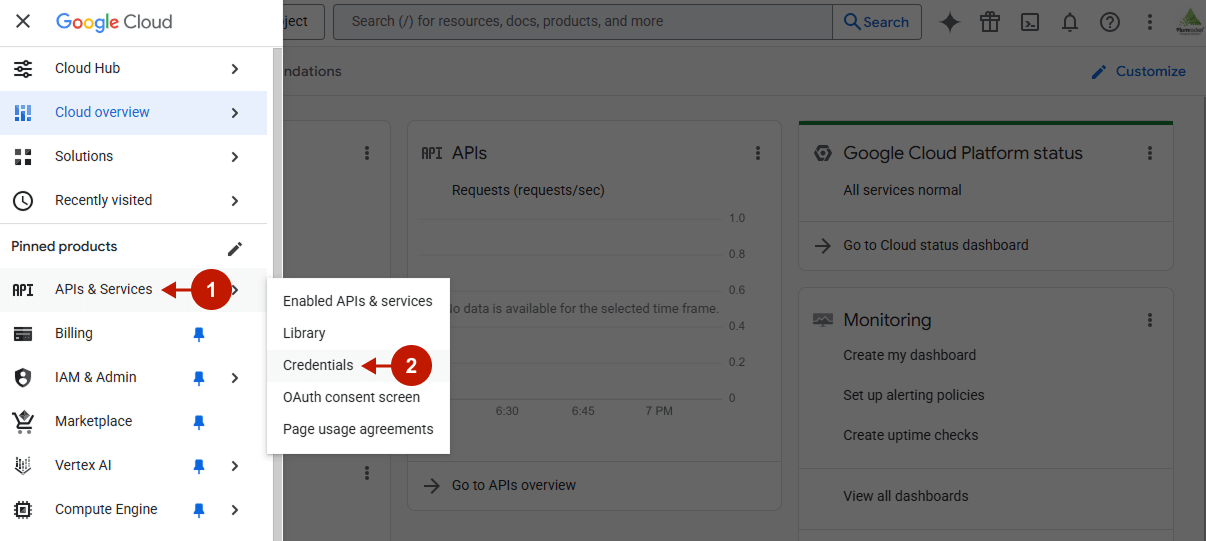
- In the left-hand menu, navigate to APIs & Services.
- Choose Credentials.
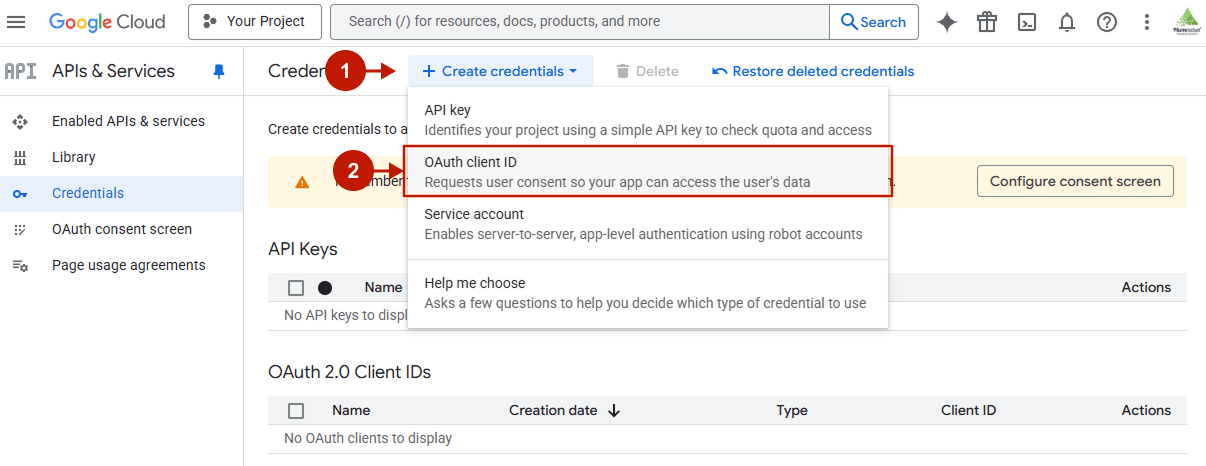
Step-by-step guide:
- Go to the Create credentials dropdown.
- Select the OAuth client ID.
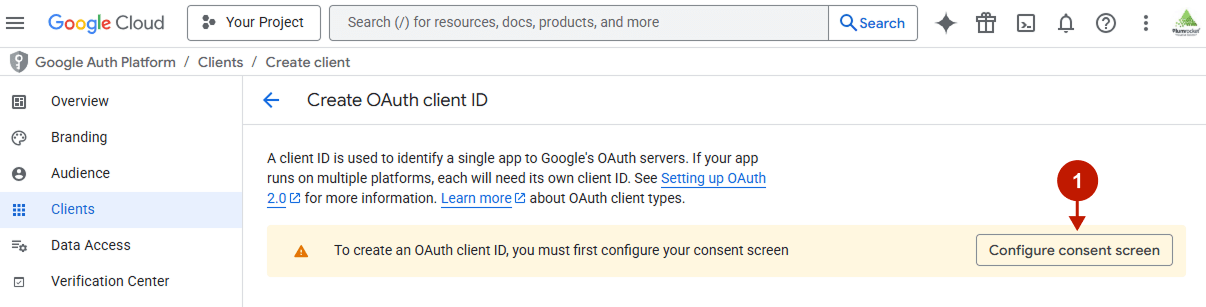
Step-by-step guide:
- Press the Configure consent screen button.
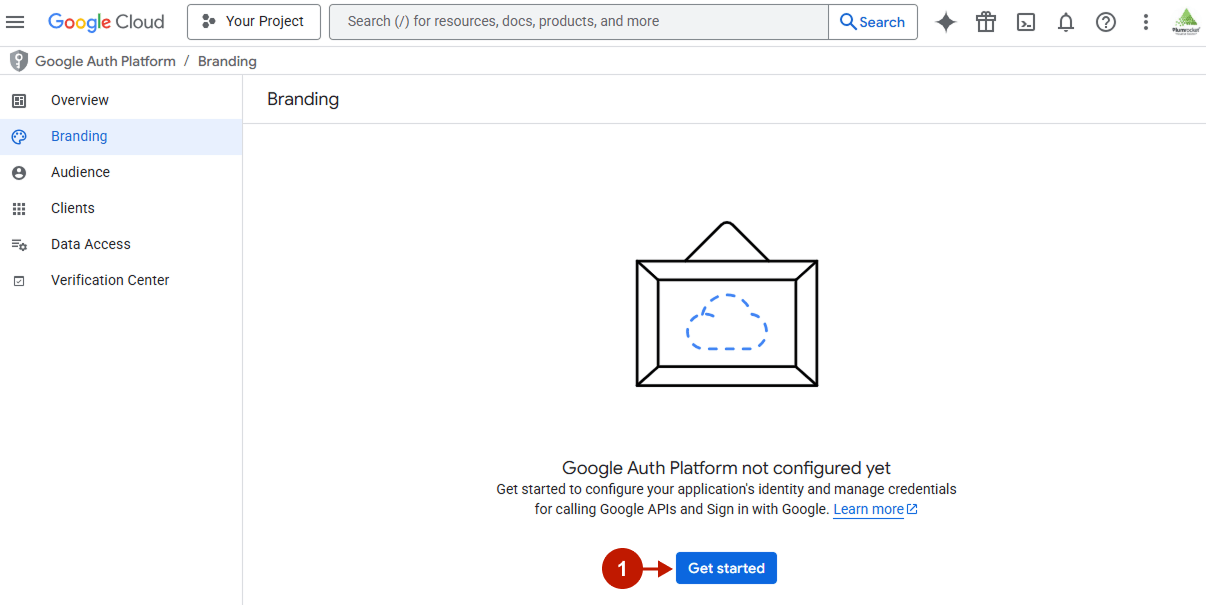
Step-by-step guide:
- Click on Get Started.
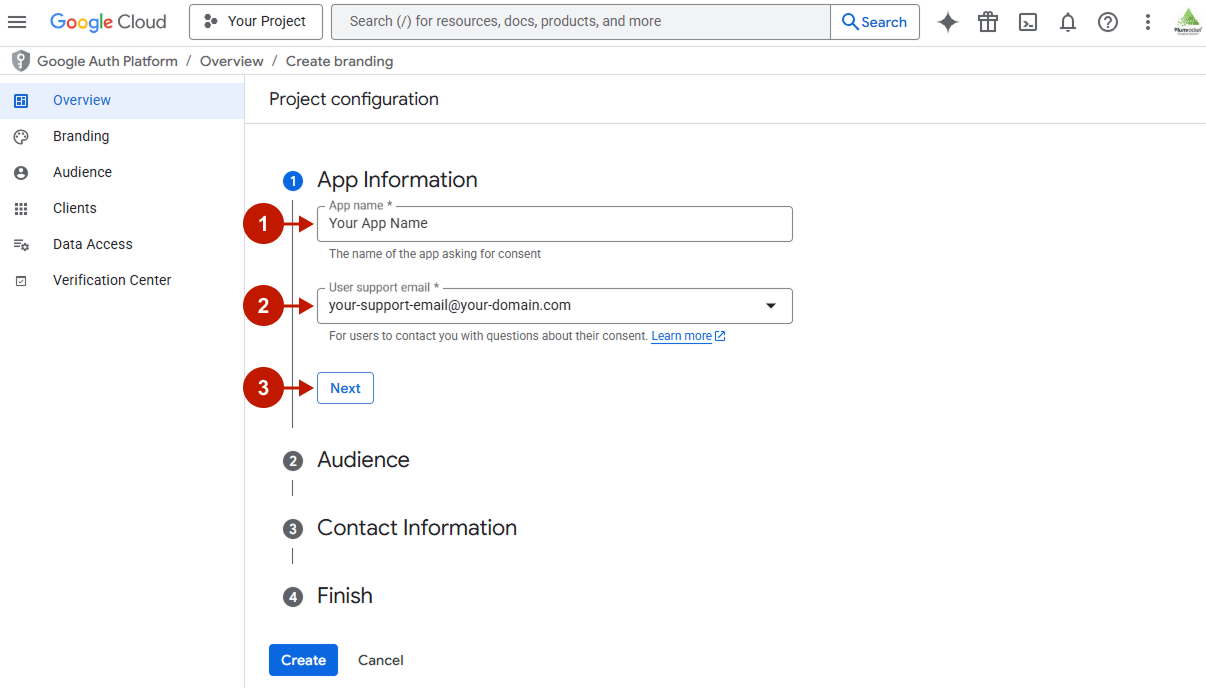
- App Name: enter the name of your Magento store that asks customers for consent to use their Google account data for authentication.
- User support email: provide an email for users to contact if they have questions about their consent.
- Press Next.
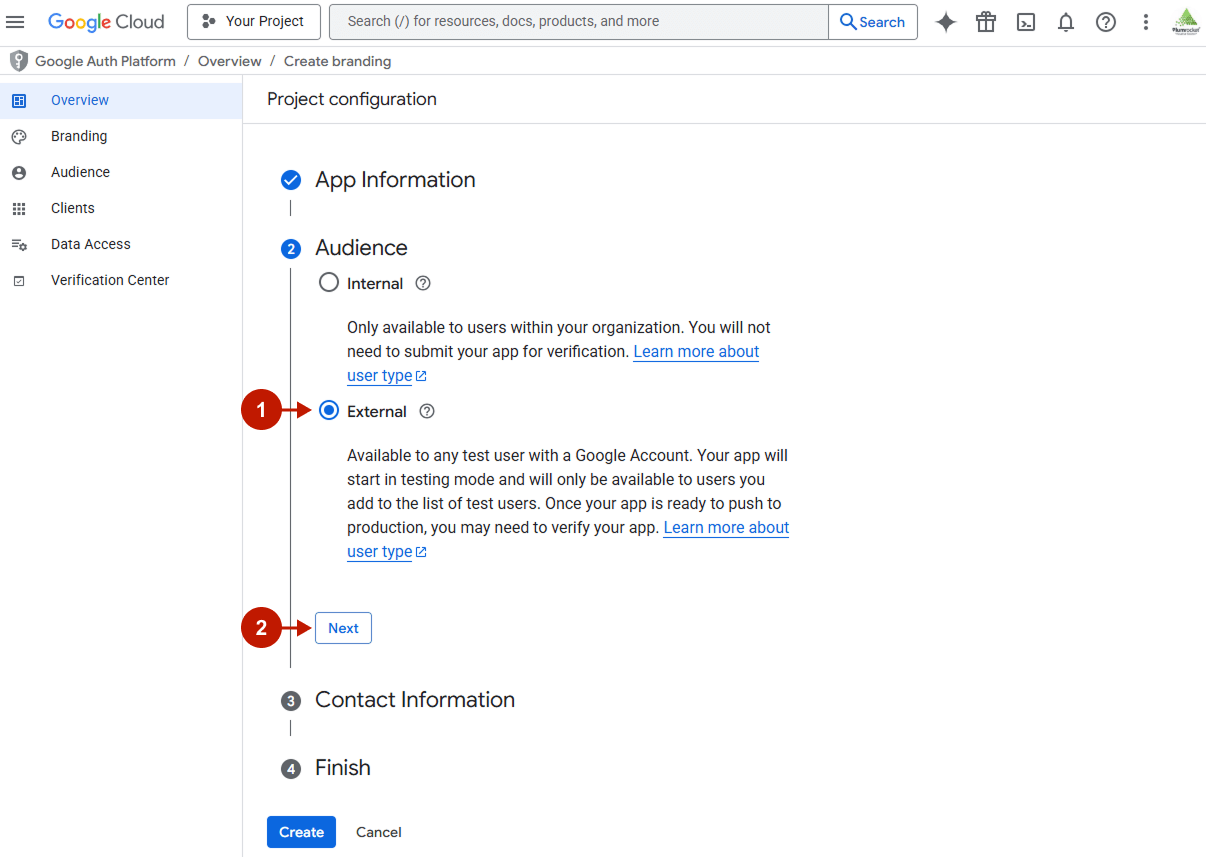
Step-by-step guide:
- Choose the External audience type. In this case, Google login would be available for all users who have a Google Account.
- Press Next.
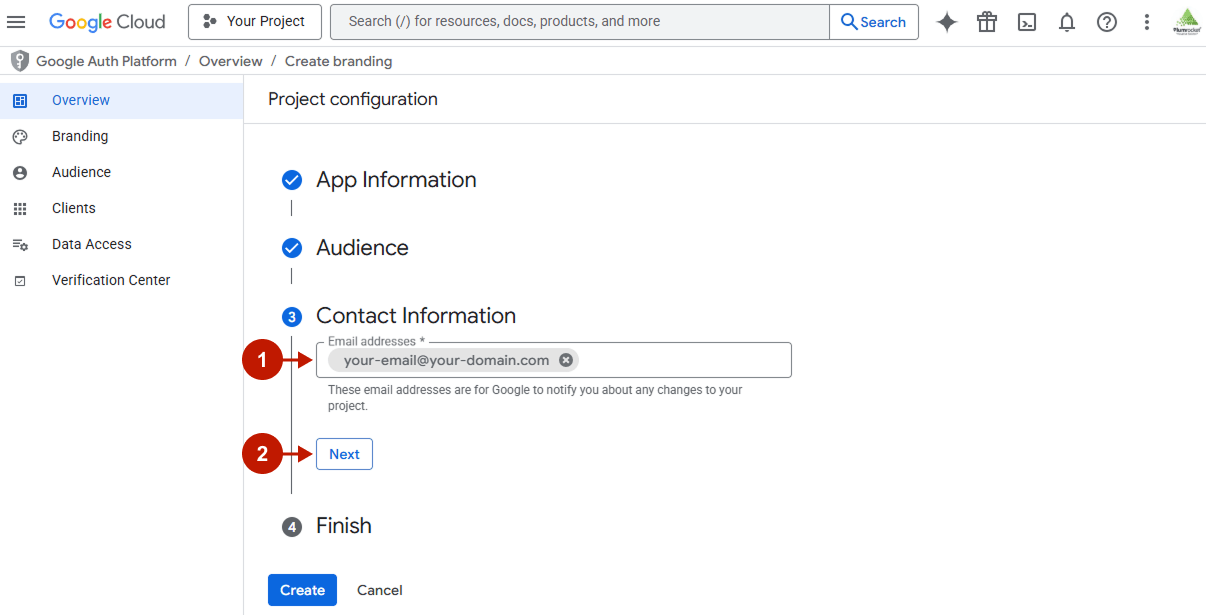
Step-by-step guide:
- In the Email addresses field, provide the Email addresses for Google to notify you about any changes to your project.
- Press Next.
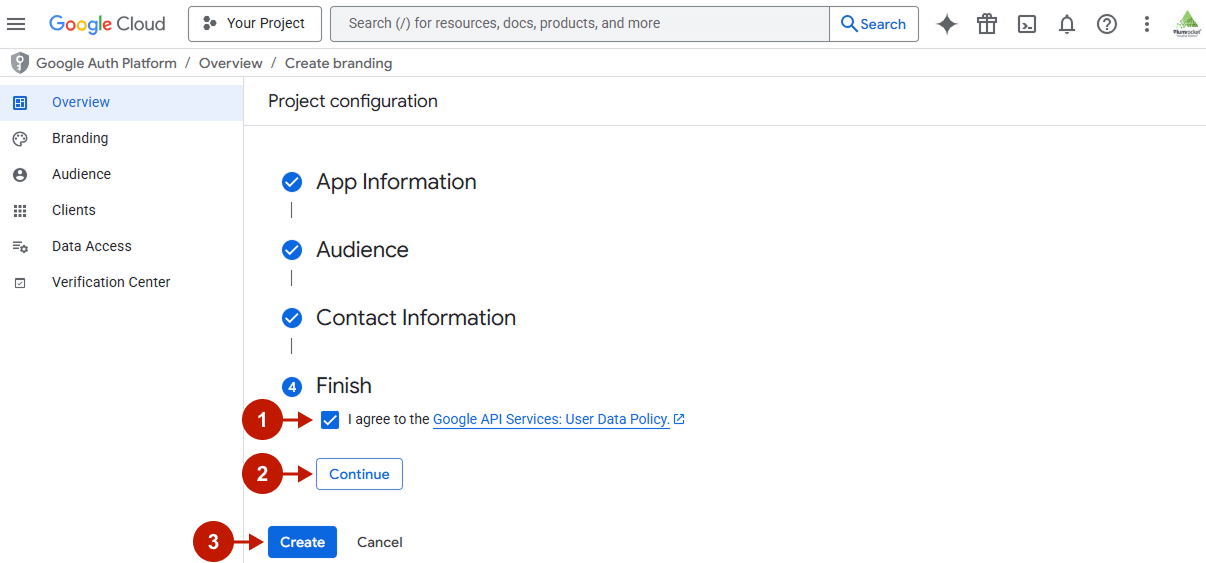
Step-by-step guide:
- Agree to the User Data Policy.
- Press Continue.
- Press the Create button.
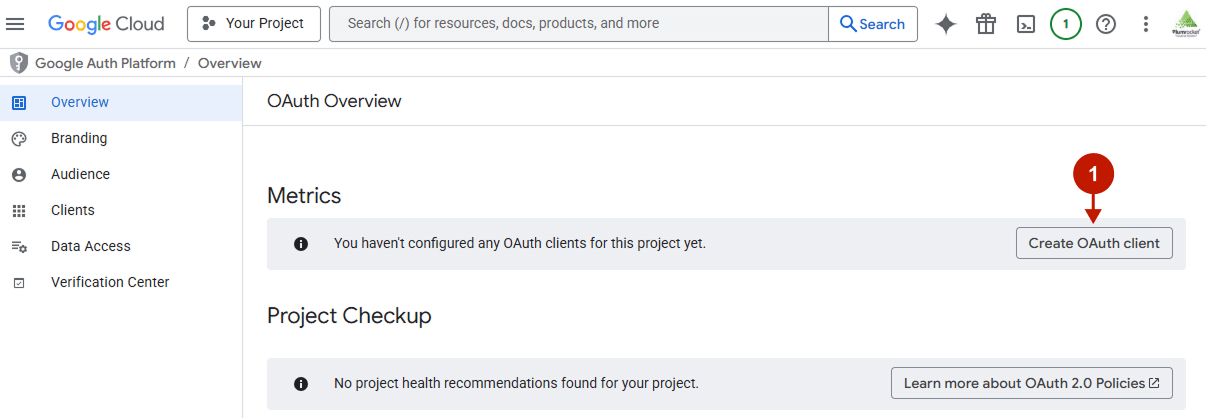
3. Create an OAuth client
After completing the previous steps, you will be redirected to the OAuth Overview page. Here, you can analyze your Google Login metrics. But first, you should create an OAuth Client:
Step-by-step guide:
- Press the Create OAuth client button.
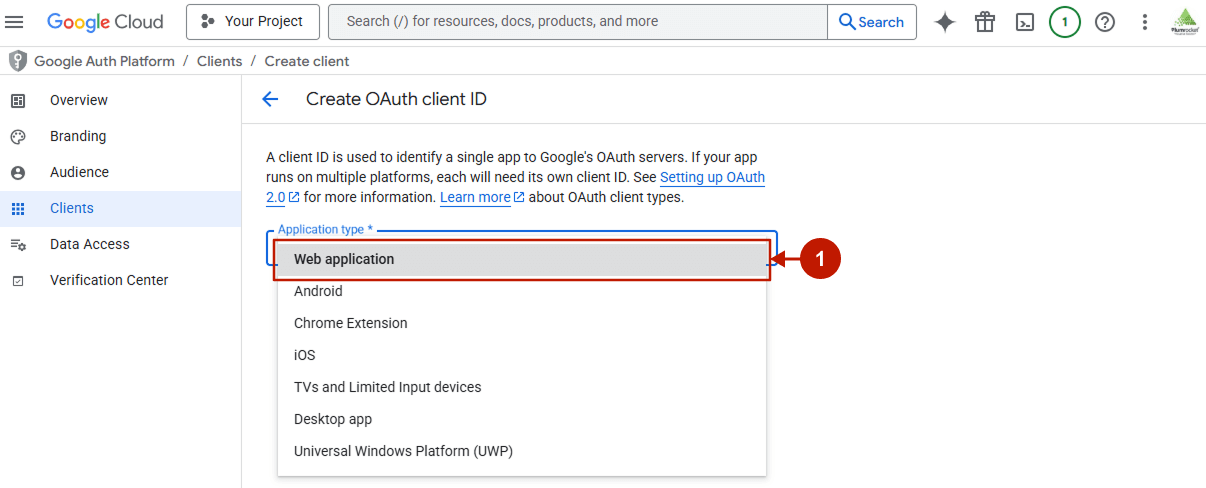
Step-by-step guide:
- From the Application type dropdown, select Web application.
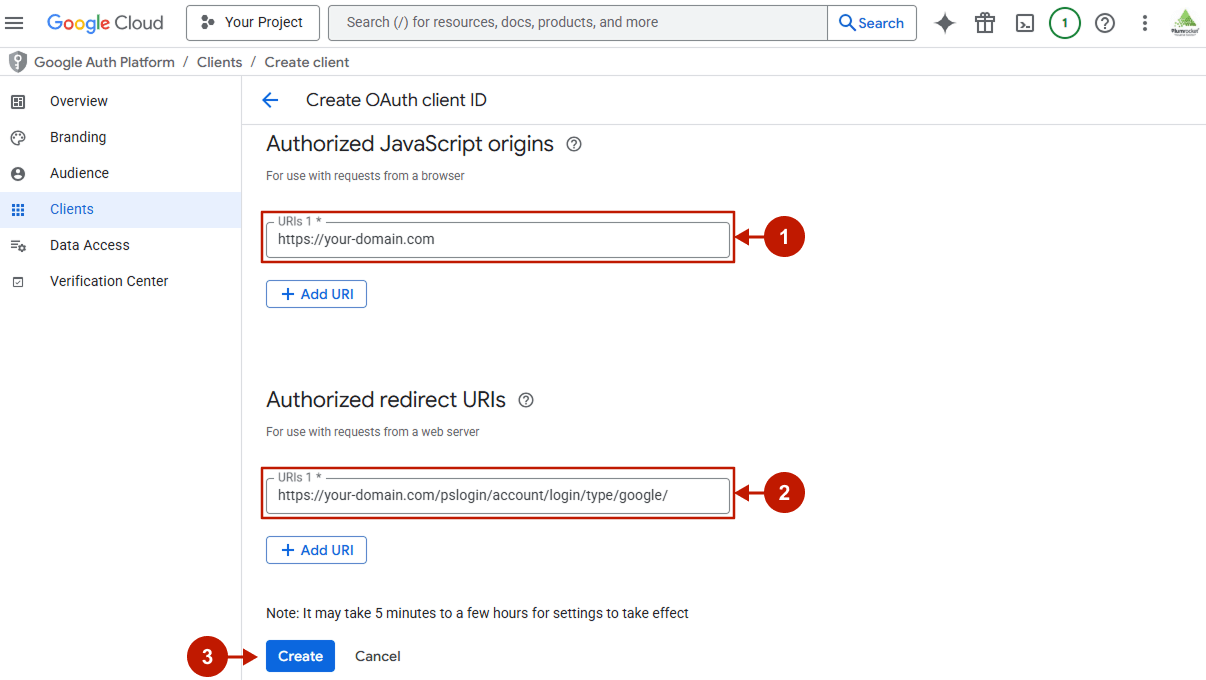
Step-by-step guide:
- Specify your Site Domain.
- Insert the Return URI. You can copy it from the Apple login configurations in your Magento 2 Admin Panel (“Redirect URIs” field).
- Press the Create button.
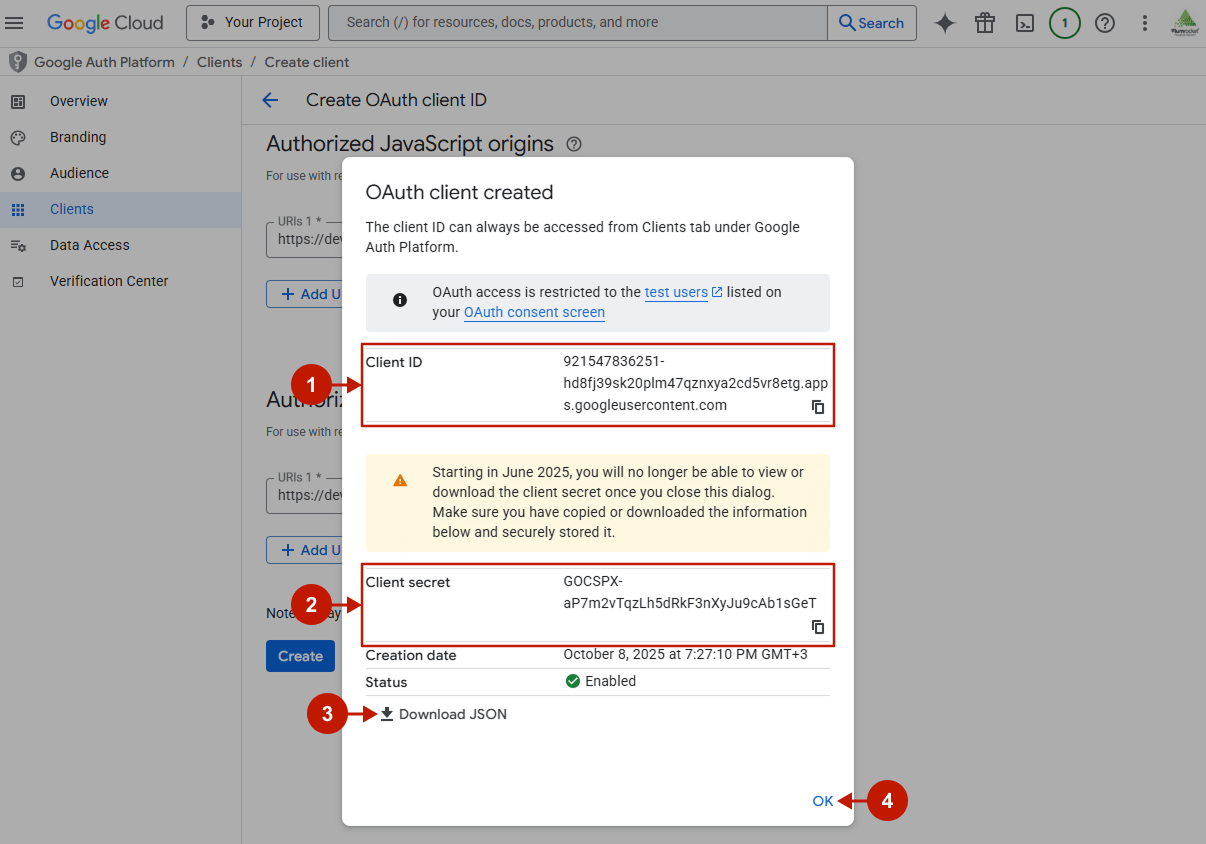
Step-by-step guide:
- This is your Client ID. You will need to insert it in the Magento admin panel in order to integrate Google social login.
- This is the Client secret. You will need to insert it in the Magento admin panel in order to integrate Apple social login.
- Download and save the JSON file containing your Client secret in a secure location.
- Press the OK button.
4. Create an API key
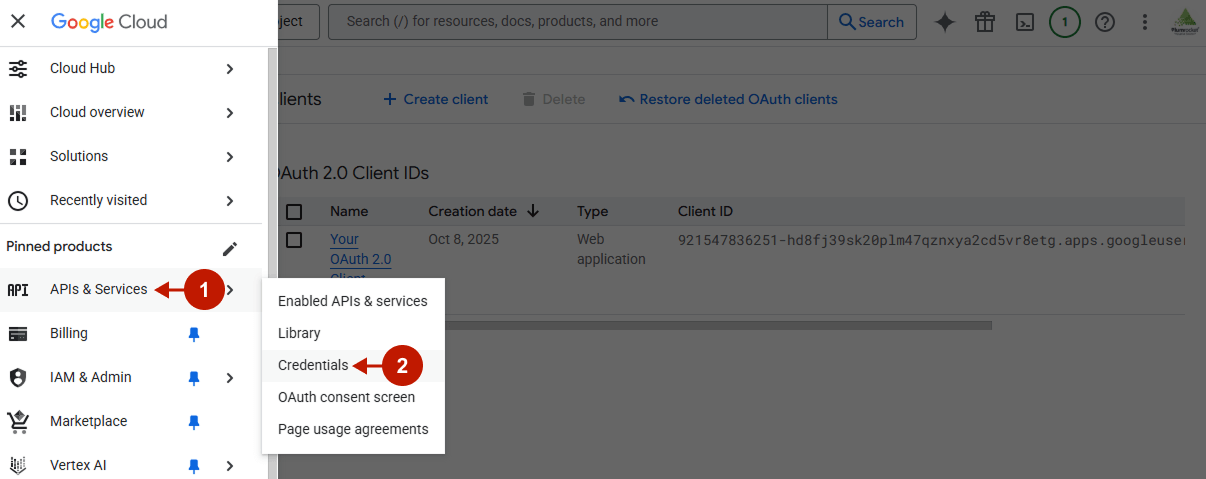
Step-by-step guide:
- In the left-hand menu, navigate to APIs & Services.
- Go to Credentials.
Step-by-step guide:
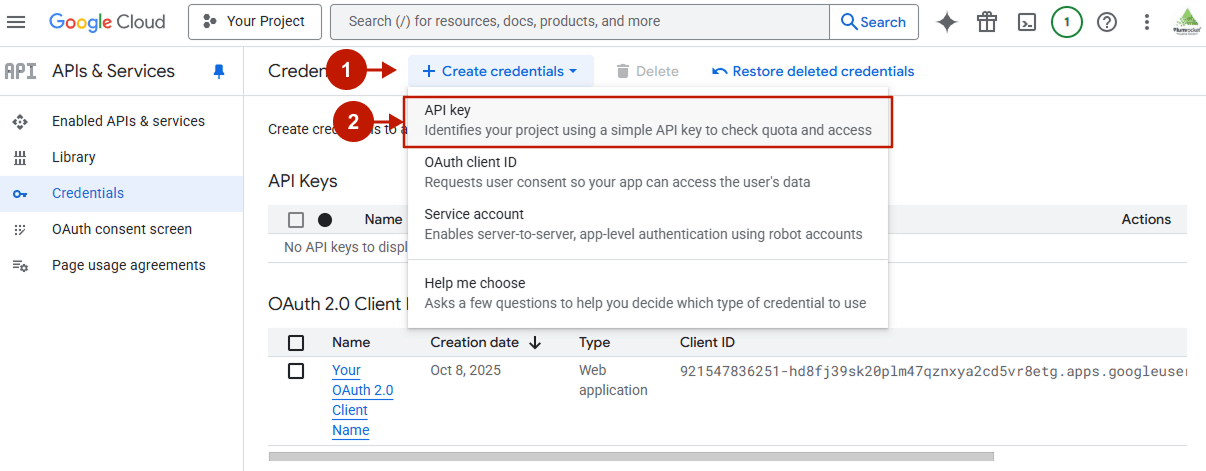
- Go to the Create credentials dropdown.
- Select the API key.
Step-by-step guide:
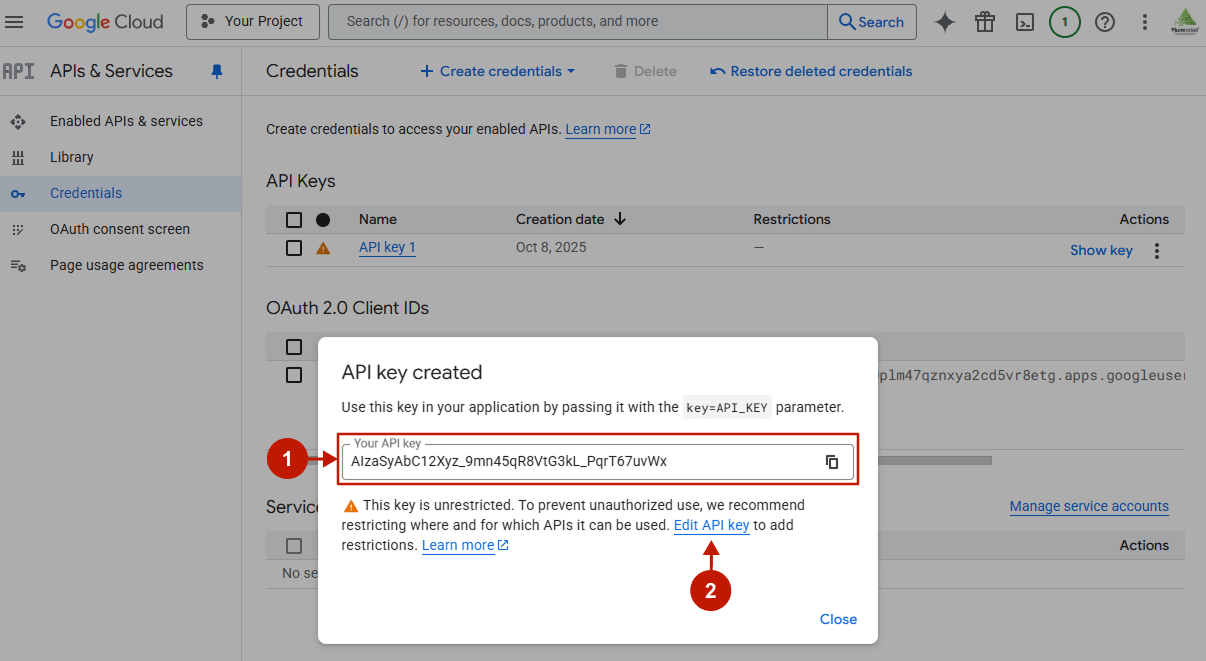
- This is your API key, which you just created. You will need to insert it in the Magento admin panel in order to integrate Google social login.
- Close the pop-up.
Step-by-step guide:
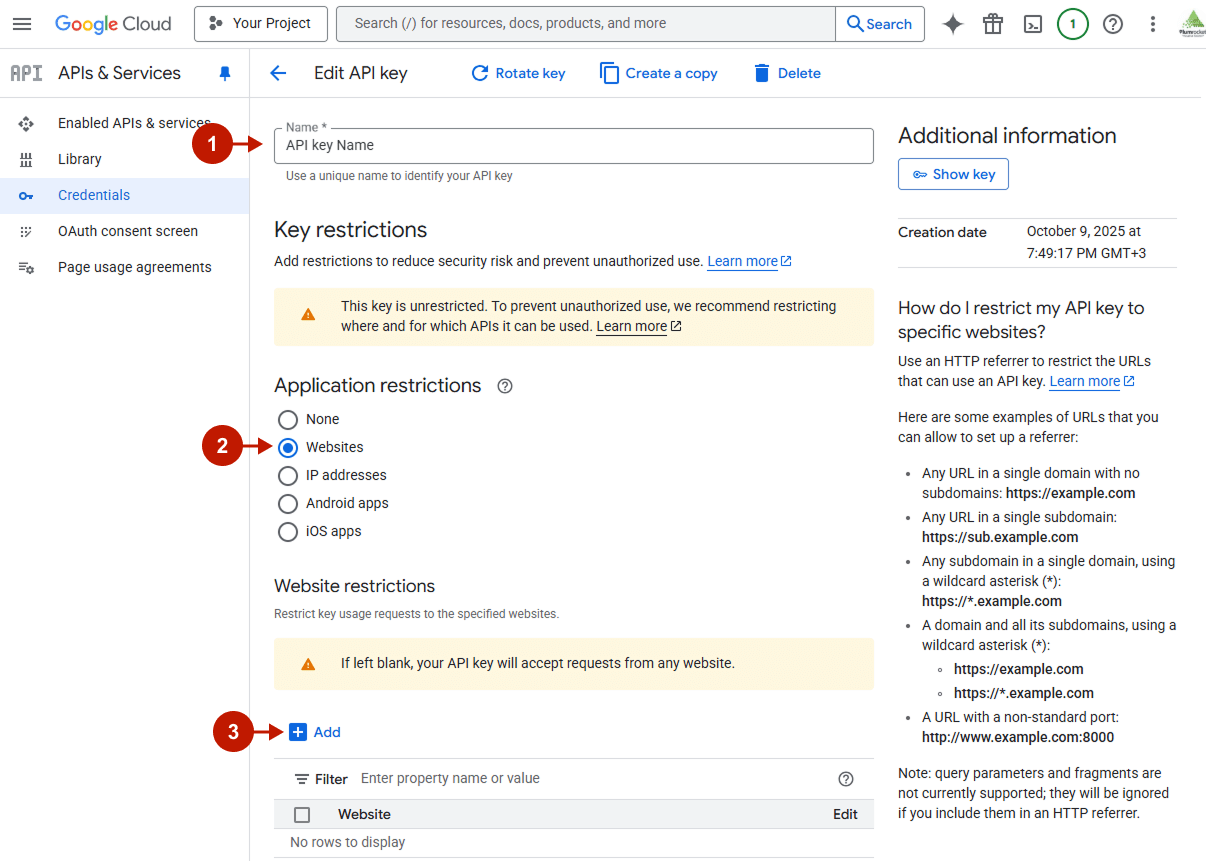
- Name: you can edit your API Key name in this field.
- Under the Application restrictions, select Websites.
Step-by-step guide:
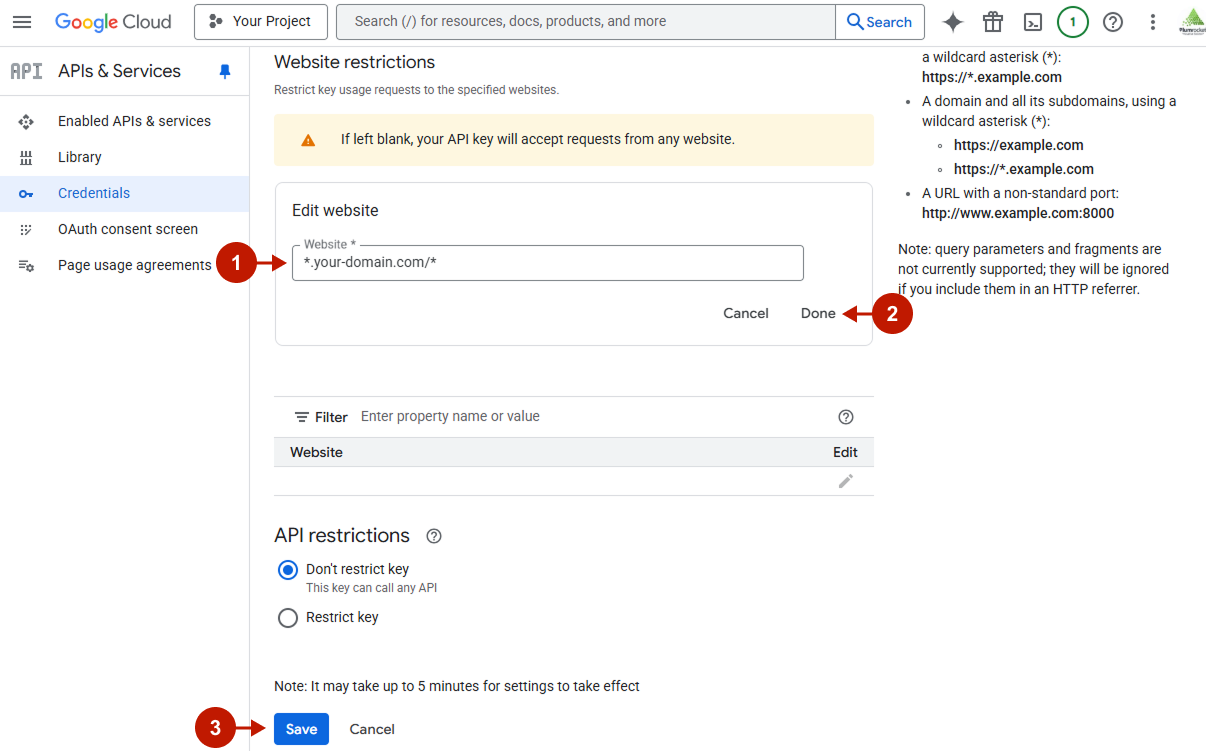
- Provide at least one restriction in the Website restrictions section. This way, you specify which websites can use your API key. Optionally, you can use wildcard characters (
*) for the subdomain and/or path. Make sure to provide both HTTP and HTTPS paths if your domain supports both. - Press Done.
- Click Save.
Configuring Google Integration in Magento Social Login Pro Extension
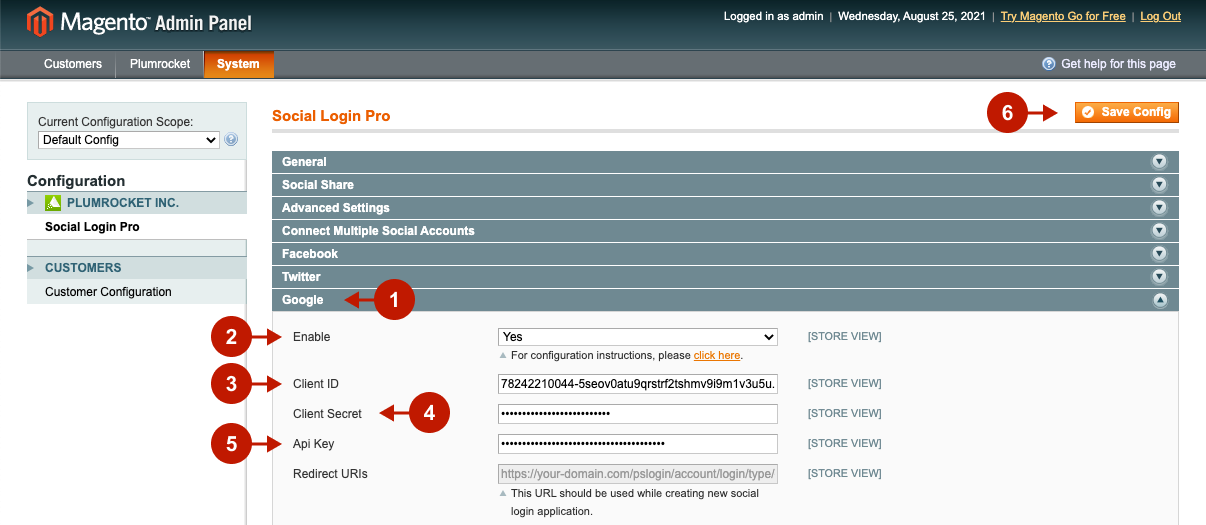
In order to integrate Google Login into your Magento store, go to System -> Configuration -> Plumrocket Inc -> Social Login Pro in the Magento admin panel.
Step-by-step guide:
- Go to the Google tab.
- Set the Enable option to Yes to enable the Google integration.
- Paste Client ID into this field.
- Paste the Client Secret key into this field.
- Enter your Google API Key, which can be found at your Google Developer’s account.
- Click Save Config to save your settings.
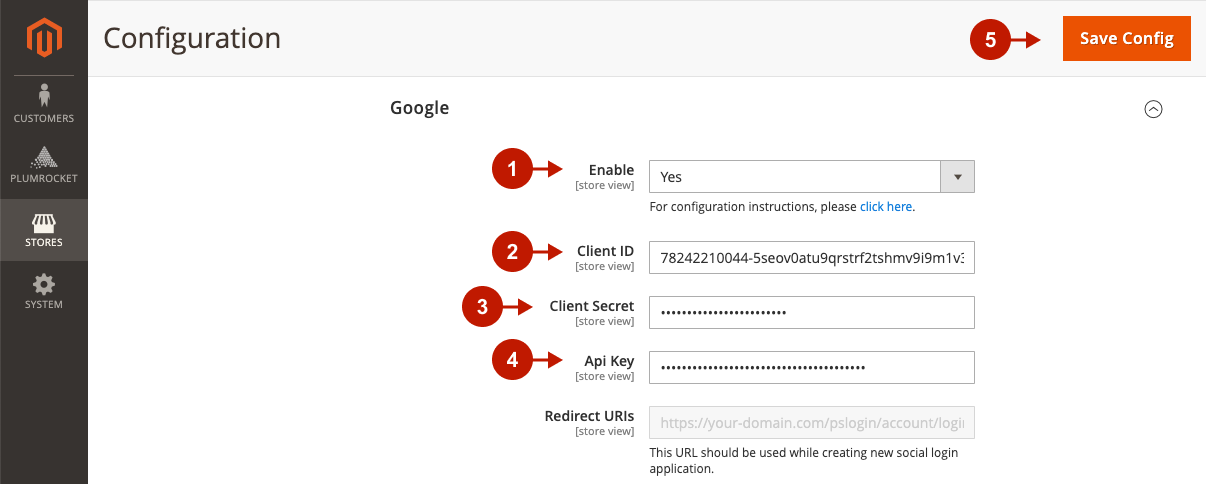
Configuring Google Integration in Magento 2 Social Login Pro Extension
In this step, you must update your Magento 2 Social Login Pro Extension configuration. In your Magento admin panel, go to Plumrocket -> Social Login Pro -> Configuration -> Google.
Step-by-step guide:
- Set the Enable option to Yes to enable Google Login on your Magento 2 website.
- Paste the Client ID into this field.
- Paste the Client Secret key into this field.
- Enter your Google API Key in this field.
- Click Save Config.
Enabling Magento Google One-Tap Sign Up and Sign In
Please follow the How to Add Magento Google One-Tap Sign In article if you want to enable it on your website.
At this point, setting up Google Magento Social Login and Magento 2 Social Login application is complete.
Next Step > Return to Social Login Pro API Reference