Skip to content
Logo
  • Support
  • My account
  • My cart
  • Magento 2 Extensions
  • Magento 1 Extensions
  • Magento Services
  • Packages
  • Special Offers
  • Blog
  • Contact Us

Home Magento 2 Extensions Magento 2 Social Login Pro Documentation Integrations Login with Yahoo! Japan Configuration

    • Installation
    • Updating
    • Configuration
      • Facebook Login Magento Configuration
      • Twitter Login Magento Configuration
      • Google Login Magento Configuration
      • Google One Tap Sign In Magento Configuration
      • LinkedIn Login Magento Configuration
      • Yahoo! Login Magento Configuration
      • Live, Hotmail, MSN Login Magento Configuration
      • Amazon Login Magento Configuration
      • Aol Login Magento Configuration
      • GitHub Login Magento Configuration
      • Instagram Login Magento Configuration
      • Foursquare Login Magento Configuration
      • Dropbox Login Magento Configuration
      • Disqus Login Magento Configuration
      • Livejournal Login Magento Configuration
      • Tumblr Login Magento Configuration
      • Flickr Login Magento Configuration
      • WordPress Login Magento Configuration
      • PayPal Login Magento Configuration
      • Salesforce Login Magento Configuration
      • Evernote Login Magento Configuration
      • Stackoverflow Login Magento Configuration
      • Mixi Login Magento Configuration
      • QQ Login Magento Configuration
      • Sina Weibo Magento Configuration
      • Kaixin001 Login Magento Configuration
      • Renren Login Magento Configuration
      • Alipay Login Magento Configuration
      • WeChat Login Magento Configuration
      • Mydigipass Login Magento Configuration
      • SoundCloud Login Magento Configuration
      • Verisign Login Magento Configuration
      • XING Login Magento Configuration
      • PersonaBrowserID Login Magento Configuration
      • Bitbucket Login Magento Configuration
      • Skyrock Login Magento Configuration
      • Bitly Login Magento Configuration
      • Box.com Login Magento Configuration
      • Vimeo Login Magento Configuration
      • Reddit Login Magento Configuration
      • Upwork Login Magento Configuration
      • TeamViewer Login Magento Configuration
      • Etsy Login Magento Configuration
      • Imgur Login Magento Configuration
      • Intuit Login Magento Configuration
      • MailChimp Login Magento Configuration
      • Dribbble Login Magento Configuration
      • Goodreads Login Magento Configuration
      • Last.fm Login Magento Configuration
      • Naver Login Magento Configuration
      • Line Login Magento Configuration
      • Apple Login Magento Configuration
      • Steam Login Magento Configuration
      • Yahoo! Japan Login Magento Configuration
      • Telegram Login Magento Configuration
      • TikTok Login Magento Configuration
      • Spotify Login Magento Configuration
      Integrations
    • How-To Guides
    • Troubleshooting
    • Developer Guide & API Reference
    • Translation
    • Uninstalling
    Magento 2 Social Login Pro - Documentation

How to Add Magento Yahoo! Japan Login to Your Website

In this article, you will learn how to enable and configure your Yahoo! Japan API in order to integrate Yahoo! Japan login into Magento 2 Social Login Pro plugin. Please follow the step-by-step instructions below to set up the integration correctly.

How to Set Up Yahoo! Japan API for Magento 2

In order to get Yahoo! Japan API credentials, you need to create and set up an application. Please Login to the Yahoo! Japan platform and follow the steps below.

Step-by-step guide:

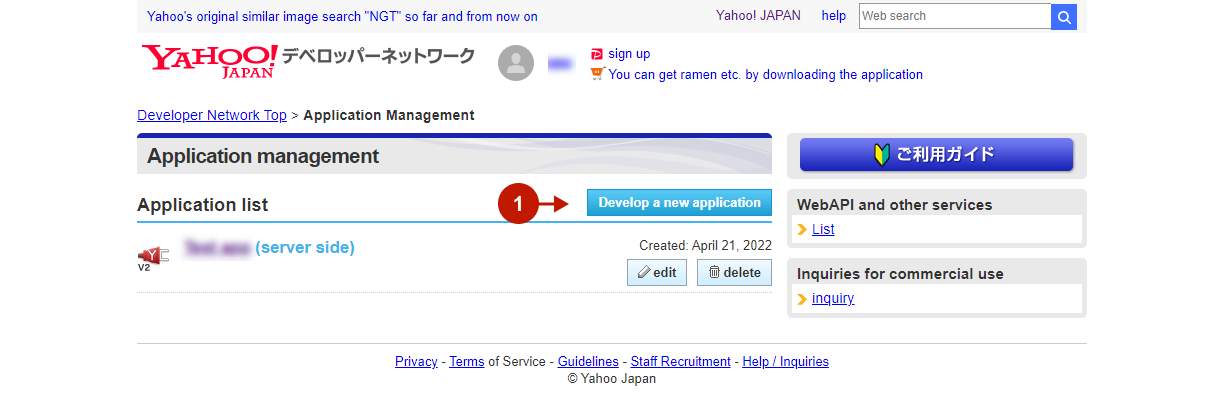
  1. Go to the Yahoo Developer Dashboard page and click Create a new application.

Magento 2 Yahoo! Japan Login Integration - 1

Step-by-step guide:

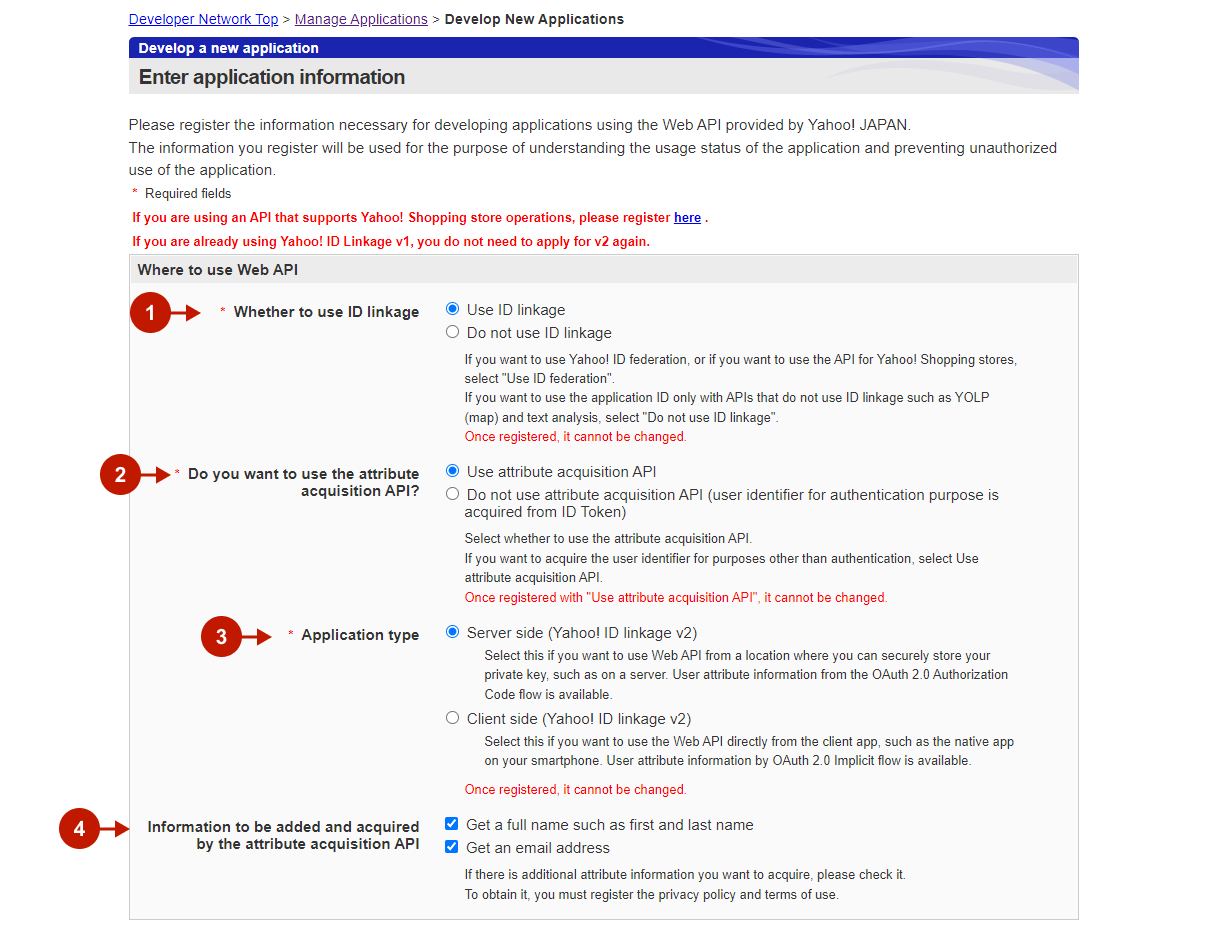
  1. “Whether to use ID linkage“: select the Use ID linkage radio button.
  2. “Do you want to use the attribute acquisition API“: set it to Use attribute acquisition API.
  3. “Application type“: choose Server side application type.
  4. Select both checkboxes to retrieve a user’s full name and email address via API.

Magento 2 Yahoo! Japan Login Integration - 2

Step-by-step guide:

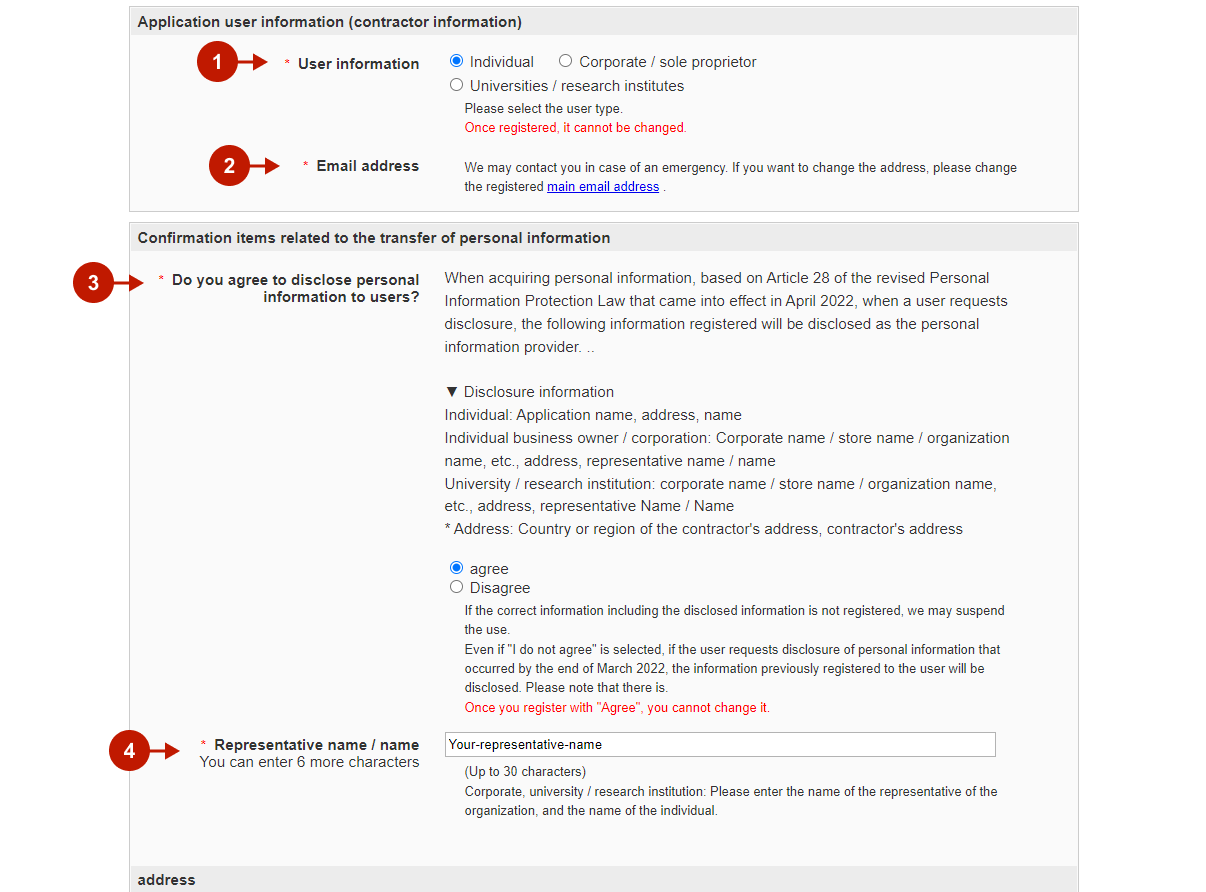
  1. “User Information“: set this option to Individual user type.
  2. “Email Address“: your primary email address will be used for emergency contact. Please follow the link provided if you would like to change it.
  3. Set this option to Agree to comply with the Personal Information Protection Law (Article 28) when a user requests a disclosure.
  4. “Representative name“: provide your name, on the name of your organization’s representative.
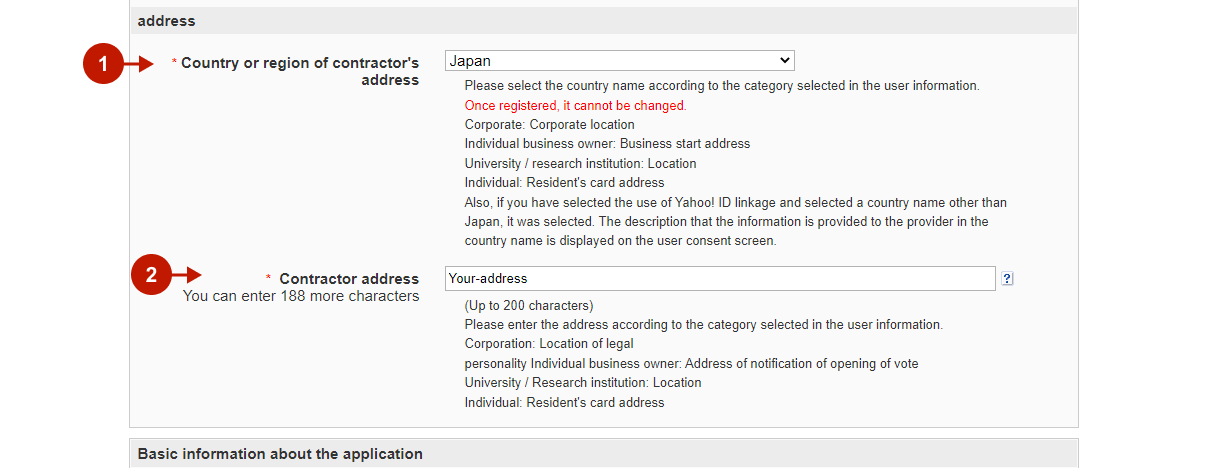
Magento 2 Yahoo! Japan Login Integration - 3

Step-by-step guide:

  1. Select the country o region of the contractor’s address from the list.
  2. Type the contractor’s address in this field.
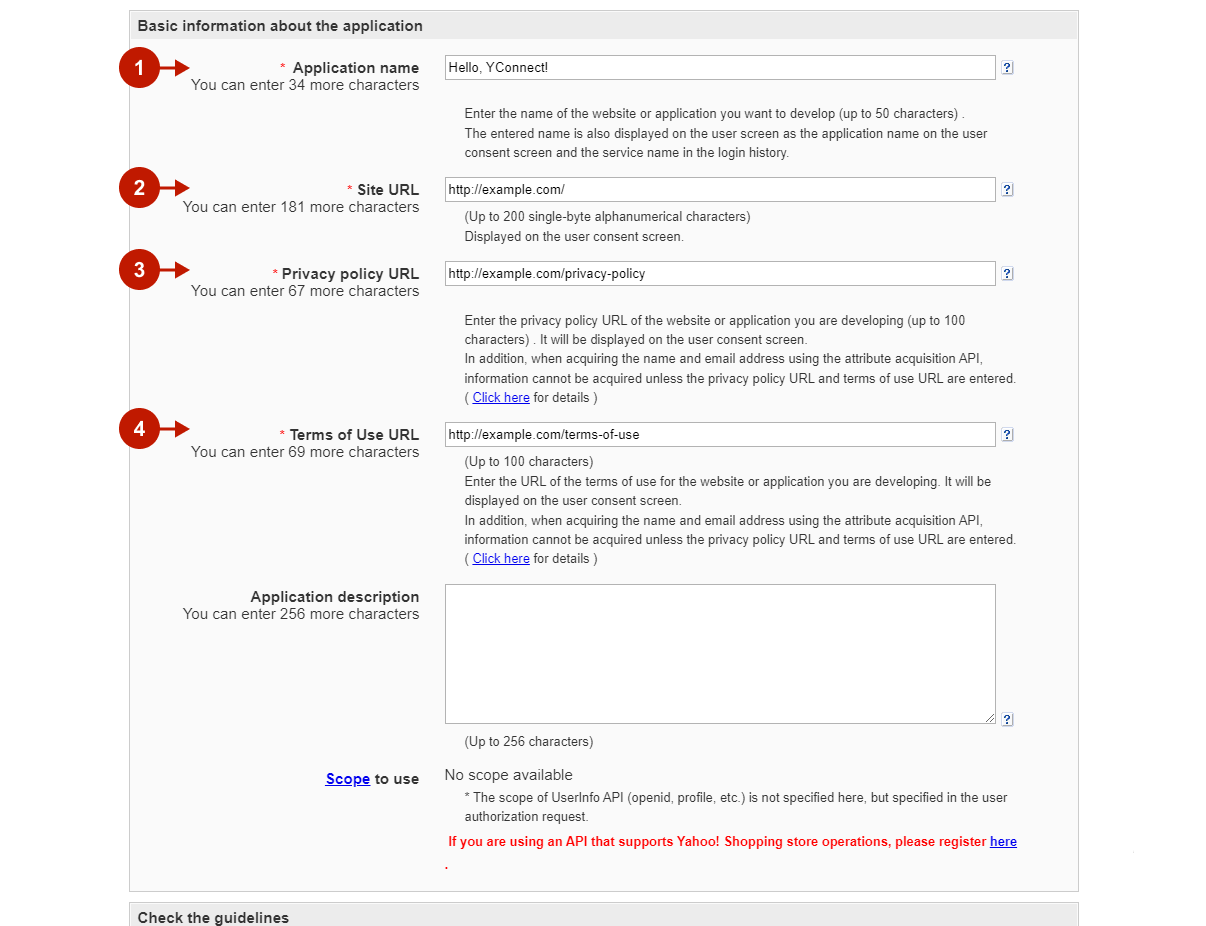
Magento 2 Yahoo! Japan Login Integration - 4

Step-by-step guide:

  1. “Application name“: enter the name of the website where the Login with Yahoo! Japan is going to be implemented.
  2. “Site URL“: provide the website full URL.
  3. “Privacy Policy URL“: enter your website’s Privacy Policy URL.
  4. “Terms of Use URL“: enter your website’s Terms of Use URL.
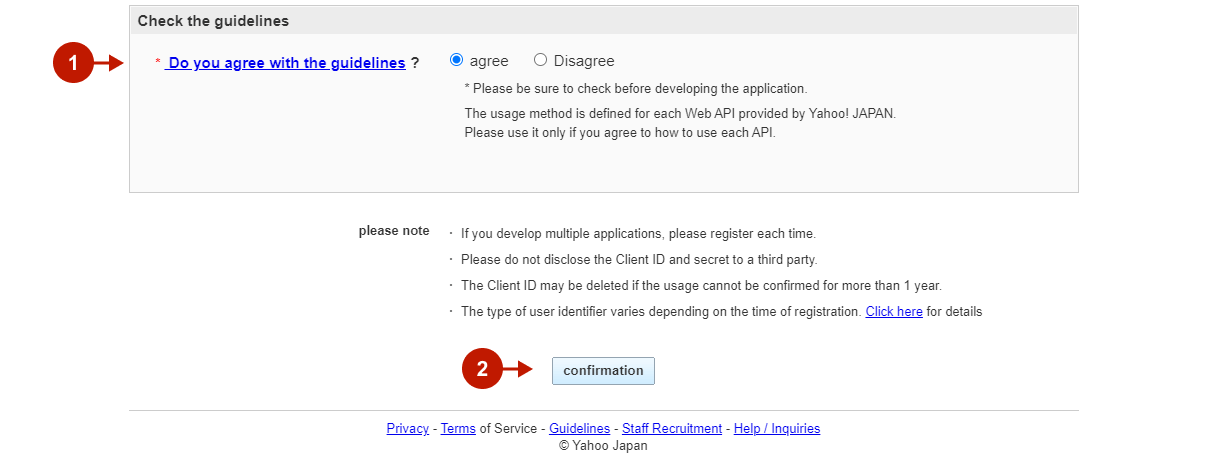
Magento 2 Yahoo! Japan Login Integration - 5

Step-by-step guide:

  1. Select Agree radio button to agree with the platform guidelines.
  2. Click Confirmation to complete setting up the application.
Magento 2 Yahoo! Japan Login Integration - 6

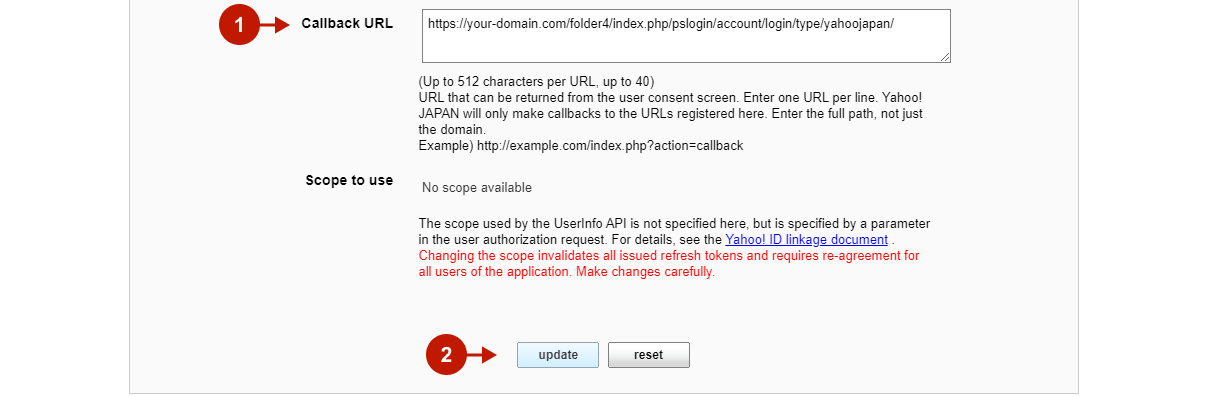
Once the Yahoo! Japan API app is created, you need to insert the Callback URL from the Magento admin panel.
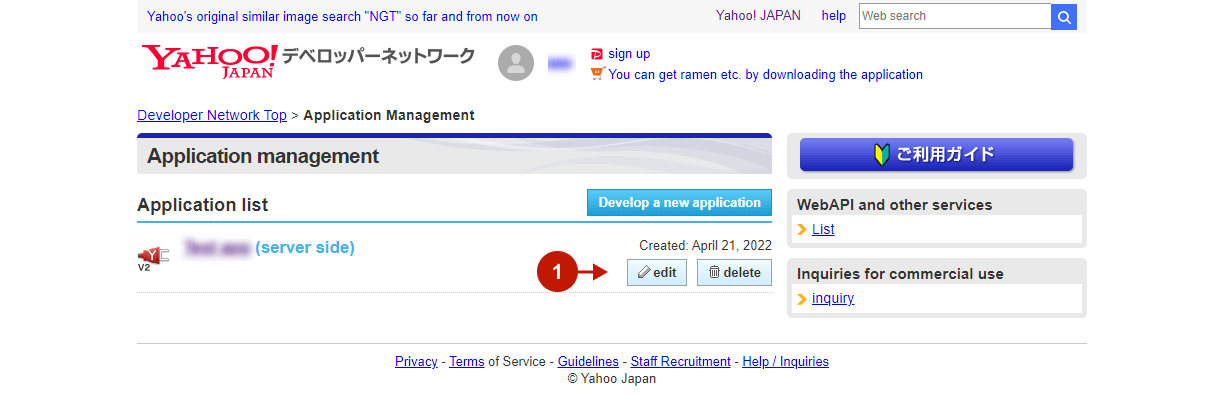
Step-by-step guide:

  1. On the Developer Dashboard page, click Edit under the newly-created app.
Magento 2 Yahoo! Japan Login Integration - 7

Step-by-step guide:

  1. Scroll down to the Callback URL field, and paste the callback URL you can find in the Social Login Pro extension configuration.
  2. Click Update.
Magento 2 Yahoo! Japan Login Integration - 8

Step-by-step guide:

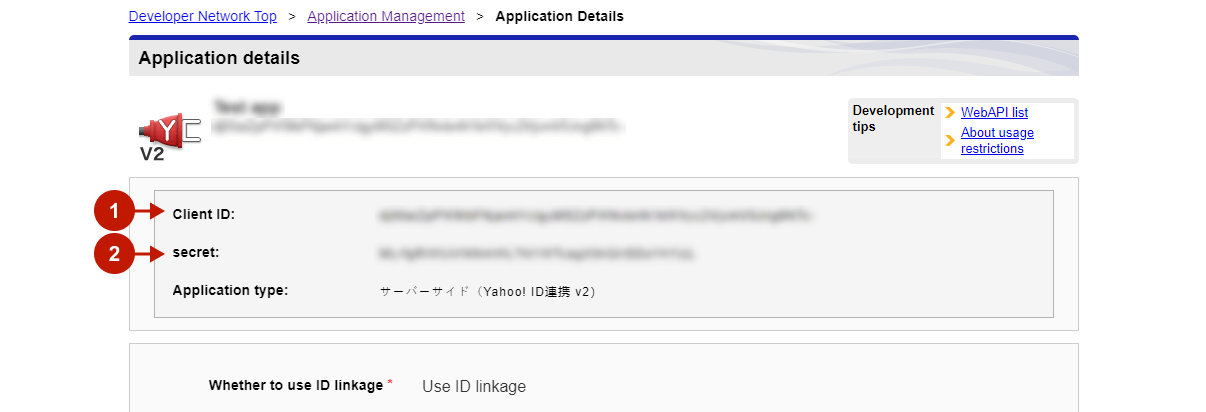
  1. This is the application Client ID that needs to be inserted into the Social Login Pro extension configuration.
  2. This is the application Client Secret that needs to be inserted into the Social Login Pro extension configuration.
Magento 2 Yahoo! Japan Login Integration - 9

Configuring Yahoo! Japan Integration in Magento 2 Social Login Pro Extension

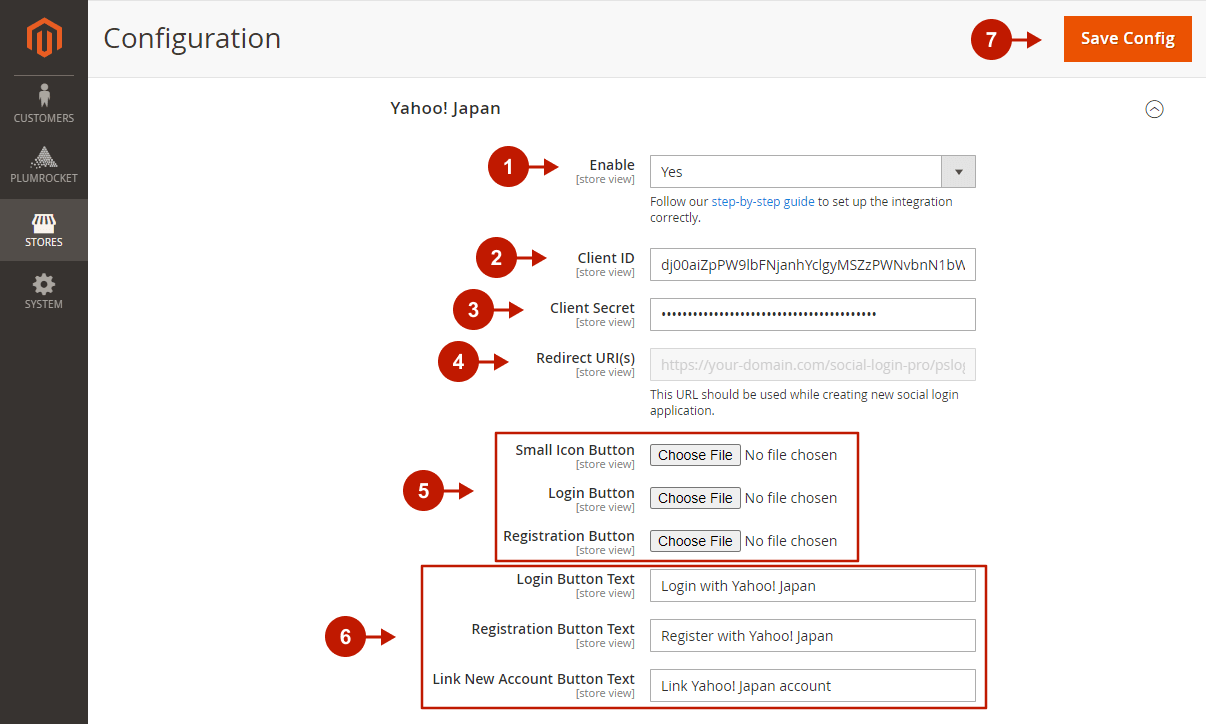
At this point, you should paste the created API keys into your Magento 2 Social Login Pro Extension configuration. In the main Magento menu, go to Plumrocket -> Social Login Pro -> Configuration -> Yahoo! Japan, and perform the following steps:

Step-by-step guide:

  1. Set the Enable option to Yes to enable Yahoo! Japan Login on your Magento 2 website.
  2. Paste the Client ID obtained after creating the API application.
  3. Paste the Client Secret obtained after creating the API application.
  4. “Redirect URI(s)“: this URL is to be copied and pasted in the Callback URL field when managing the Yahoo! Japan API application.
  5. Skip this step to have the extension use the default icons for the Yahoo! Japan login buttons, or select the files to use your own.
  6. Specify the text to be displayed on the Yahoo! Japan login buttons.
  7. Click Save Config to save the configurations.
Configuring Magento 2 Yahoo! Japan Login Integration

Was this article helpful?
08/02/202208/02/2022
Search
Search
Generic selectors
Exact matches only
Search in title
Search in content
Contents
Company
  • Home
  • About Plumrocket Inc.
  • Customer Stories
  • Programs & Promotions
  • Careers
  • Contact Us
Legal
  • Terms of Service
  • Privacy Policy
  • Refund Policy
  • Cookie Policy
  • Privacy Center
  • Updates & Support Policy
Resources
  • Blog
  • FAQ
  • Documentation
  • Tutorials
Partners
  • Partner Program
  • Affiliate Program
  • Official Partners
Plumrocket Inc. © 2008 - 2025
Follow Us:
  • Facebook
  • Twitter
  • LinkedIn
  • YouTube