
LINE |
|
| Protocol | OAuth 2.1 |
| Returned Data | userId, name, email, photo |
| Requires SSL? | No |
How to Set Up Line API for Magento
In this article, you will learn how to enable and configure your Line API in order to integrate Line login into Magento Social Login Pro extension. Please follow the step-by-step instructions below.
Step-by-Step action:
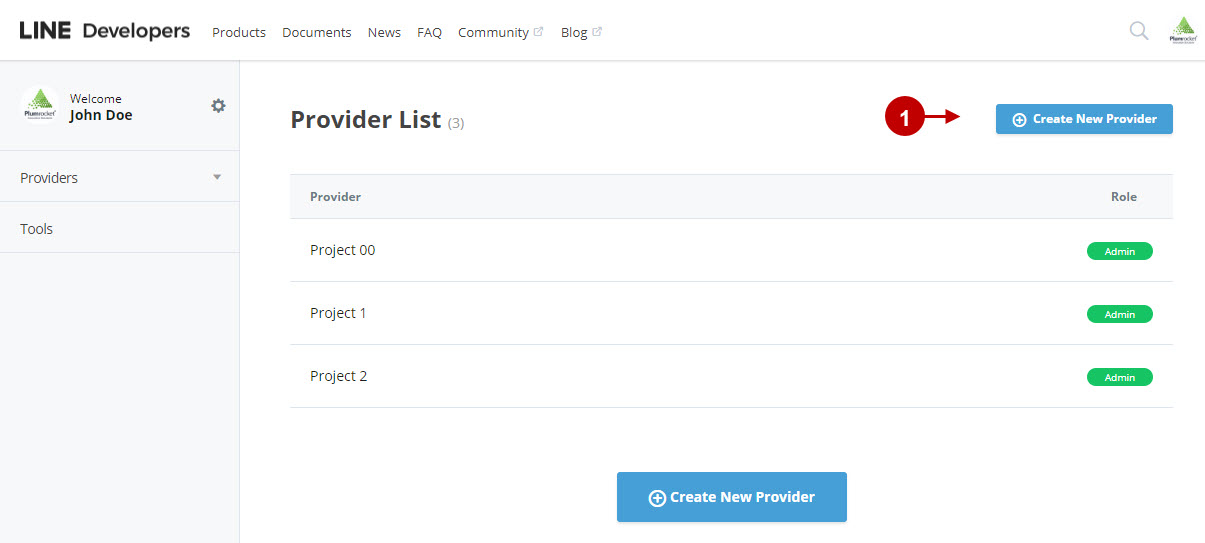
- Log into your account at developers.line.me/console/.

Step-by-Step action:
- In your account, press the “Create New Provider” button.
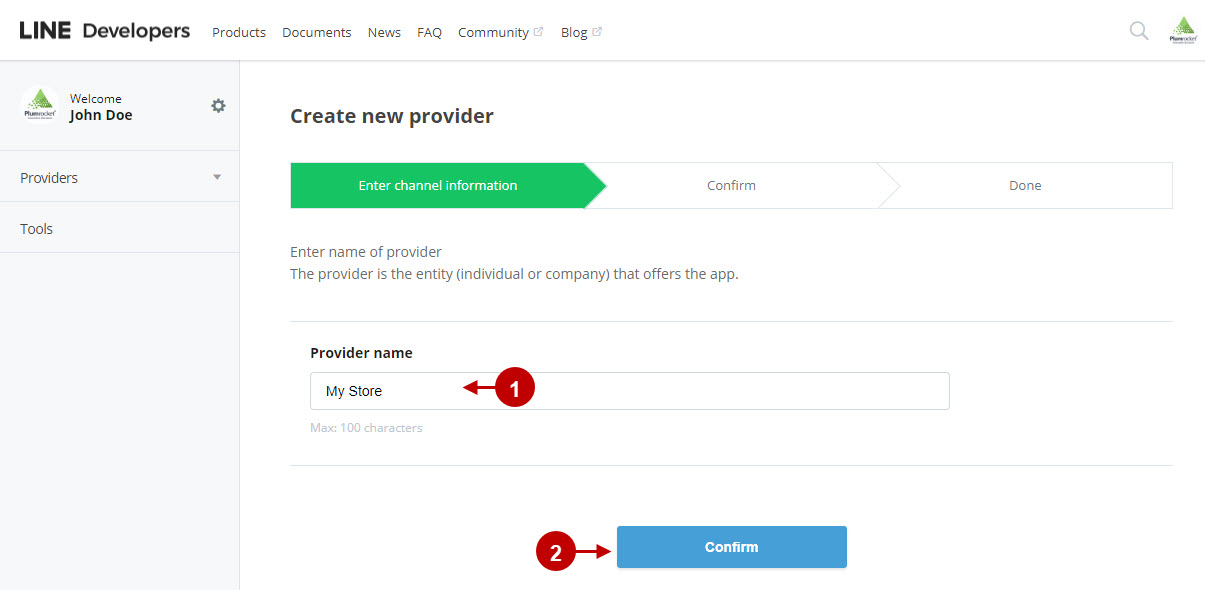
Step-by-Step action:
- In this field enter the name of the provider.
- Press the “Confirm” button to proceed.
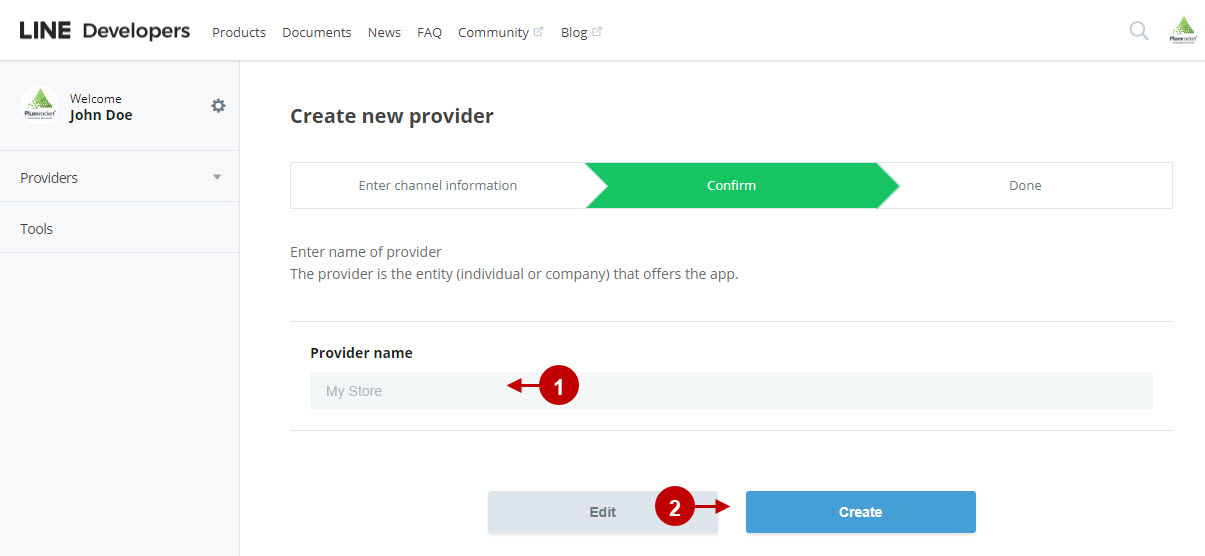
Step-by-Step action:
- Check the information you have entered.
- Press the “Create” button to create new provider.
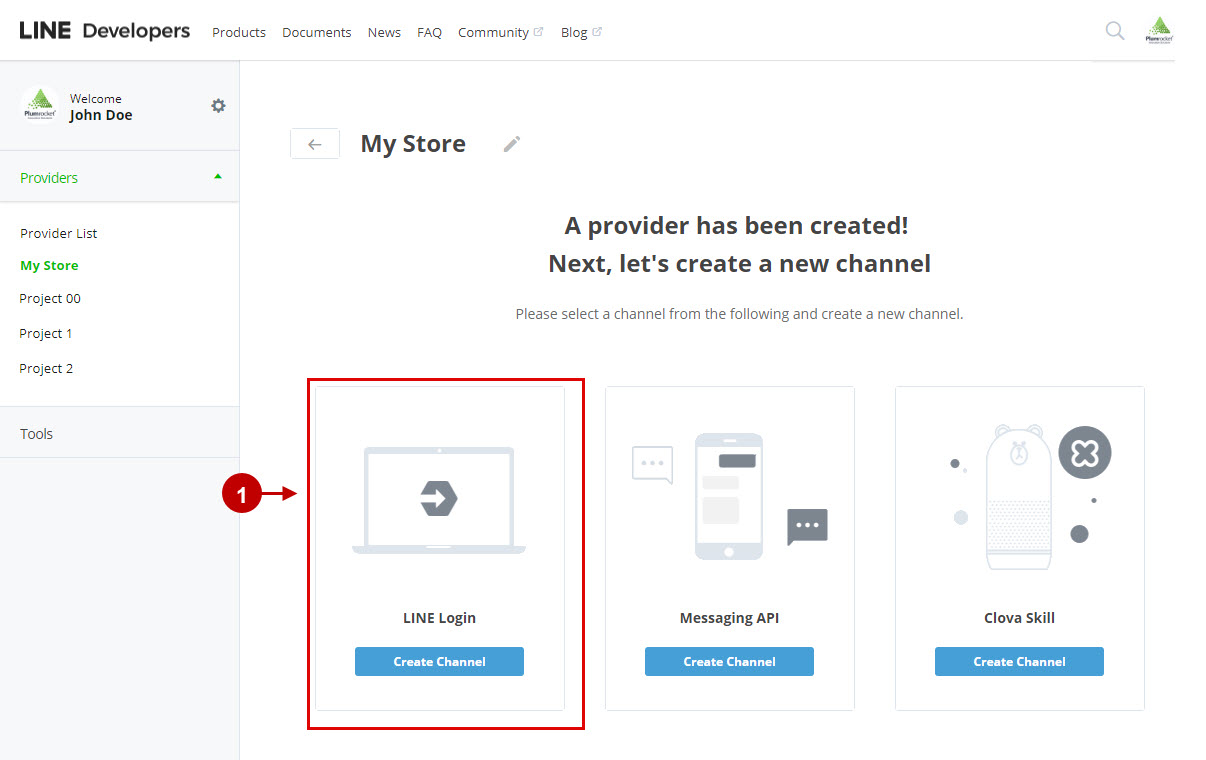
Step-by-Step action:
- Select “LINE Login”.
Step-by-Step action:
- Upload the app icon.
- Enter the app name.

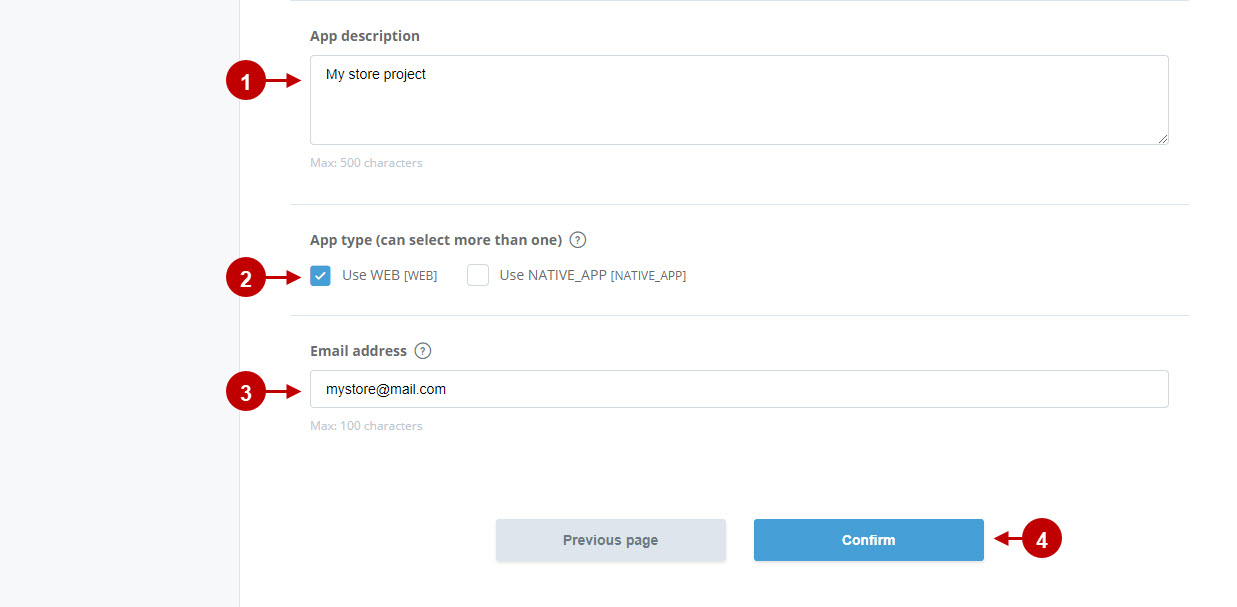
Step-by-Step action:
- Enter the app description.
- Select the “Use WEB” option for app type.
- Specify your email address in this field.
- Press the “Confirm” button to save your information.
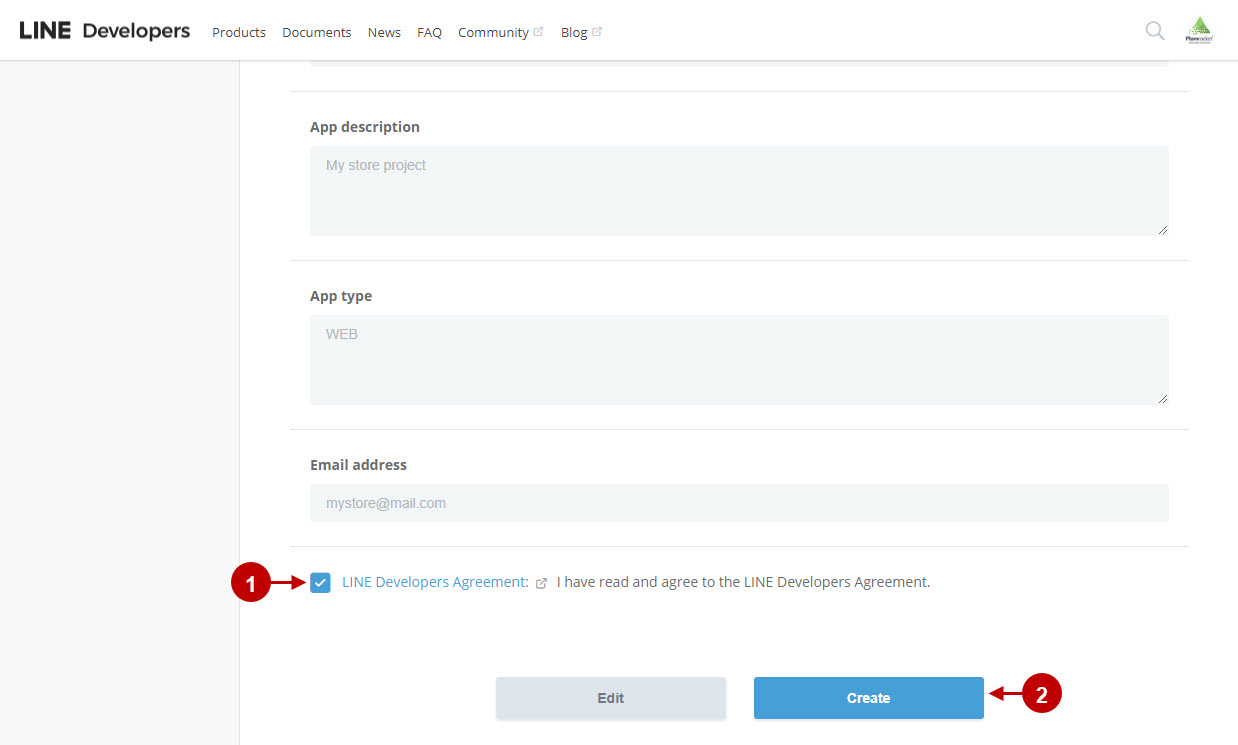
Step-by-Step action:
- Check the “LINE Developers Agreement” consent box to proceed.
- Press the “Create” button.
Step-by-Step action:
- The provider you created should appear in the Provider List grid.
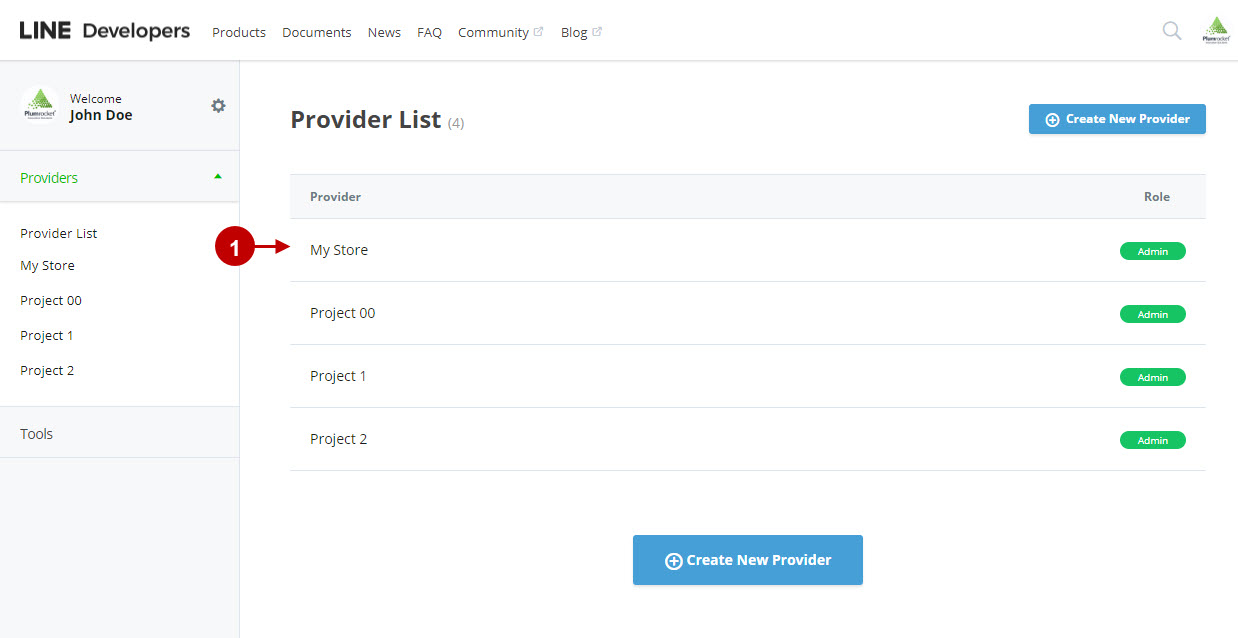
Step-by-Step action:
- Press on the icon of your provider to proceed.

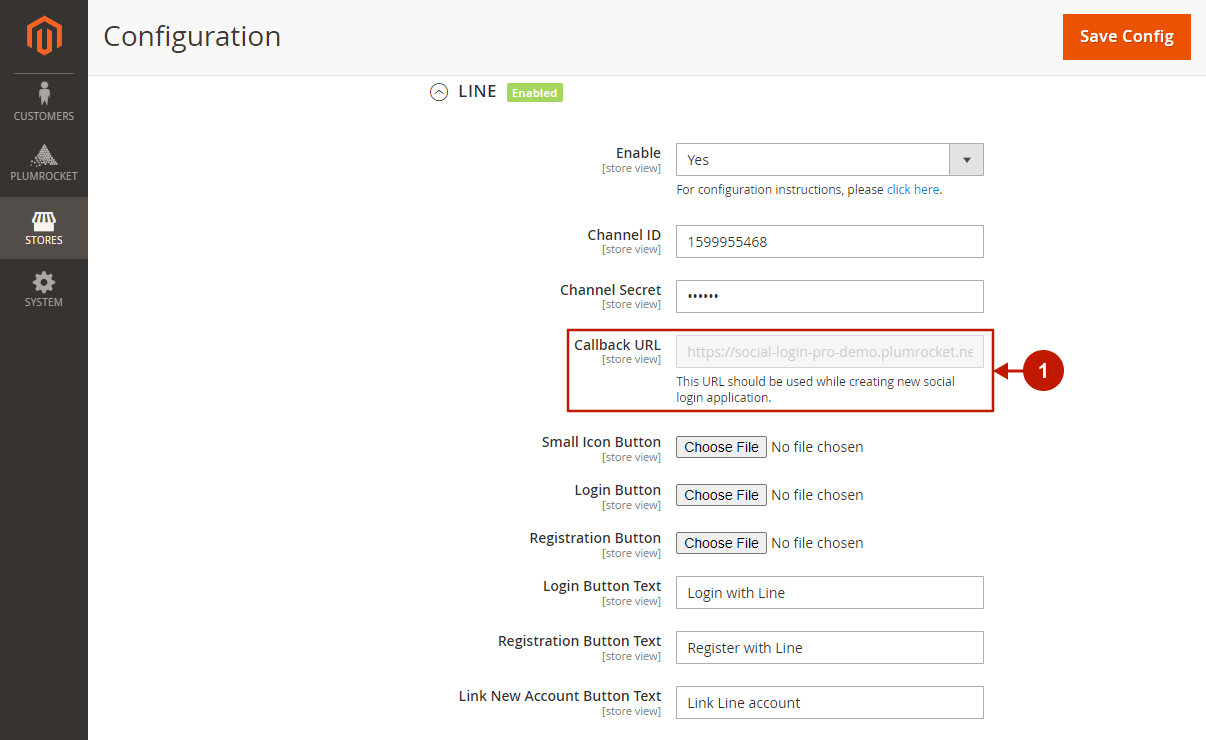
After creating the application, you need to insert the Callback URL to make the integration work properly. For this, do the following:
Step-by-step guide:
- Copy the “Callback URL” field’s content from your “LINE” backend tab.
Step-by-step guide:
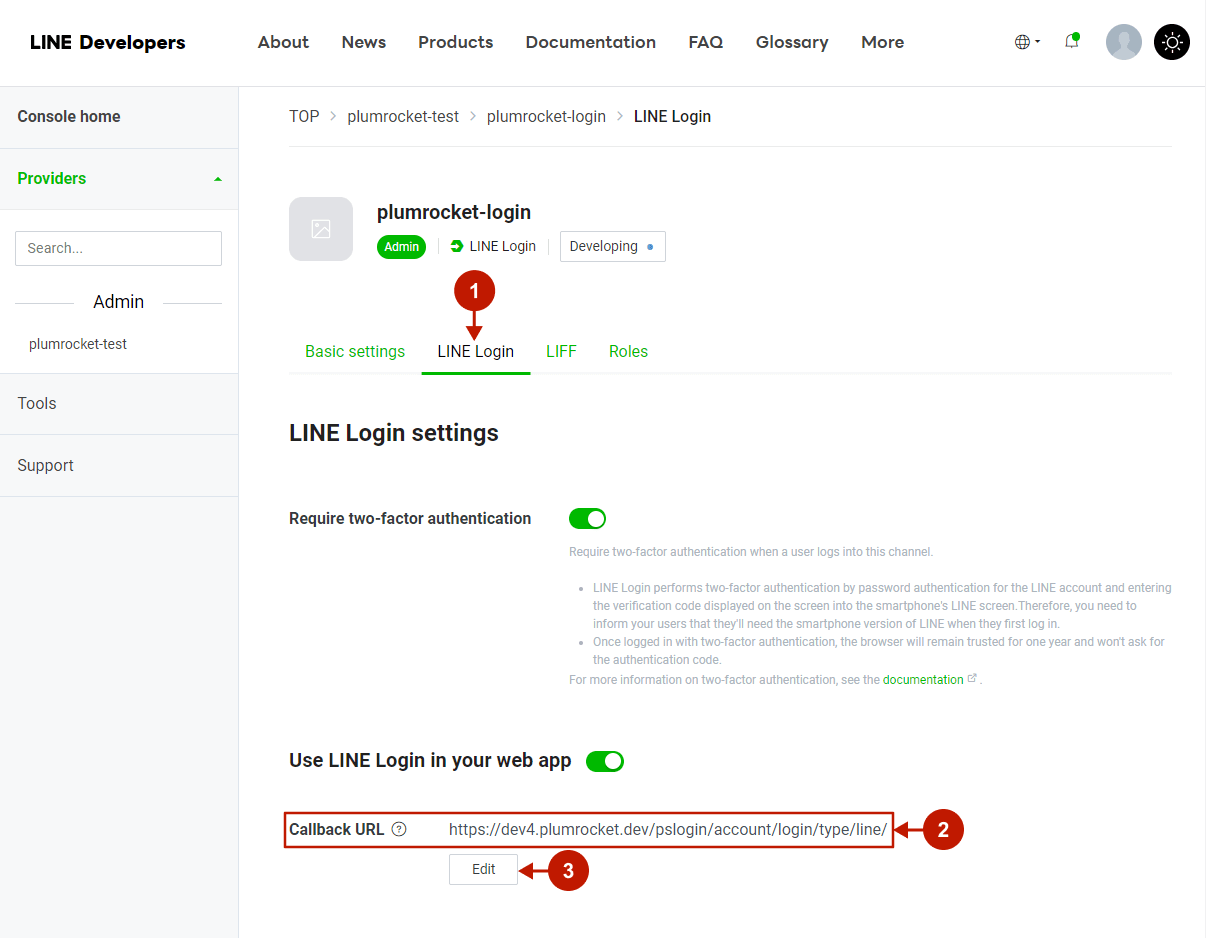
- In the created application, go to LINE Login.
- Find the Callback URL field.
- Press the “Edit” button.
Step-by-step guide:
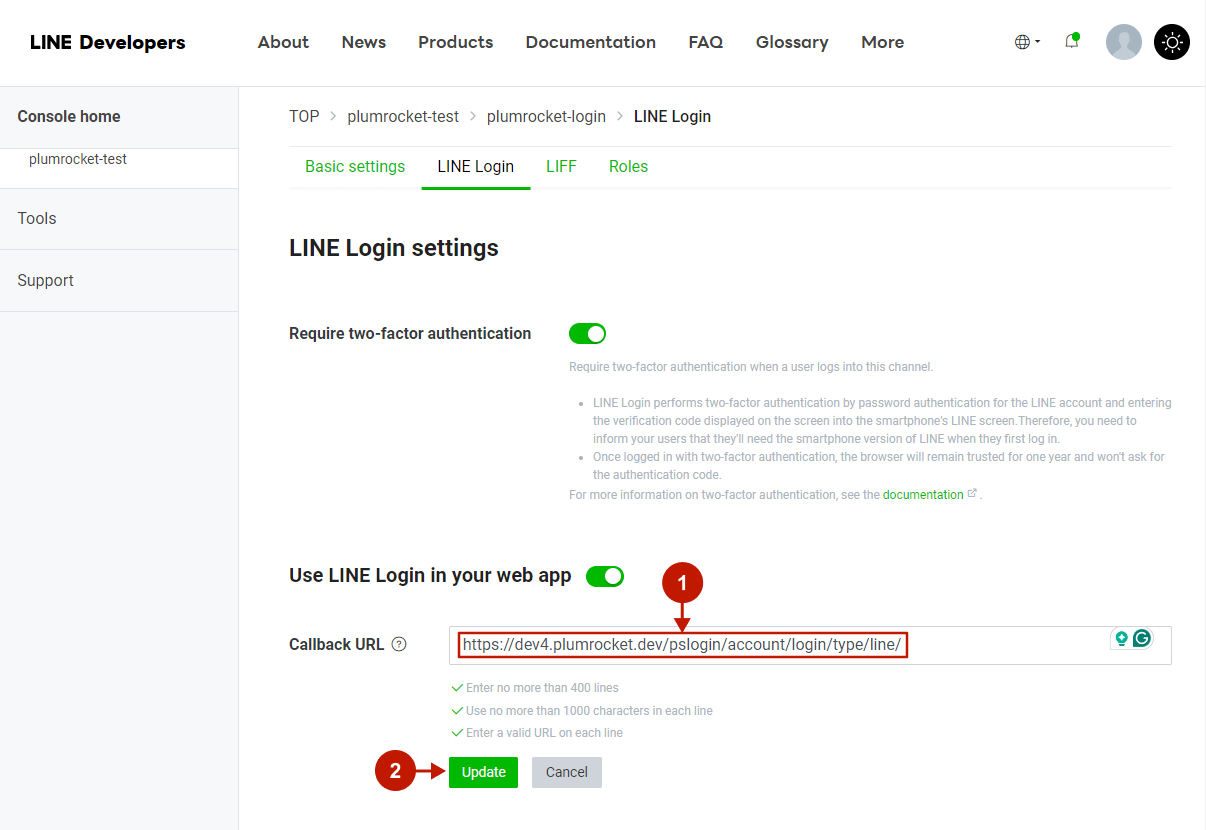
- Insert the Callback URL value copied in the “Line” backend tab.
- Press the “Update” button.
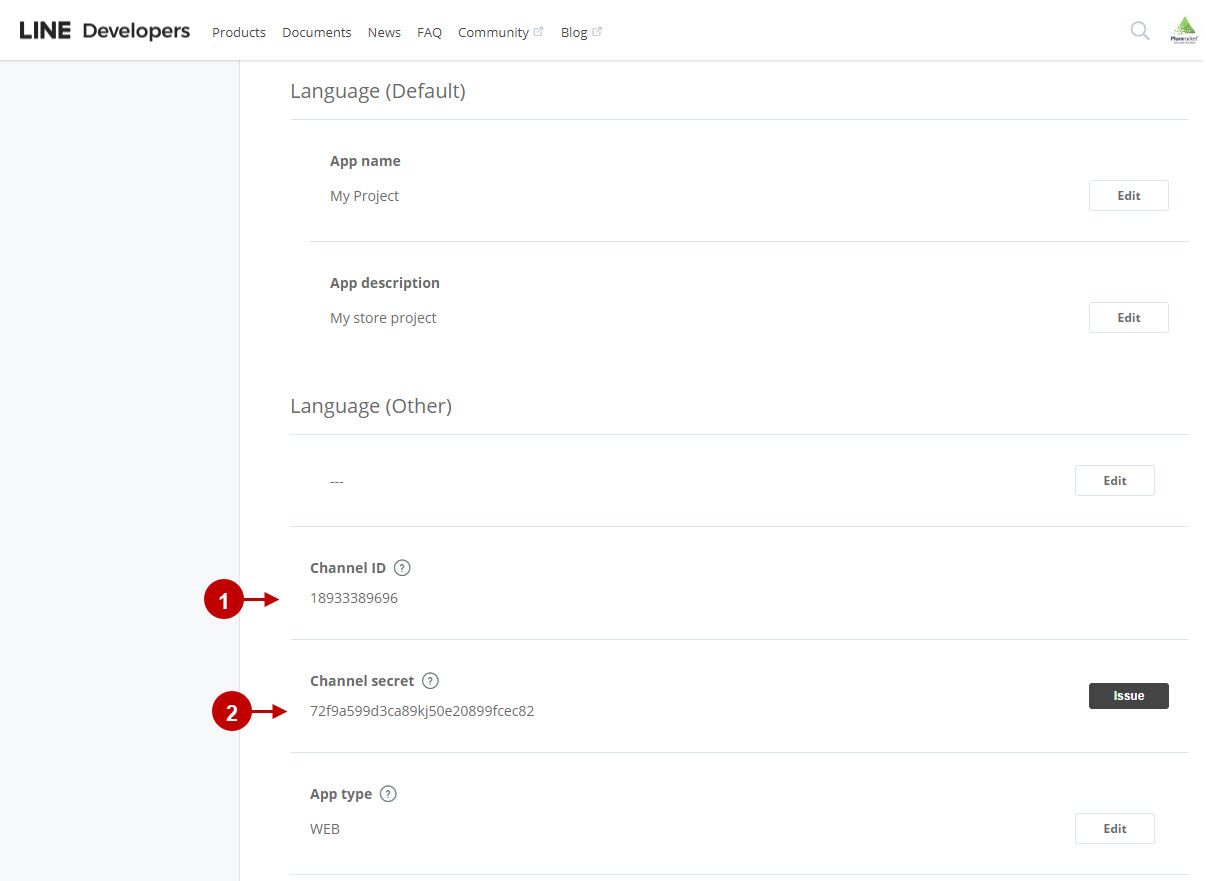
Once you have created your Line API and inserted the Callback URL, you will be able to copy paste the Channel ID and Channel Secret into your Magento Social Login extension.
Step-by-Step action:
- Copy the “Channel ID” from this field.
- Copy the “Channel Secret” from this field.
Configuring LINE Integration in Magento Social Login Pro Extension
In this step you must update your Magento Social Login Pro Extension configuration. In your magento admin panel, go to “System” -> “Configuration” -> “Plumrocket Inc” -> “Social Login Pro” -> “LINE” Tab.
Step-by-Step action:
- Paste Channel ID into the relevant field of your “LINE” backend tab.
- Insert Channel Secret key into the relevant field of your “LINE” backend tab.

Configuration of Line Magento Social Login application is now completed
Configuring LINE Integration in Magento 2 Social Login Pro Extension
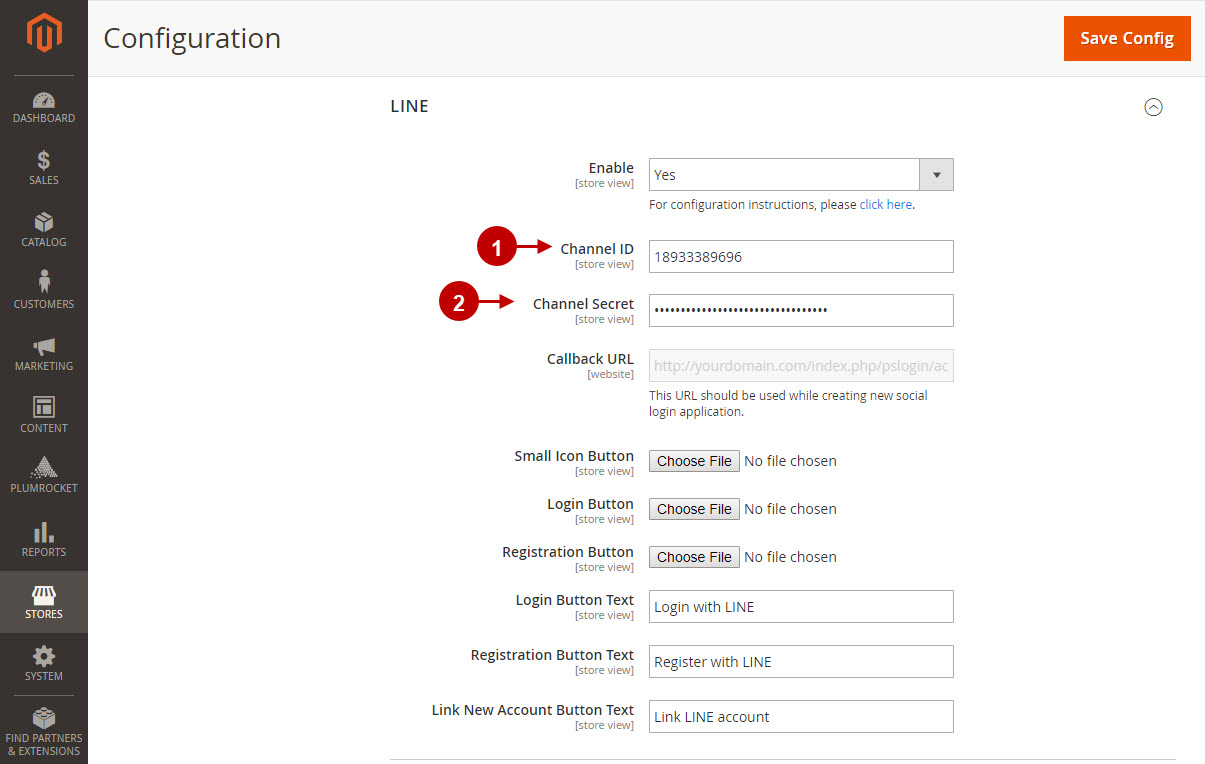
In this step you must update your Magento 2 Social Login Pro Extension configuration. In your magento 2 admin panel, go to “Plumrocket” tab in the main menu -> “Social Login Pro” section -> “Configuration” -> “LINE” Tab.
Step-by-Step action:
- Paste Channel ID into the relevant field of your “LINE” backend tab.
- Insert Channel Secret into relevant field of your “LINE” backend tab.
Configuration of Line Magento 2 Social Login application is now completed
Next Step > Return to Social Login Pro API Reference