How to Set Up Renren API for Magento
In this article, you will learn how to enable and configure your Renren API in order to integrate Renren login into Magento Social Login Pro module. Please follow the step-by-step instructions below.
Step-by-Step action:
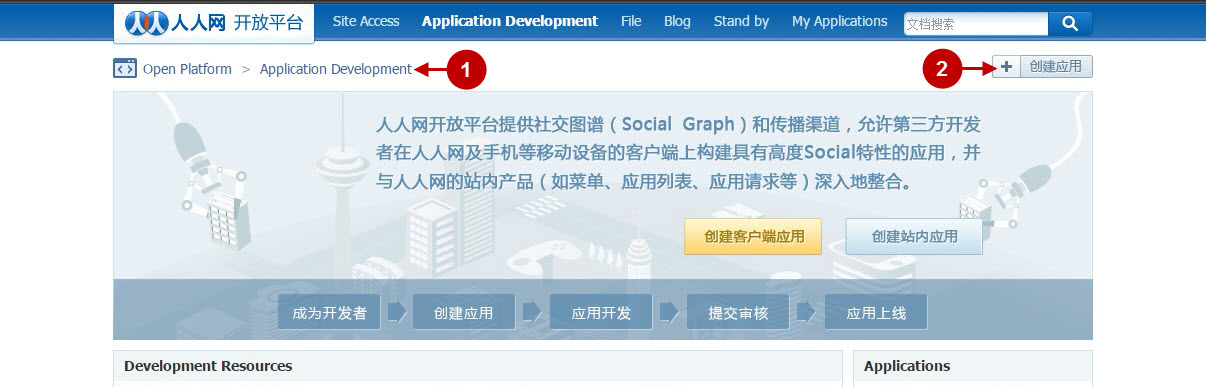
- Log into dev.renren.com/app/.
- Press “Add new application” button to start creating your Renren application.
Step-by-Step action:
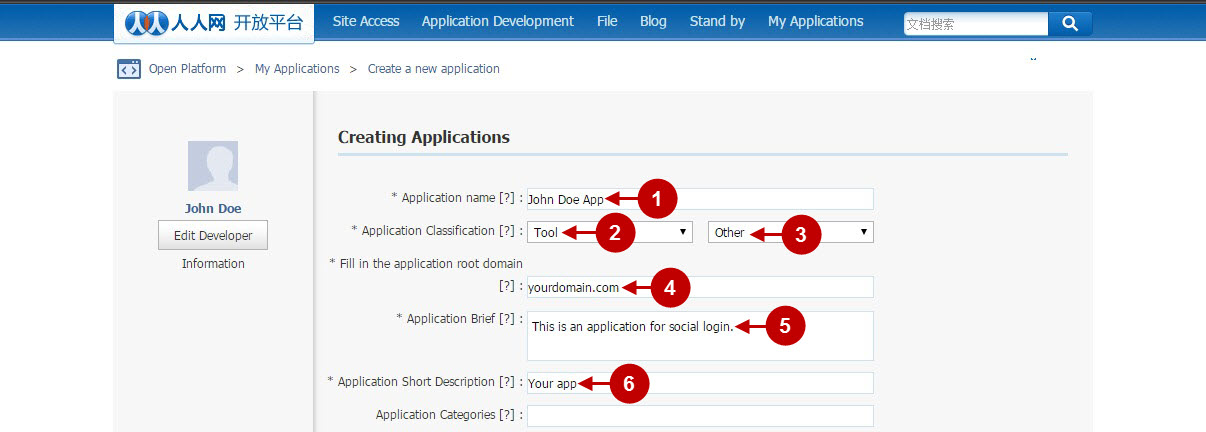
- Indicate your application name.
- Select your application classification.
- Specify your application classification.
- Enter your root domain.
- Provide description of your application.
- Provide short description of your application.
Step-by-Step action:
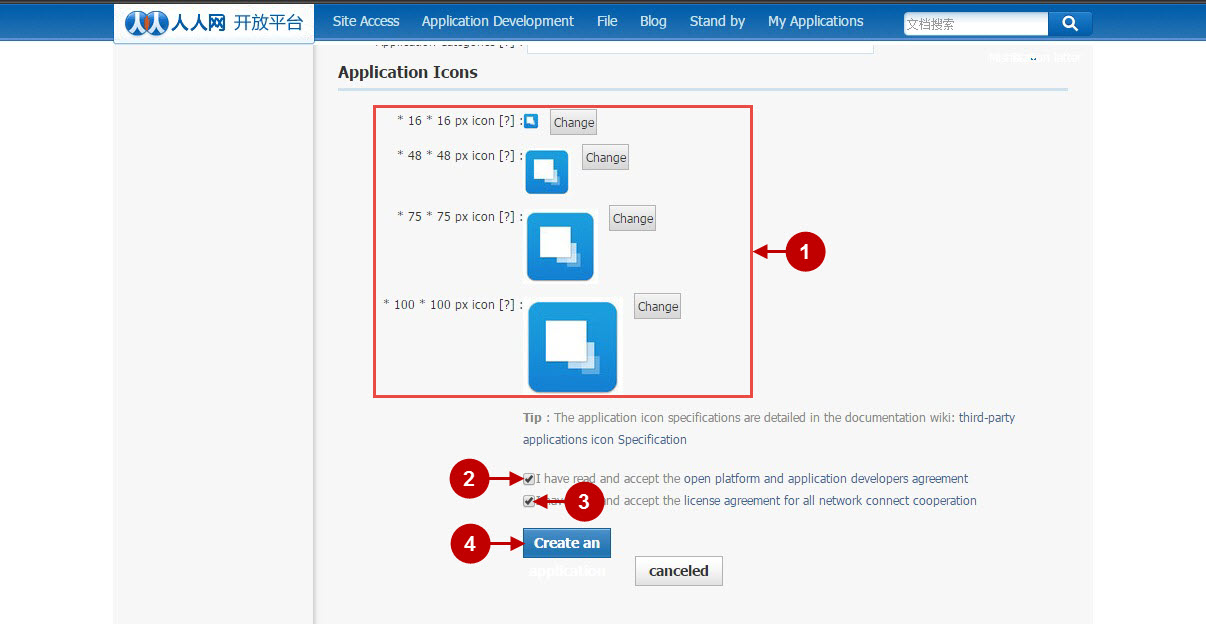
- Upload 4 types of icons for your application by clicking on “Change” button.
- In order to proceed please read and accept the open platform and application developers agreement.
- Please read and accept the license agreement for all network connect cooperation.
- Press “Create an application” button to create your Renren application.
Step-by-Step action:
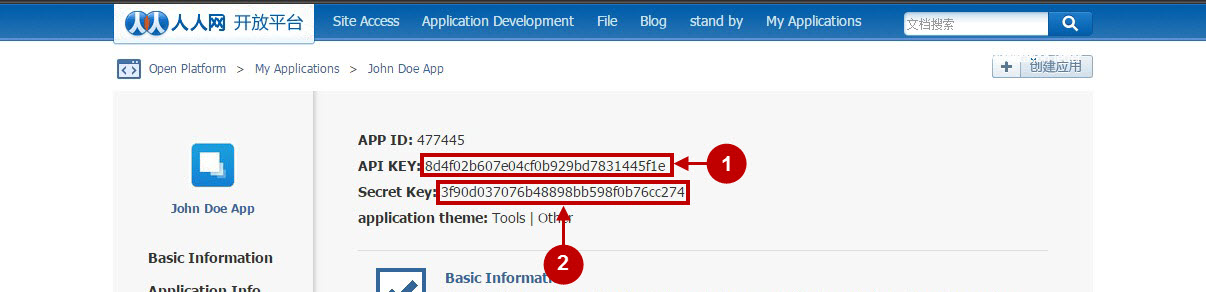
- Copy “API KEY” to your clipboard.
- Copy “Secret key” to your clipboard.
Configuring Renren Integration in Magento Social Login Pro Extension
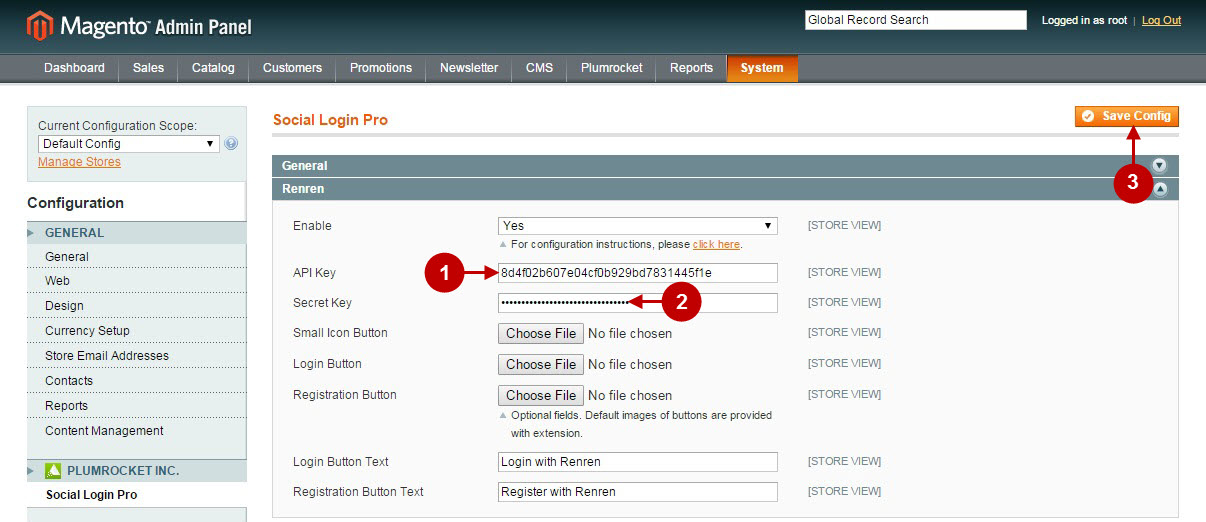
In this step you must update your Magento Social Login Pro Extension configuration. In your magento admin panel, go to “System” -> “Configuration” -> “Plumrocket Inc” -> “Social Login Pro” -> “Renren” Tab.
Step-by-Step action:
- Paste API Key into the relevant field of your “Renren” backend tab.
- Copy Secret Key into the relevant field of your “Renren” backend tab.
- Press “Save Config” button.
Configuring Renren Integration in Magento 2 Social Login Pro Extension
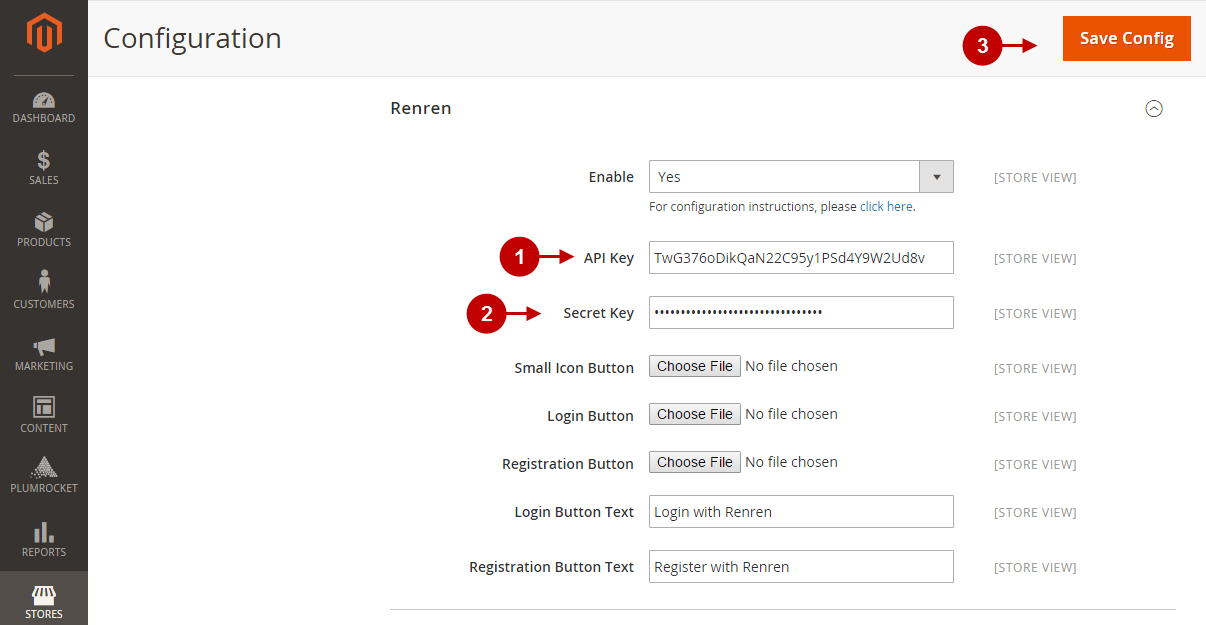
In this step you must update your Magento 2 Social Login Pro Extension configuration.In your magento 2 admin panel, go to “Plumrocket” tab in the main menu -> “Social Login Pro” section -> “Configuration -> “Renren” Tab.
Step-by-Step action:
- Enter API Key into the relevant field of your “Renren” backend tab.
- Enter Secret Key into the relevant field of your “Renren” backend tab.
- Press “Save Config” button.
How to Set Up Renren API for Magento – Production Mode
At this point, in order to apply this application for production, you will need to add more data to your application. Please follow the steps below.
Step-by-Step action:
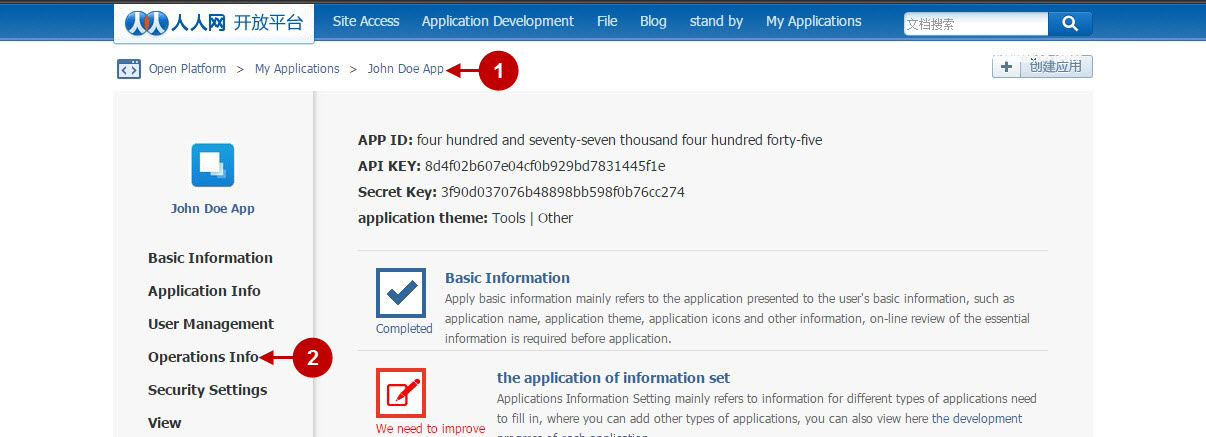
- Return to your Renren application page.
- Press “Operations Info” tab.
Step-by-Step action:
- Indicate your contact name.
- Enter your contact phone.
- Specify your QQ (messenger) number.
- Insert your e-mail.
- Press “Save” button.

Step-by-Step action:
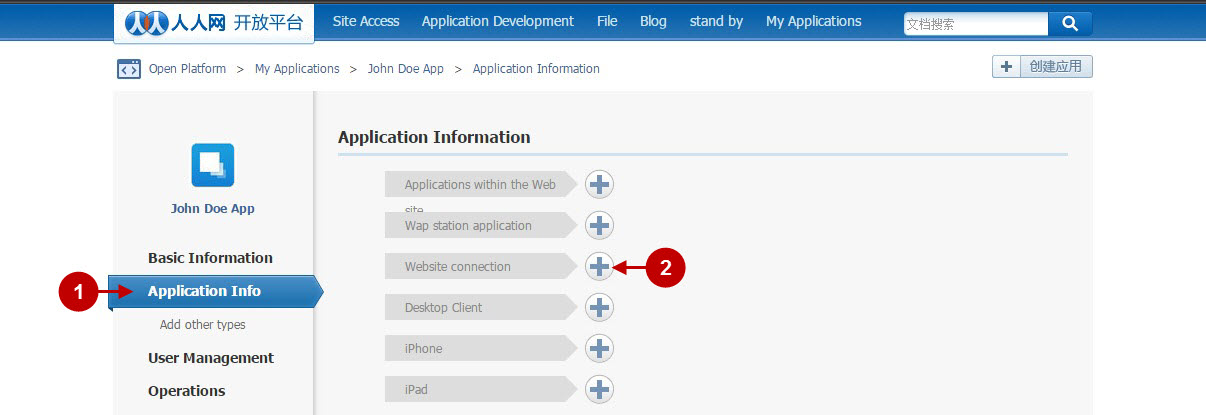
- Press “Operations Info” tab.
- Click on “Add website connection” button.
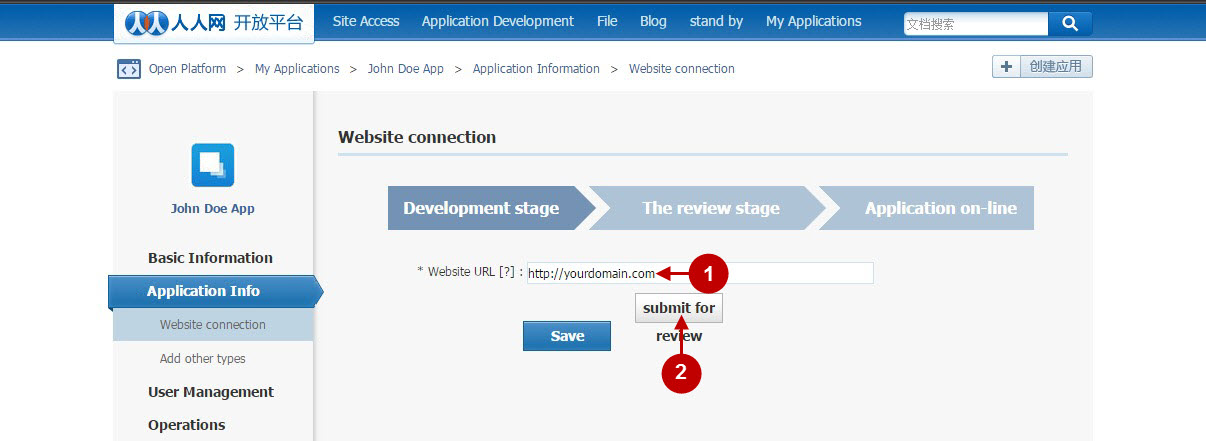
Step-by-Step action:
- Enter your website URL.
- Press “Submit for review” button.
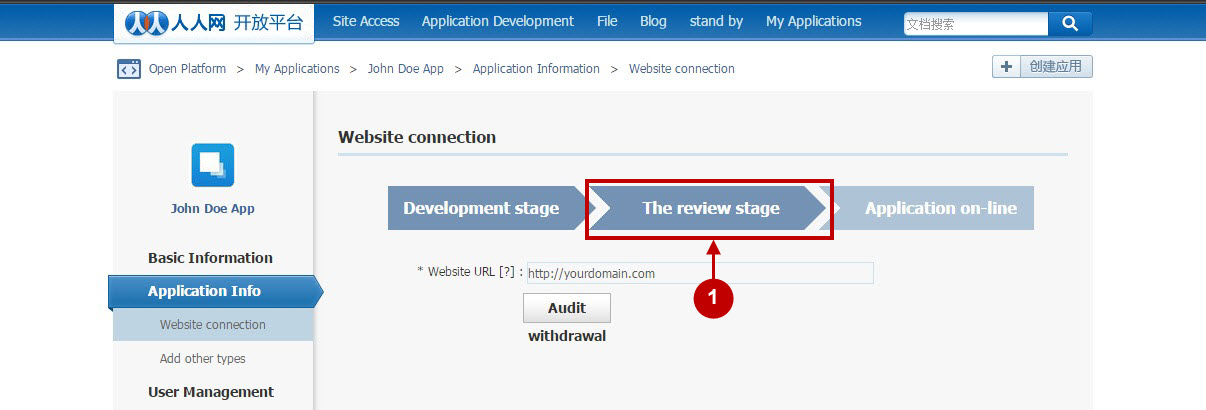
Step-by-Step action:
- Now your application will be in “Review stage”. Once it’s approved – you will receive a notification. Please note that Renren application approval takes a number of days.
Configuration of Renren Magento Social Login and Magento 2 Social Login application is now completed.
Next Step > Return to Social Login Pro API Reference