In this article, you will learn how to find your Instagram API and integrate Instagram Login into Magento Social Login Pro plugin. Please follow the step-by-step instructions below.
How to Set Up Instagram API for Magento
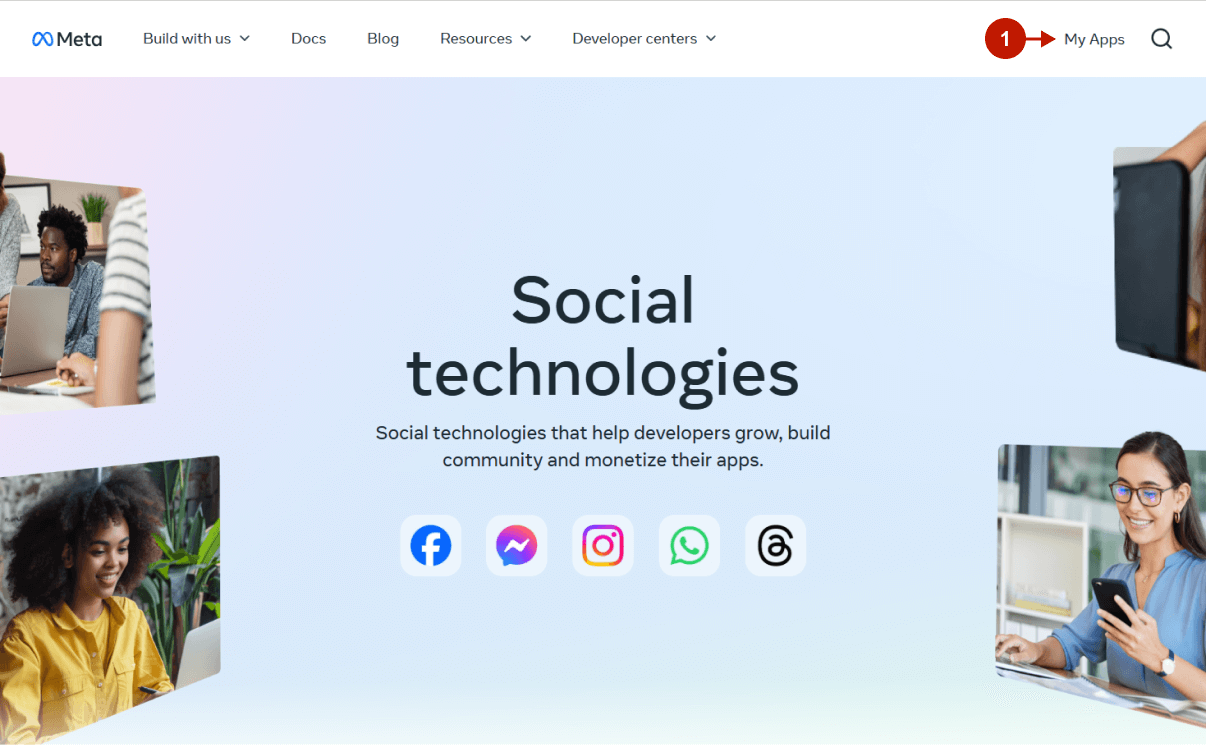
Step 1: Create a Facebook App
Step-by-Step guide:
- Go to developers.facebook.com, and click My Apps
Step-by-step guide:
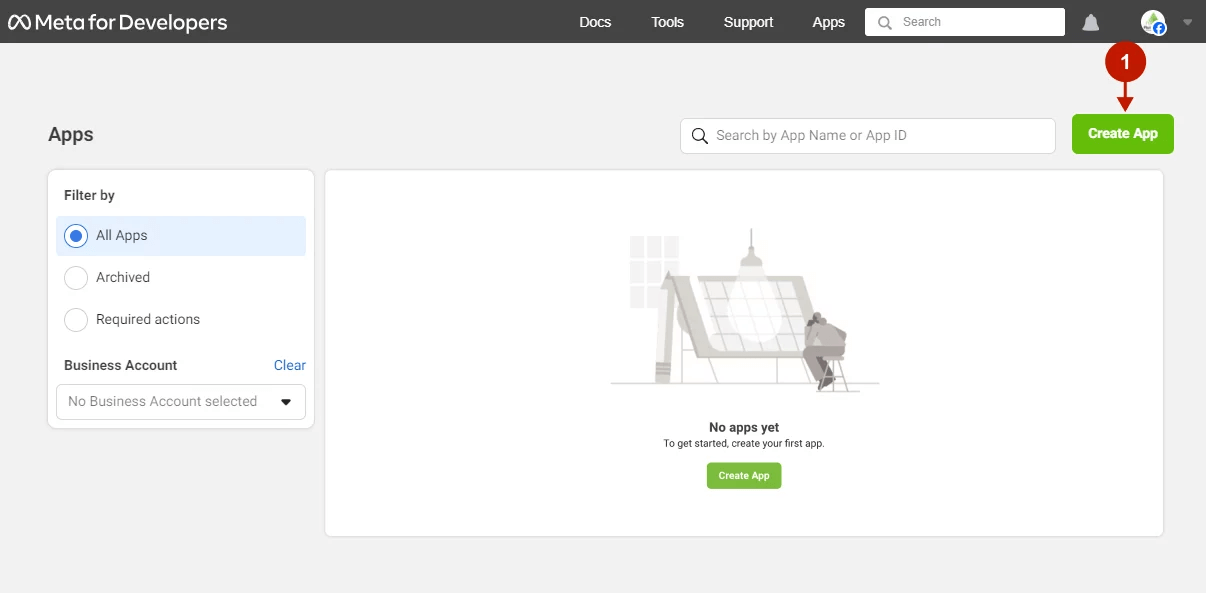
- Press the Create App button.
Step-by-step guide:
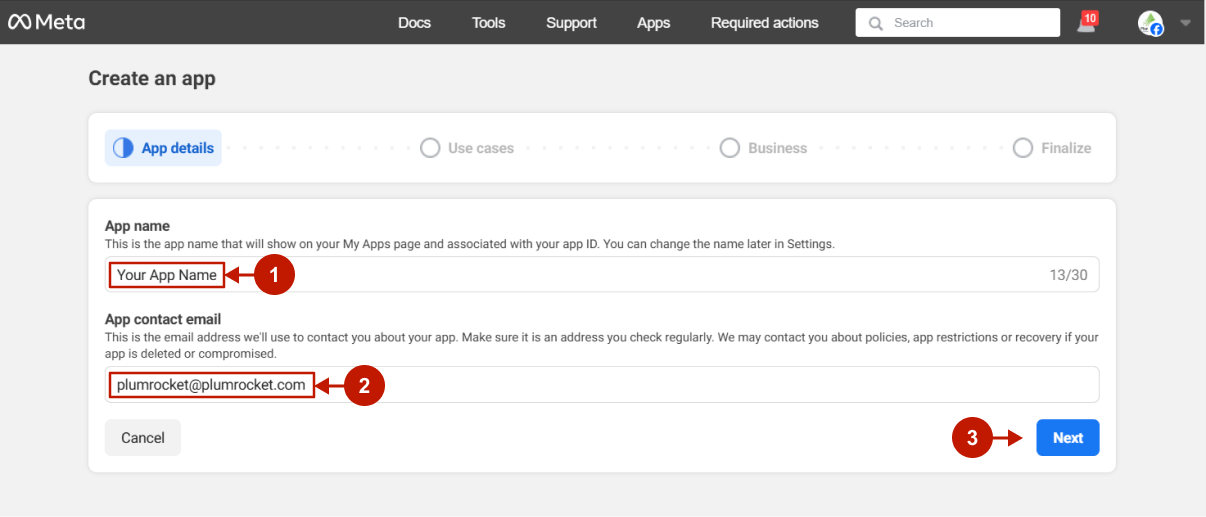
- Specify the App Name.
- Insert your Contact Email.
- Press the Next button.
Step-by-step guide:
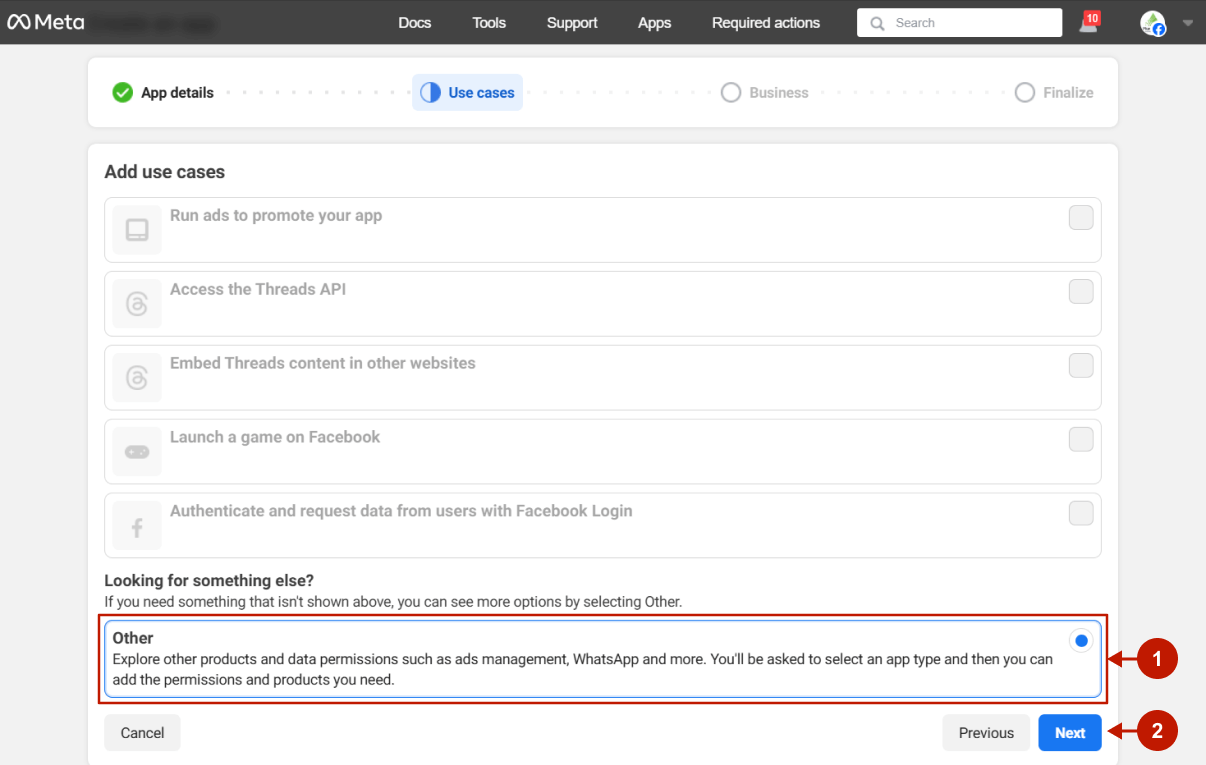
- Choose the Other use case.
- Press the Next button.
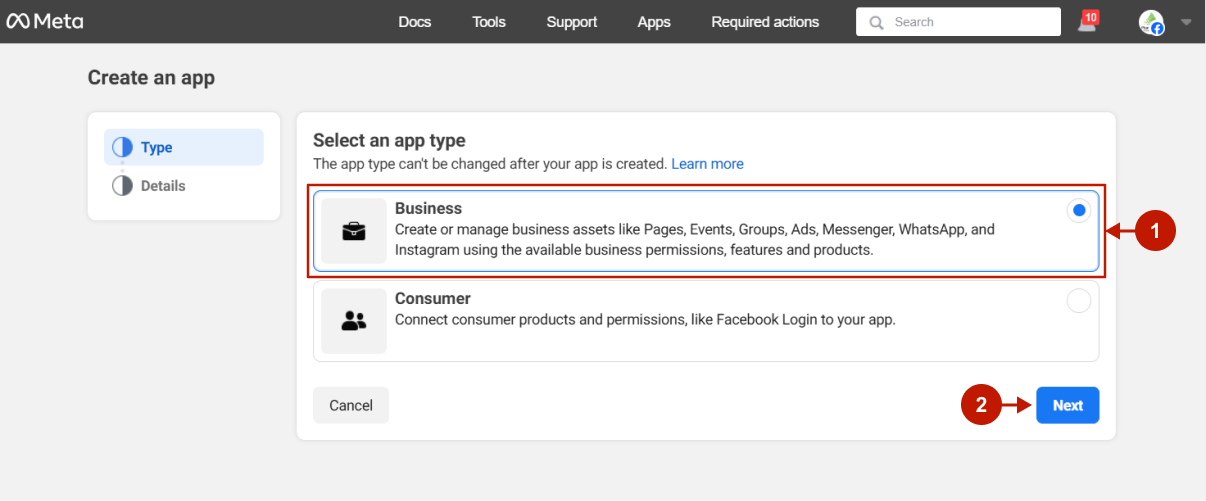
Step-by-step guide:
- Choose the Business app type.
- Press the Next button.
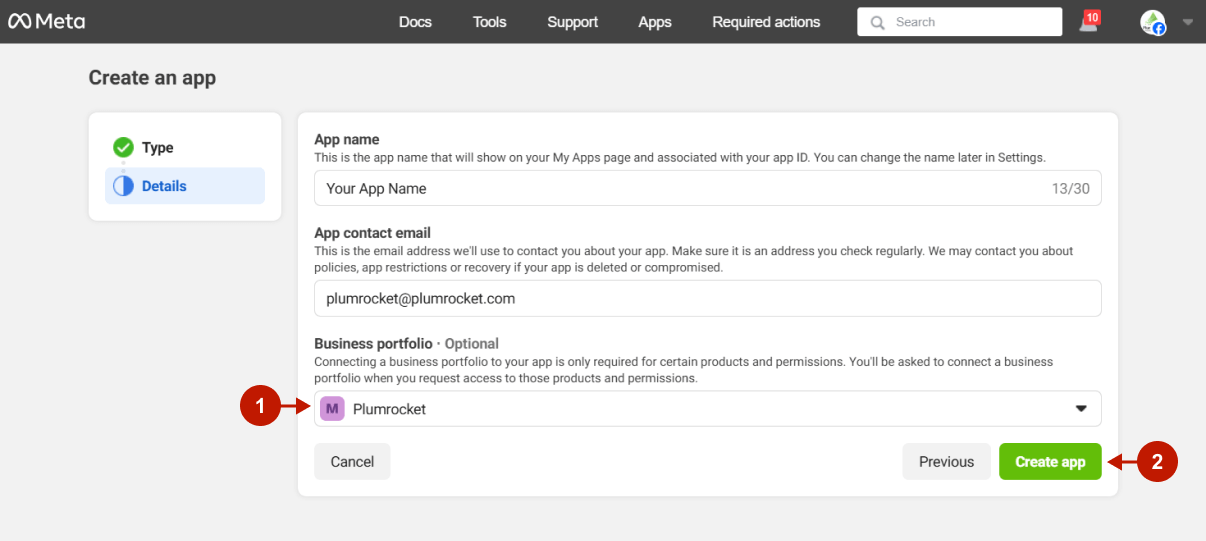
Step-by-step guide:
- Select your Business Account.
- Press the Create App button.
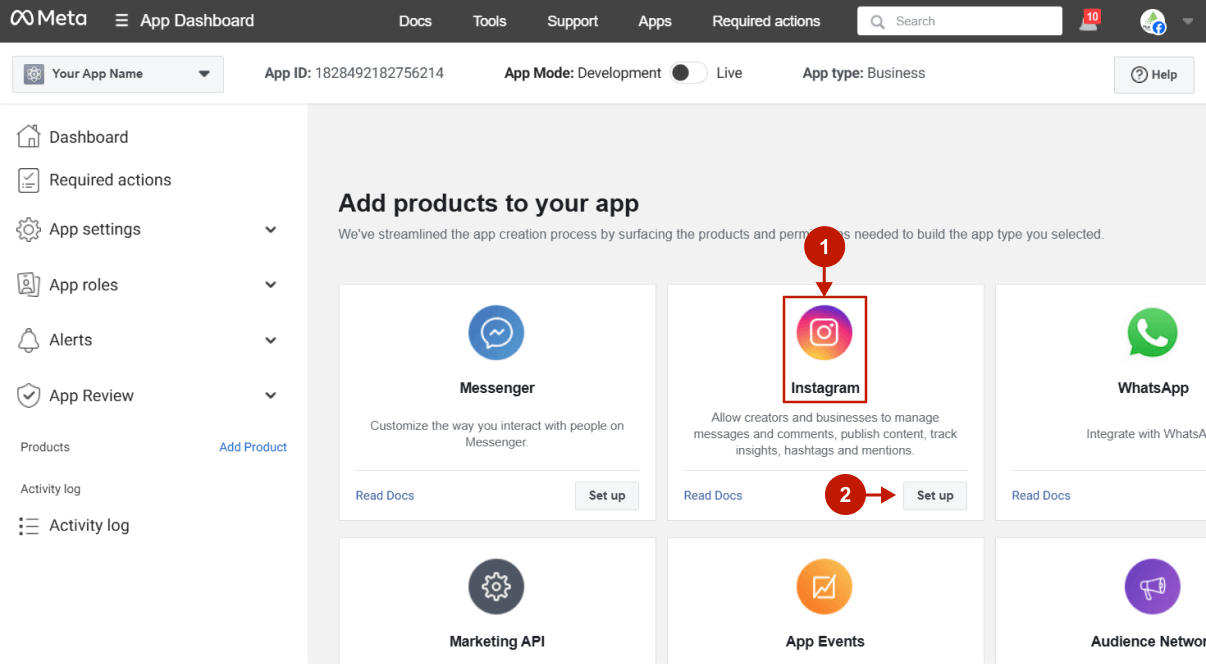
Step 2: Configure Instagram API
Step-by-step guide:
- In the products list, find Instagram.
- Press the Set Up button.
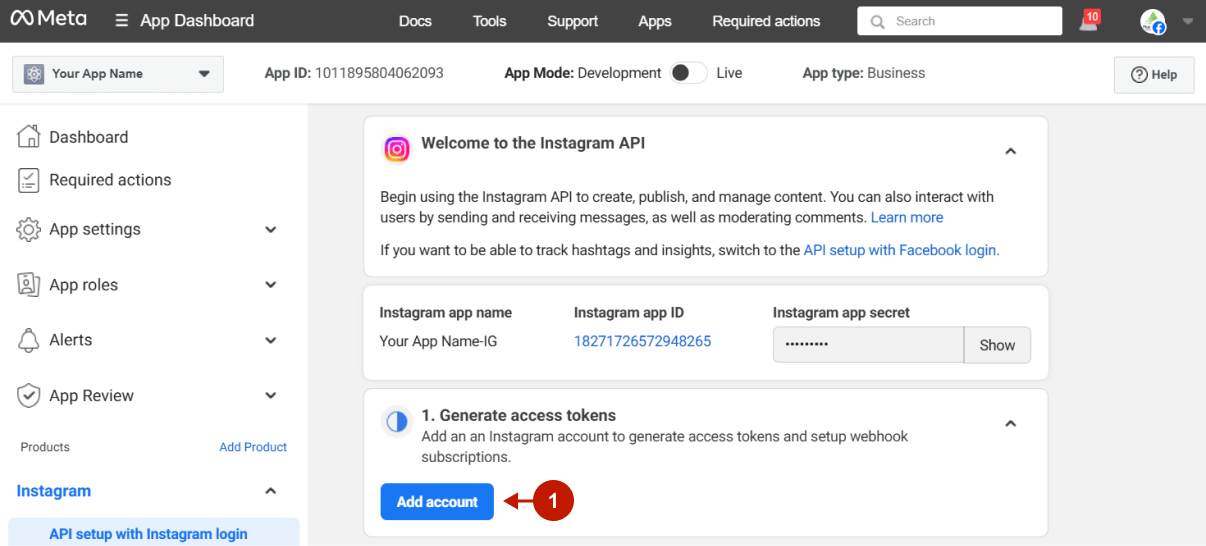
Step-by-step guide:
- Add your Instagram account in order to generate access tokens.
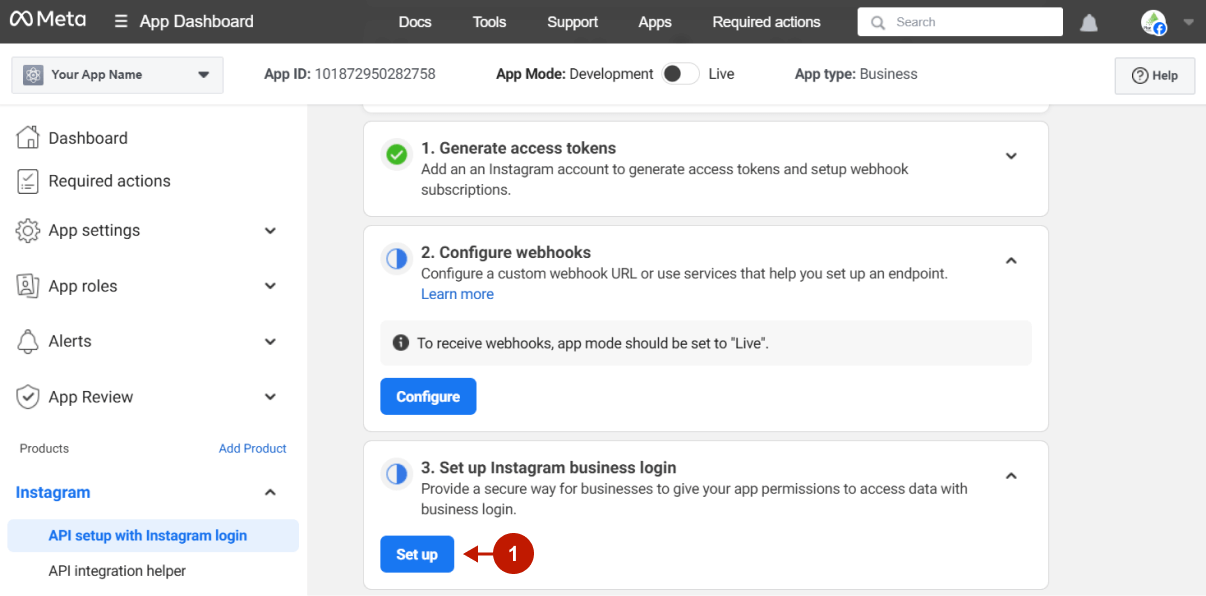
Step-by-step guide:
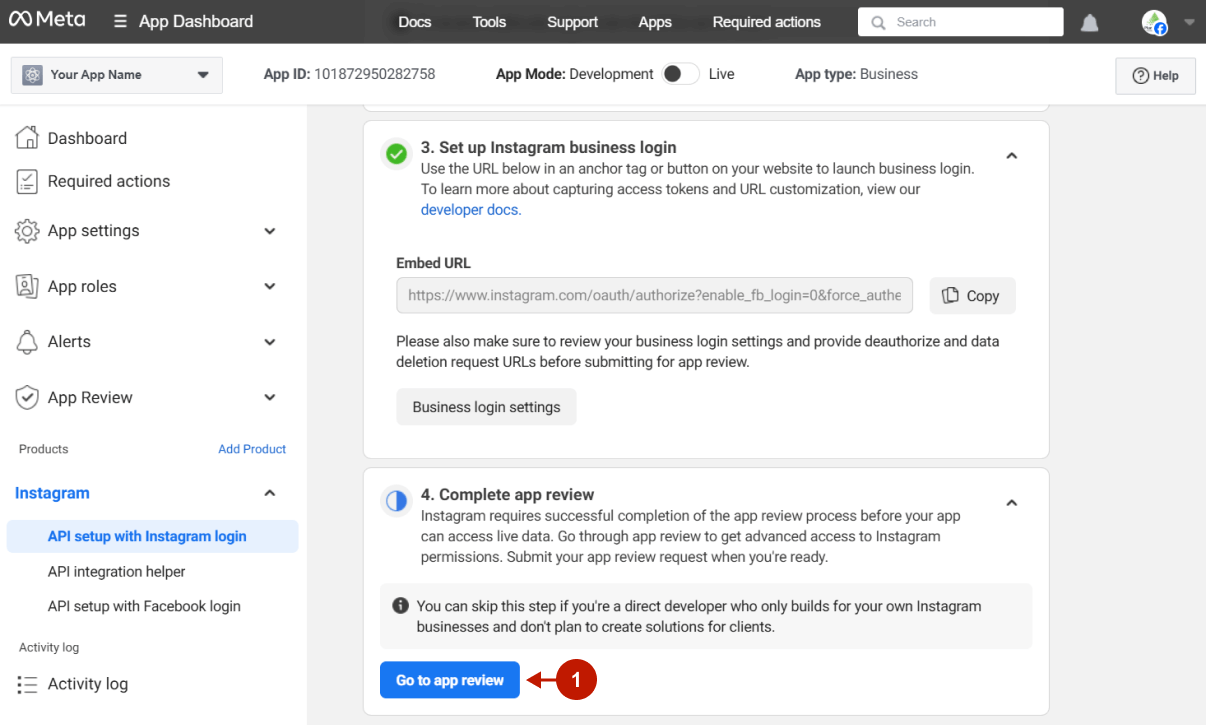
- Set up the Instagram business login
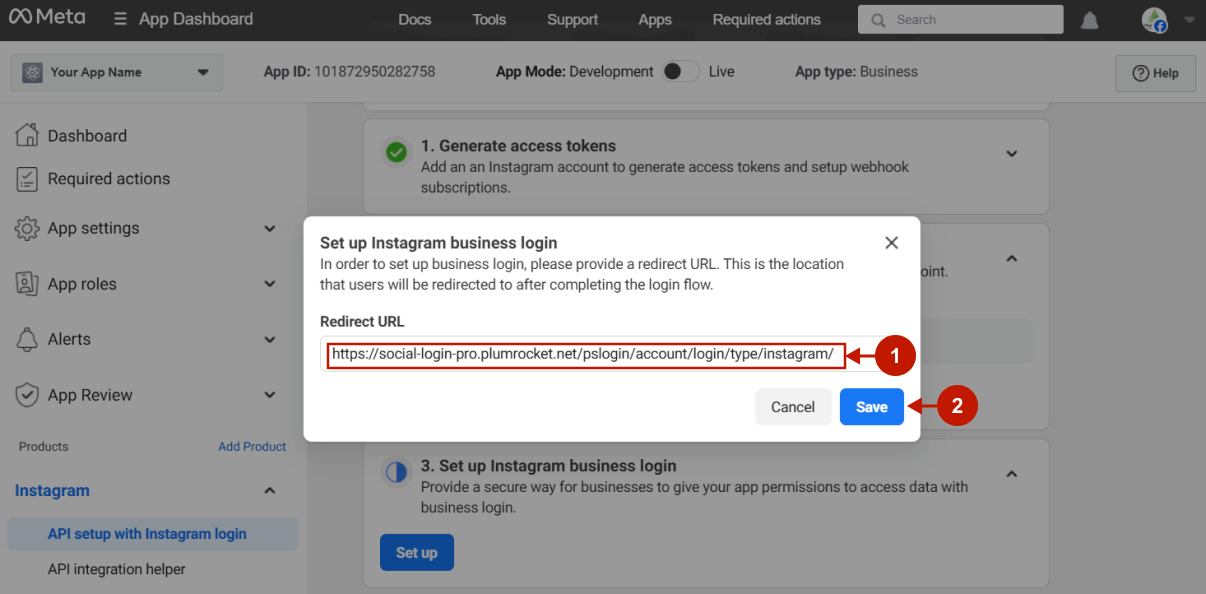
Step-by-step guide:
- Indicate your Redirect URL for this application. This URL can be found in the OAuth Redirect URI field in your Admin Panel -> Plumrocket -> Social Login Pro -> Configurations -> Instagram.
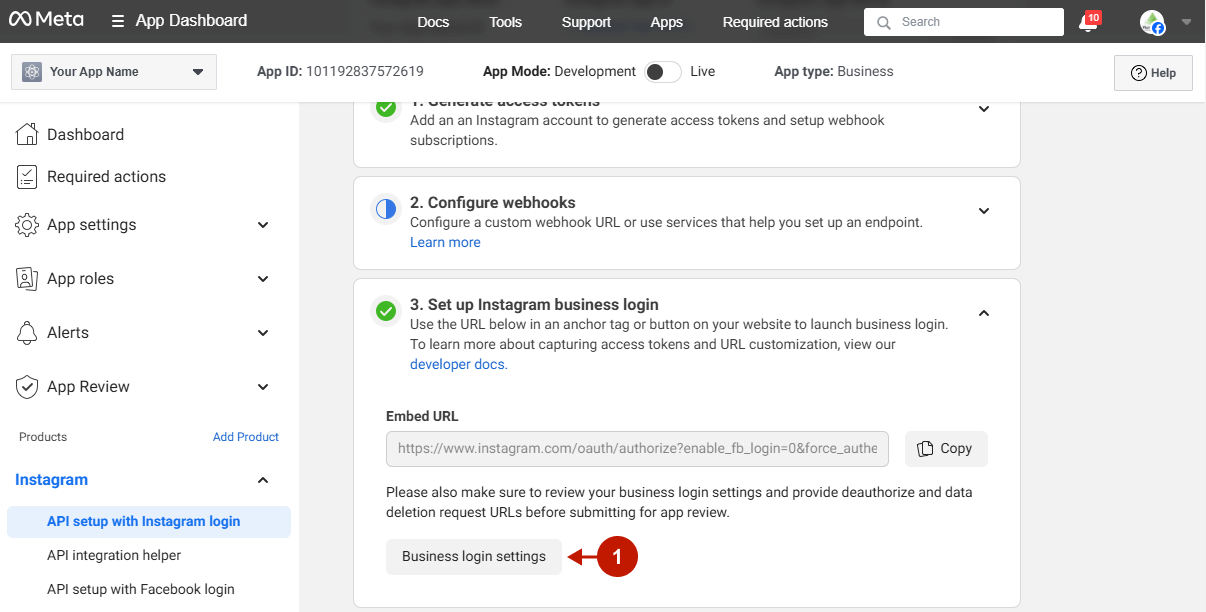
Step-by-step guide:
- Navigate to the Business login settings.
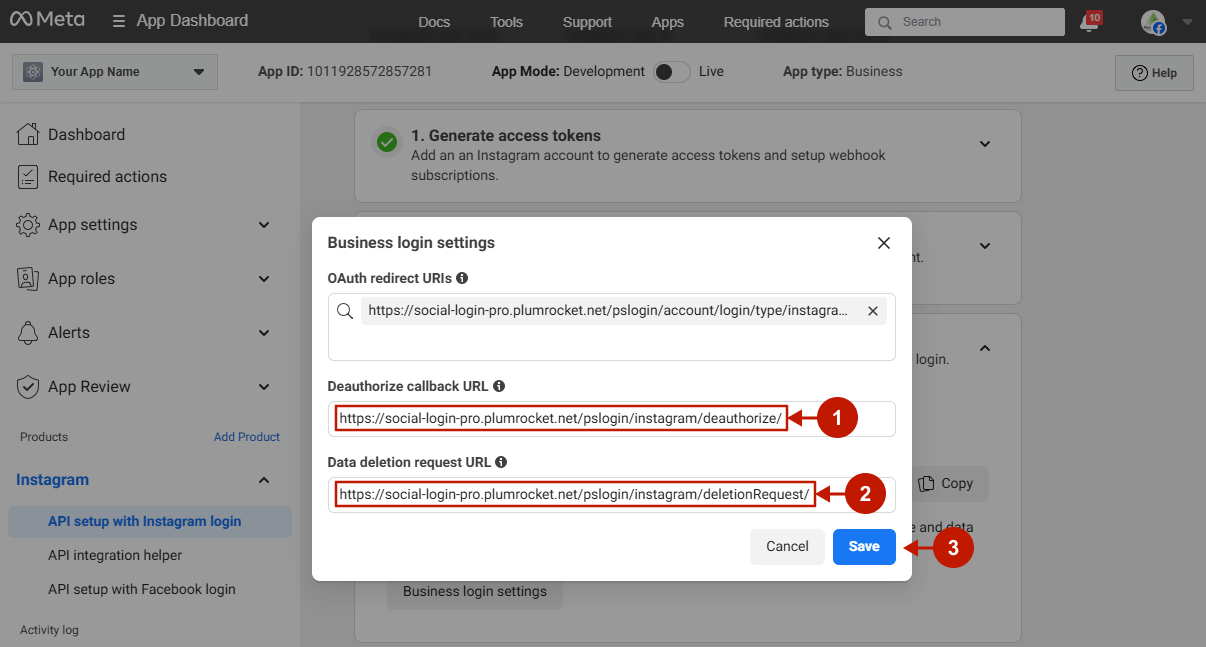
Step-by-step guide:
- Indicate your Callback URL for this application. This is a URL endpoint where Instagram sends notifications when a user revokes access or permissions granted to your store via their Instagram account, essentially removing the app’s ability to access their Instagram data. You can find the Callback URL in the Magento Admin Panel -> Plumrocket -> Social Login Pro -> Configurations -> Instagram– Deauthorize Callback URL field.
- Insert your Data deletion request URL. This URL can be found in the Data Deletion Request URL field in your Admin Panel -> Plumrocket -> Social Login Pro -> Configurations -> Instagram.
- Press the Save button.
Step-by-step guide:
- Proceed with your App Review.
Step 3. Release to Production
After all development and testing, you should switch your app to Live Mode and set up permissions to be able to offer Instagram login to your Magento 2 site users.
Step-by-step guide:
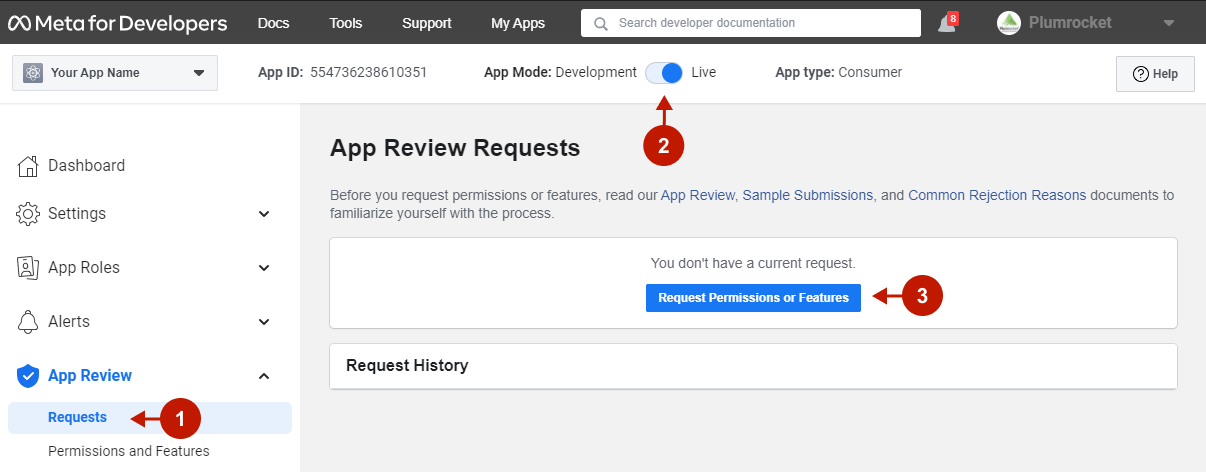
- Go to App Review -> Requests.
- Switch the App Mode toggle to Live.
- Click Request Permissions or Features.
Step-by-step guide:
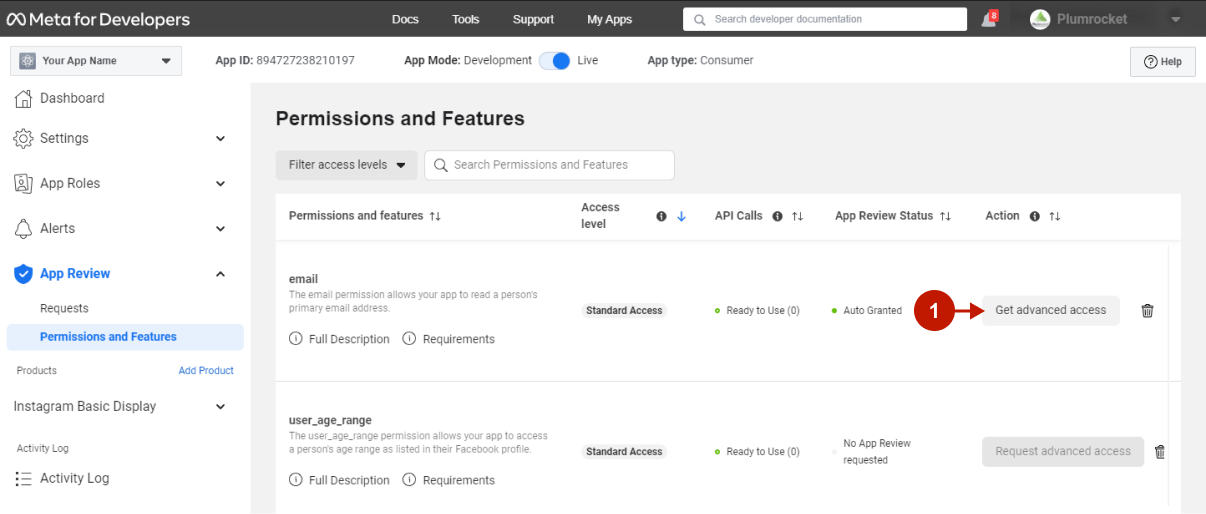
- Locate the “email” permission and click Get advanced access. The value in the Access Level column will change from Standard Access to Advanced Access.
The Instagram API is now set up and ready to use in the Magento 2 Instagram Login.
Configuring Instagram Integration in Magento 2 Social Login Pro Extension
In this step, you have to provide your Instagram API credentials for Instagram integration in the Magento 2 Social Login Pro extension configurations.
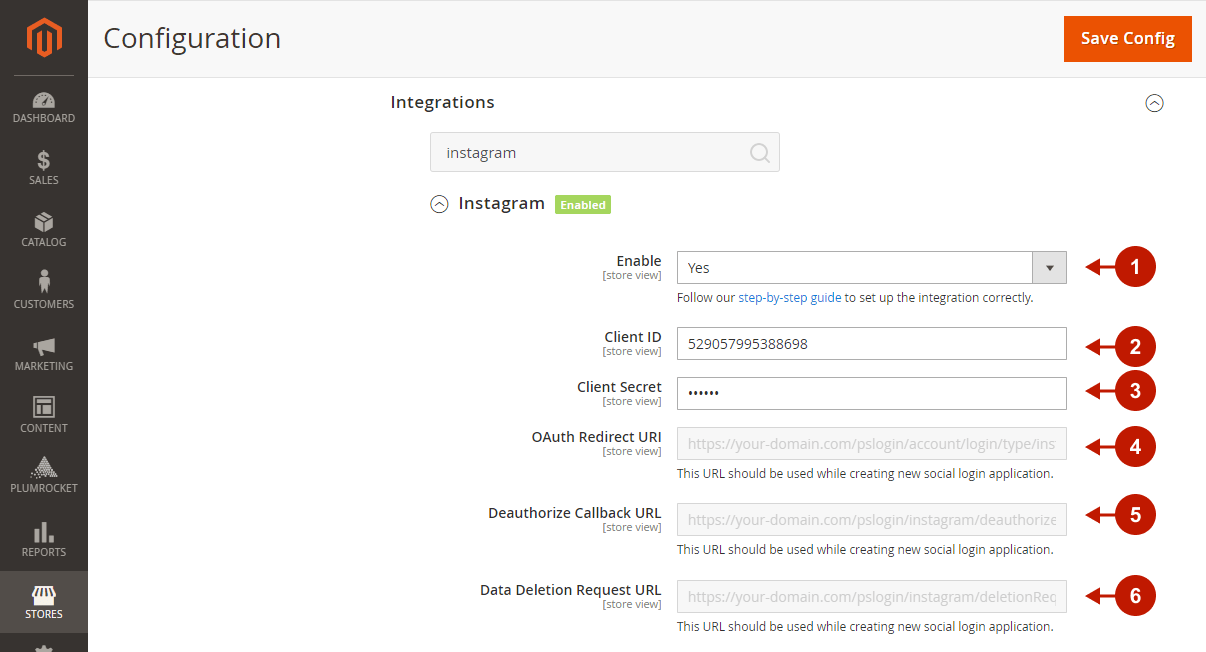
In your Magento 2 admin panel, go to Plumrocket -> Social Login Pro -> Configuration -> Integrations -> Instagram.
Step-by-Step guide:
- Make sure the Instagram integration is enabled.
- Provide your Instagram App Client ID (to find it, go to Instagram Basic Display -> Basic Display -> Instagram App ID).
- Provide your Instagram App Client Secret key (to find it, go to Instagram Basic Display -> Basic Display -> Instagram App Secret).
- “OAuth Redirect URI“: you will need this URL to configure your Instagram application.
- “Deauthorize Callback URL“: you will need this URL to configure your Instagram application.
- “Data Deletion Request URL“: you will need this URL to configure your Instagram application.
- Click Save Config.
Configuration of the Instagram API for the Magento 2 Instagram Login is now completed.
Configuring Instagram Integration in Magento Social Login Pro Extension
In this step, you must update your Magento Social Login Pro Extension configuration. In your Magento admin panel, go to “System” -> “Configuration” -> “Plumrocket Inc” -> “Social Login Pro” -> “Instagram” Tab.
Step-by-Step action:
- Paste Client ID into the relevant field of “Instagram” tab in your backend.
- Paste Client Secret key into the relevant field of “Instagram” tab in your backend.
- Click Save Config.
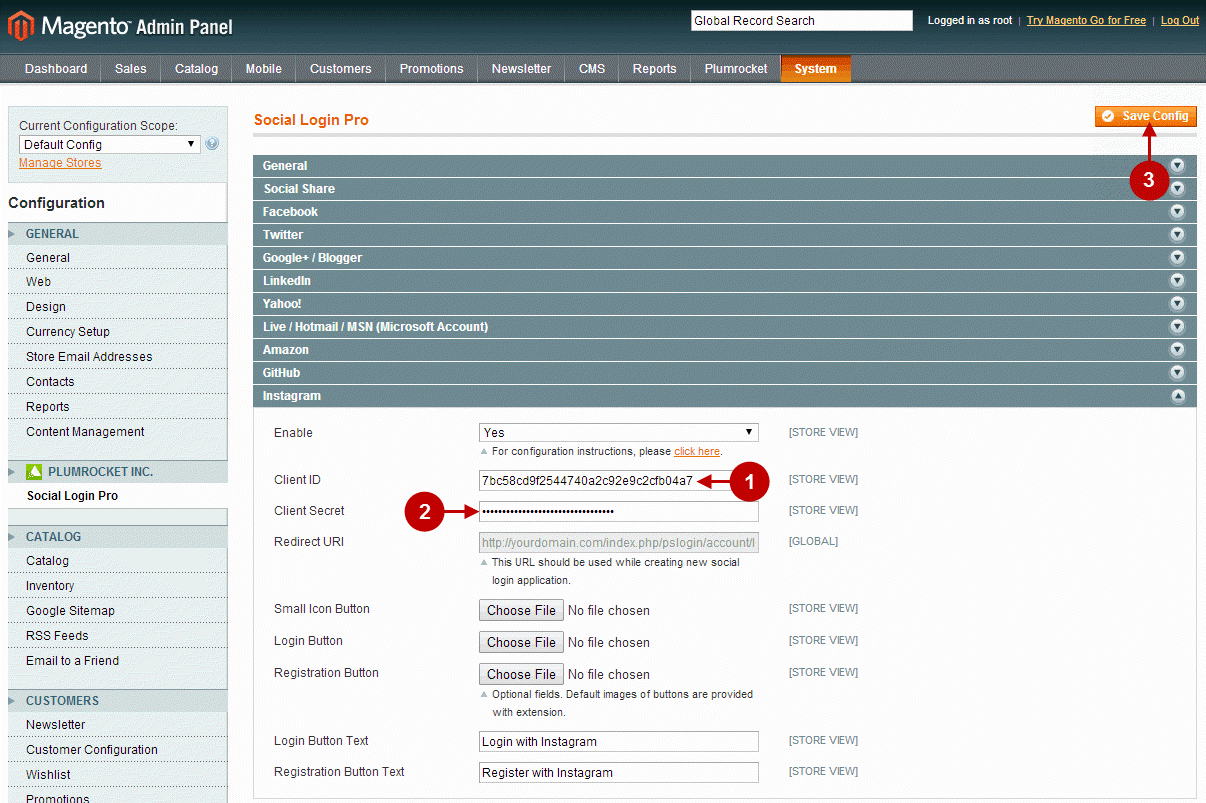
The configuration of the Instagram Magento Social Login application is now completed.
Next Step > Return to Social Login Pro API Reference