How to Set Up Facebook API for Magento
In this article, you will learn how to find your Facebook API and integrate Facebook Login into Magento Social Login Pro plugin and Magento Facebook & Twitter Login extension. Please follow the step-by-step instructions below.
Step 1. Create Facebook App
Step-by-step guide:
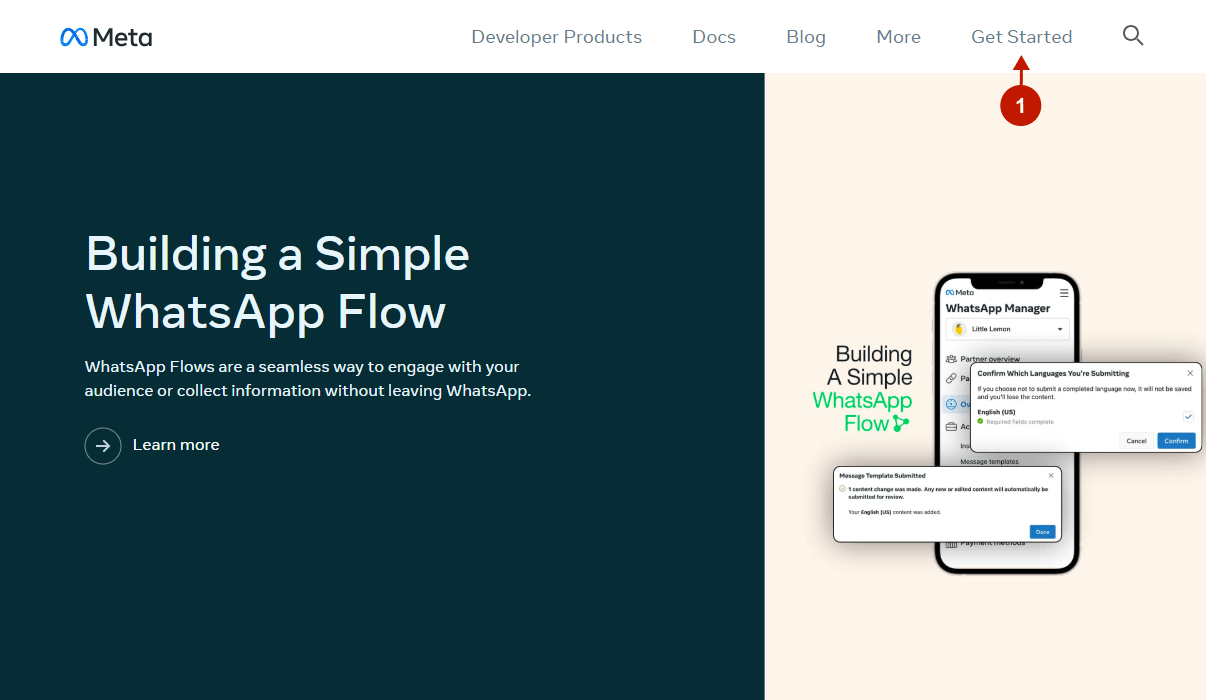
- Create an account and log in to https://developers.facebook.com/. Then, click Get Started.
Step-by-step guide:
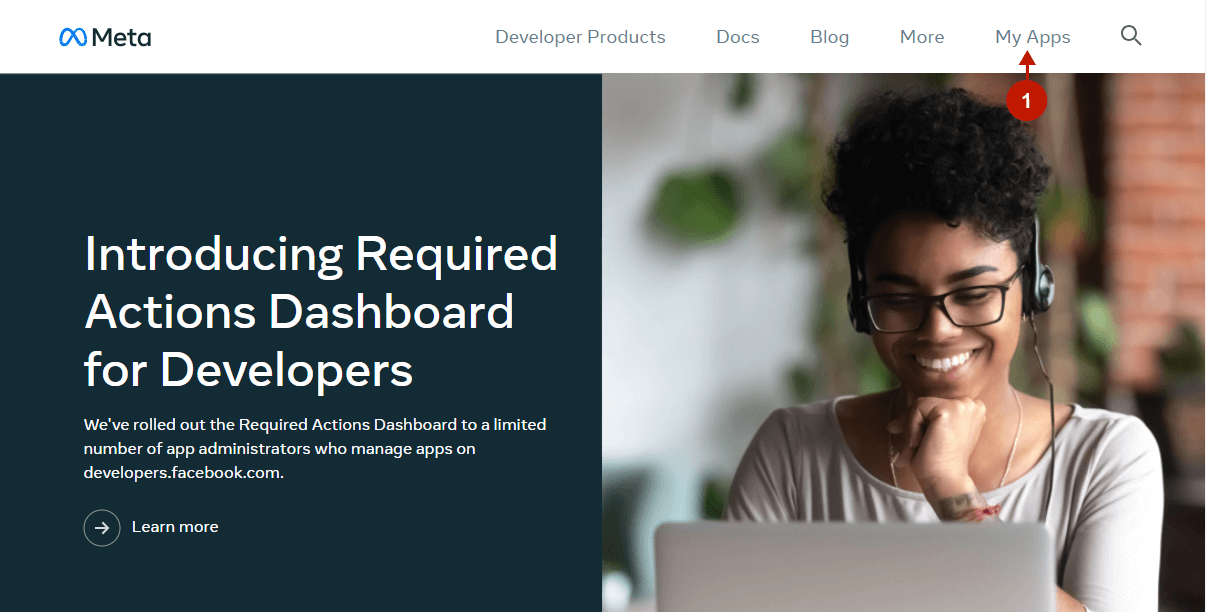
- If you have created apps before, you will find My Apps in the navigation menu instead of Get Started.
Step-by-step guide:
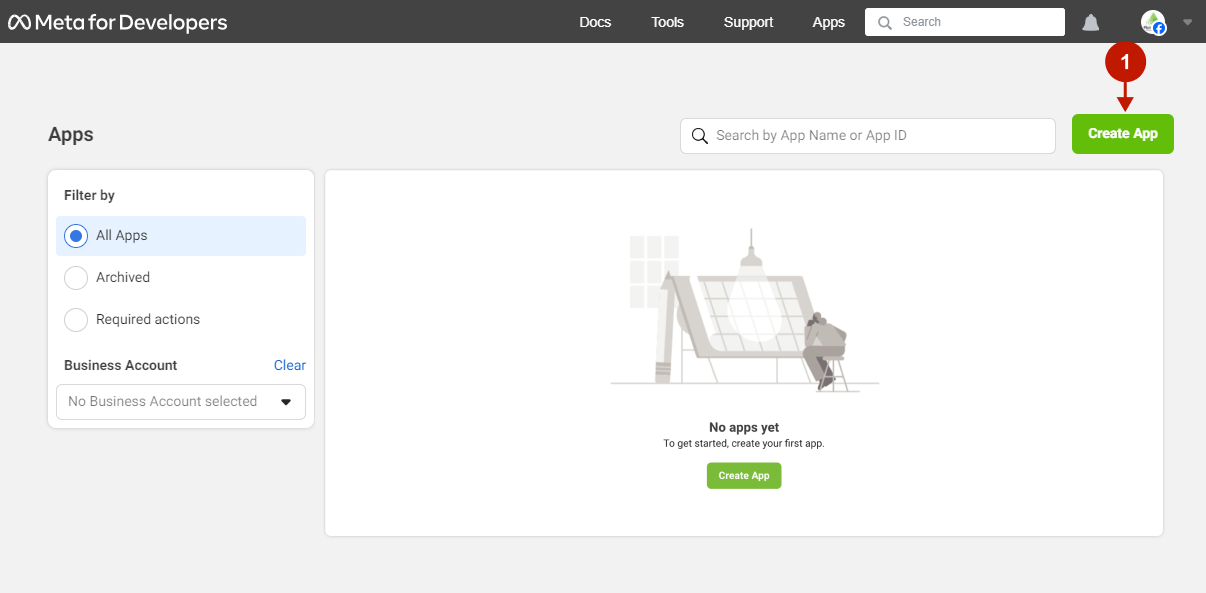
- Next, press the Create App button.
Step-by-step guide:
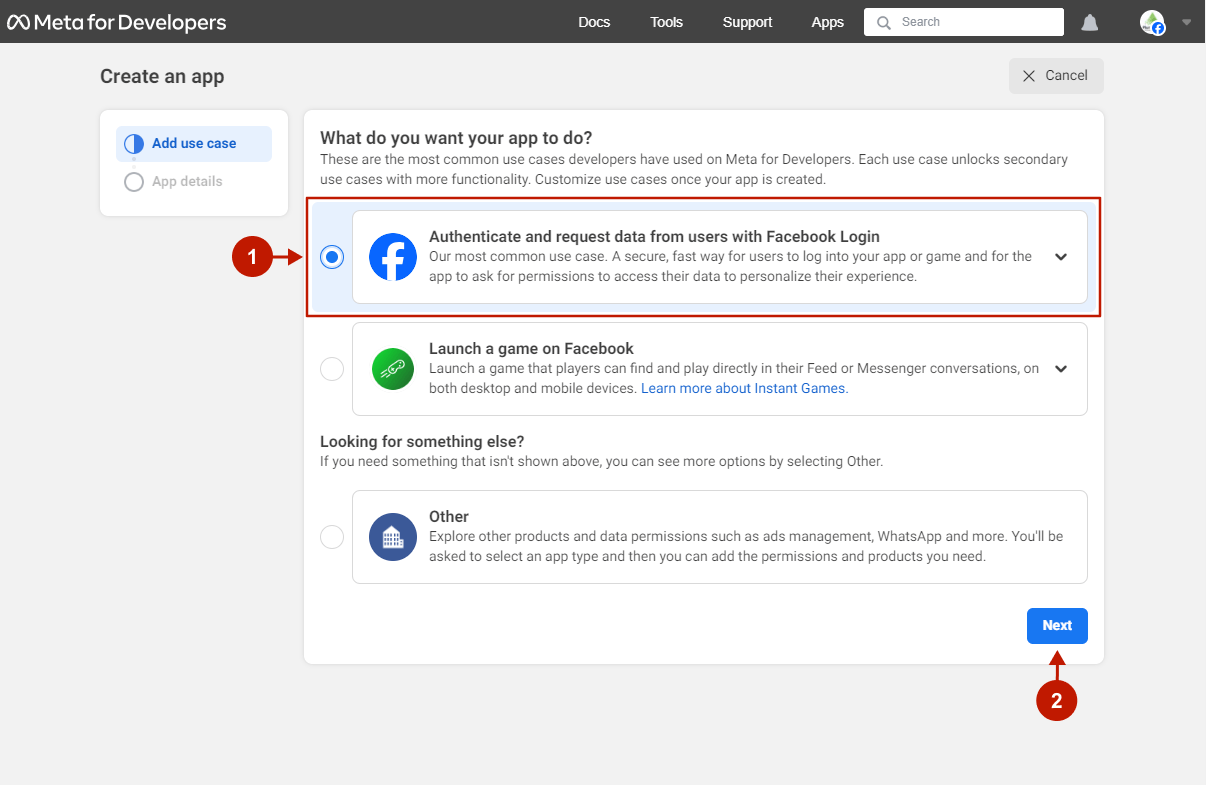
- In the “Add use case” tab that opened, choose the “Authenticate and request data from users with Facebook Login” option.
- Press the Next button.
Step-by-step guide:
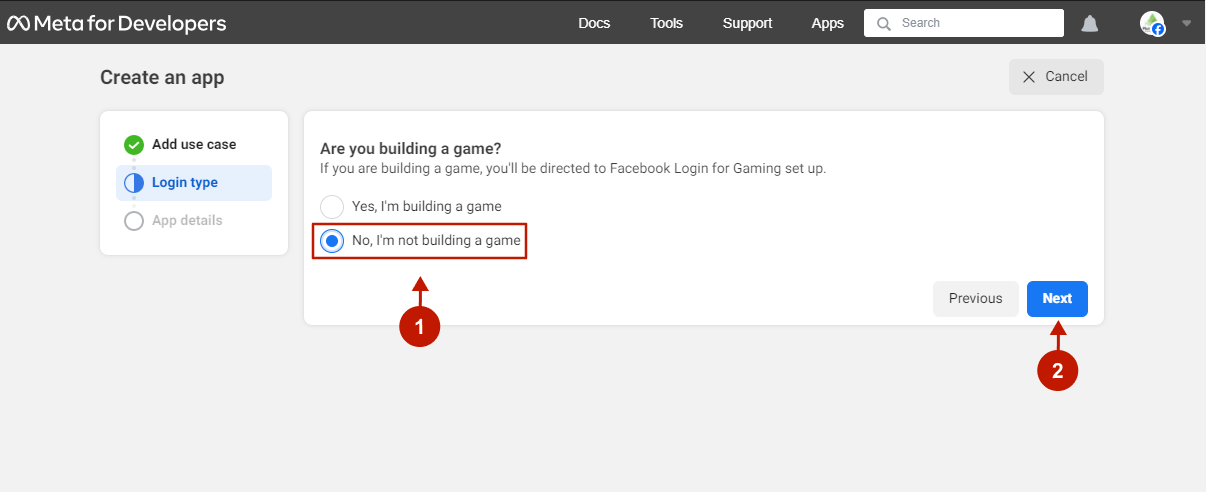
- You will be redirected to the “Login type” tab. Choose the “No, I’m not building a game” option.
- Press the Next button.
Step-by-step guide:
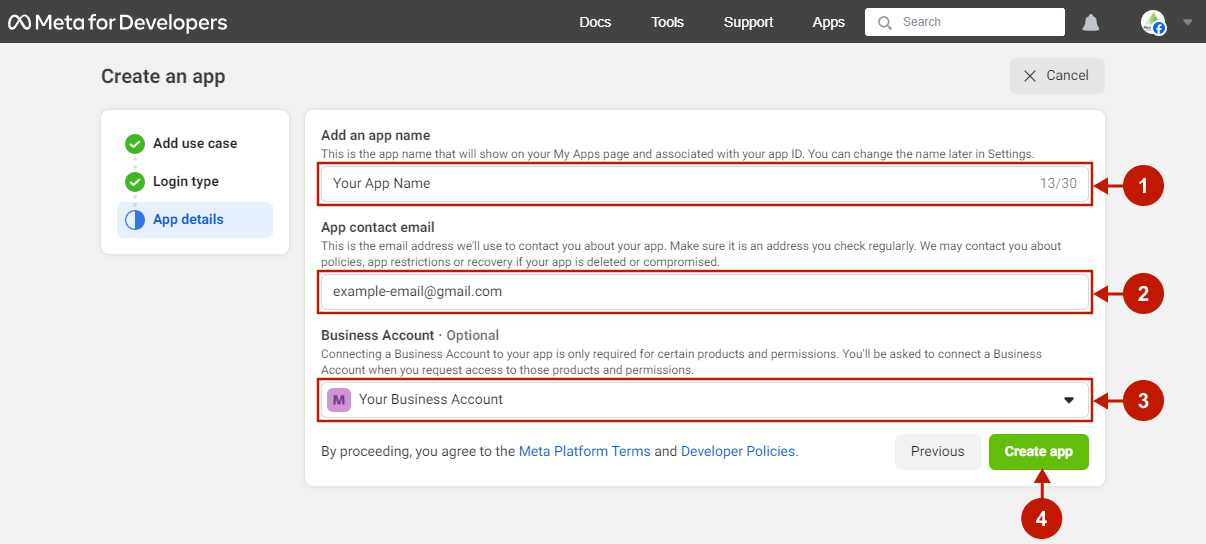
- On the “App details” tab, enter the name of your app.
- Input your contact email address.
- Choose your business account if you have one. Please note: this setting is optional. You can use your application even without the business account, but there will be some limitations. Please find detailed information about the business account and limitations below in this documentation.
- Press the Create App button.
Step 2. Configure Facebook App
After creating an app, you need to configure it.
Step-by-step guide:
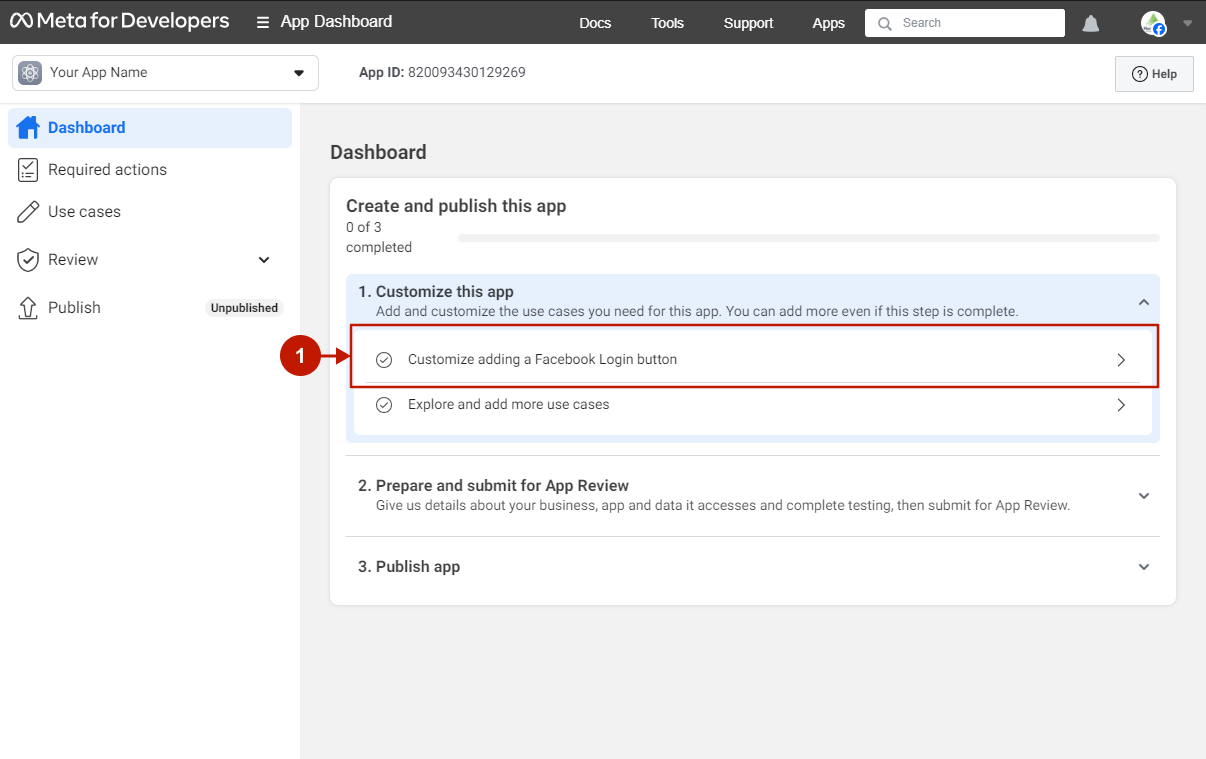
- Press the “Customize adding a Facebook Login” button.
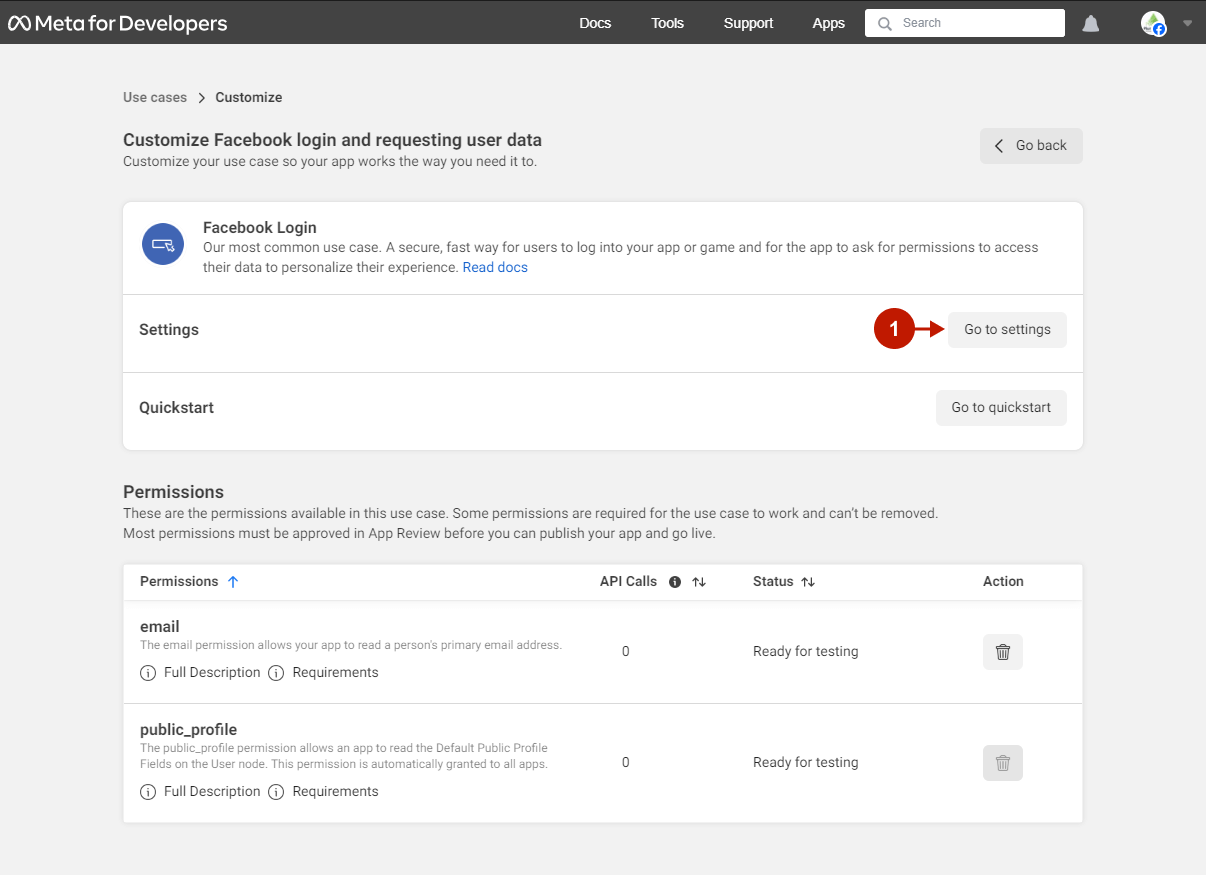
Settings
Step-by-step guide:
- Press the Go to settings button.
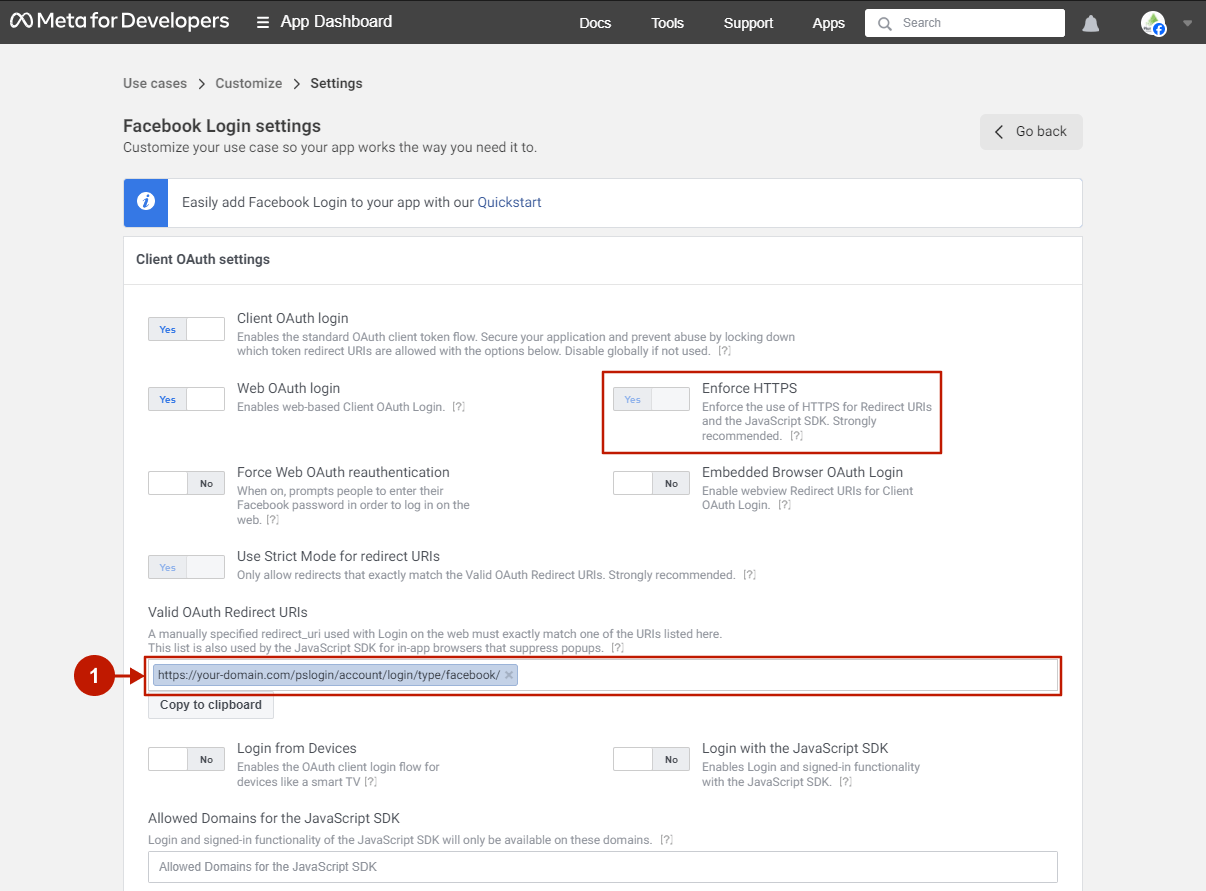
Step-by-step guide:
- Indicate your Valid OAuth Redirect URIs for this application. This URL can be found in the OAuth Redirect URL field in your Admin Panel -> Plumrocket -> Social Login Pro (or Twitter&Facebook Login) -> Configurations -> Facebook. Important: This URL must use the HTTPS protocol, as Facebook’s “Enforce HTTPS” setting is enabled by default.
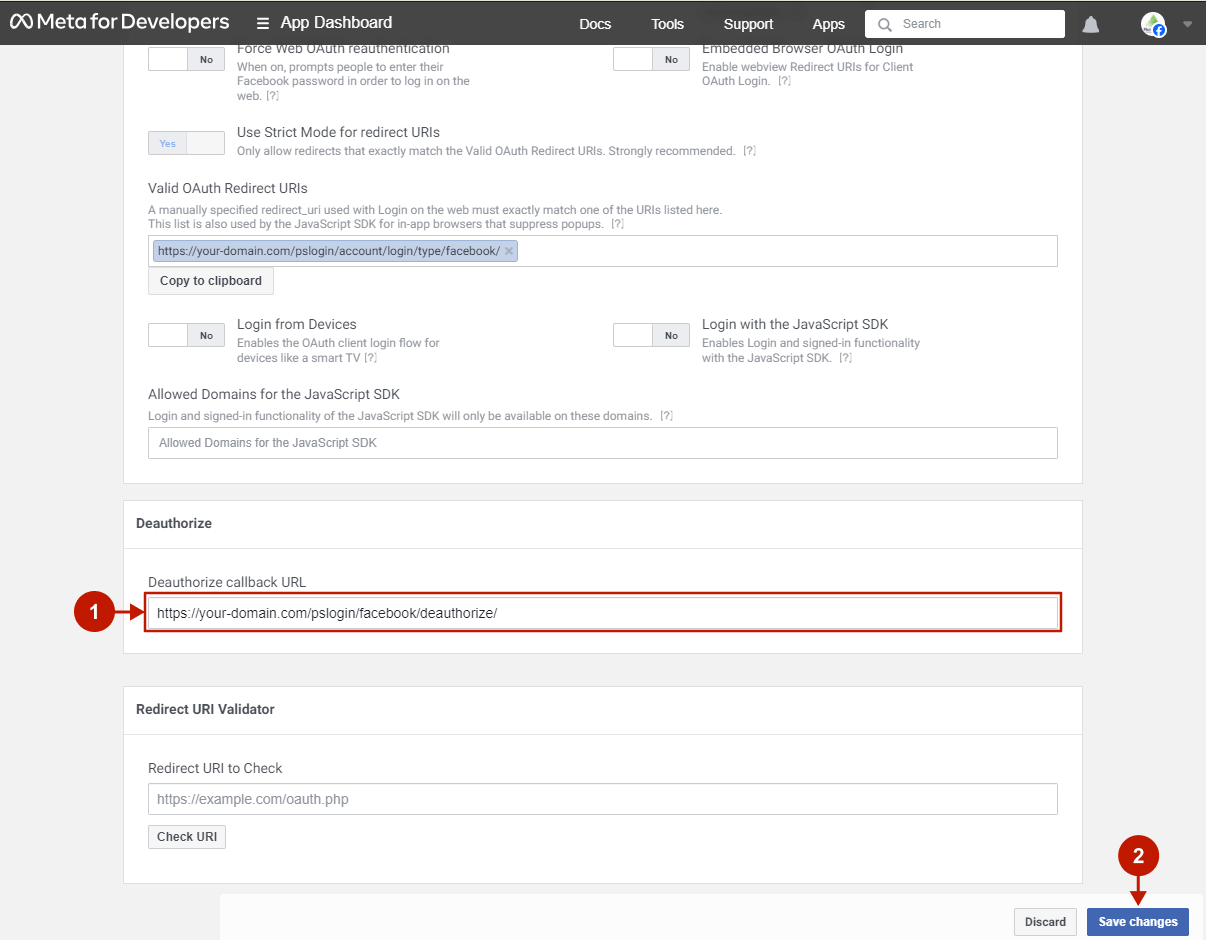
Step-by-step guide:
- Indicate your Deauthorize callback URL for this application. This is a URL endpoint where Facebook sends notifications when a user revokes access or permissions granted to your store via their Facebook account, essentially removing the app’s ability to access their Facebook data. You can find the Deauthorize callback URL in the Magento Admin Panel -> Plumrocket -> Social Login Pro (or Twitter & Facebook Login) -> Configurations -> Facebook – OAuth Redirect URL field.
- Press the Save changes button.
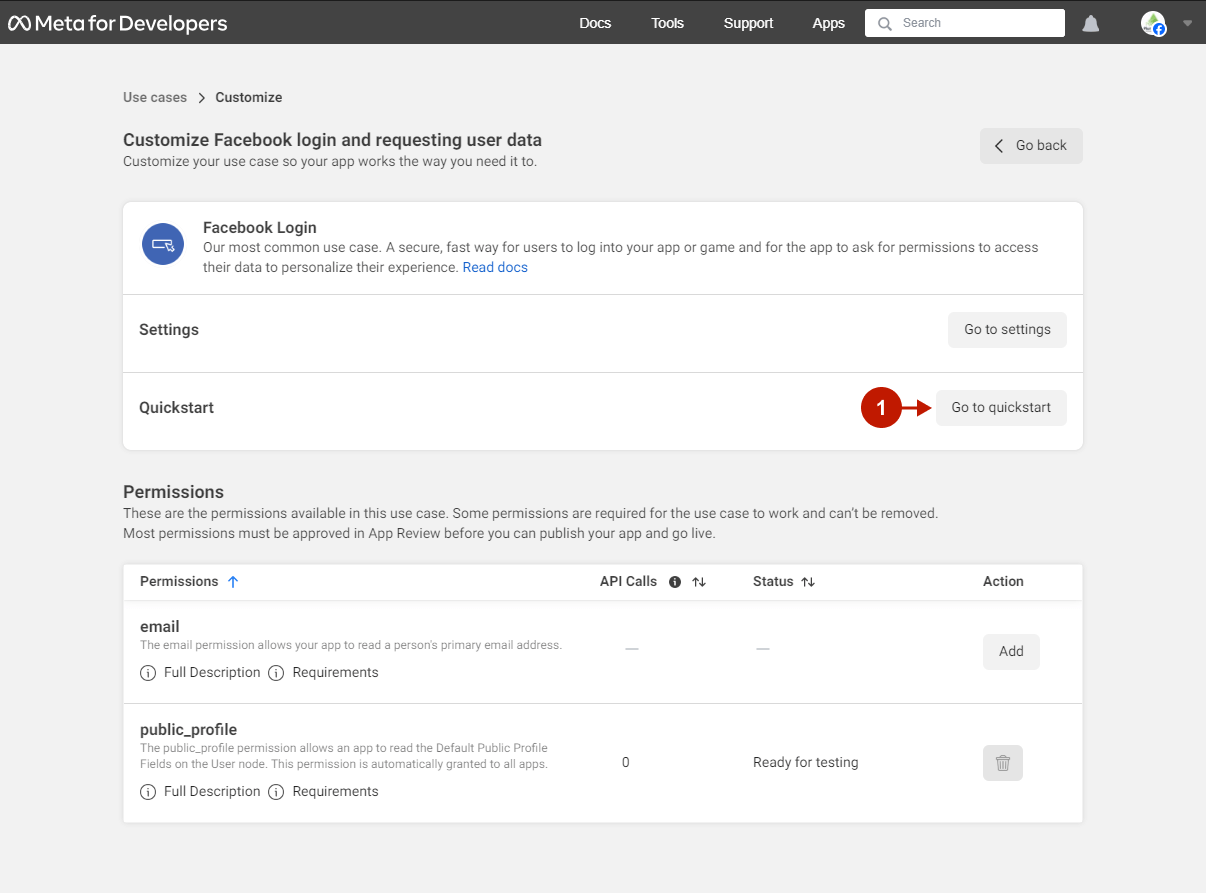
Quickstart
Step-by-step guide:
- Press the Go to quickstart button.
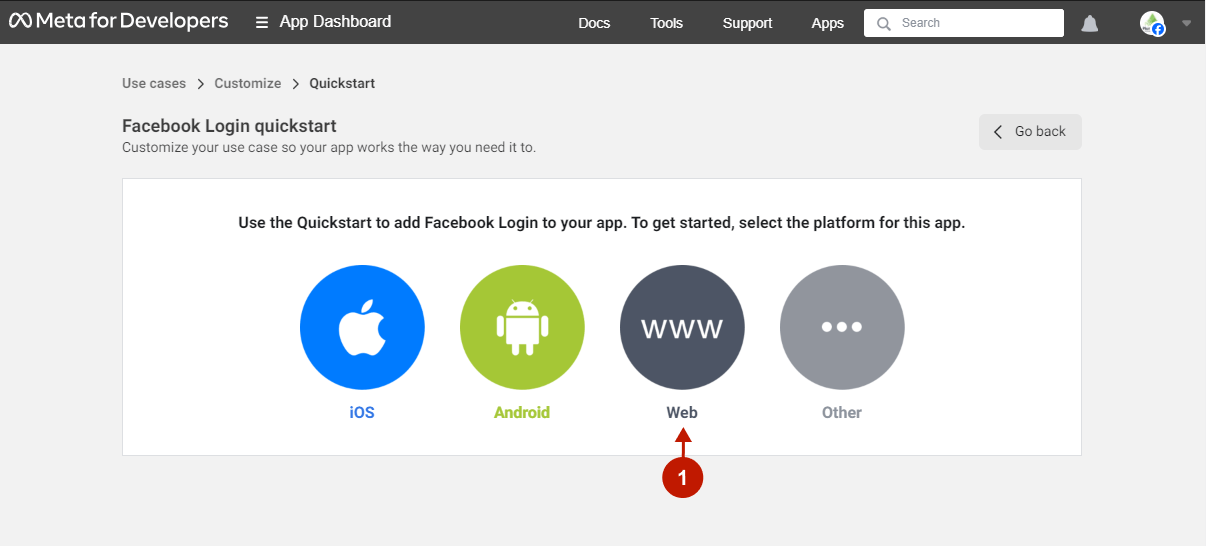
Step-by-step guide:
- Choose the Web option.
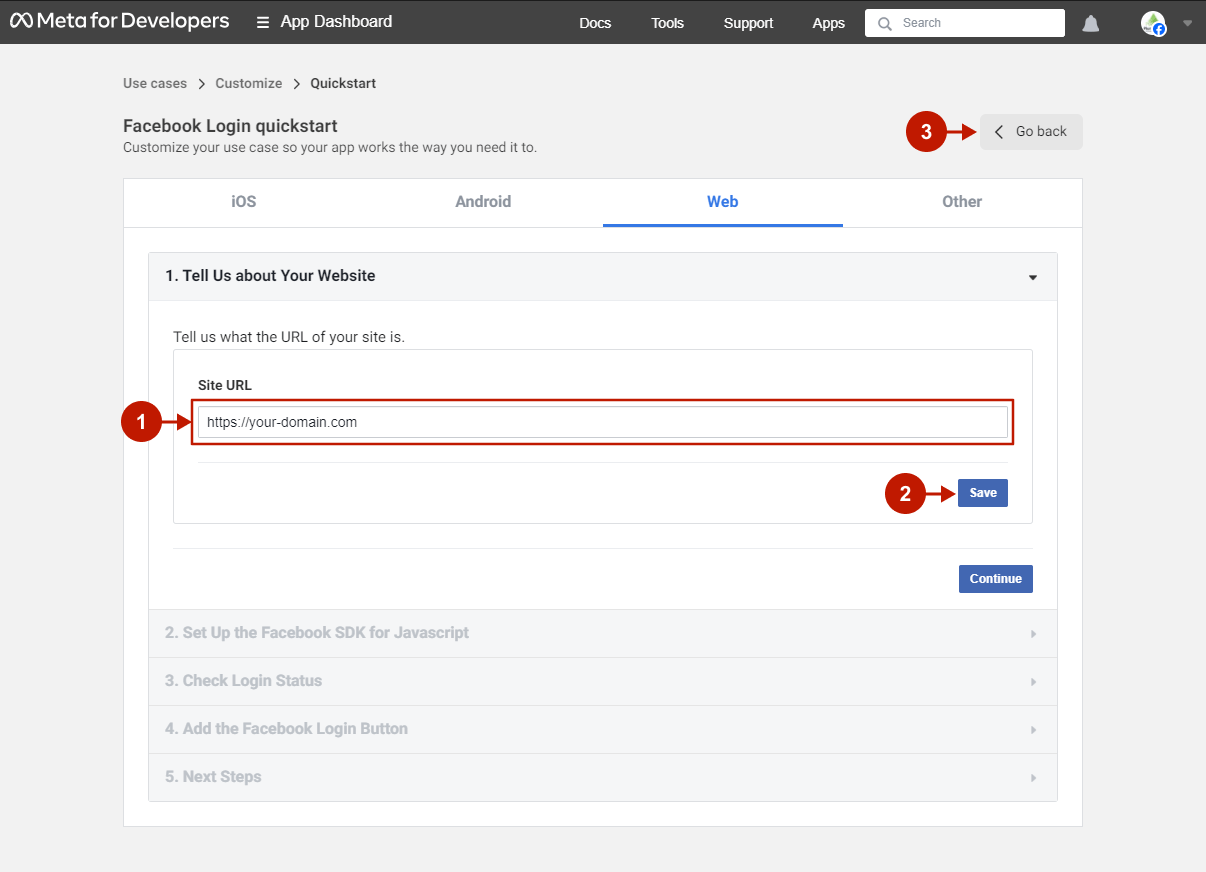
Step-by-step guide:
- Enter your site URL.
- Press the Save button.
- Press the Go back button.
Step 3. Configure Facebook App’s Permissions
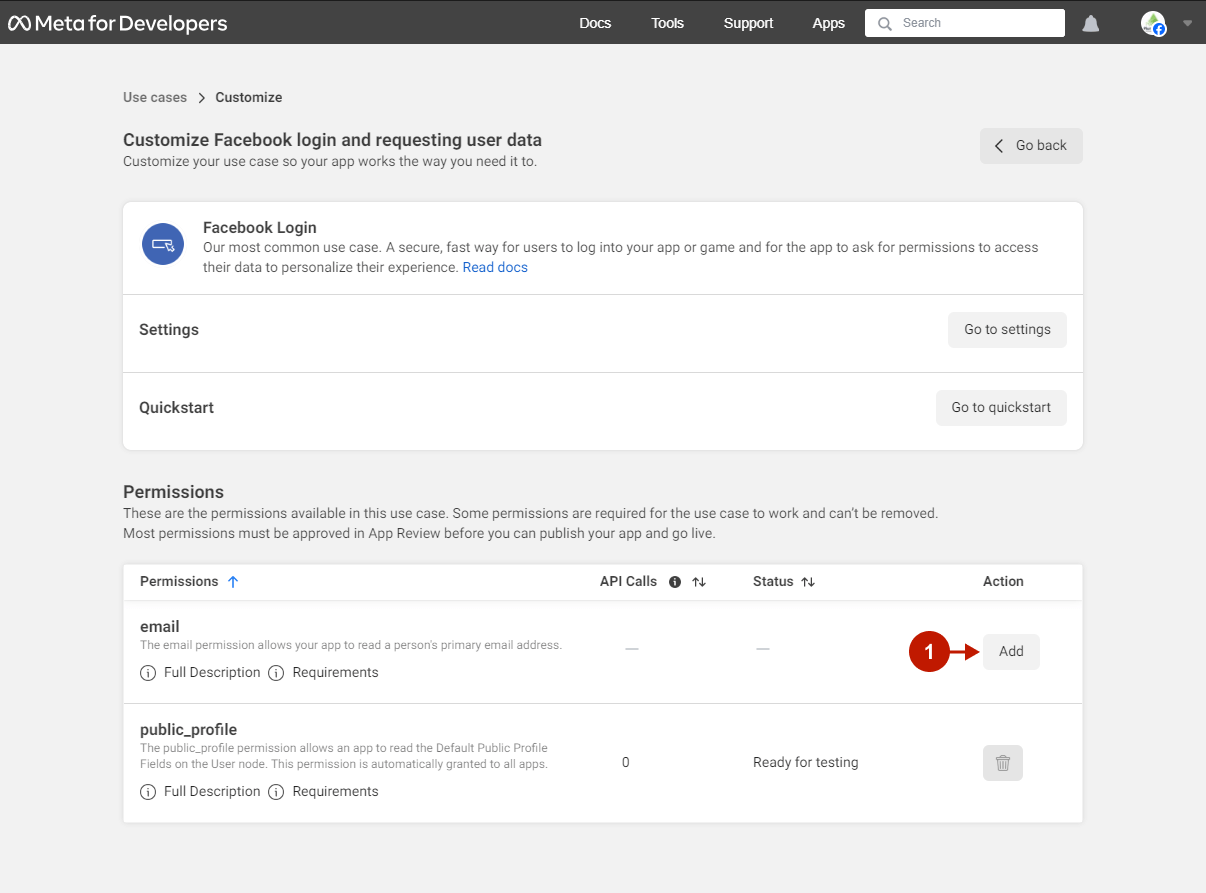
In the Permissions section, you can choose what information to retrieve from the user’s Facebook profile that is saved to their Magento store profile during the user registration.
Important Information:
The public_profile permission is automatically added to the use case and requires no additional action. This permission allows you to retrieve the user id, profile picture, first name, and last name from the user’s Facebook account.
.
Additionally, you may collect a user’s email address. Follow the instructions below to add the email permission.
Step-by-step guide:
- To the right of the
emailpermission, click the Add button.
Important Information:
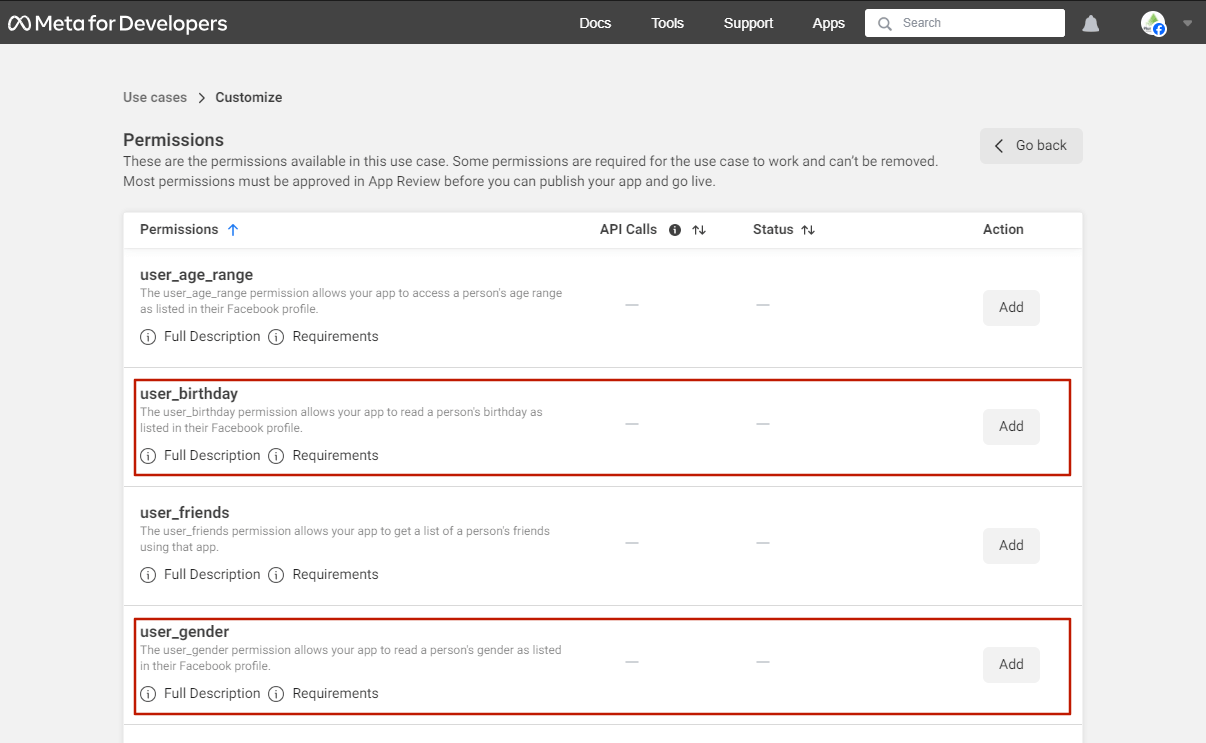
The Social Login Pro extension also supports collecting additional user information, such as email, birthday, and gender. If the acquiring of this information aligns with your business objectives, please follow the steps below to add these permissions to your Facebook app.
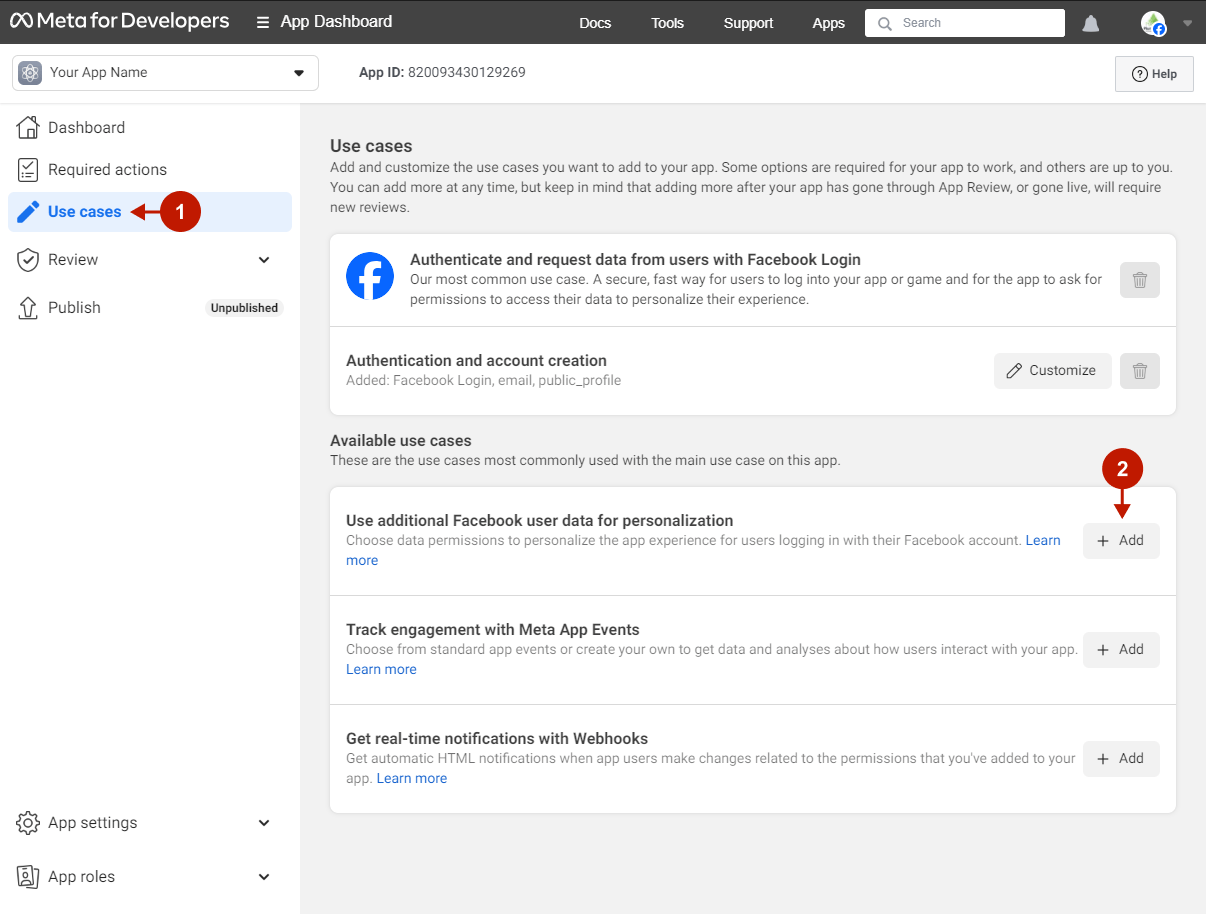
Step-by-step guide:
- Click the Go Back button in the upper right or Use Cases in the left side menu.
- Click the Add button beside the “Use additional Facebook user data for personalization” case.
Step-by-step guide:
- Click Add on the right to the
user_birthdayand/oruser_genderpermission.
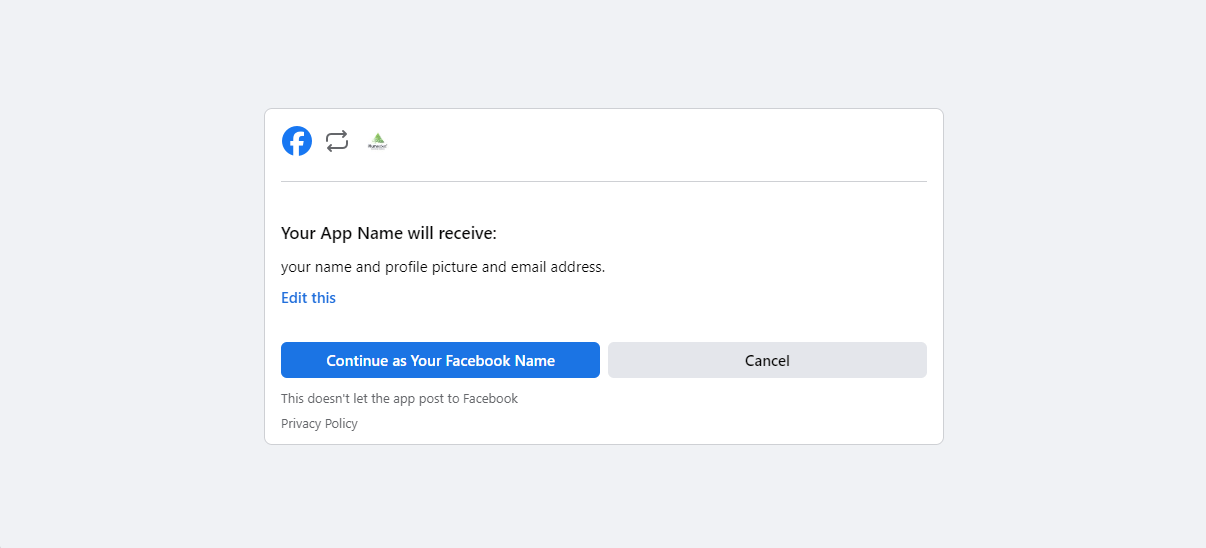
Please note that users will see the list of personal information they share with your Magento store during the registration:
Step 4. Complete Business verification and Data handling questions
Important Information:
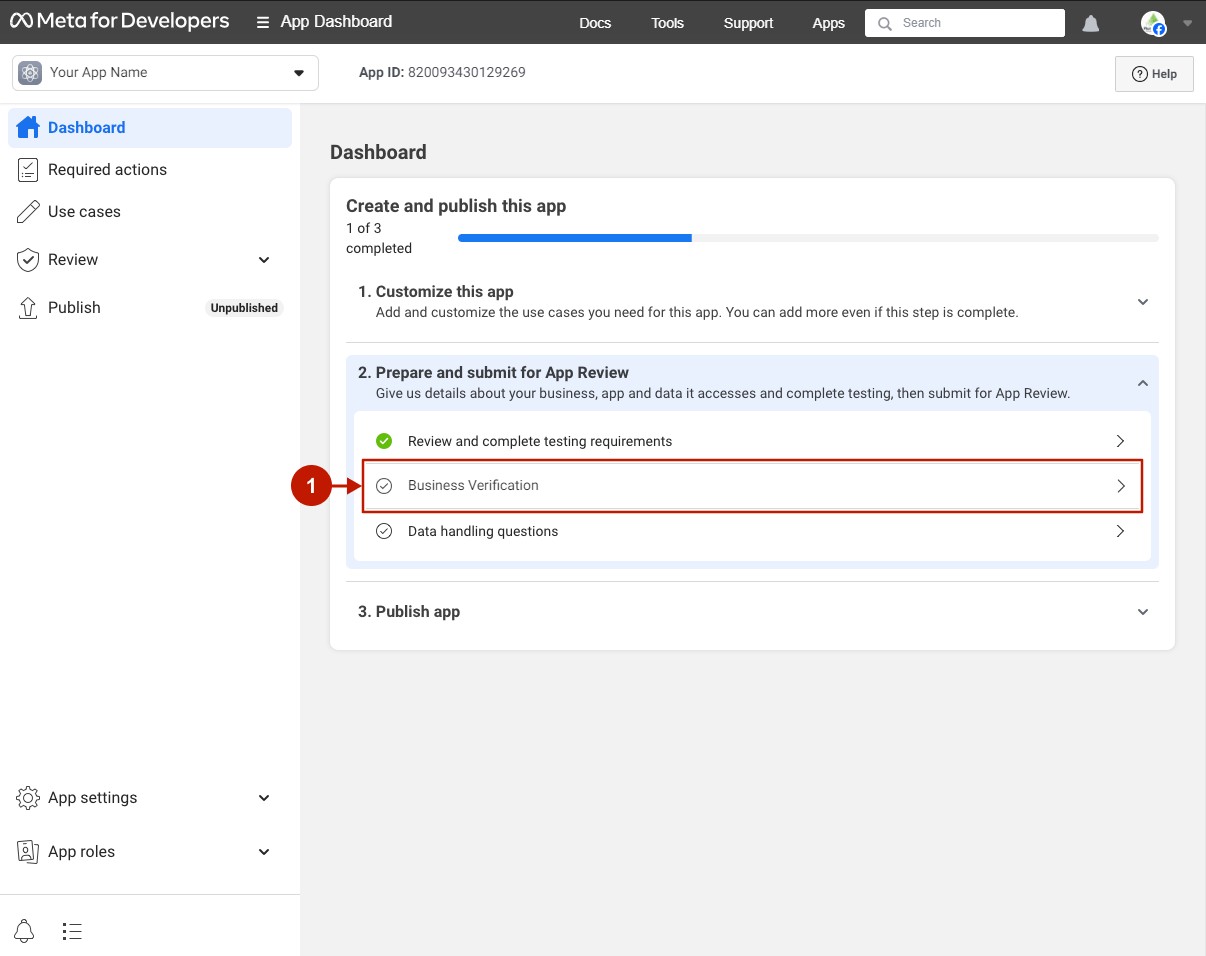
As of February 1, 2023, all businesses should verify their businesses in order to get advanced access for any permission, such as public_profile, email, birthday, etc. This means that if you want to implement Facebook login on your store, you need to complete the business verification process.
Step-by-step guide:
- Go to the Dashboard in the left menu and click Business Verification.
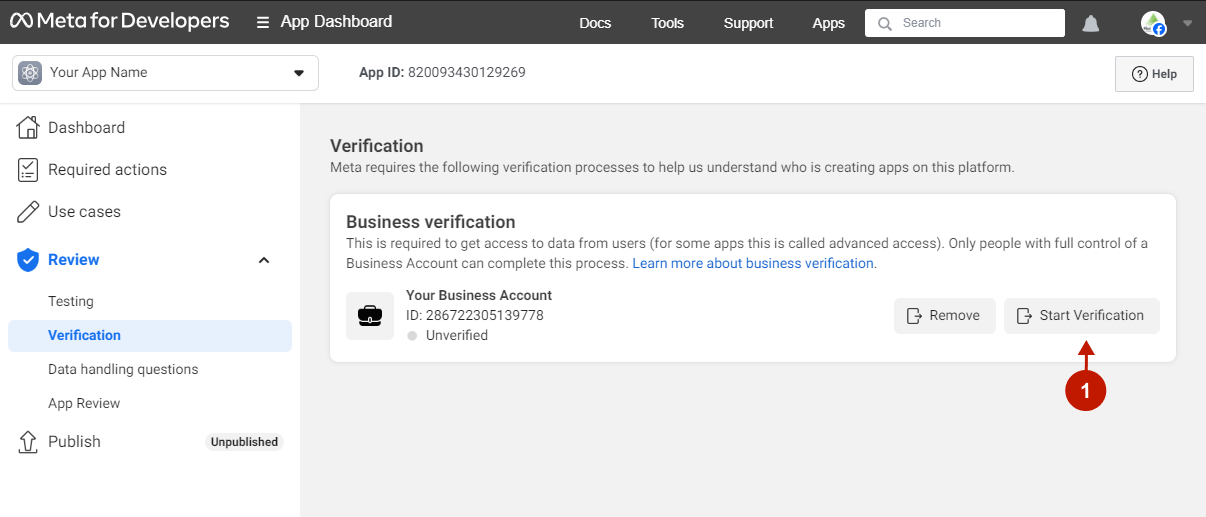
Step-by-step guide:
- Press the “Start Verification” button and fill in all the necessary information.
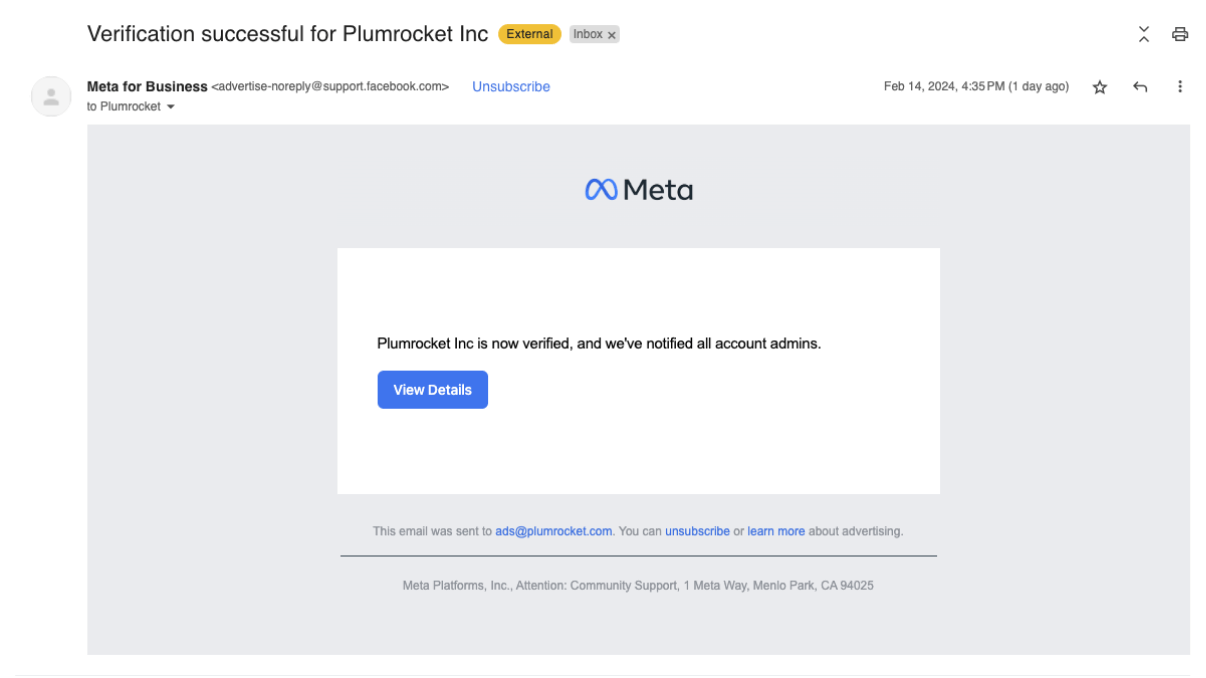
After you complete the Business Verification and provide all required information and documents, the following email will be sent to your contact email address:
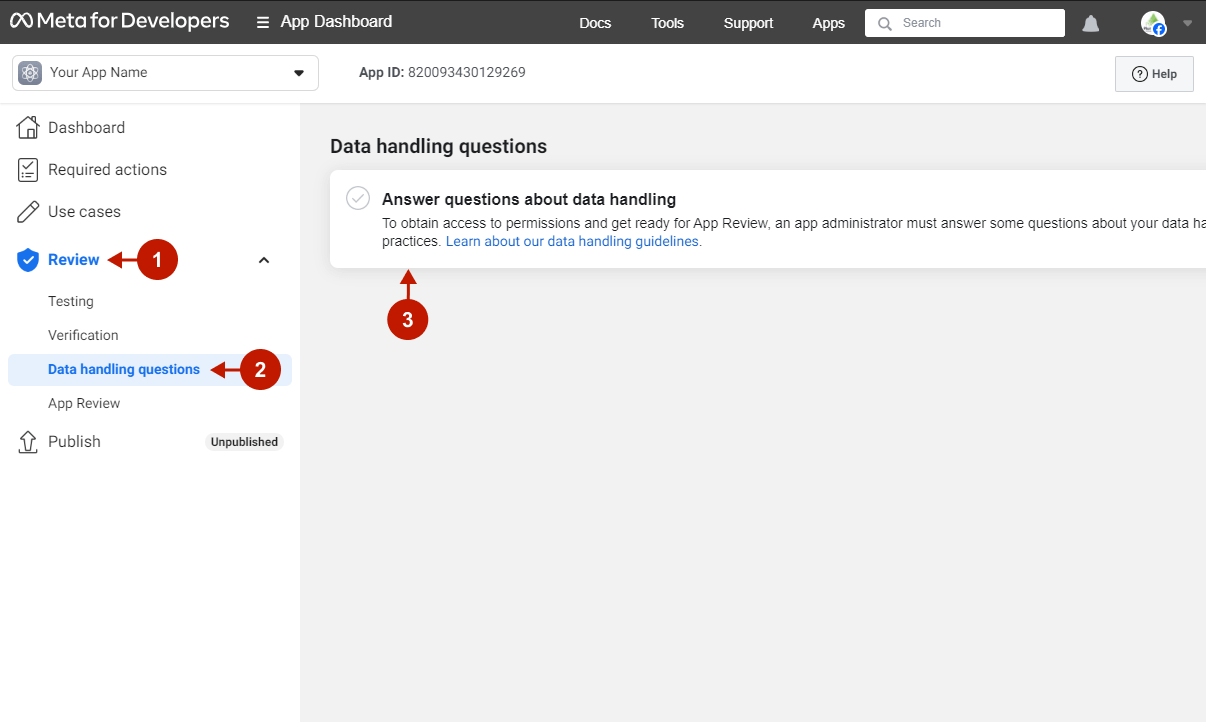
After completing the Business Verification, you need to pass the Data handling questions. To do this, please follow the steps below:
Step-by-step guide:
- Go to Review.
- Go to Data handling questions.
- Press the “Answer questions about data handling“.
Step-by-step guide:
- Check the “I agree that any data I receive through email will be used in accordance with the allowed usage” checkbox.
- Check the “I agree that any data I receive through public_profile will be used in accordance with the allowed usage” checkbox.
- Press the Confirm button.

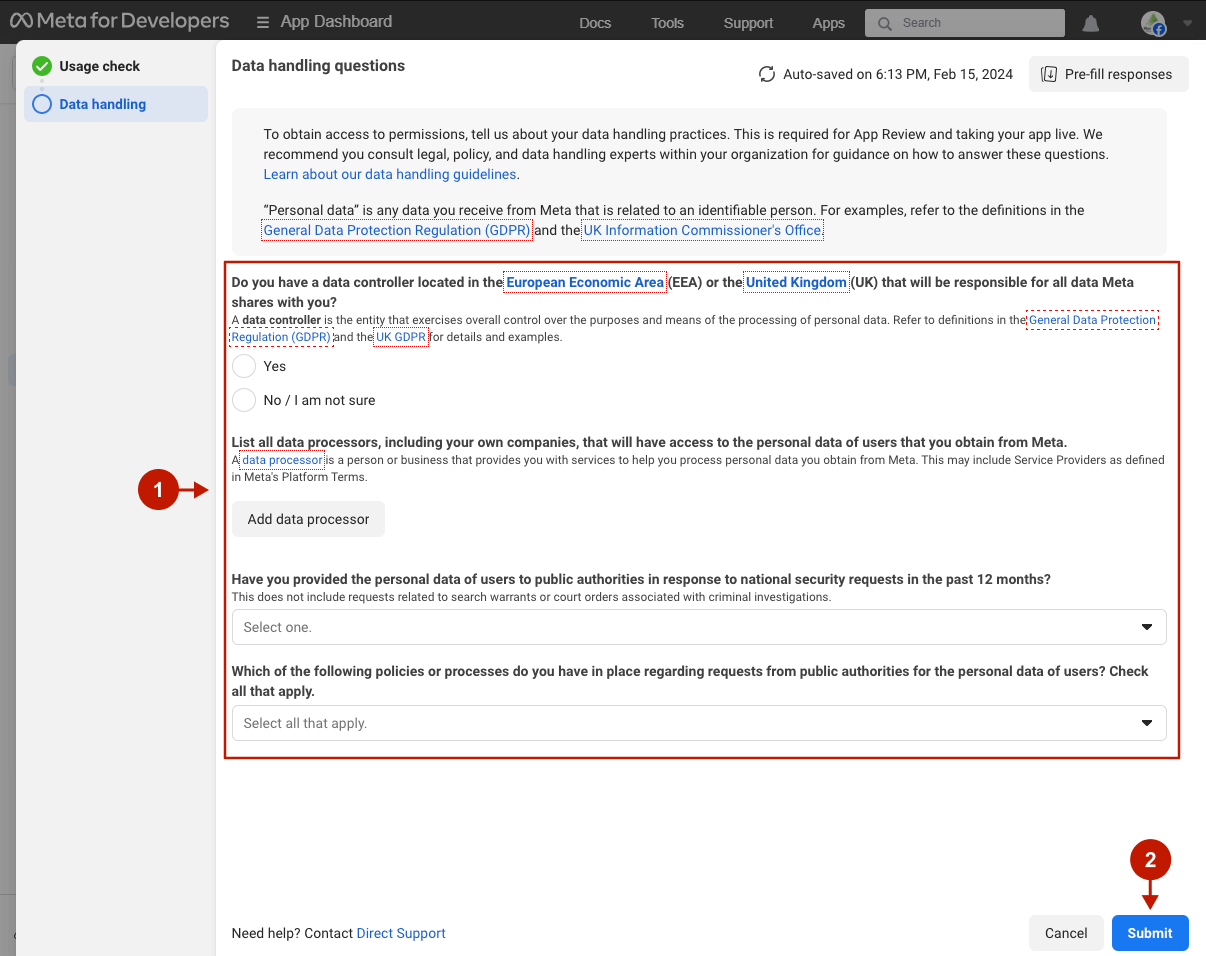
Step-by-step guide:
- Select the appropriate options.
- Press the Submit button.
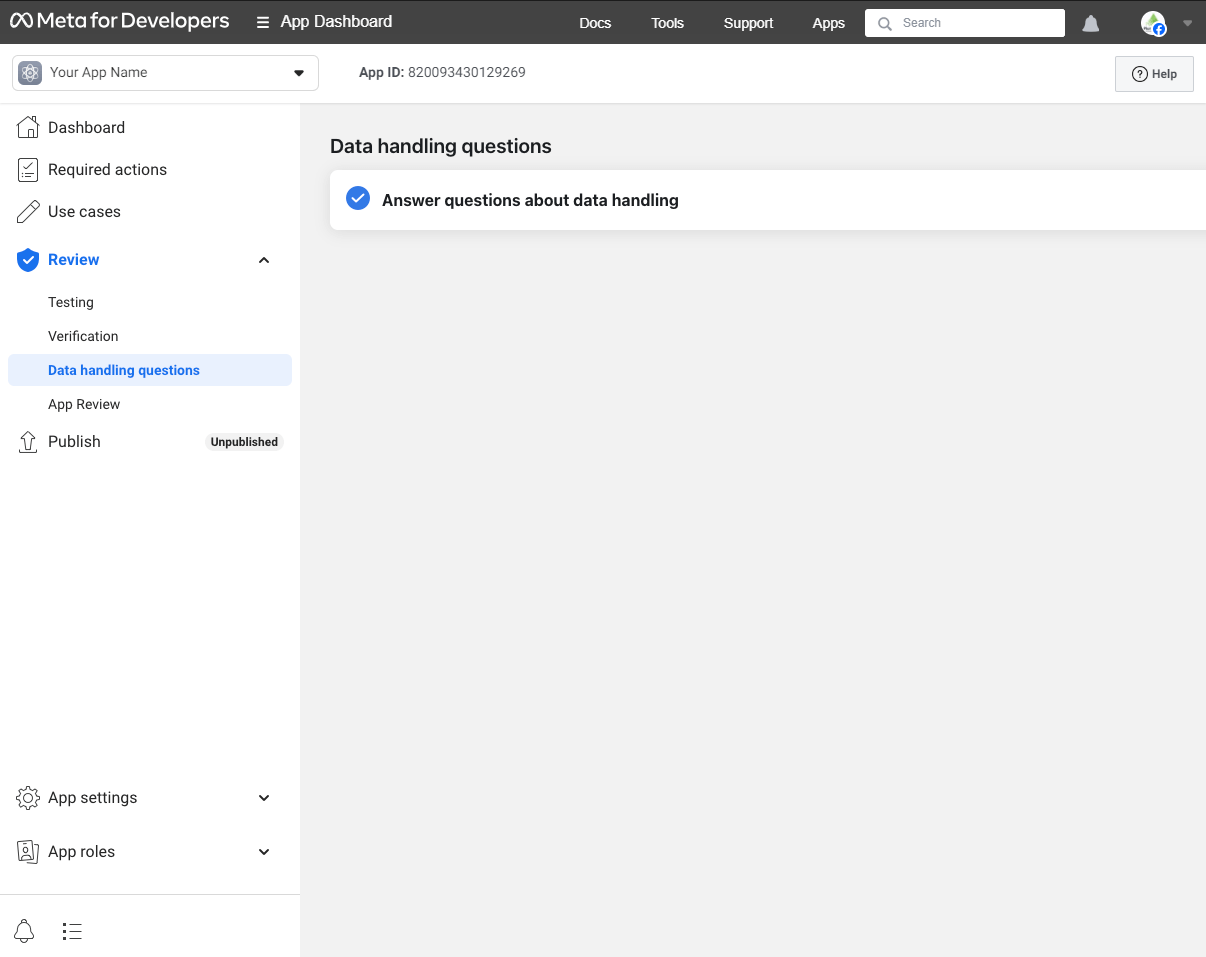
After passing the Data handling questions, the appropriate tab will look like the following:
Step 5. Publish Your Facebook App
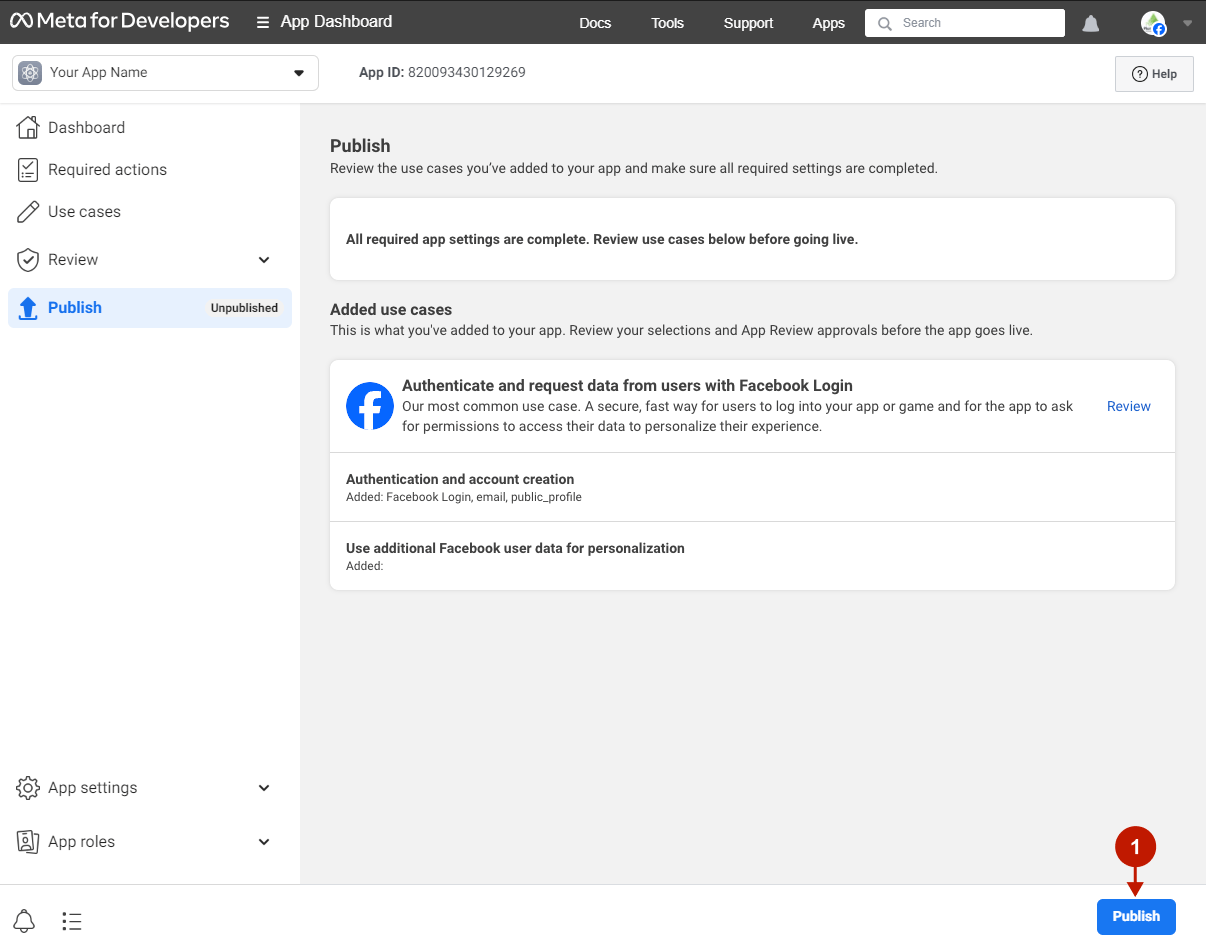
Step-by-step guide:
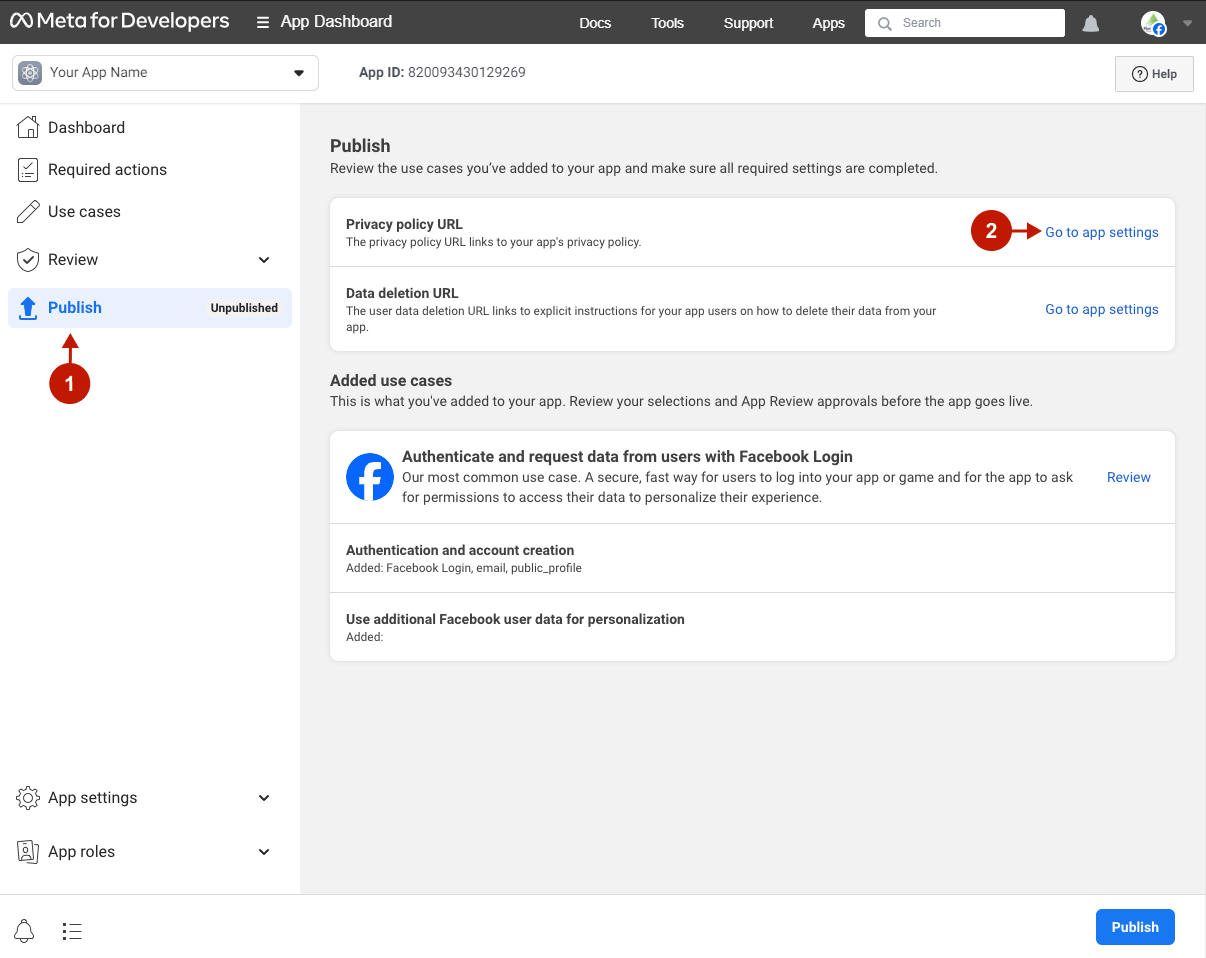
- Go to Publish.
- Press the “Go to app settings” button.
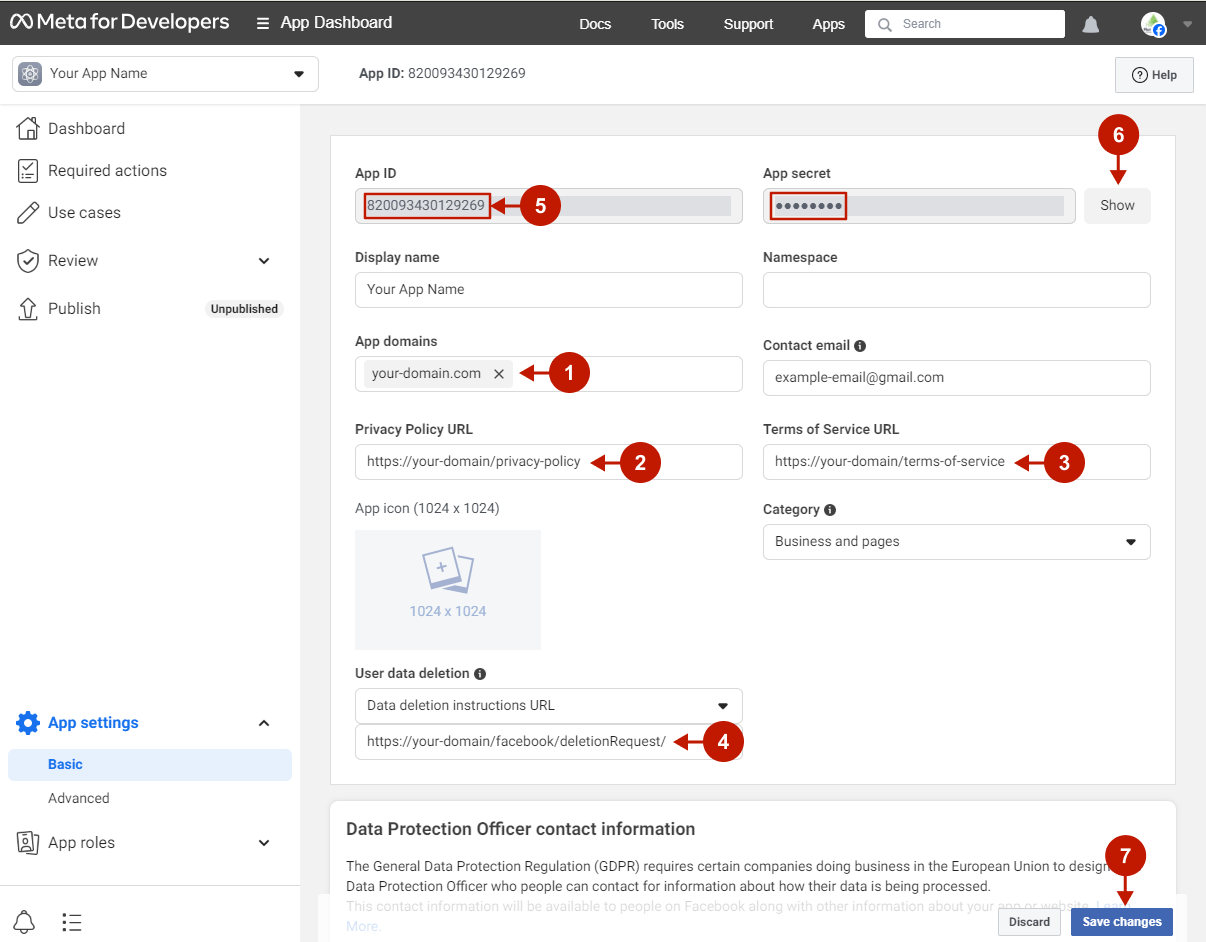
Step-by-step guide:
- Enter your App domains.
- Insert your Privacy Policy URL.
- Insert your Terms of Service URL.
- Insert your User data deletion instructions URL. This URL can be found in the Data Deletion Request URL field in your Admin Panel -> Plumrocket -> Social Login Pro (or Twitter&Facebook Login) -> Configurations -> Facebook.
- Copy the App ID to your clipboard.
- Click Show to make the App Secret appear by indicating your Facebook password and copy it to your clipboard.
- Press the “Save changes” button.
Step-by-step guide:
- Press the Publish button.
Facebook Integration in Social Login Pro Extension for Magento 2
At this point, you need to enter your Facebook Login app data in Magento 2 Social Login Pro Extension configuration.
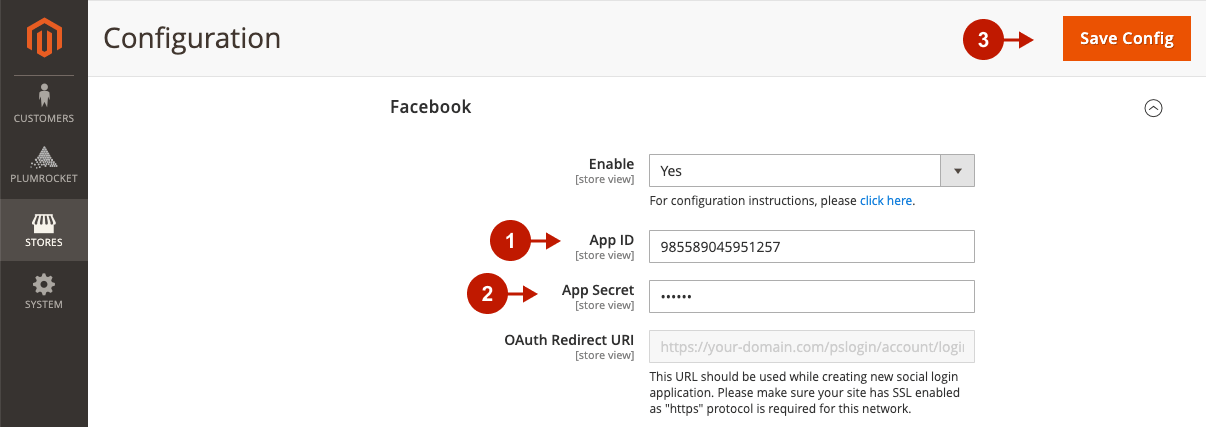
In your Magento 2 admin panel, go to Plumrocket -> Social Login Pro -> Configuration -> Facebook tab.
Step-by-step guide:
- Paste your App ID.
- Paste your App secret.
- Click Save Config.
The configuration of the Facebook Magento Social Login and Magento 2 Social Login application is now completed.
Next Step > Return to Social Login Pro API Reference
Facebook Integration in Social Login Pro Extension for Magento 1
At this point, you need to enter your Facebook Login app data in the Magento Social Login Pro Extension configuration.
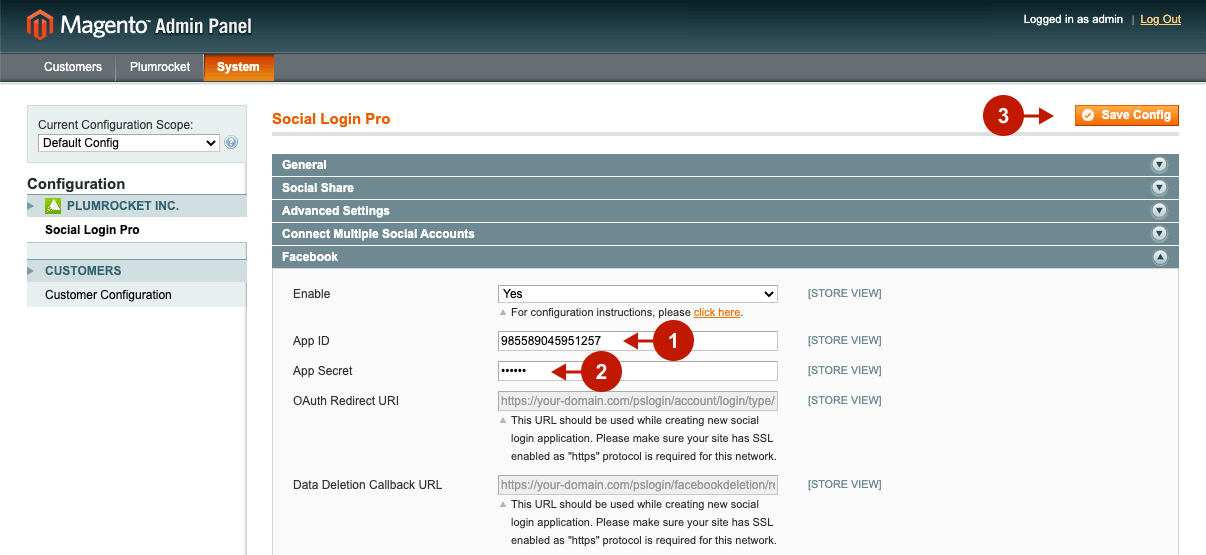
In your Magento admin panel, go to System -> Configuration -> Plumrocket Inc -> Social Login Pro -> Facebook tab.
Step-by-step guide:
- Paste your App ID.
- Paste your App Secret.
- Click Save Config.