In this article, you will learn how to find your Twitter API keys and integrate Twitter Login into Magento Social Login Pro extension and Magento Twitter & Facebook Login extension. Please follow the step-by-step instructions below.
Important Information:
Twitter API v1.1 was deprecated on April 21, 2023. This means if the Twitter login functionality on your Magento 2 store has stopped working, you need to migrate to v2.0 to provide an uninterrupted social login experience. This process involves deleting the old application and creating a new one with OAuth 2.0 support. You can follow our guide for detailed instructions.
Setting Up Twitter API for Magento
Step 1. Create the Twitter Developer Account
If you created apps earlier, you may continue managing them on a developer platform. However, in order to create a new app, you need to create a new Twitter developer account. Please follow the steps below to do it correctly.
Important Information:
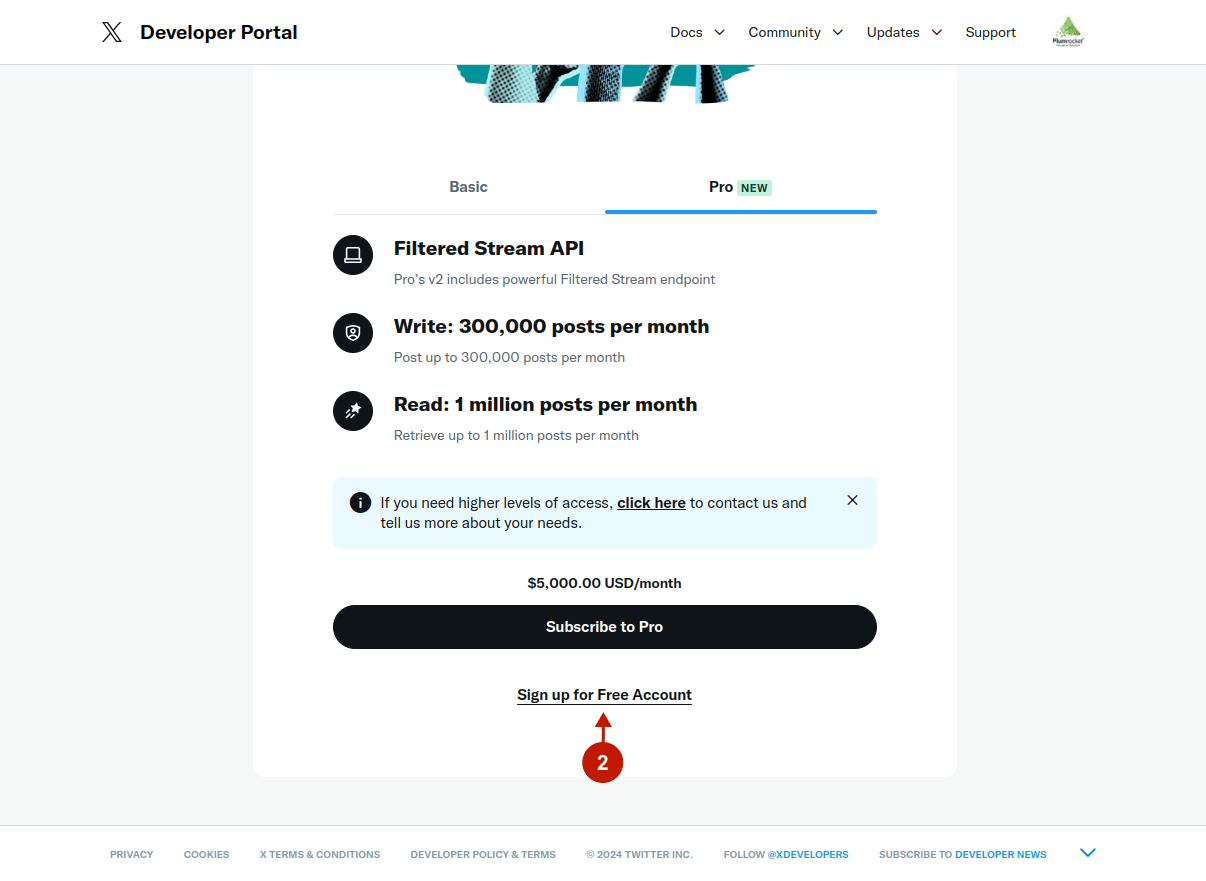
On March 30, 2023, Twitter introduced revamped API tiers – Free, Basic, Pro, and Enterprise. When creating a Twitter Developer account for the social login API, please consider the app and project limits associated with each tier, as well as the limits on users who can log in to your website via Twitter:
| Free | Basic | Pro | |
| Project limits | 1 Project | 1 Project | 1 Project |
| App limits | 1 App / Project | 2 Apps / Project | 3 Apps / Project |
| Social login limits | 25 users / 24 hours | 200 users / 24 hours | 75 users / 15 min |
Step-by-step guide:
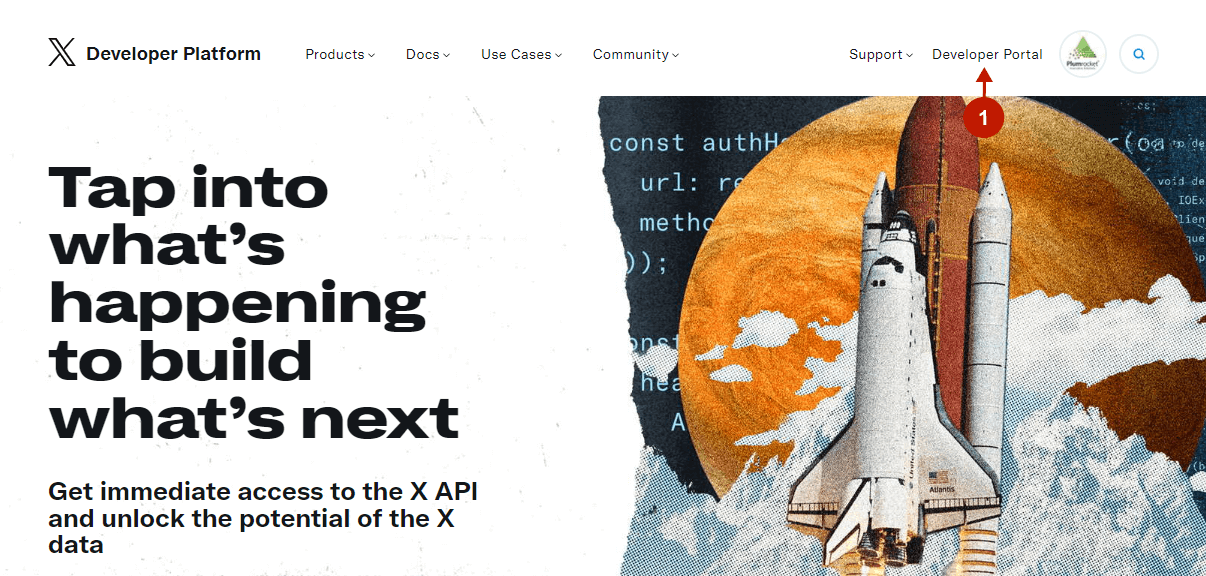
- Sign in to your Twitter account and go to developer.twitter.com. Then, click Developer Portal in the upper right corner.
Step-by-step guide:
- Choose the suitable tier considering the limitations described above. In this guide, we will be creating a free account. To do this, click Sign up for a free account at the bottom of the popup.
Step-by-step guide:
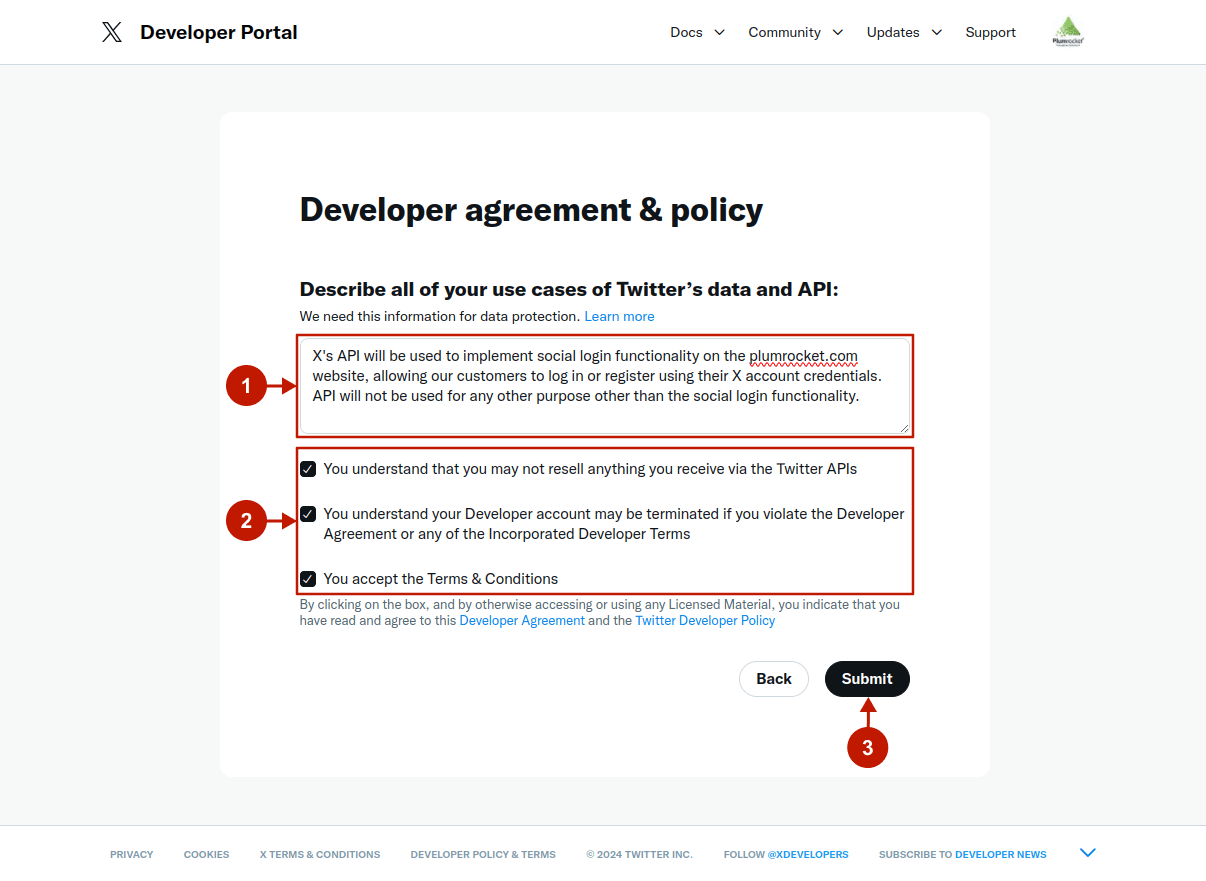
- Please provide a comprehensive description of how you intend to use the Twitter API or Twitter Data. Make sure to specify all the details for the review to be approved successfully.
- Check all the checkboxes.
- Click Submit.
Step 2. Configure the Twitter Application
After the account is created, the application will be created automatically. Please proceed with the steps below to configure it.
Important Information:
If you have already set up your developer account and just need to create a new app, make sure it is assigned to a “Project” section. Apps categorized under “Standalone App” won’t be able to access v2 endpoints and OAuth 2.0, resulting in errors during requests.
Step-by-step guide:
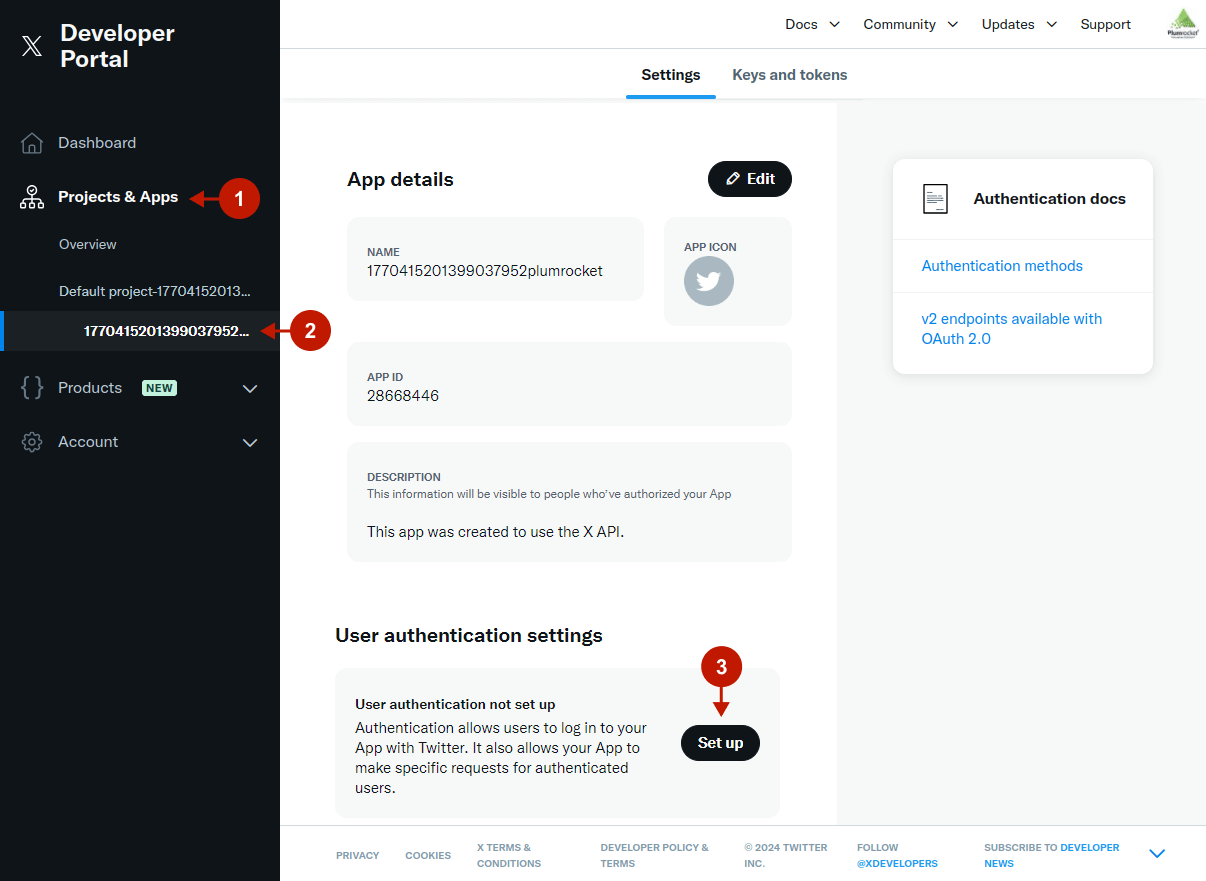
- Go to Projects & Apps.
- Go to the created App.
- Press the Set up button under the User Authentication Settings section.
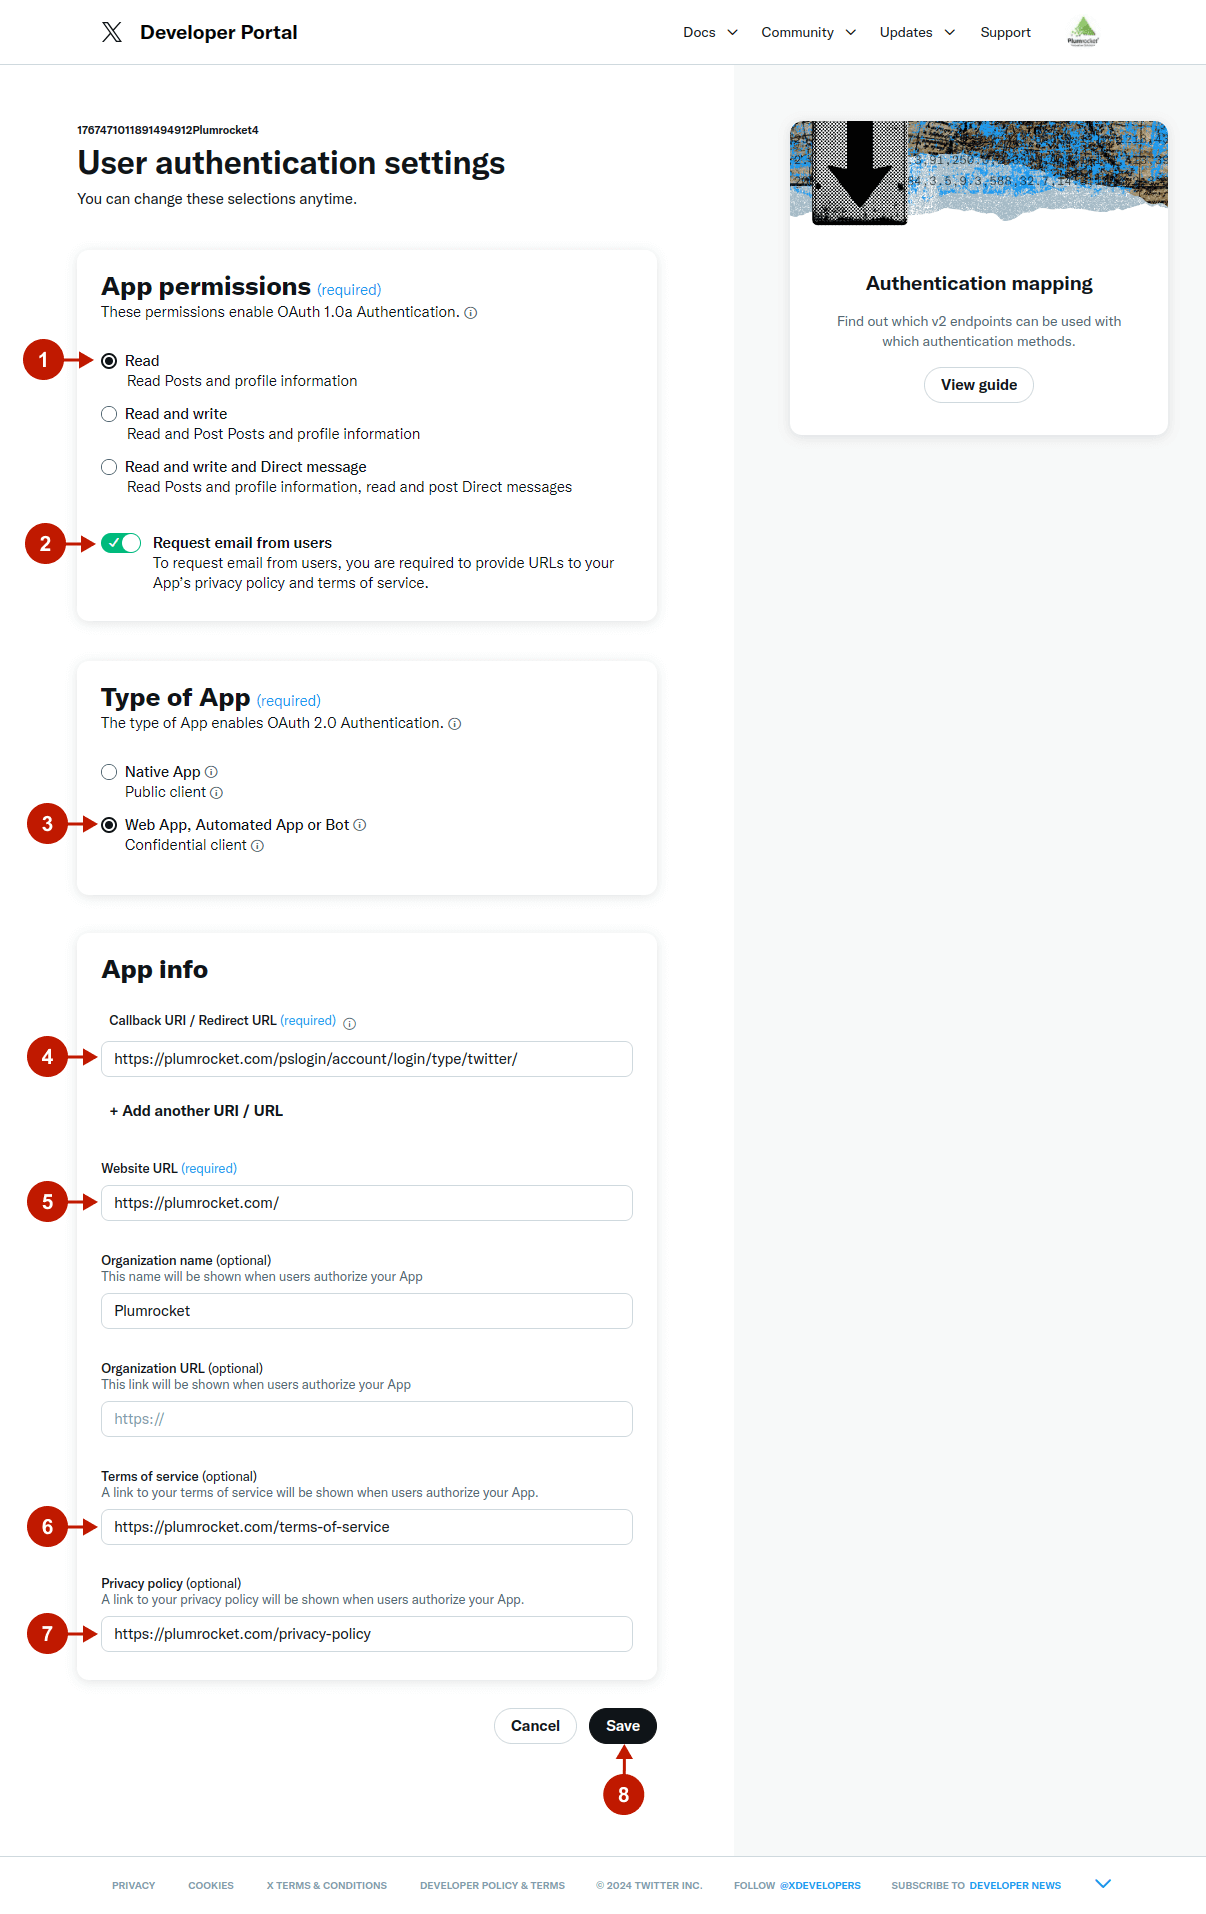
Step-by-step guide:
- Choose the “Read” option under the App Permissions section.
- If you want to collect users’ email addresses from their Twitter account during the registration, switch the “Request emails from users” toggle to enable.
- Select the “Web App, Automated App or Bot” option under the Type of App section.
- Under the App Info section, indicate your Callback URI/Redirect URL for this application. This URL can be found in the Callback URL field in your Admin Panel -> Plumrocket -> Social Login Pro (or Twitter&Facebook Login) -> Configurations -> Twitter – Callback URL.
- Provide your Website URL.
- Indicate your Terms of service page URL.
- Indicate your Privacy policy page URL.
- Press the Save button.
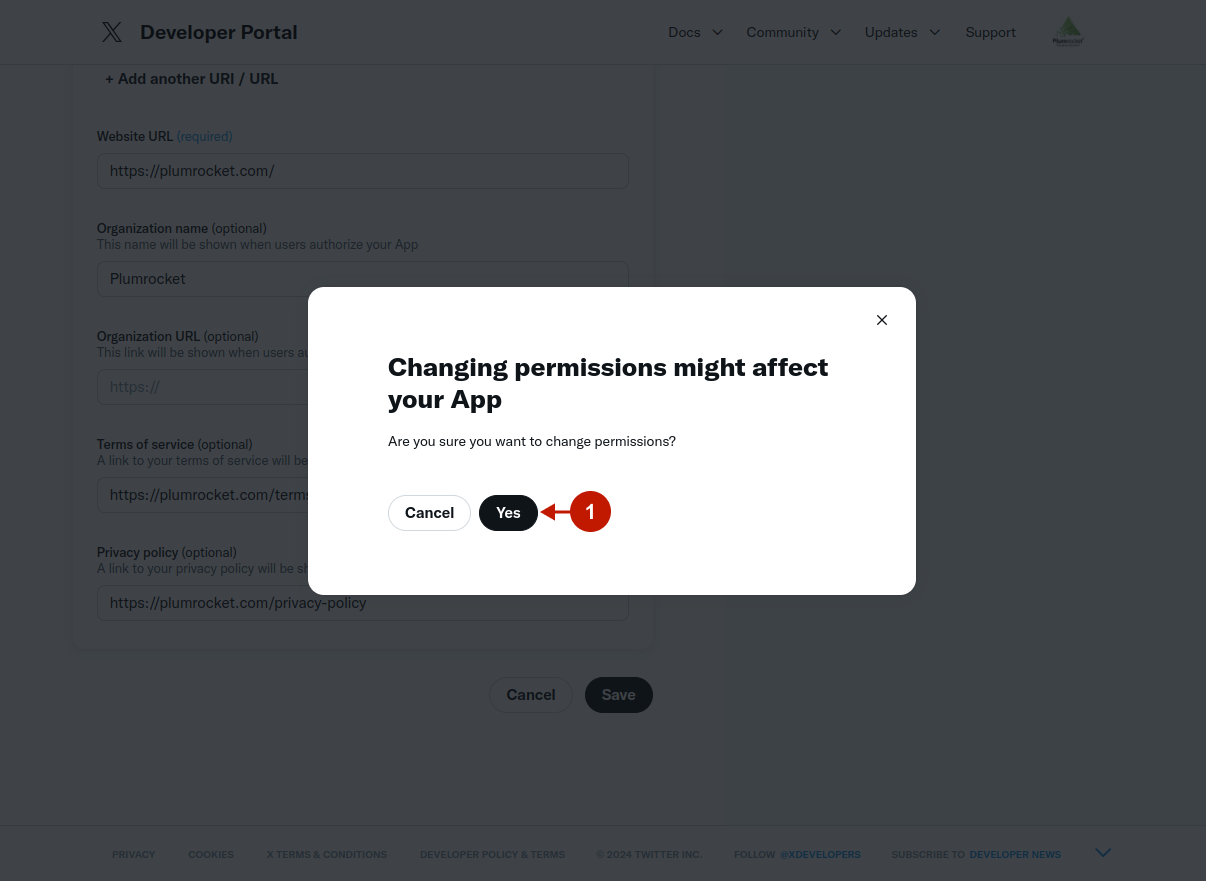
Step-by-step guide:
- Press the Yes button to apply the app permissions.
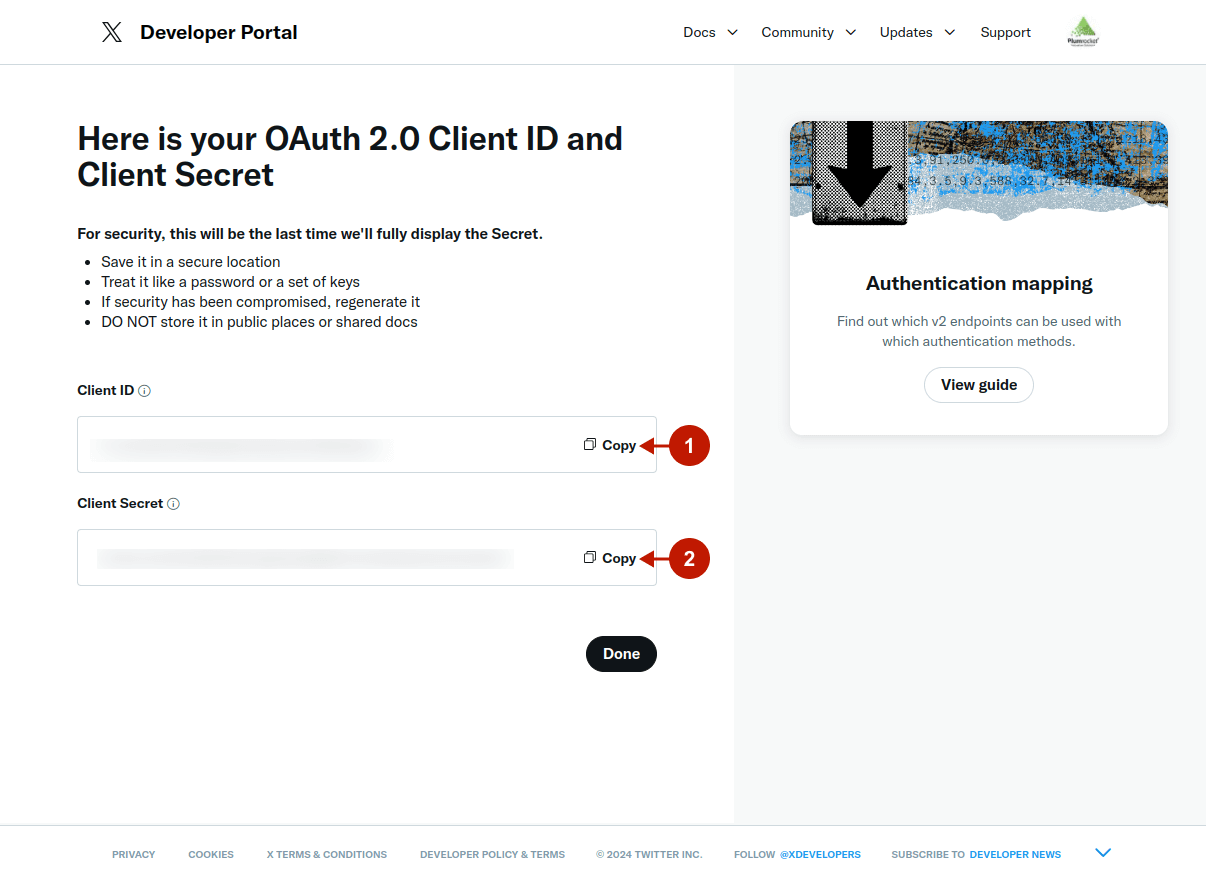
You will see your OAuth 2.0 API keys that allow you to integrate Twitter with your Magento 2 store.
Important Information:
Please note, if you are using Magento 1, it’s essential to additionally generate OAuth 1.1 API keys (refer to the guide below). This version is still required due to the platform’s deprecation and its inability to support the latest technologies.
Step-by-step guide:
- Copy your Client ID to paste it later in the Magento 2 admin panel.
- Copy your Client Secret.
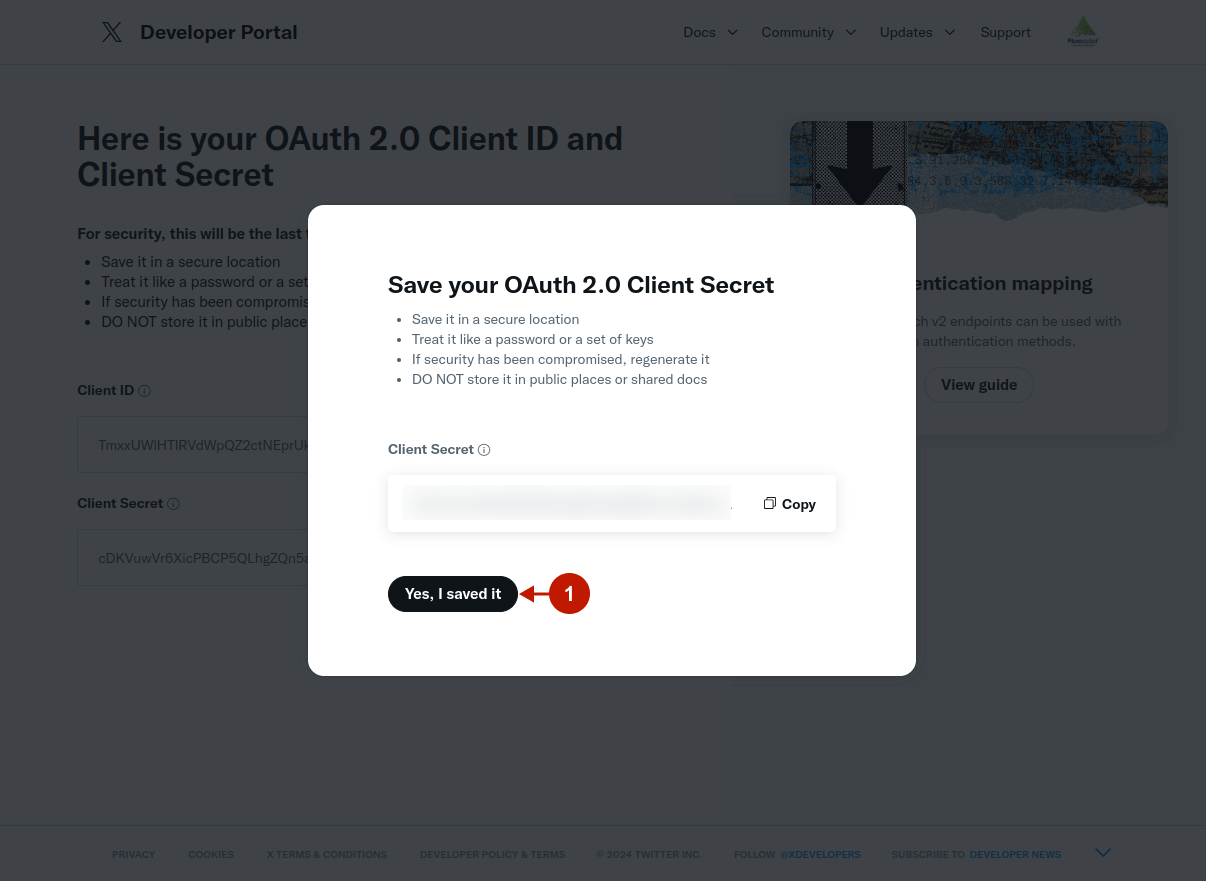
Step-by-step guide:
- Press the Yes, I saved it button to confirm.
OAuth 1.1 Keys Generation (only for Magento 1 integration)
If you use the Social Login Pro (or Twitter & Facebook Login) extension with Magento 1, you should generate OAuth 1.1 API keys, and paste them instead in the extension configurations. The integration will only work properly with OAuth 1.1. Please follow the next steps to generate the keys:
Step-by-step guide:
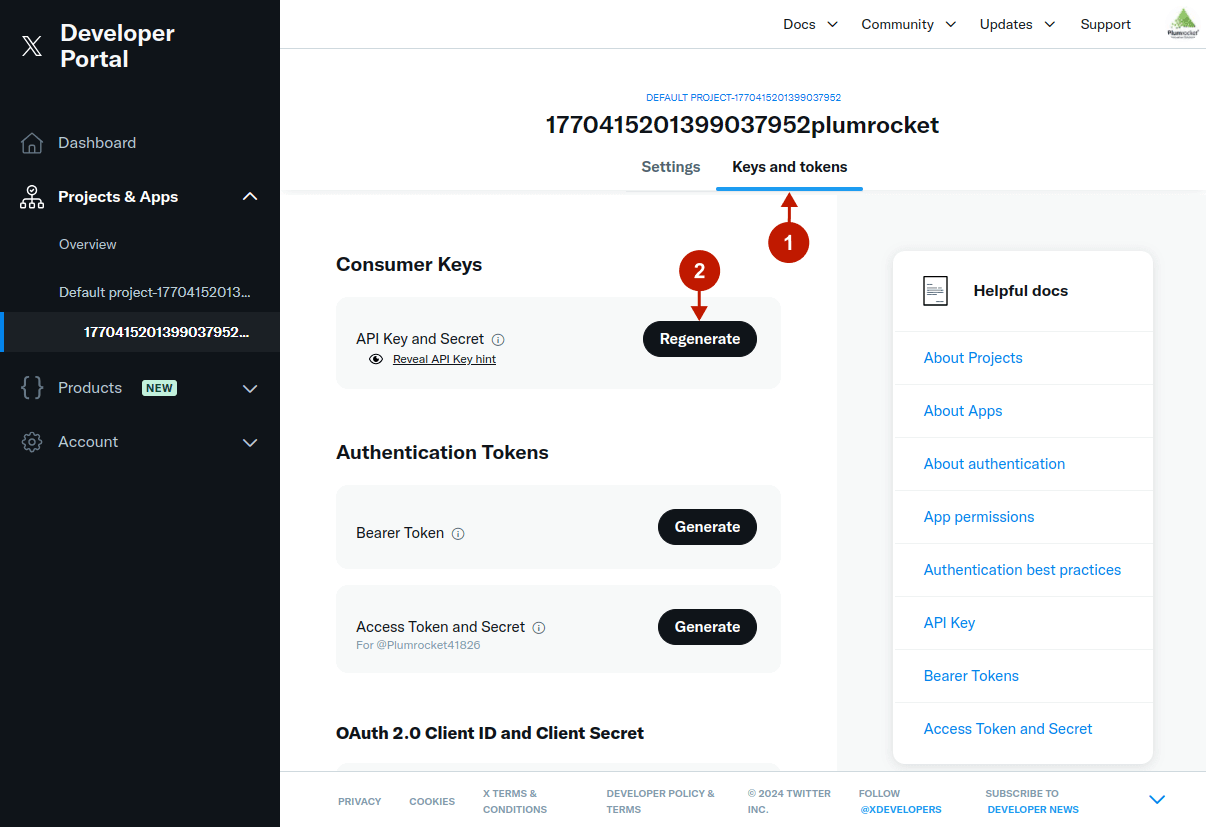
- Go to your project in the menu, and navigate to the Keys and tokens tab.
- Under the Consumer Keys section, press the Regenerate button.
Step-by-step guide:
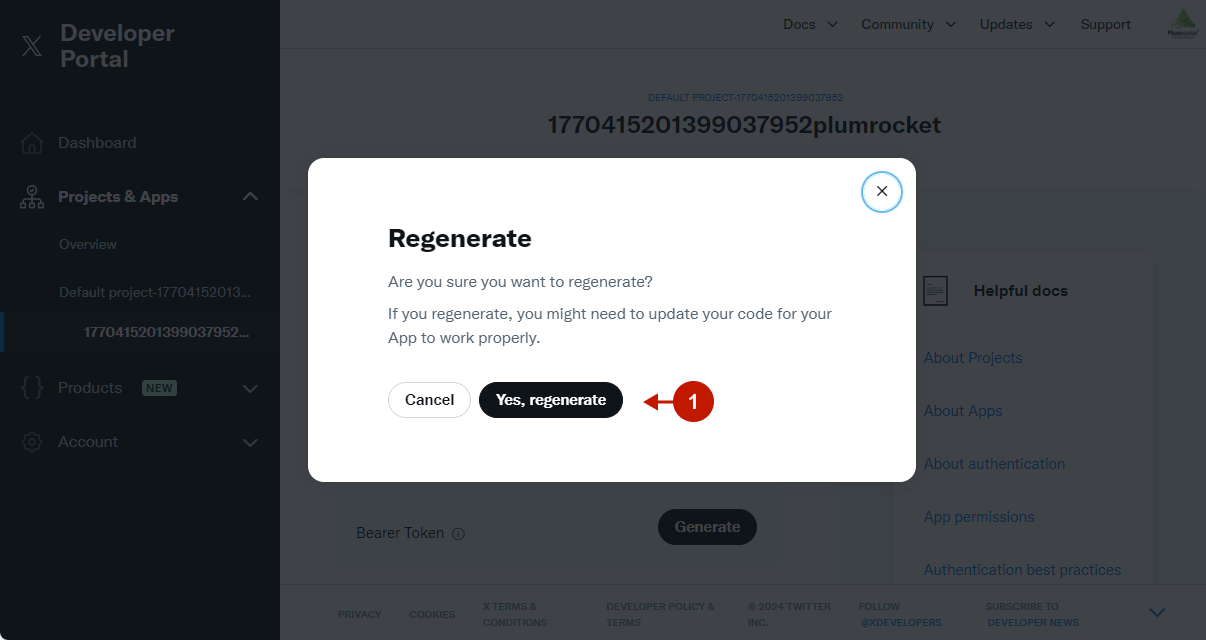
- Press the Yes, regenerate button to confirm.
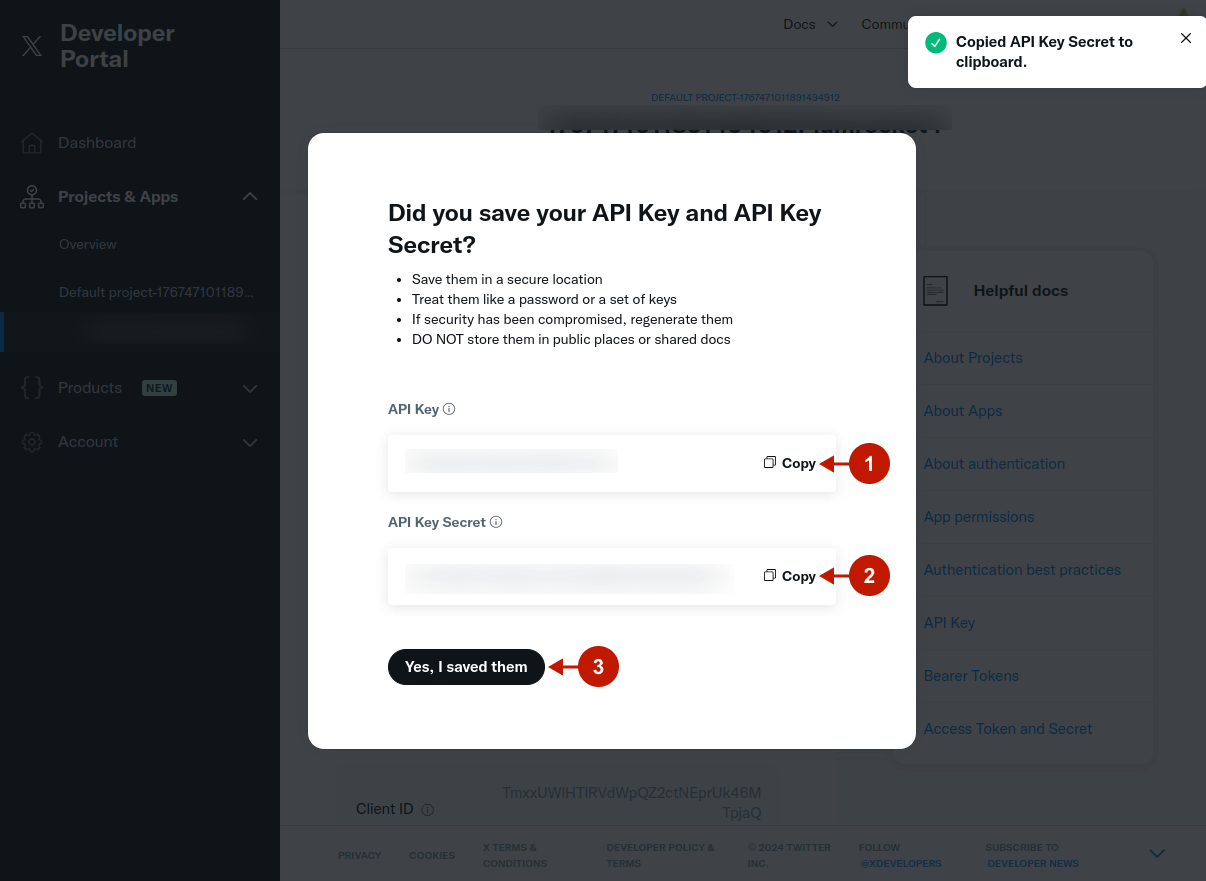
These are your OAuth 1.1 API keys you need to paste later in the Magento 1 admin panel. Save them in a secure location.
Step-by-step guide:
- Copy your API Key.
- Copy your API Key Secret.
Twitter Integration in Magento 2 Social Login Pro Extension
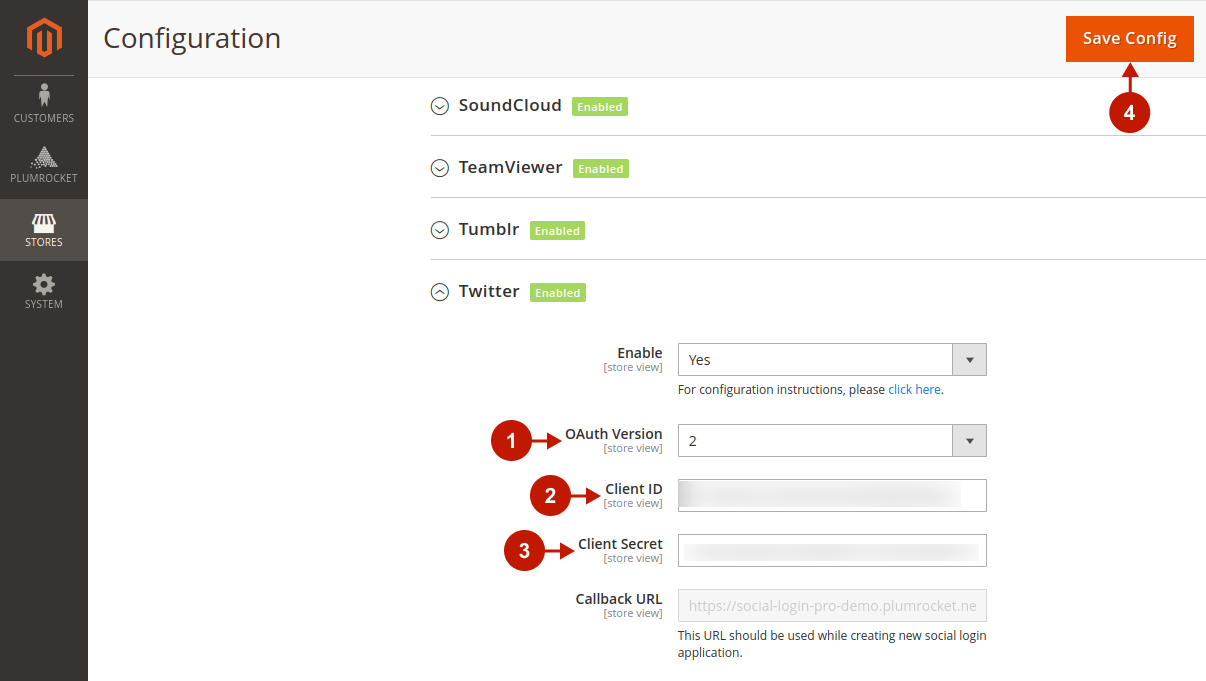
At this point, you should paste the created API keys into your Magento 2 Social Login Pro Extension configuration. In the main Magento menu, go to Plumrocket -> Social Login Pro -> Configuration -> Twitter.
Step-by-step guide:
- “OAuth Version“: Select the “2” value from the drop-down menu.
- “Cliend ID“: paste the OAuth 2.0 Client ID you copied early into this field.
- “Client Secret”: paste the OAuth 2.0 Client Secret you copied early into this field.
- Press Save Config to save your settings.
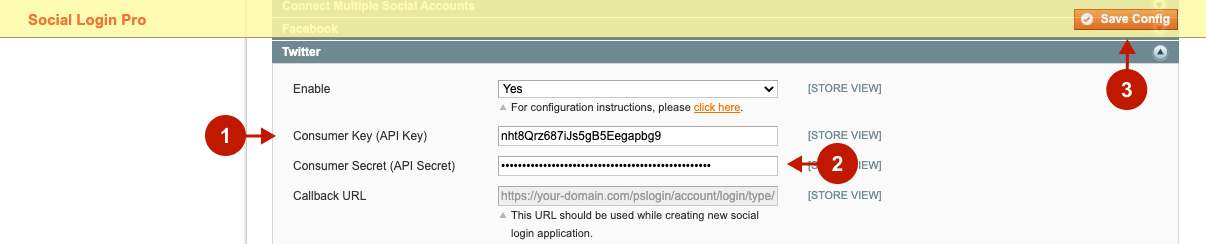
Twitter Integration in Magento 1 Social Login Pro Extension
In order to integrate Twitter Login into Magento 1 Social Login Pro Extension, go to System -> Configuration -> Plumrocket Inc -> Social Login Pro -> Twitter in your main Magento menu. Then, follow the steps below:
Step-by-step guide:
- “Consumer Key (API Key)“: paste the OAuth 1.1 Key into this field.
- “Consumer Secret (API Secret)“: paste the OAuth Key Secret into this field.
- Press Save Config to save your settings.
Configuration of the Twitter Magento social login application is now completed.