How to Set Up AliPay API for Magento
In this article, you will learn how to obtain your AliPay API credentials in order to integrate AliPay Login into Magento Social Login Pro extension. Please follow the step-by-step instructions below. Please note: customers who speak Chinese can use this online documentation guide.
Important Information:
All the screenshots have been translated from original Chinese language to English using Google Chrome translate functionality.
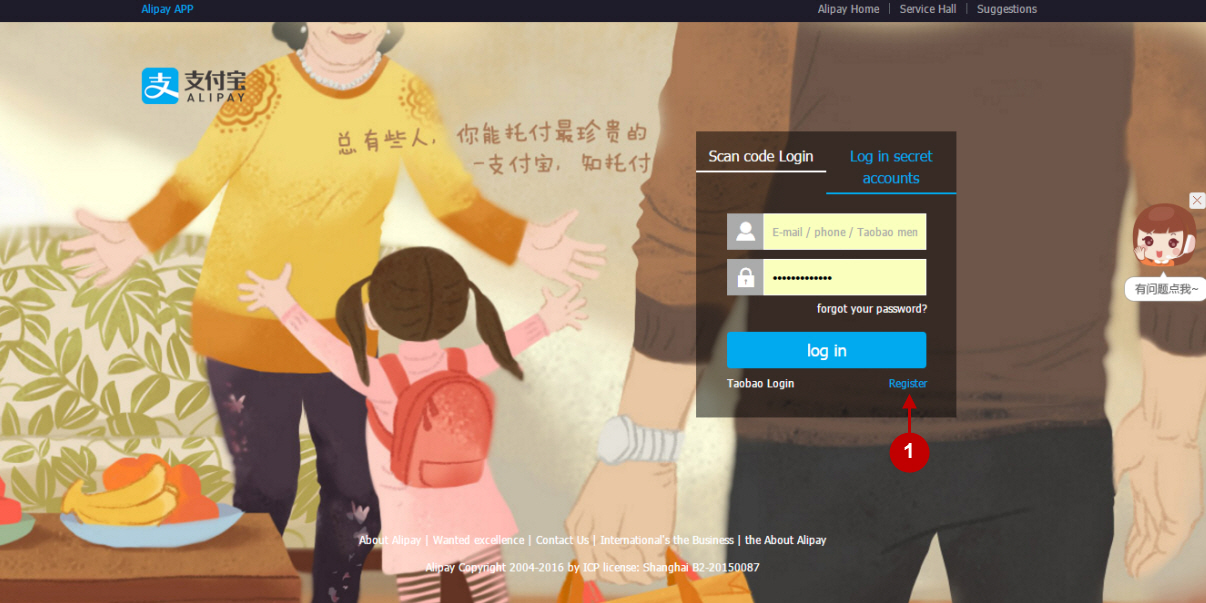
First, you need to create AliPay account. In order to do so, please go to auth.alipay.com/login/index.htm.
Step-by-Step action:
- Press “Register” link to create your account.
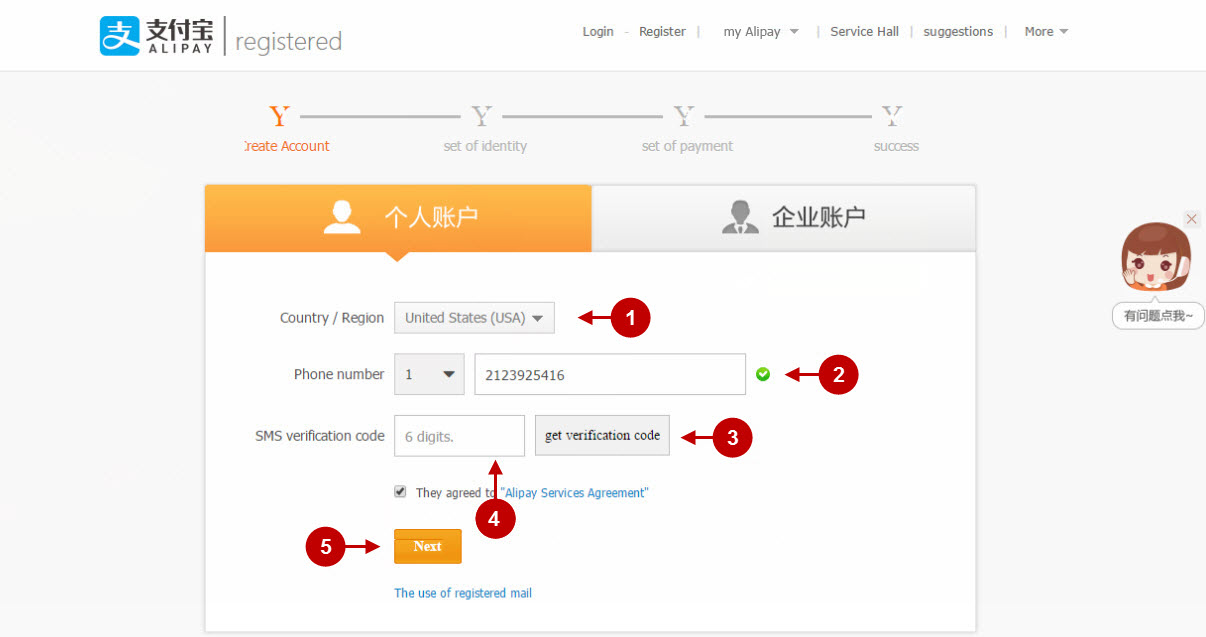
Step-by-Step action:
- Select your country.
- Enter your mobile phone number.
- Press on “Get verification code” button to get a verification code in a text message on your phone.
- Enter the code you received in SMS text message.
- Press “Next” button to proceed.
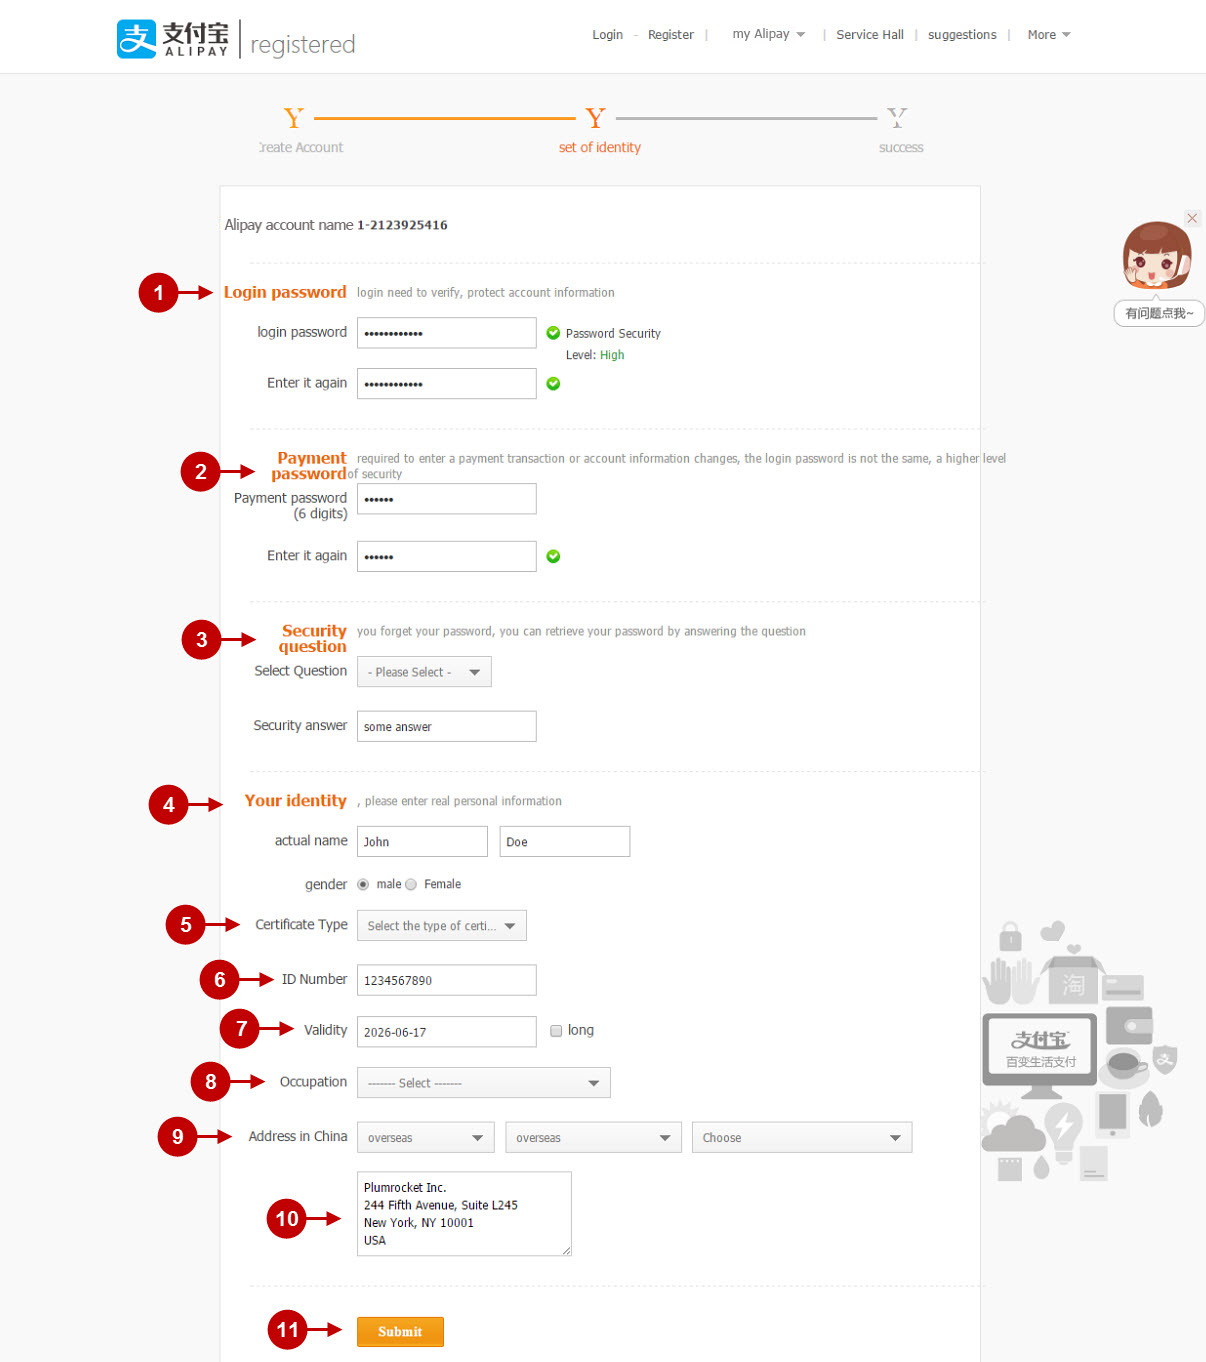
On this step of your AliPay account registration you will be requested to enter your ID details.
Step-by-Step action:
- Enter your password in ‘ “Login password” field. Use numeric characters (0-9), special characters (e.g.!@#$%), upper case (A-Z) and lower case(a-z) letters.
- Enter “Payment password” . Use only 6 numeric characters (0-9).
- “Security question” : select the question which will help to retrieve the password in case you forget it.
- “Your Identity”: specify your personal information: First Name, Last Name, gender.
- “Certificate type”: select your ID type e.g. your driving license ID, your passport ID etc.
- “ID number”: enter your ID number.
- “Validity”: enter the expiration date of the document specified in the field above.
- “Occupation”: enter the type of your occupation.
- Address in China”: if you are from China, enter your home address, if you are not from China, select “Overseas” option.
- Specify your home address in this field.
- Once you filled in all the fields, press “Submit” button.
Step-by-Step action:
- Once you have registered your account you need to log in. In order to do so, please go to auth.alipay.com/login/index.htm.

Step-by-Step action:
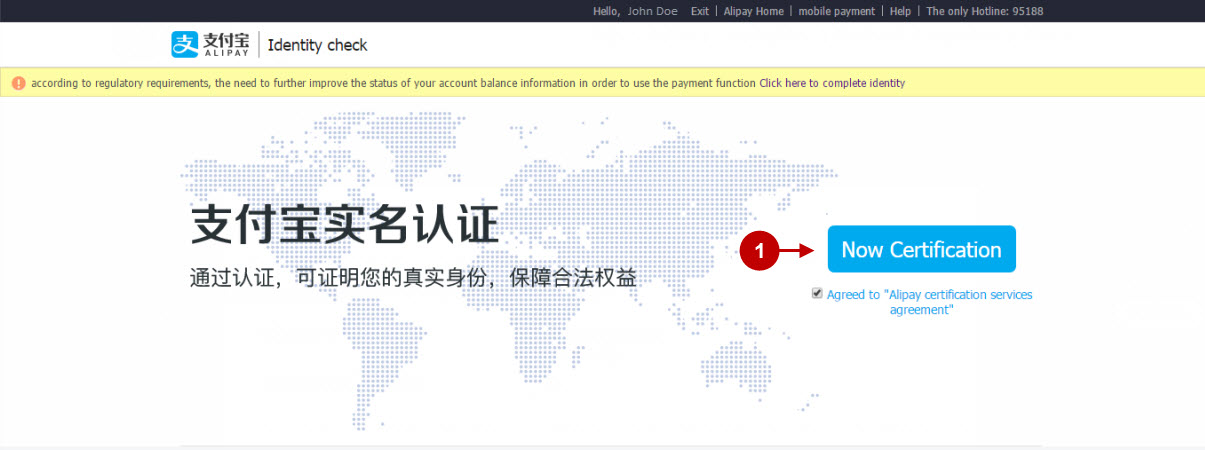
- Once you are logged in, you need to verify your Alipay account. Please, go to certify.alipay.com/choose.htm
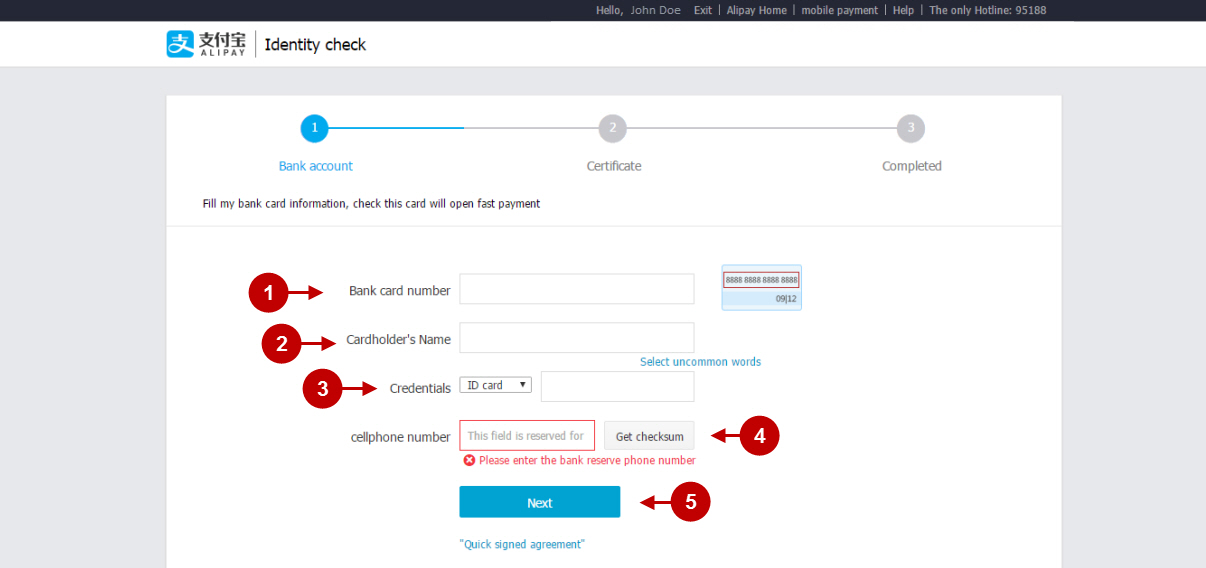
In this part enter your bank card information in order to verify your AliPay account.
Step-by-Step action:
- “Bank card number”: in this field enter your bank card number – 16 digits number on the front-side of your card.
- “Cardholder’s name”: in this field enter the name specified on your card number.
- “Credentials”: select ID type and specify your ID number in this field.
- “Cellphone number”: enter your mobile phone number in this field.
- Press “Next” button to proceed.
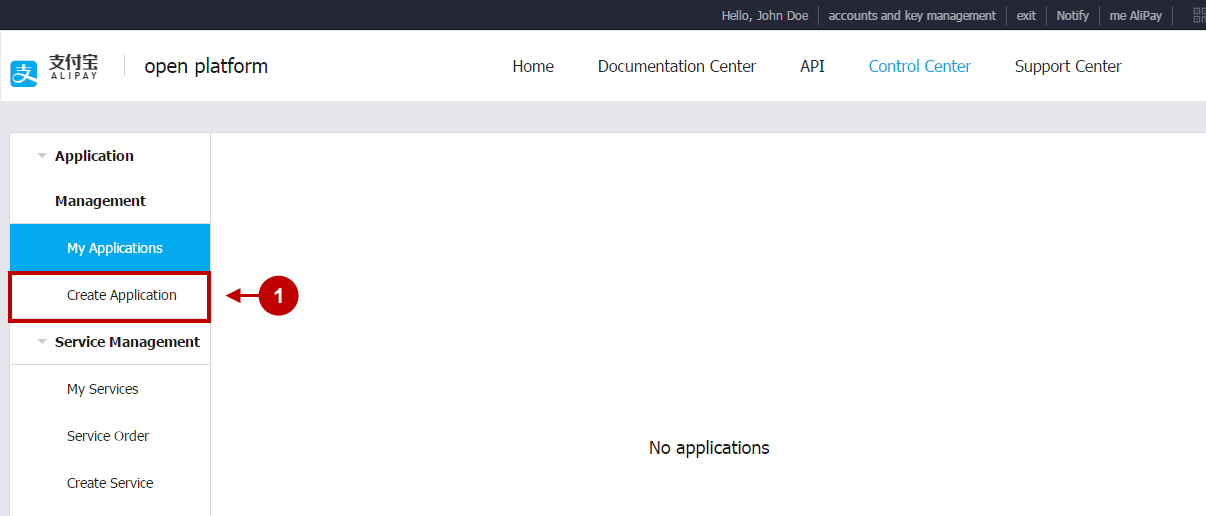
After you verified your account, you can create AliPay login application. Please go to the following page: openhome.alipay.com/platform/manageApp.htm.
Step-by-Step action:
- Select “Create Application” button to create AliPay API.
Step-by-Step action:
- Select “Web application development” option to create your AliPay web application.
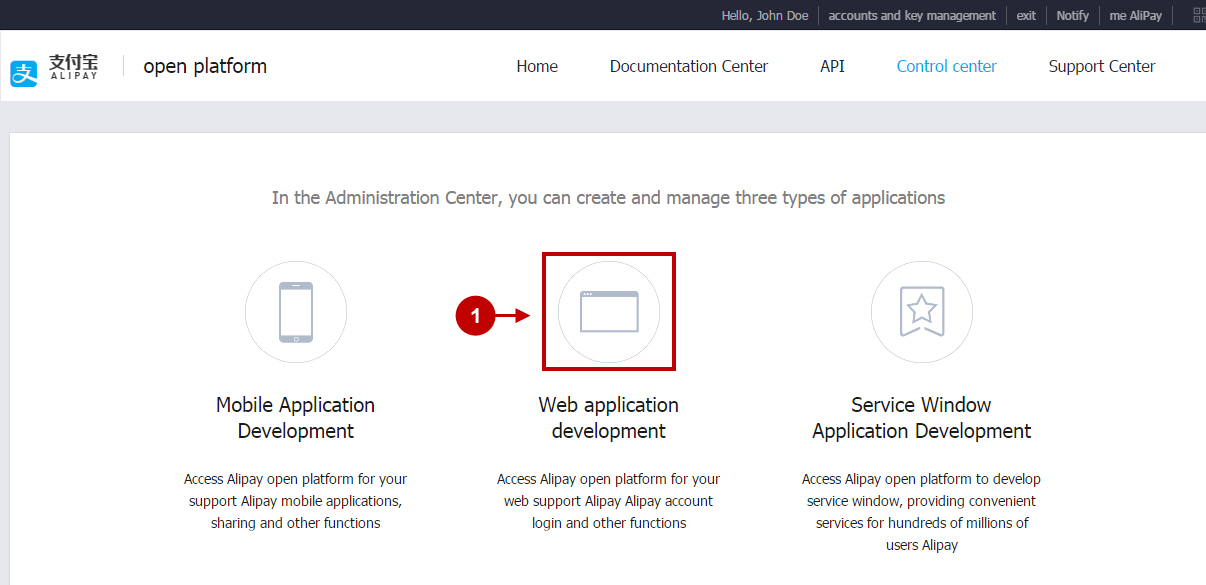
After you selected “Web application development” follow the steps below.
Step-by-Step action:
- Fill in the name of the application. After submitting the form – new page will be opened which shows awaiting time of your application approval, it can take up to two days.
- After application approval, go to the “Function information” page > find the “Quick Login” option > click on the “Subscribe” button.
Configuring AliPay Integration in Magento Social Login Pro Extension
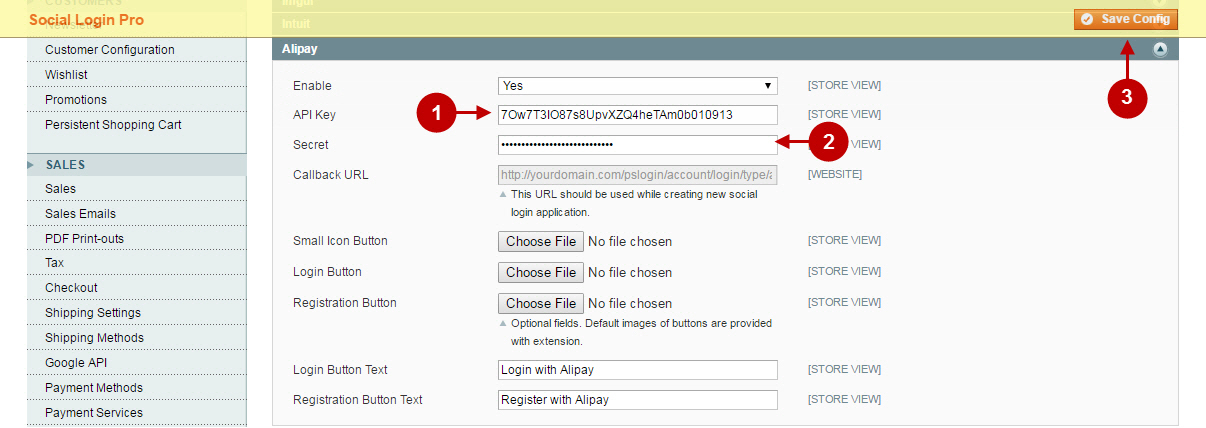
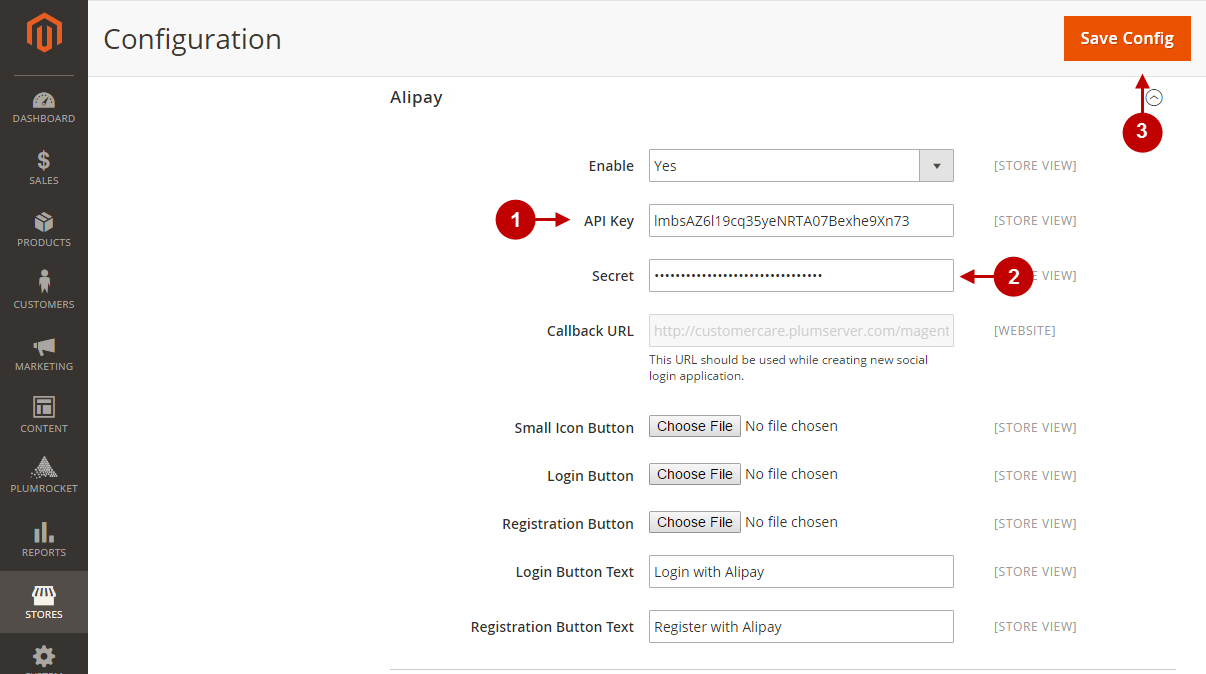
In this step you must update your Magento Social Login Pro Extension configuration. In your magento admin panel, go to “System” -> “Configuration” -> “Plumrocket Inc” -> “Social Login Pro” -> “AliPay” Tab.
Step-by-Step action:
- Paste API Key into the relevant field of your “AliPay” backend tab.
- Insert Secret key into the relevant field of your “AliPay” backend tab.
- Press “Save Config” to save your settings.
Configuration of AliPay Magento Social Login application is now completed
Configuring AliPay Integration in Magento 2 Social Login Pro Extension
In this step you must update your Magento 2 Social Login Pro Extension configuration. In your magento 2 admin panel, go to “Plumrocket” tab in the main menu -> “Social Login Pro” section -> “Configuration” -> “AliPay” Tab.
Step-by-Step action:
- Paste API Key into the relevant field of your “AliPay” backend tab.
- Insert Secret key into the relevant field of your “AliPay” backend tab.
- Press “Save Config” to save your settings.
Configuration of AliPay Magento 2 Social Login application is now completed.
Next Step > Return to Social Login Pro API Reference