Apple (apple.com)
Apple is an American multinational technology company that designs, develops, and sells home electronics, computer software, and online services. With 510 retail stores worldwide, Apple is considered one of the Big Five companies in the U.S. IT industry.
| Protocol | Similar to OAuth 2.0 and OpenID |
| Returned Data | |
| Requires SSL? | Yes |
How to Set Up Apple API for Magento
In this article, you will learn how to enable and configure your Apple API in order to integrate Apple login into Magento 2 Social Login Pro plugin. Once integrated, your users will be able to quickly authenticate to your Magento store using their existing Apple ID and password, or use Face ID / Touch ID. Please follow the step-by-step instructions below to set up Apple API for Magento 2 correctly.
Step-by-step guide:
- In the Apple Developer, click on Account to sign in.
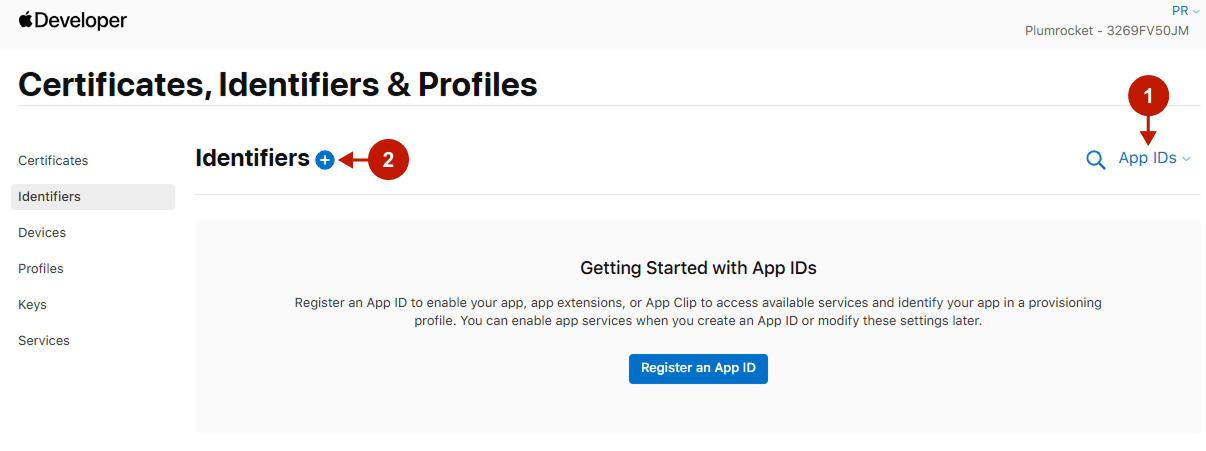
- Go to Certificates, IDs & Profiles -> Identifiers.

1. Create an App ID
Please follow the instructions below to learn how to create an App ID correctly:
Step-by-Step actions:
- Make sure that the App IDs is selected.
- Create a New Identifier.
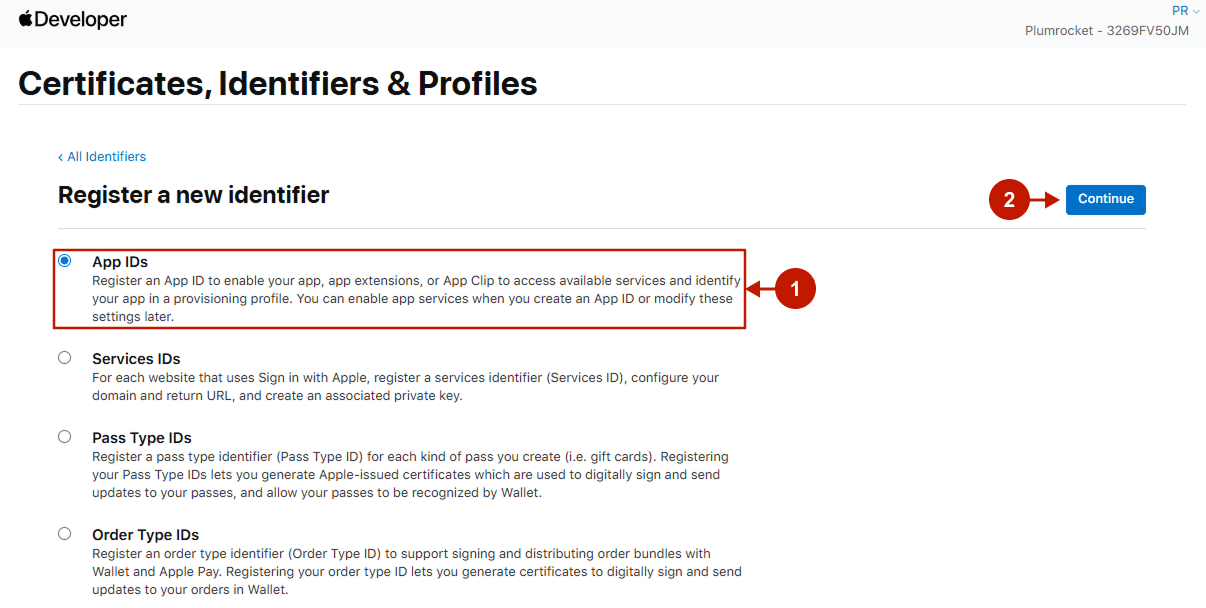
Step-by-step guide:
- Select App IDs option.
- Press the Continue button.
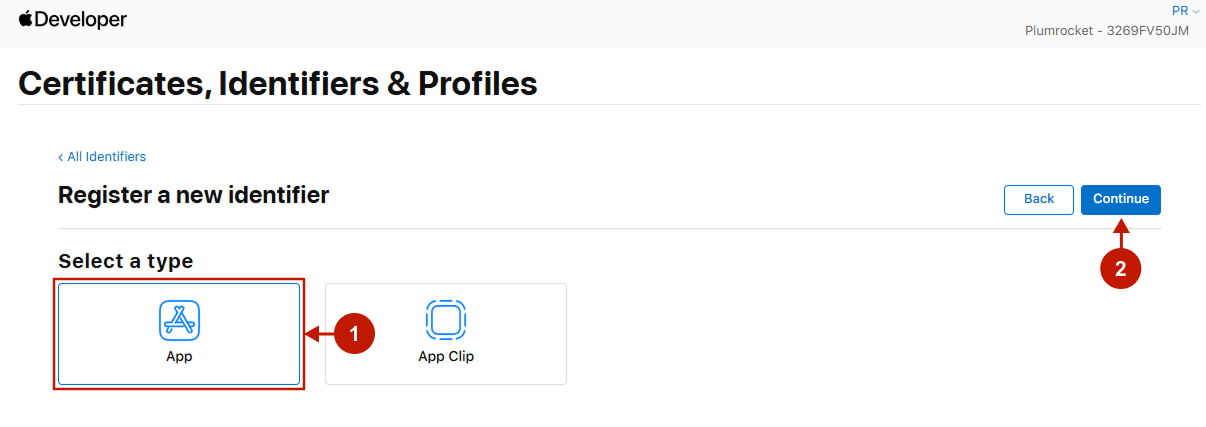
Step-by-Step actions:
- Select the App type.
- Press the Continue button.
Step-by-Step actions:
- Enter a Description for the App ID. You will see this description internally, so you can write any description that you want to easily recognize which website the App ID belongs to.
- Enter Bundle ID for the App ID, best in a reverse-dns style string.
Please NOTE: don’t press the Continue button before completing the next step of this documentation.

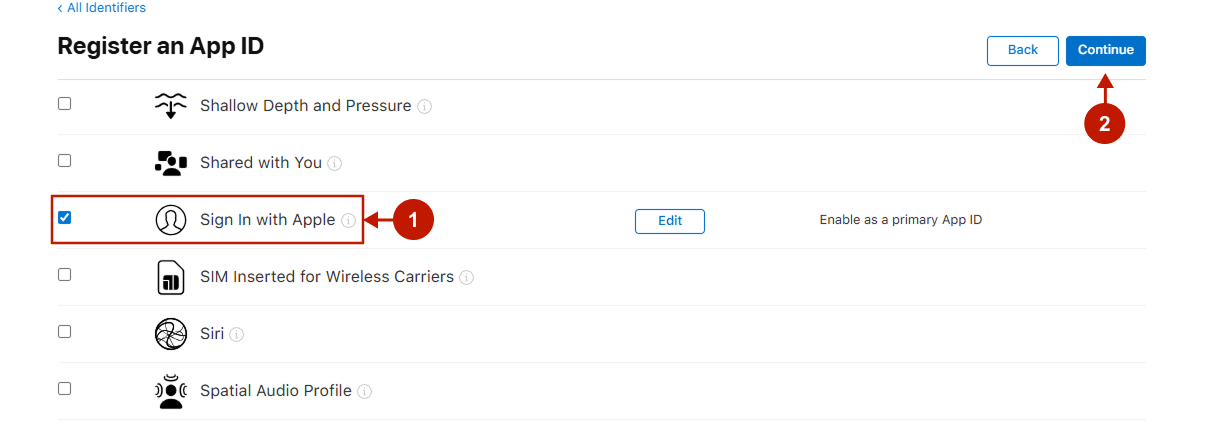
Step-by-Step actions:
- Scroll down the list of Capabilities and find the Sign In with Apple checkbox. Check it to enable the Sign In With Apple on your website.
- Press the Continue button.
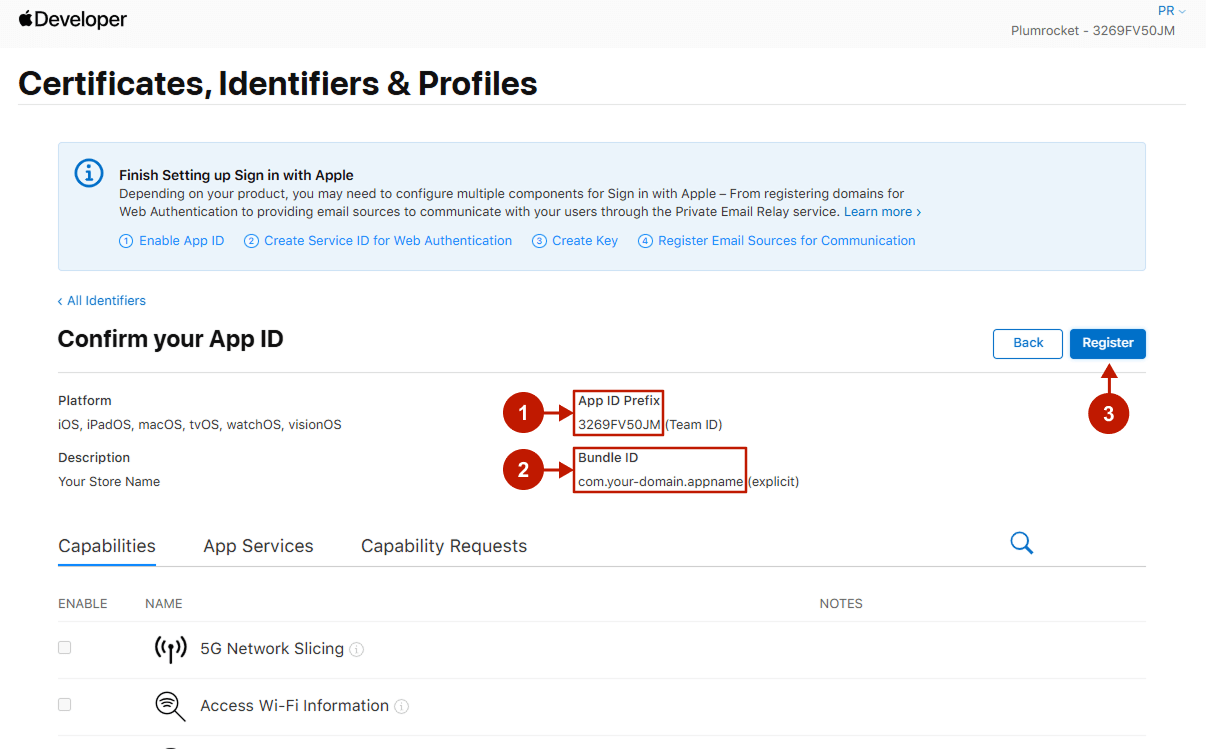
Step-by-Step actions:
- This is the Team ID you will need to insert later in the Magento admin panel in order to integrate Apple social login.
- This is the Bundle ID for yor App ID.
- Finish the App ID configurations by clicking on the Register button.
2. Create a Service ID
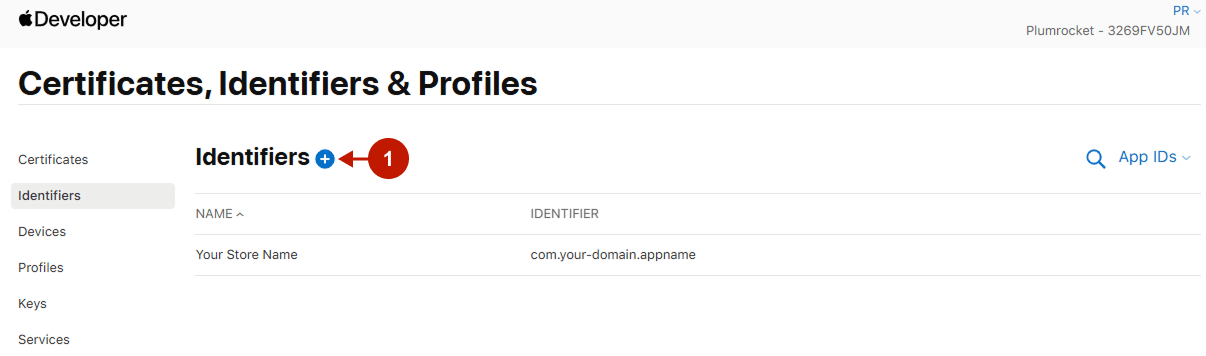
Step-by-step guide:
- After creating an App ID, create the Service ID by pressing the Plus sign.
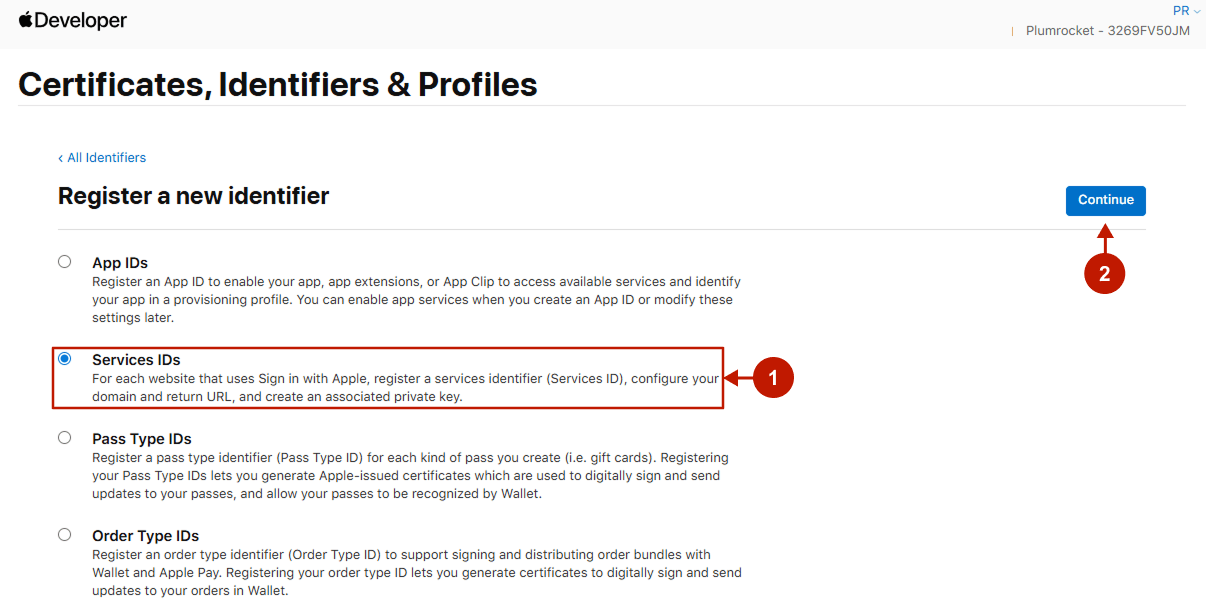
Step-by-Step actions:
- Select the Services IDs option.
- Press the Continue button.
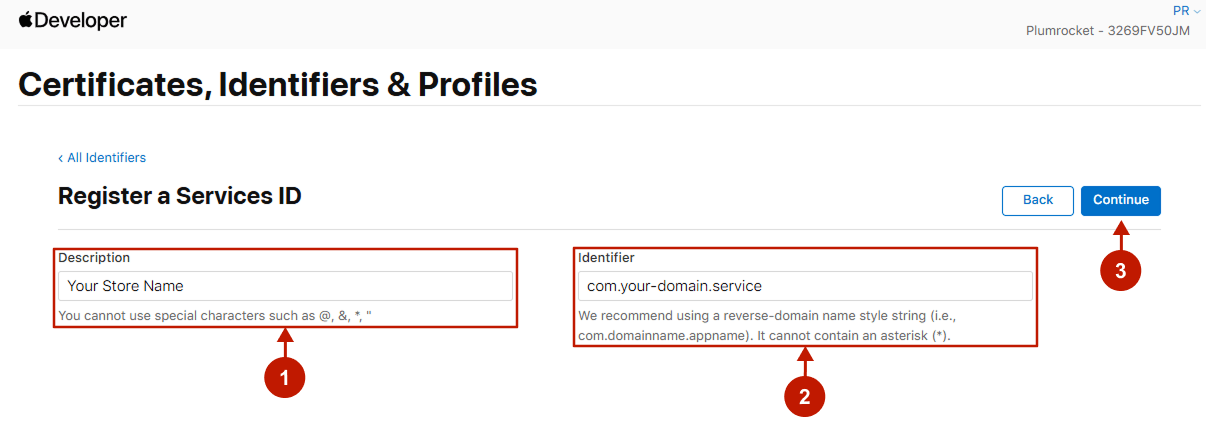
Step-by-Step actions:
- Enter a Service ID Description.
- Enter the Identifier, which will be your Client Id. The Identifier is recommended to be written in a reverse-dns style string.
- Press the Continue button.
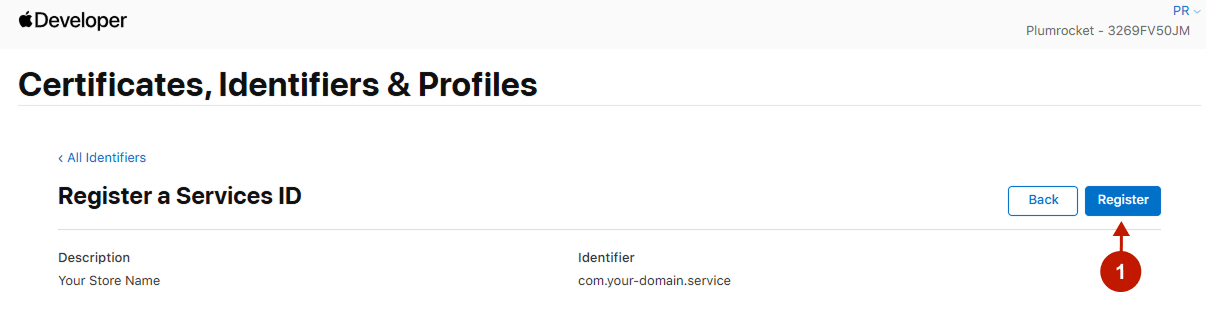
Step-by-step guide:
- Make sure that all the data is correct, and Register your Services ID.
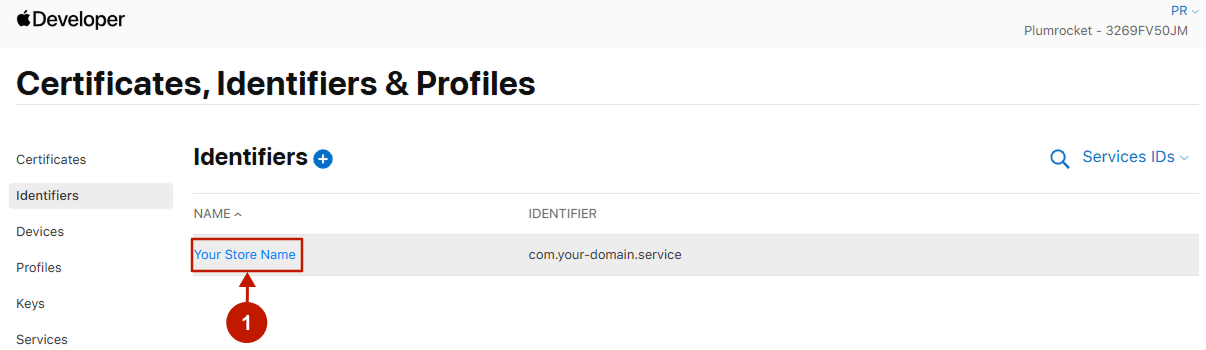
Step-by-step guide:
- On the Identifiers page, choose the Services ID you created.
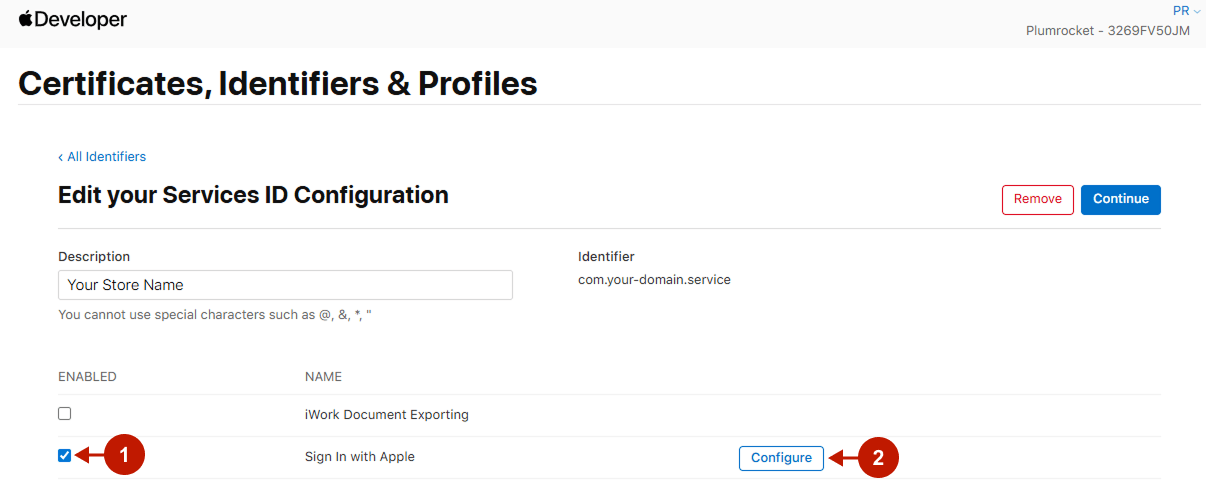
Step-by-Step actions:
- Check the Sign In with Apple checkbox.
- Press the Configure button.
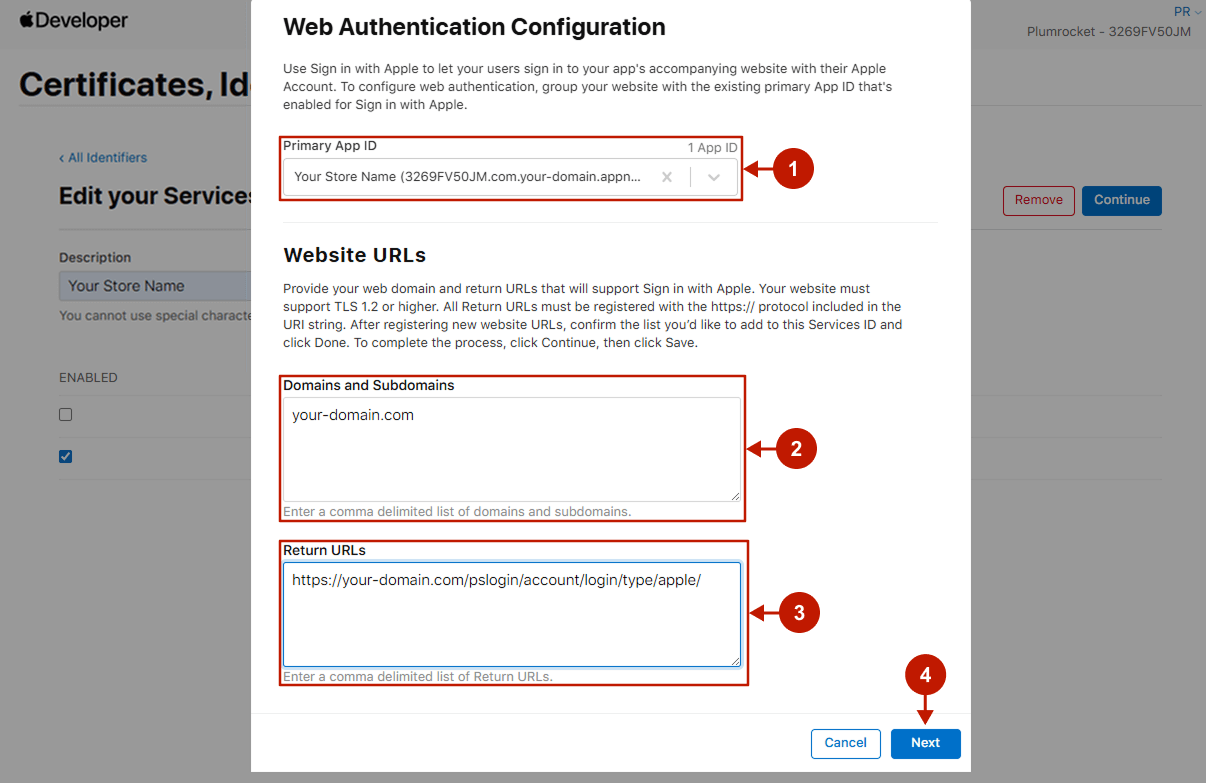
Step-by-step guide:
- From the App IDs list, choose the App ID you created.
- Specify your Domains and Subdomains.
- Insert the Return URL. You can copy it from the Apple login configurations in your Magento 2 Admin Panel (“OAuth Redirect URI” field).
- Press the Next button.
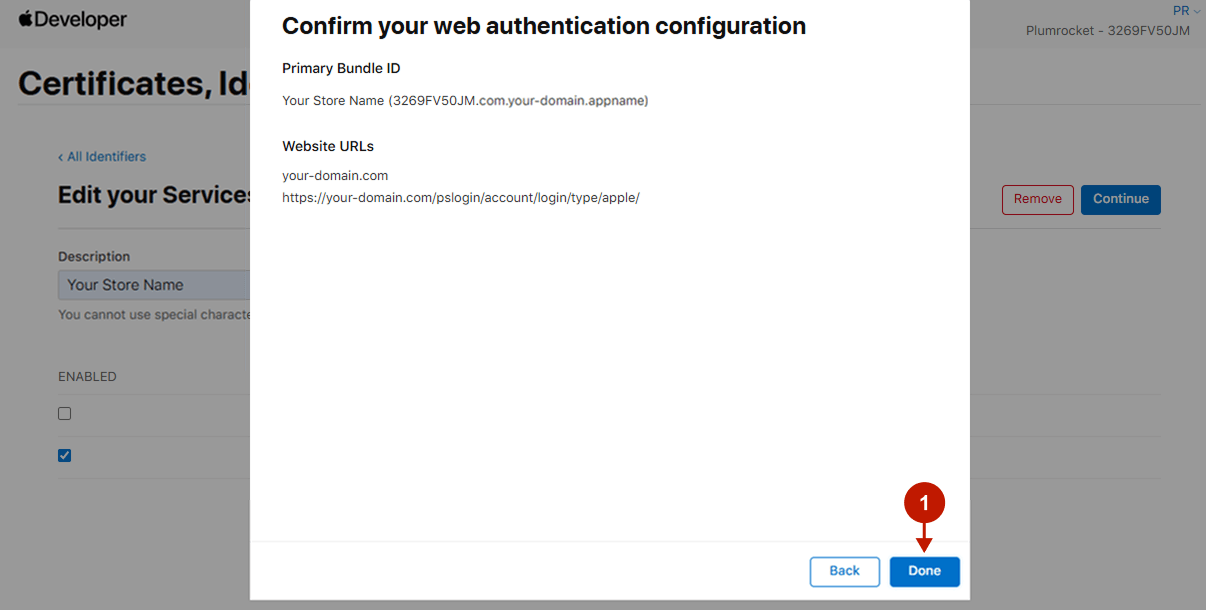
Step-by-step guide:
- Check if the data is correct, and press the Done button.
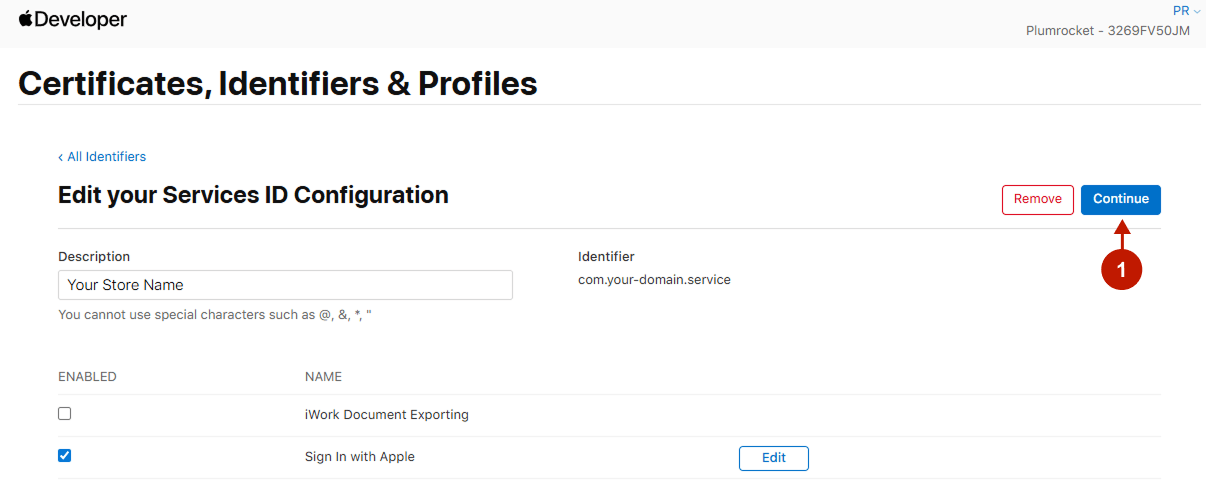
Step-by-step guide:
- After all the previous steps are completed, press the Continue button.
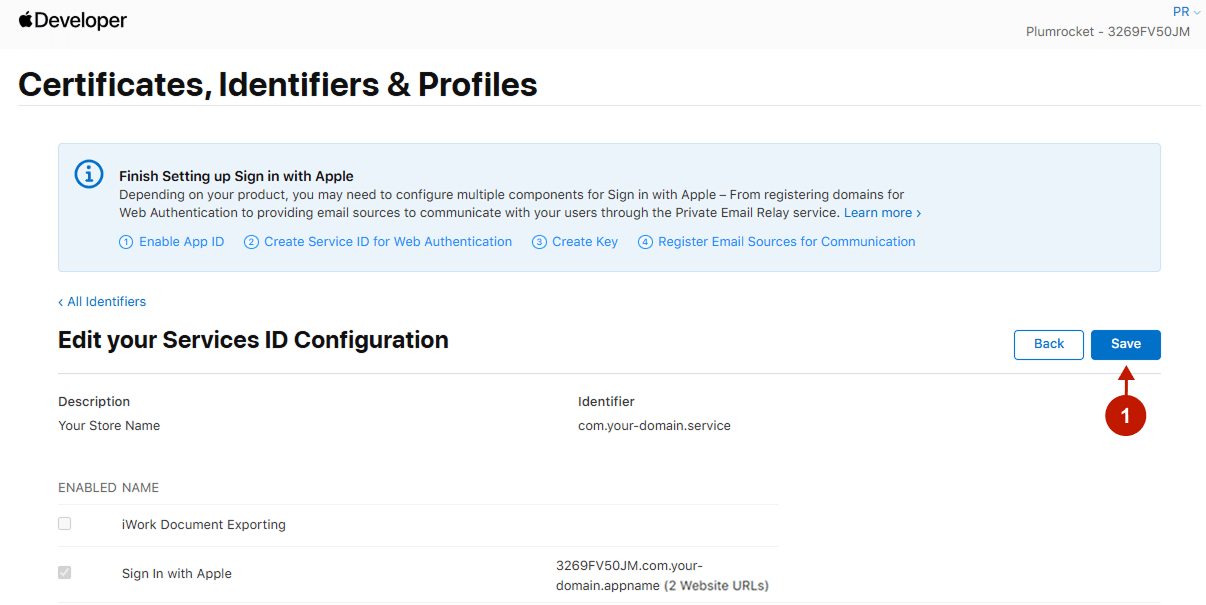
Step-by-step guide:
- Save your changes.
3. Create a Key ID
The next step in configuration the Magento sign in with Apple is a Private Key creation. Please follow the instructions below to learn how to create it correctly:
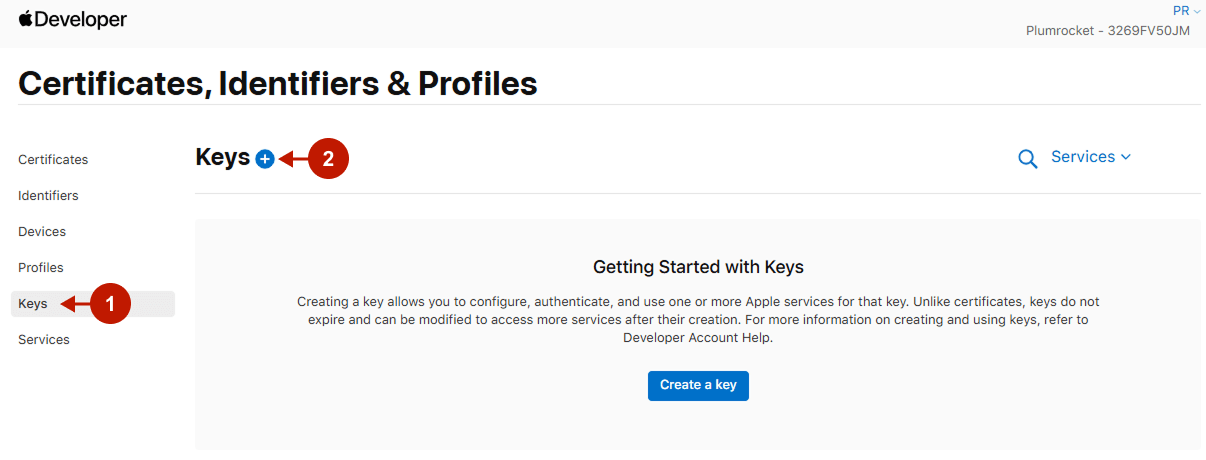
Step-by-Step actions:
- In the Apple Developer Account, go to the Certificates, Identifiers & Profiles -> Keys.
- Click the blue “+” icon.
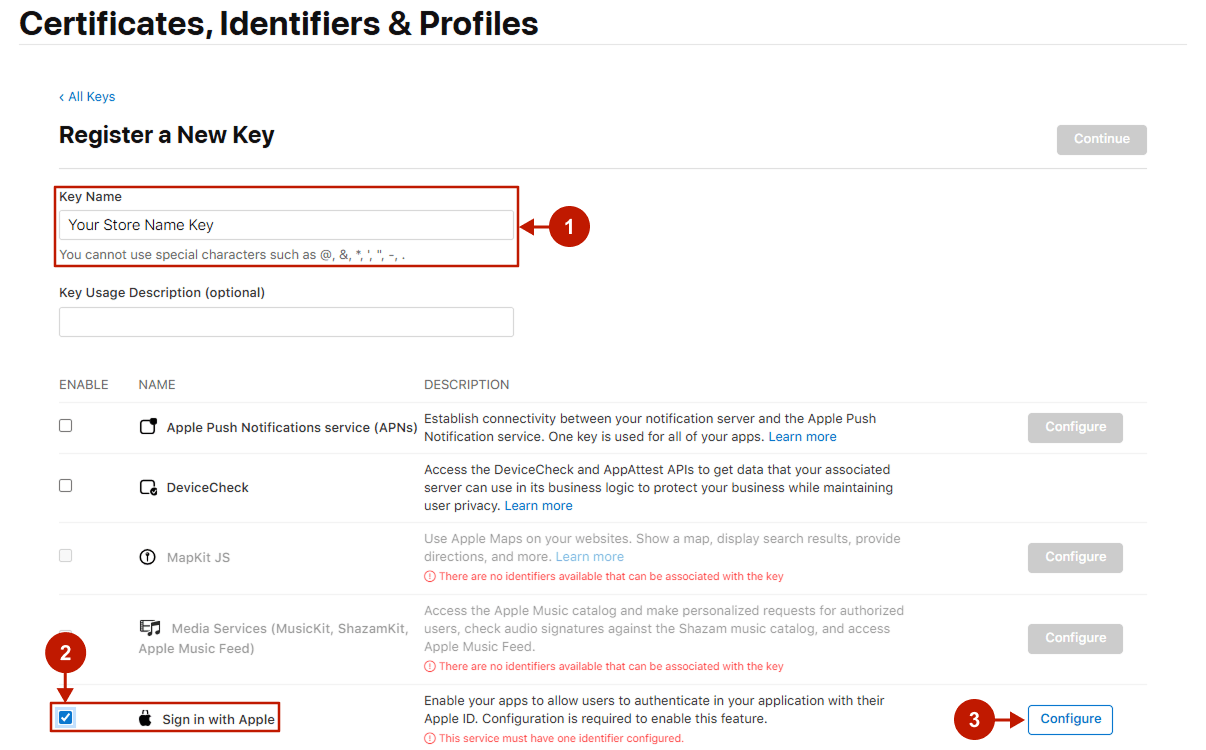
Step-by-Step actions:
- Enter the Key Name.
- Check the Sign In with Apple checkbox.
- Press the Configure button to configure your key.
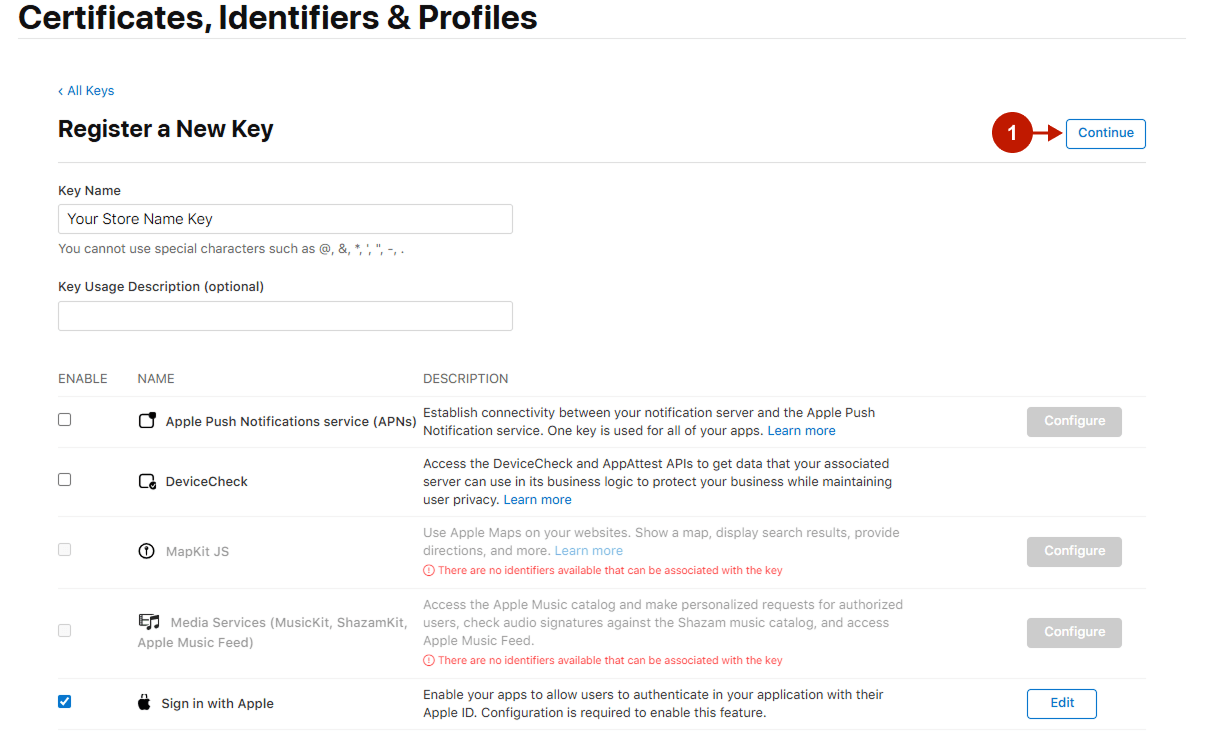
Step-by-Step actions:
- Select your Primary App ID from the drop-down menu.
- Press the Save > Continue > Register buttons in the top right corner.

Step-by-step guide:
- After the previous steps are completed, press the Continue button.
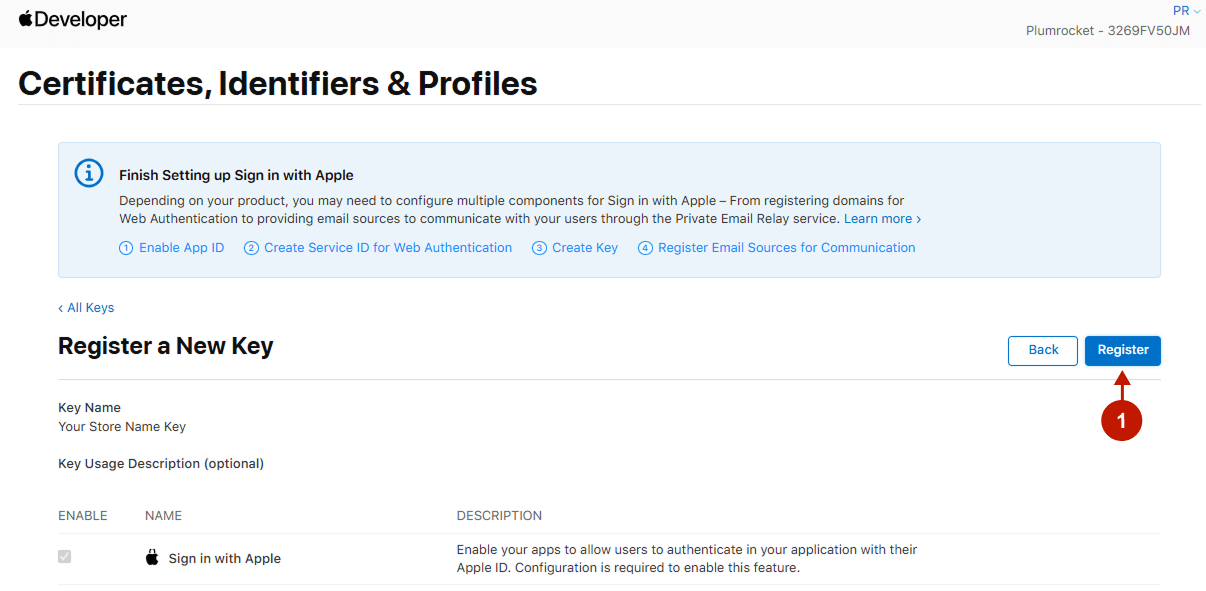
Step-by-step guide:
- Register your Key ID.
Step-by-Step actions:
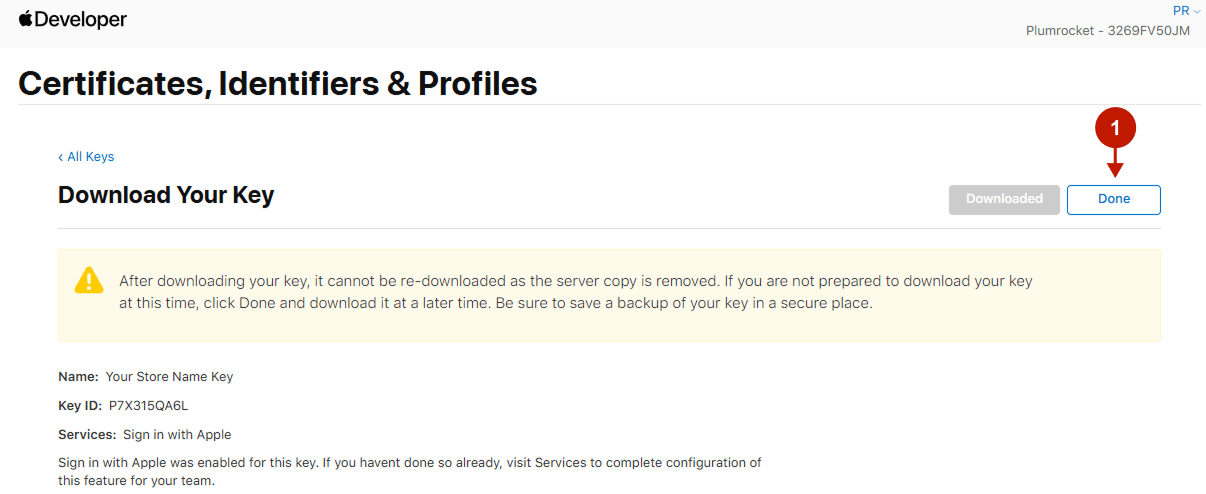
- This is the Key ID you have just registered. You will need to insert it in the Magento admin panel in order to integrate Apple social login.
- In order to download the Key ID file, click on the Download button. Remember that it cannot be downloaded again, so make sure to keep it in a secure place.
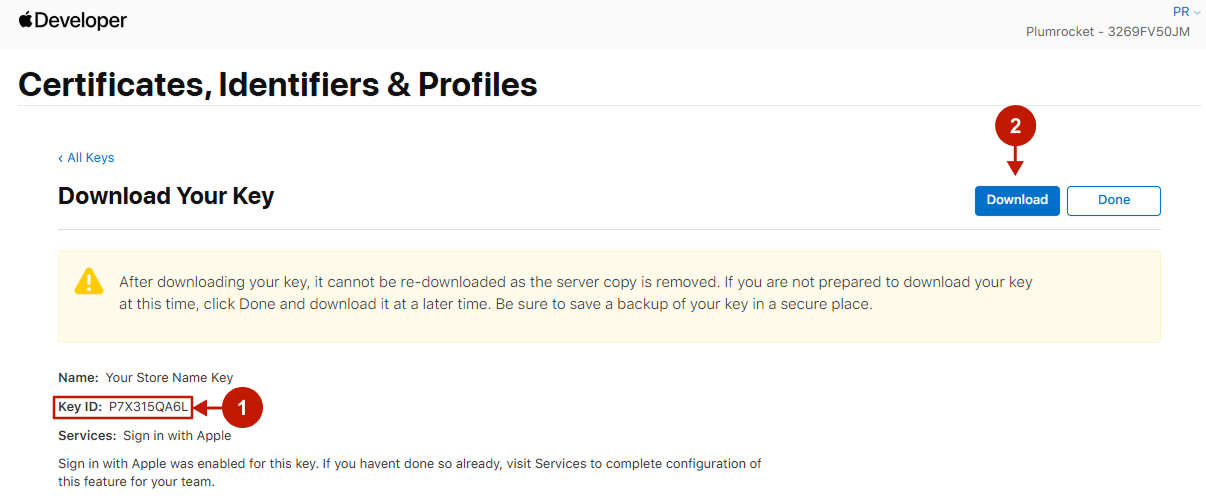
Step-by-step guide:
- Once the key is downloaded, press the Done button.
Configuring Apple Integration in Magento 2 Social Login Pro Extension
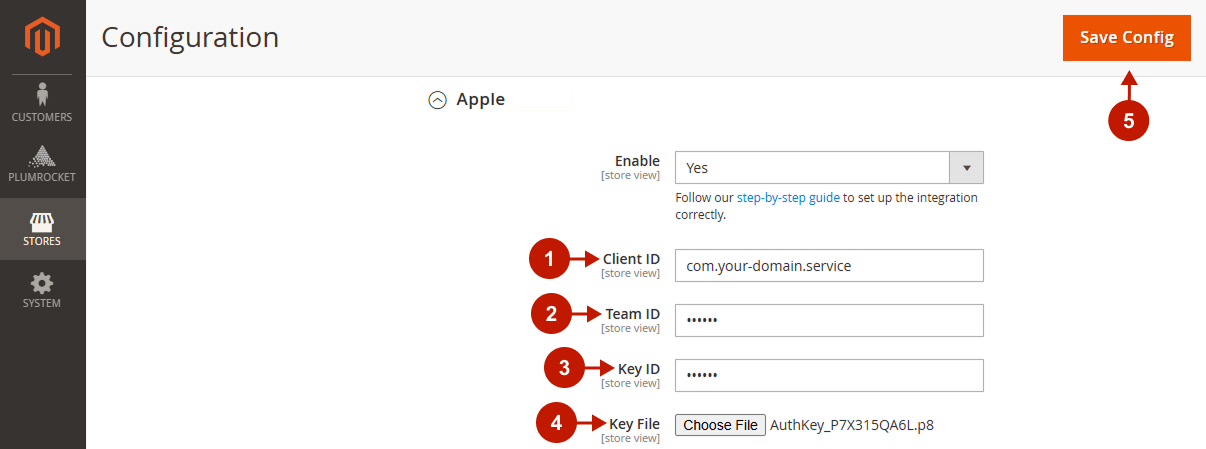
In this step, you have to update your Magento 2 Social Login Pro Extension configuration. In your Magento 2 admin panel, go to the Plumrocket tab in the main menu > Social Login Pro section > Configuration > Apple tab.
Step-by-Step actions:
- Enter the Client ID generated in the Apple Developer account.
- Insert the Team ID you got in the Apple Developer account.
- Enter the Key ID you registered in the Apple Developer account.
- Choose the Key File you downloaded in the final step of its registration in the Apple Developer account.
- Press the Save Config button to save your changes.
Next Step > Return to Social Login Pro API Reference