Mixi (mixi.jp) |
|
| Protocol | OAuth 2 |
| Returned Data | userId, name, gender, birthday, photo |
| Requires SSL? | No |
How to Set Up Mixi API for Magento
In this article, you will learn how to find your Mixi API in order to integrate Mixi Login into Magento Social Login Pro extension. Please follow the step-by-step instructions below.
Step-by-Step action:
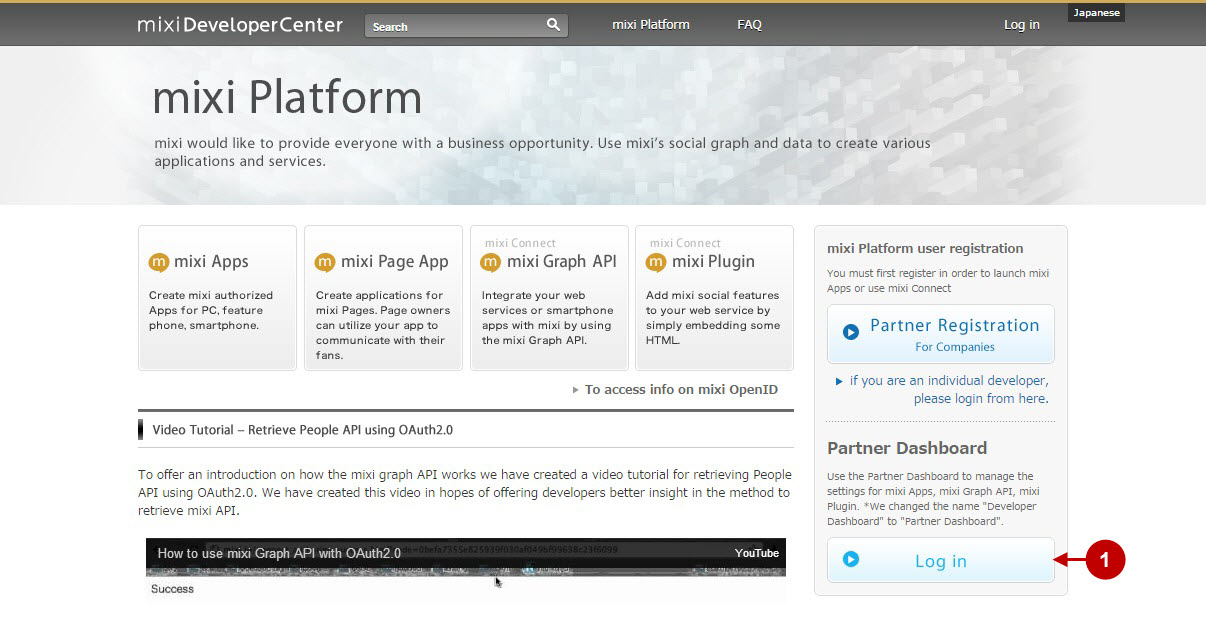
- Log into developer.mixi.co.jp/en/.

Proceed with Mixi Graph API registration, you can find a video tutorial here
Configuring Mixi Integration in Magento Social Login Pro Extension
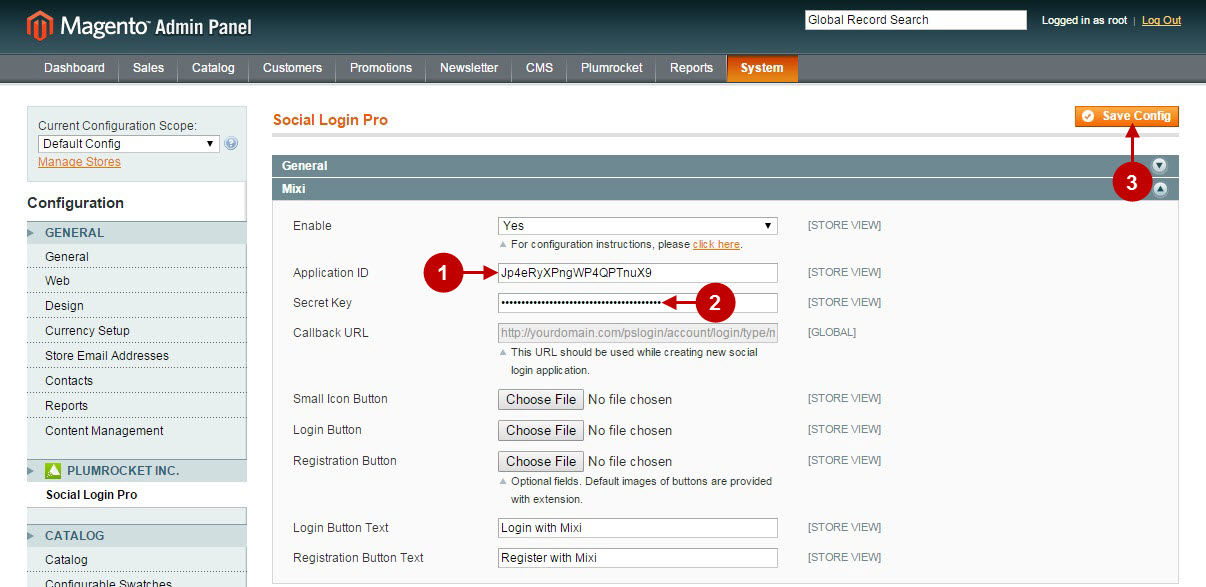
In this step you must update your Magento Social Login Pro Extension configuration. In your magento admin panel, go to “System” -> “Configuration” -> “Plumrocket Inc” -> “Social Login Pro” -> “Mixi” Tab.
Step-by-Step action:
- Paste Application ID into the relevant field of your “Mixi” backend tab.
- Insert Secret Key into the relevant field of your “Mixi” backend tab.
- Press “Save Config” button to save your settings.

Configuration of Mixi Magento Social Login application is now completed.
Configuring Mixi Integration in Magento 2 Social Login Pro Extension
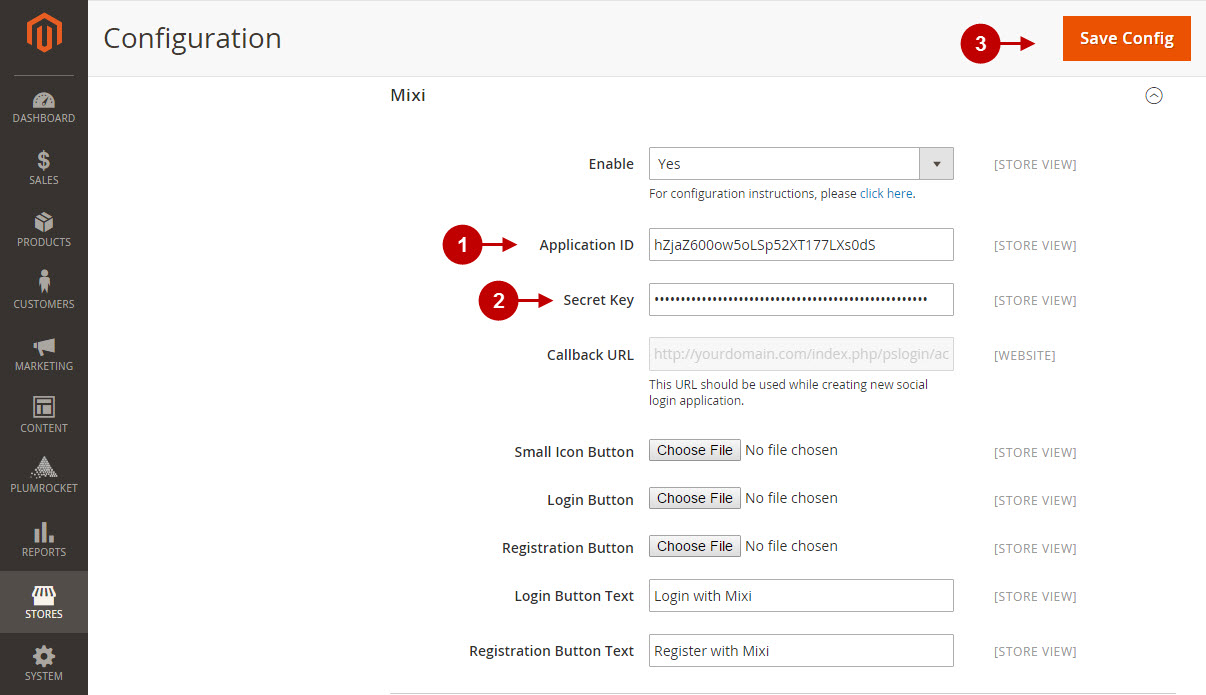
In this step you must update your Magento 2 Social Login Pro Extension configuration. In your magento 2 admin panel, go to “Plumrocket” tab in the main menu -> “Social Login Pro” section -> “Configuration” – >” “Mixi” Tab.
Step-by-Step action:
- Paste Application ID into the relevant field of your “Mixi” backend tab.
- Insert Secret Key into the relevant field of your “Mixi” backend tab.
- Press “Save Config” button to save your settings.

Configuration of Mixi Magento 2 Social Login application is now completed.
Next Step > Return to Social Login Pro API Reference
