How to Set Up Verisign API in Magento Social Login Pro Extension
In this article, you will learn how to integrate Verisign login into Magento Social Login Pro extension. Note that it does not require application installation, since it uses the “OpenID” protocol. Please follow the step-by-step instructions below.
Configuring Verisign Integration in Magento Social Login Pro Extension
Step-by-Step action:
- Navigate to your Magento backend and select “Plumrocket” from the main menu.
- Select “Social Login Pro” from the list.

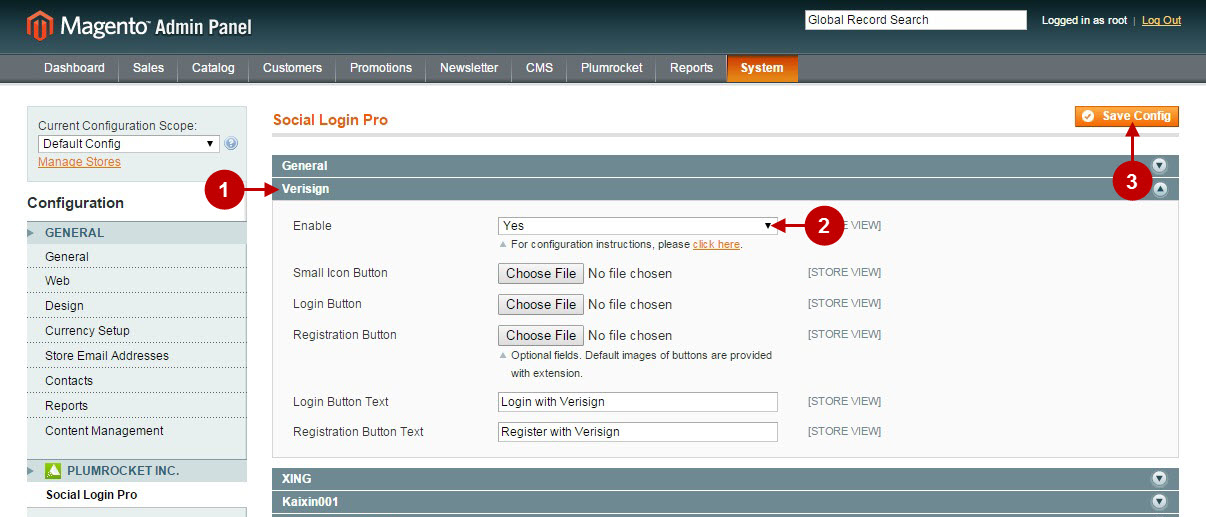
In this step you need to update your Magento Social Login Pro Extension configuration. In your magento admin panel, go to “System” -> “Configuration” -> “Plumrocket Inc” -> “Social Login Pro” -> “Verisign” Tab.
Step-by-Step action:
- From the list of all available networks please navigate to Verisign tab.
- Choose “Yes” to enable Verisign security service login.
- Press “Save Config” button to save your settings.

Configuration of Verisign Magento Social Login application is now completed.
Configuring Verisign Integration in Magento 2 Social Login Pro Extension
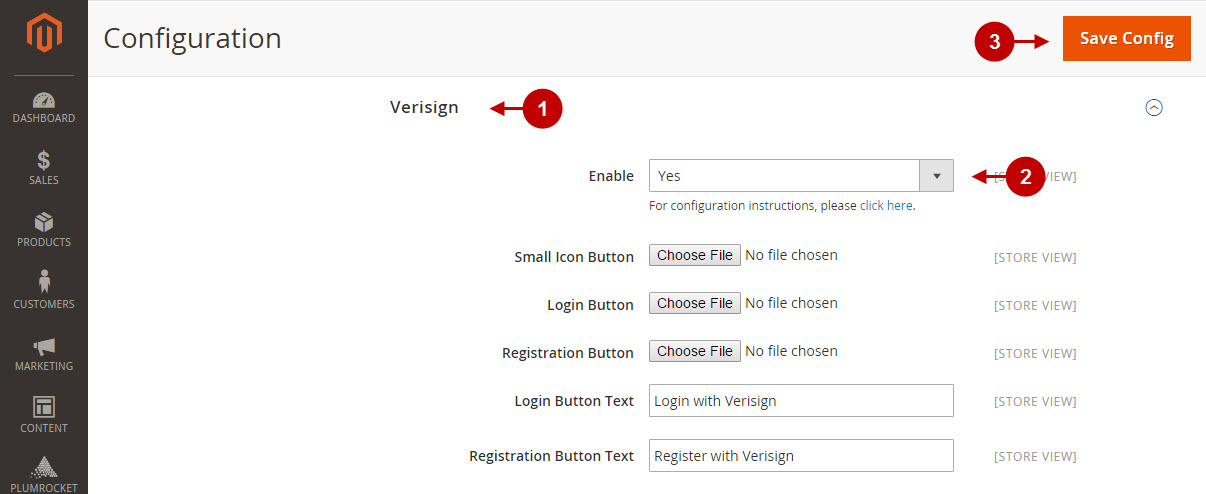
In this step you need to update your Magento 2 Social Login Pro Extension configuration. In your magento 2 admin panel, go to “Plumrocket” tab in the main menu -> “Social Login Pro” section -> “Configuration” -> “Verisign” Tab.
Step-by-Step action:
- Navigate to the “Verisign” tab in the list of all available networks .
- In order to enable “Verisign” security service login select “Yes” from the drop-down menu.
- Press “Save Config” button to save your settings.

Configuration of Verisign Magento 2 Social Login application is now completed.
Next Step > Return to Social Login Pro API Reference
