
Naver |
|
| Protocol | OAuth 2 |
| Returned Data | userId, name, email, gender, photo |
| Requires SSL? | No |
How to Set Up Naver API for Magento
In this article, you will learn how to enable and configure your Naver API in order to integrate Naver login into Magento Social Login Pro extension. Please follow the step-by-step instructions below.
Step-by-Step action:
- Log into your account at developers.naver.com and go to the “Application” tab.
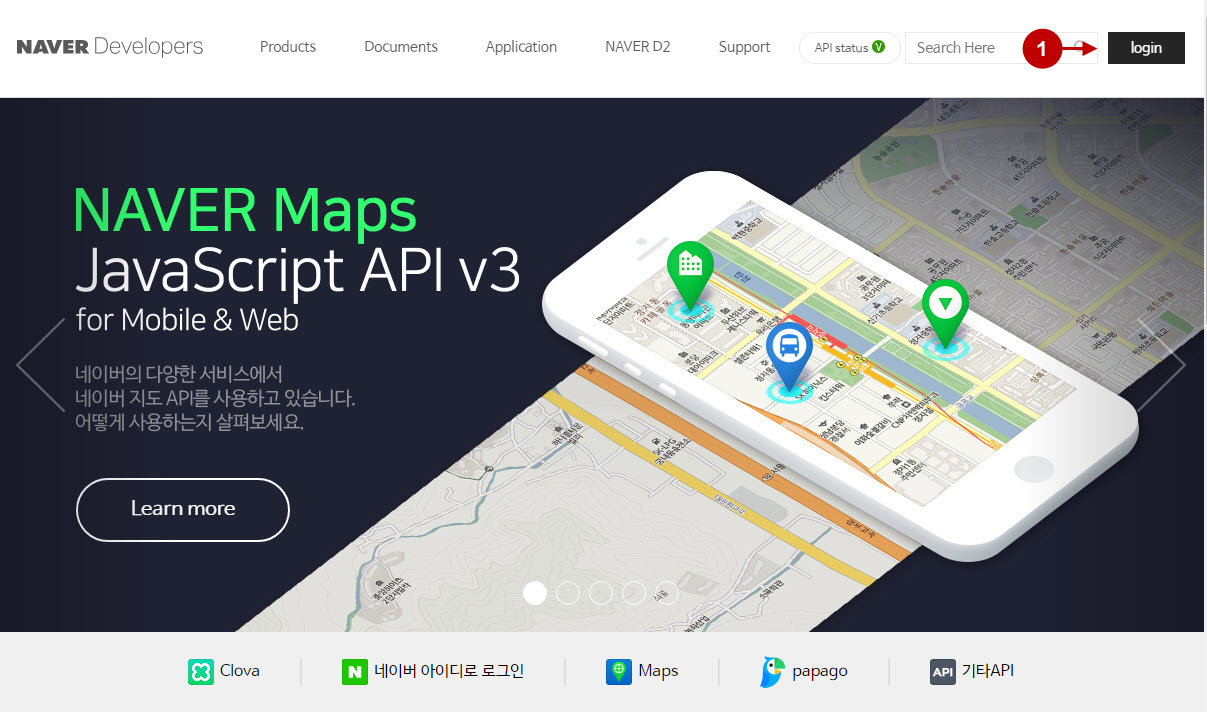
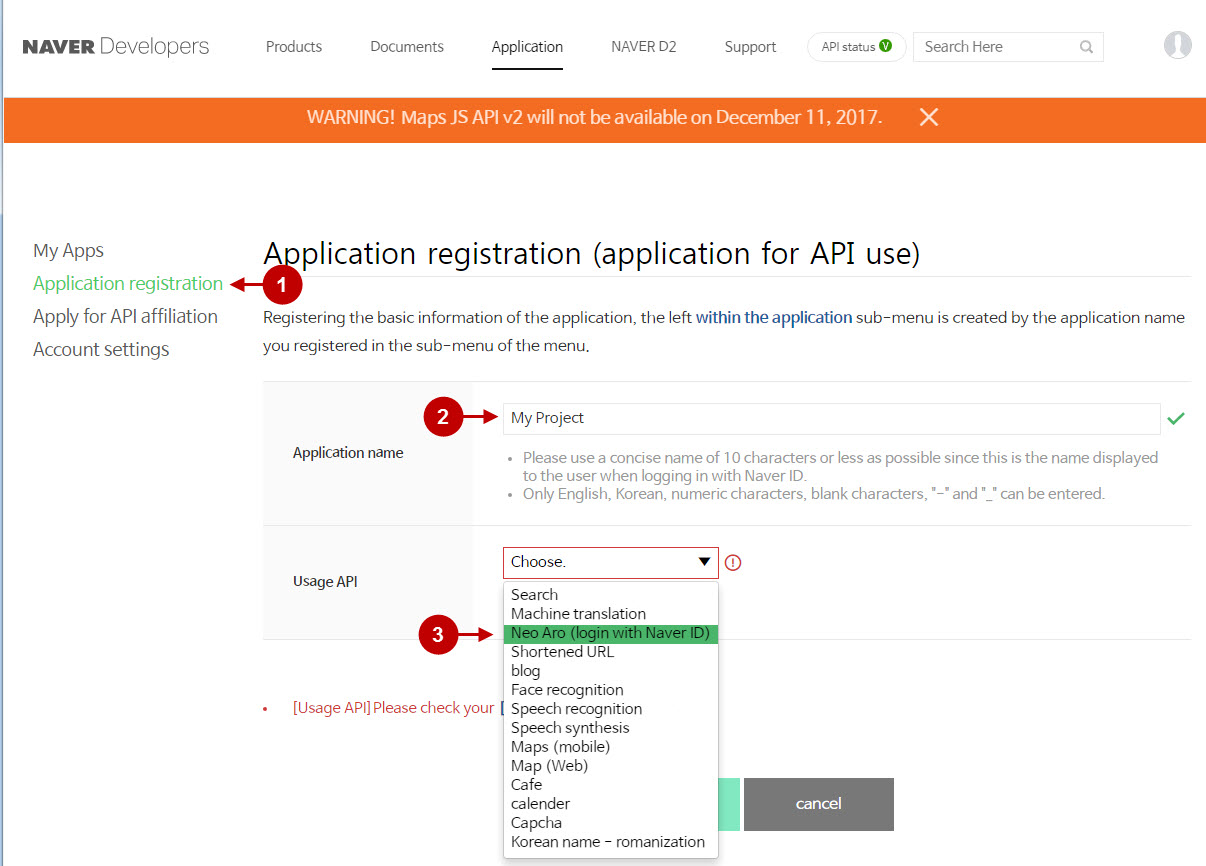
Step-by-Step action:
- Go to “Application registration” tab.
- Enter the application name in this field.
- In the “Usage API” select “Neo Aro(login with Naver ID)”.
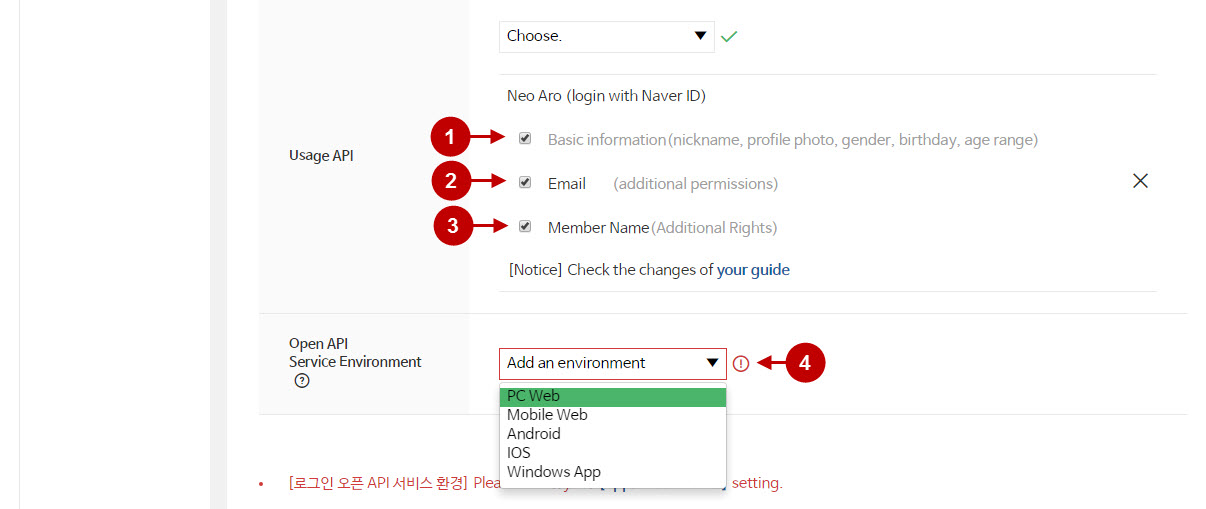
In this tab, check the following checkboxes.
Step-by-Step action:
- Check the “Basic Information” checkbox.
- Check the “Email” checkbox.
- Check the “Member Name” checkbox.
- For the Open API Service Environment select from the drop-down: “PC Web” and “Mobile Web”.
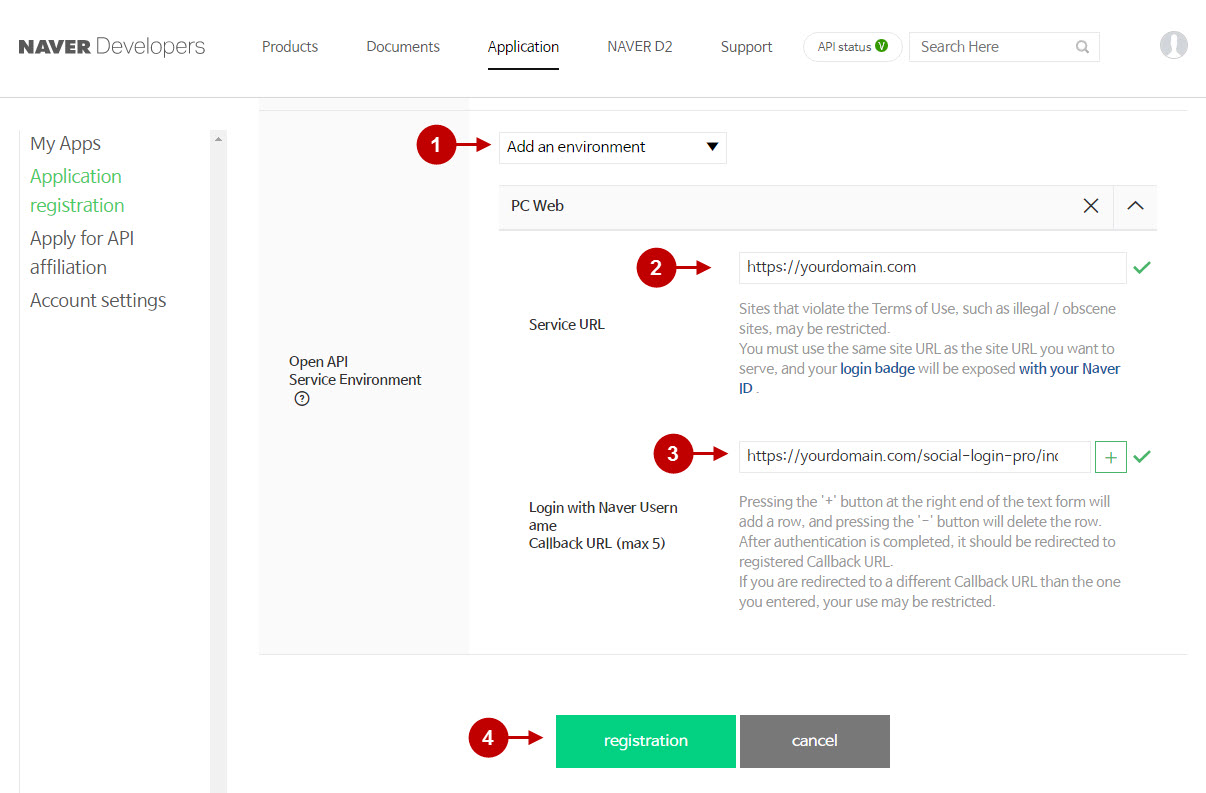
Step-by-Step action:
- Once you selected “PC Web” and “Mobile Web”, enter the following links for both sections.
- Enter your domain into the “Service URL”.
- Enter your Call URL in this field.
- Press the “Registration” button.
Once you have created your Naver API, you will be able to copy paste the Client ID and Client Secret into your Magento Social Login extension.
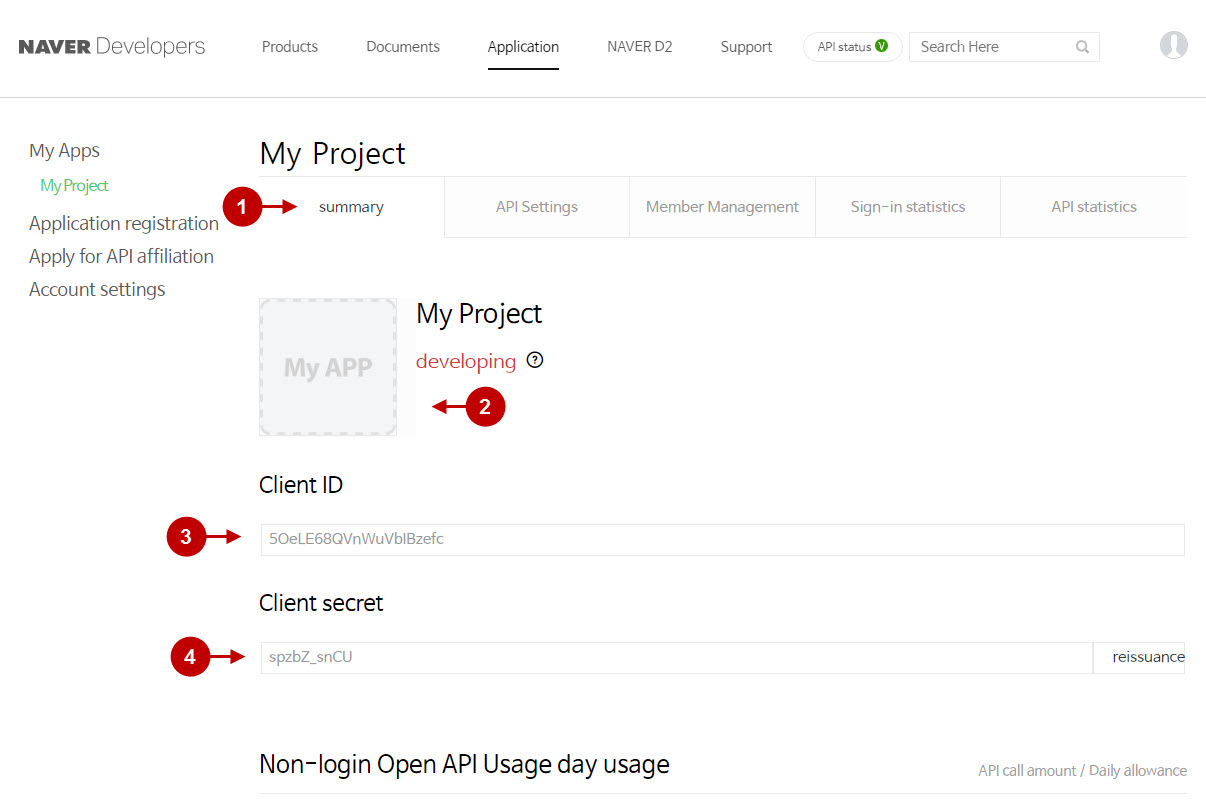
Step-by-Step action:
- Go to the “Summary” tab.
- Upload your logo here”.
- Copy the Client ID from this field.
- Copy the Client Secret from this field.
Once you have finished your testing of Naver API, switch to the regular mode by following these steps.
Step-by-Step action:
- Go to the “My Project” application tab > “API settings” .
- Select the “Apply service” option.
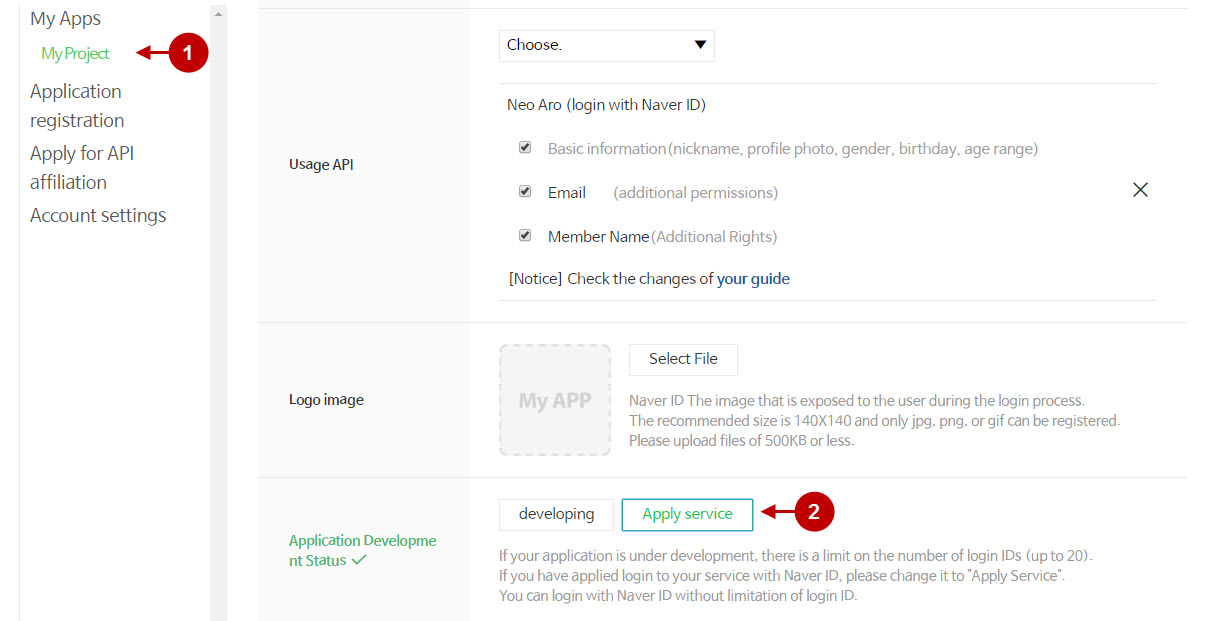
*Pages on the screenshots have been translated into English by Google Translate functionality.
Configuring Naver Integration in Magento Social Login Pro Extension
In this step you must update your Magento Social Login Pro Extension configuration. In your magento admin panel, go to “System” -> “Configuration” -> “Plumrocket Inc” -> “Social Login Pro” -> “Naver” Tab.
Step-by-Step action:
- Paste Client ID into the relevant field of your “Naver” backend tab.
- Insert Client Secret key into the relevant field of your “Naver” backend tab.
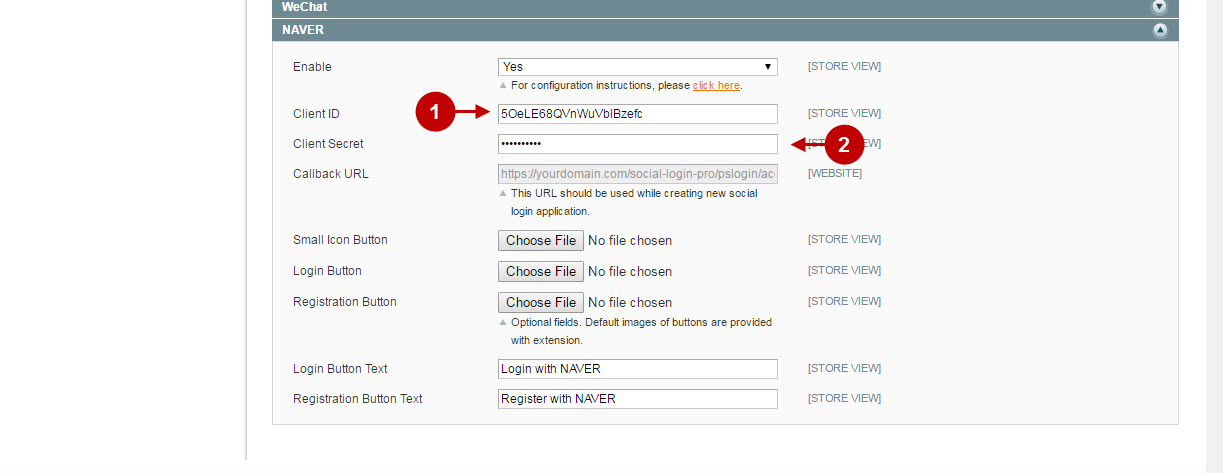
Configuration of Naver Magento Social Login application is now completed
Configuring Naver Integration in Magento 2 Social Login Pro Extension
In this step you must update your Magento 2 Social Login Pro Extension configuration. In your magento 2 admin panel, go to “Plumrocket” tab in the main menu -> “Social Login Pro” section -> “Configuration” -> “Naver” Tab.
Step-by-Step action:
- Paste Client ID into the relevant field of your “Naver” backend tab.
- Insert Client Secret into relevant field of your “Naver” backend tab.
- Press “Save Config” to save your settings.
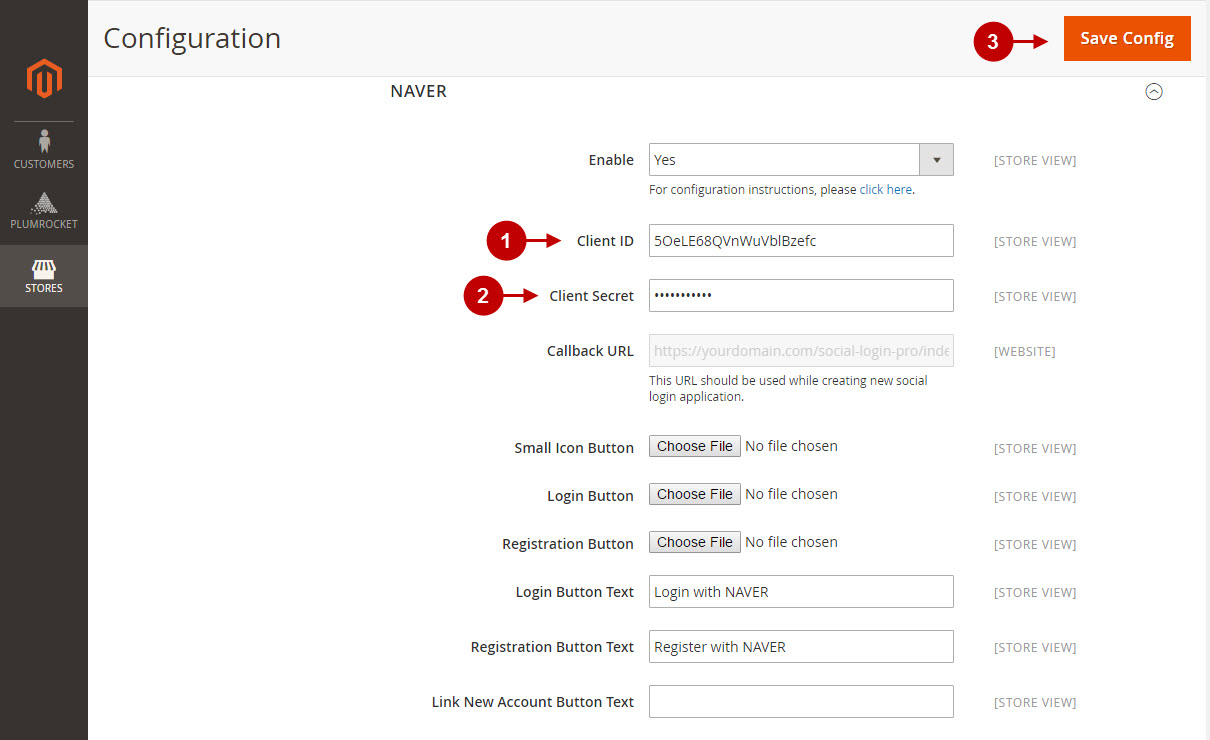
Configuration of Naver Magento 2 Social Login application is now completed
Next Step > Return to Social Login Pro API Reference
