After installing the Magento 2 AMP Theme One, you get a template for AMP Homepage. In the template, we provide you with widgets, static banners, and carousel examples. Moreover, you can edit and customize all AMP content according to your needs. Please follow the steps below to learn how to configure Magento 2 AMP Homepage.
Step-by-step guide:
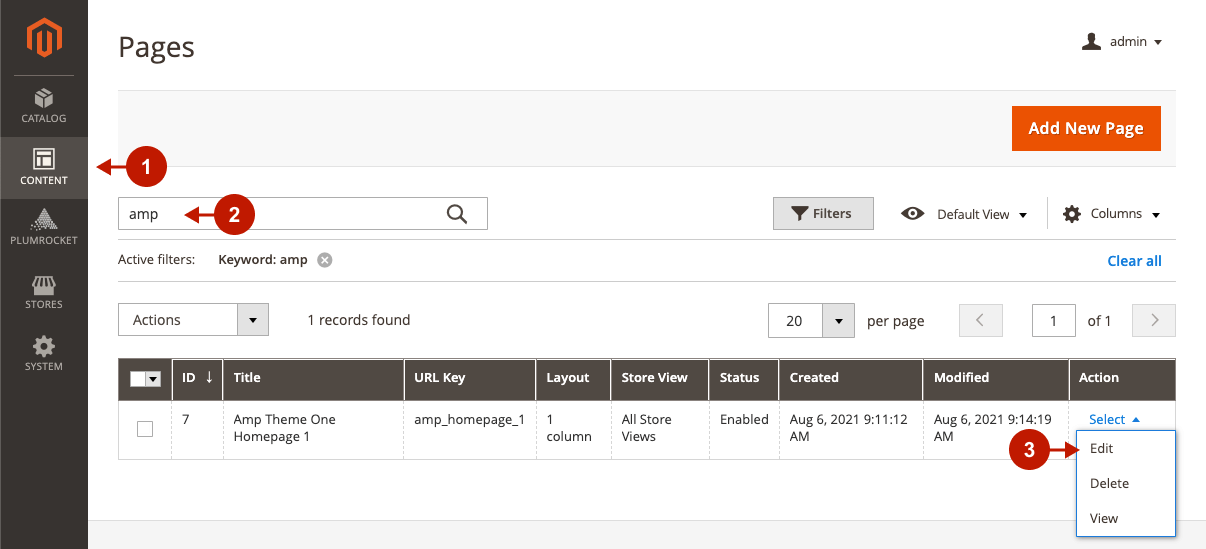
- In the main Magento menu, go to Content -> Elements -> Pages. You will find a grid with the available CMS pages.
- Search for “amp” in the search field.
- Find the Amp Theme One Homepage 1 in the grid. This is the AMP Homepage template provided with the Magento 2 AMP Theme One. By clicking Select -> Edit in the corresponding record, you will get on the Homepage edit page.
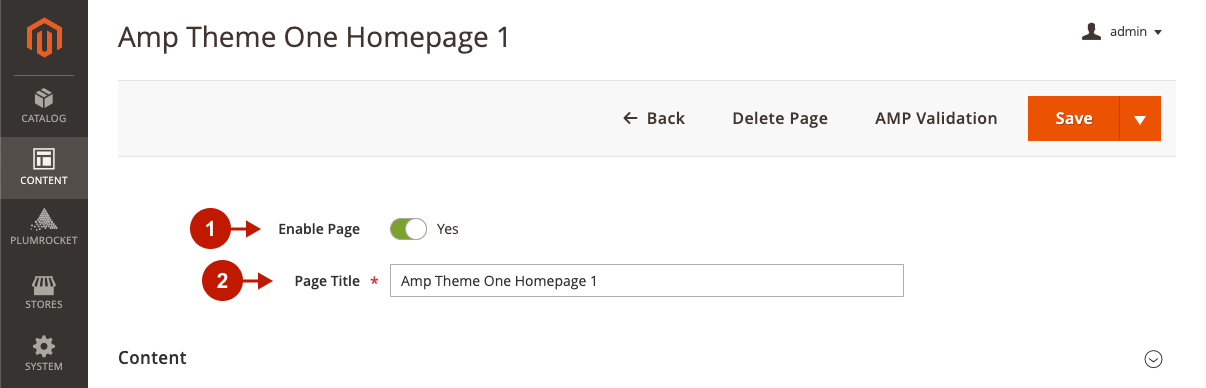
Once you selected Amp Theme One Homepage 1, you can set all the required settings set custom AMP content.
Step-by-step guide:
- Enable Page: enable or disable AMP Theme One Homepage in this option.
- Page Title: if necessary, enter a recognizable AMP Home Page title to be displayed in theMagento backend.
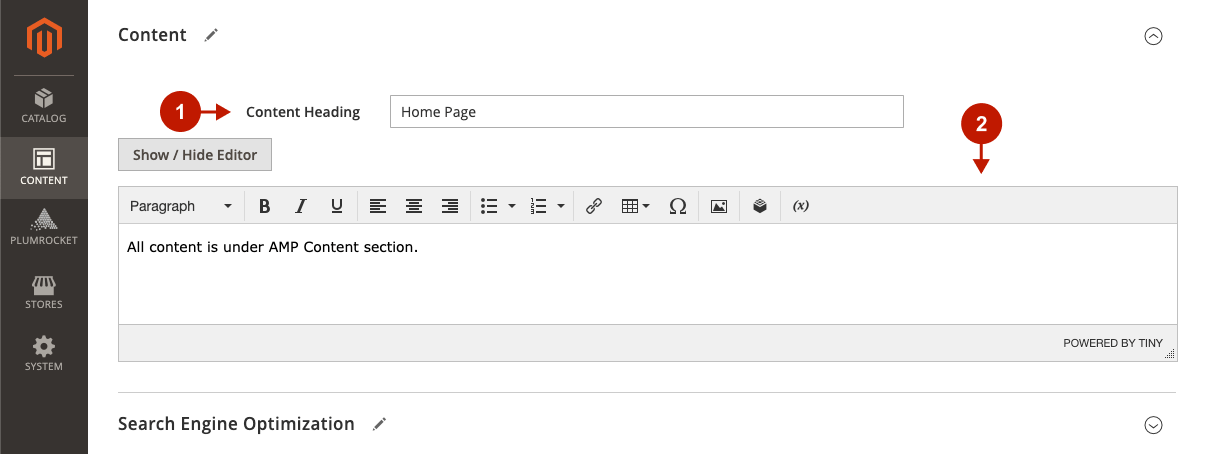
Content
Step-by-step guide:
- Content Heading: this option is not currently used in AMP.
- The Magneto 2 AMP extension converts simple CMS page content into AMP format if the AMP Content field is empty. However, you need to specify AMP content manually for complex pages, where you want to display banners, sliders, or AMP widgets. In this case, the extension will use your custom AMP content and ignore this Content section.
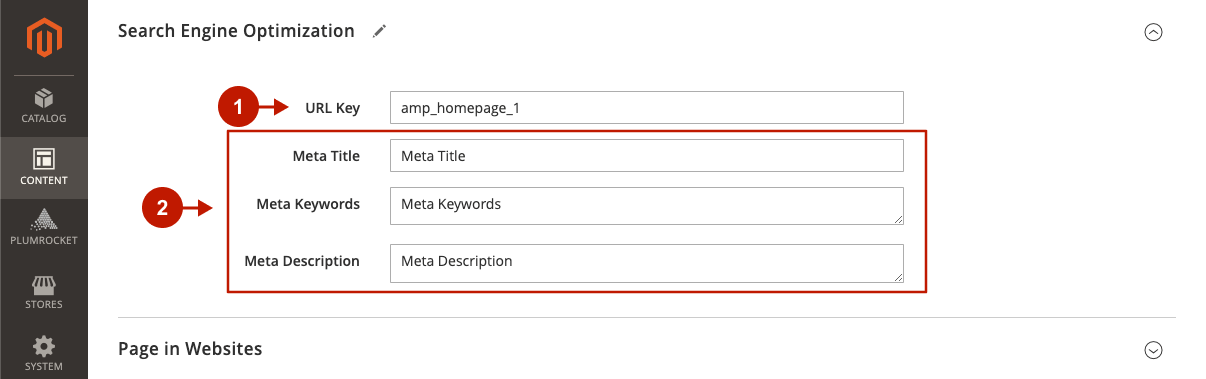
Search Engine Optimization
Step-by-step guide:
- URL key: this is the default URL key for the AMP Theme One Homepage 1.
- When the Magento 2 AMP extension generates AMP Homepage, it copies all metadata from your website Homepage. You can edit it if necessary in this field.
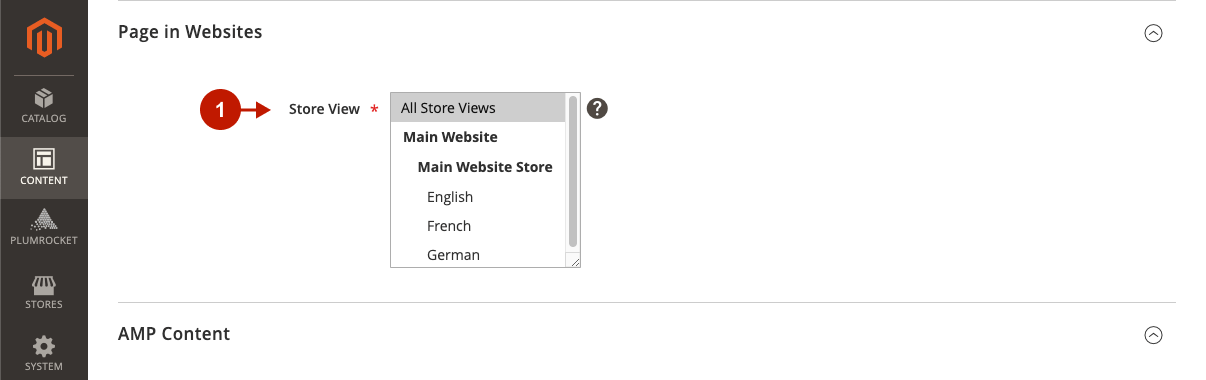
Page in Websites
Step-by-step guide:
- Store View: select the store view(s) the AMP Homepage will be visible at.
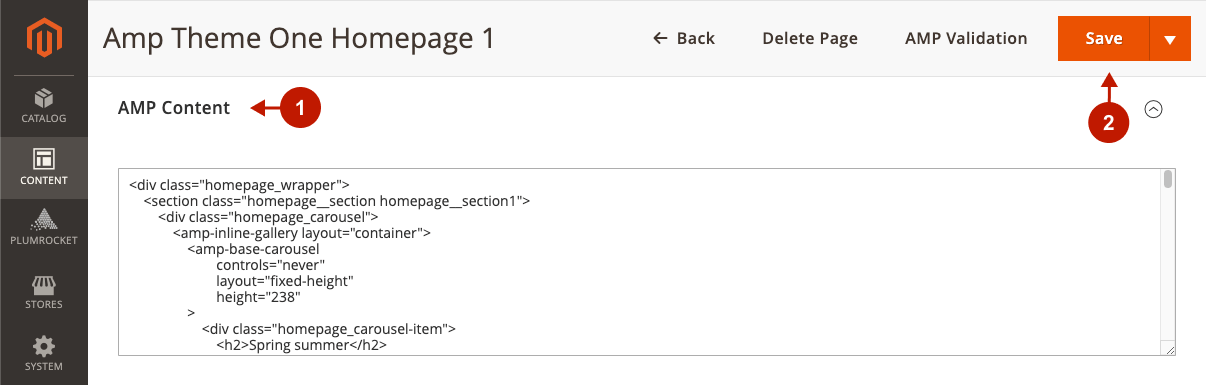
AMP Content
Step-by-step guide:
- AMP Content: in this field, you can specify AMP content for your AMP Theme One Homepage 1. Currently, the WYSIWYG editor is not supported, so we recommend using the online AMP playground to write valid AMP HTML code and paste it here.
- Click Save Page.
- Now you can validate your AMP Homepage by clicking AMP Validation.
How to Use the Same CMS Page for Both Regular and AMP Homepage
In the previous section, you learned how to customize the demo AMP Homepage provided with AMP Theme One. However, you may facilitate the AMP Homepage maintenance by using one CMS page with different content for regular and AMP websites. Follow the steps below to learn how to use the same CMS Page for both regular and AMP Homepage.
Step 1. Add AMP content to the default Magento Homepage
First of all, find out which CMS page is assigned as your Homepage.
Step-by-step guide:
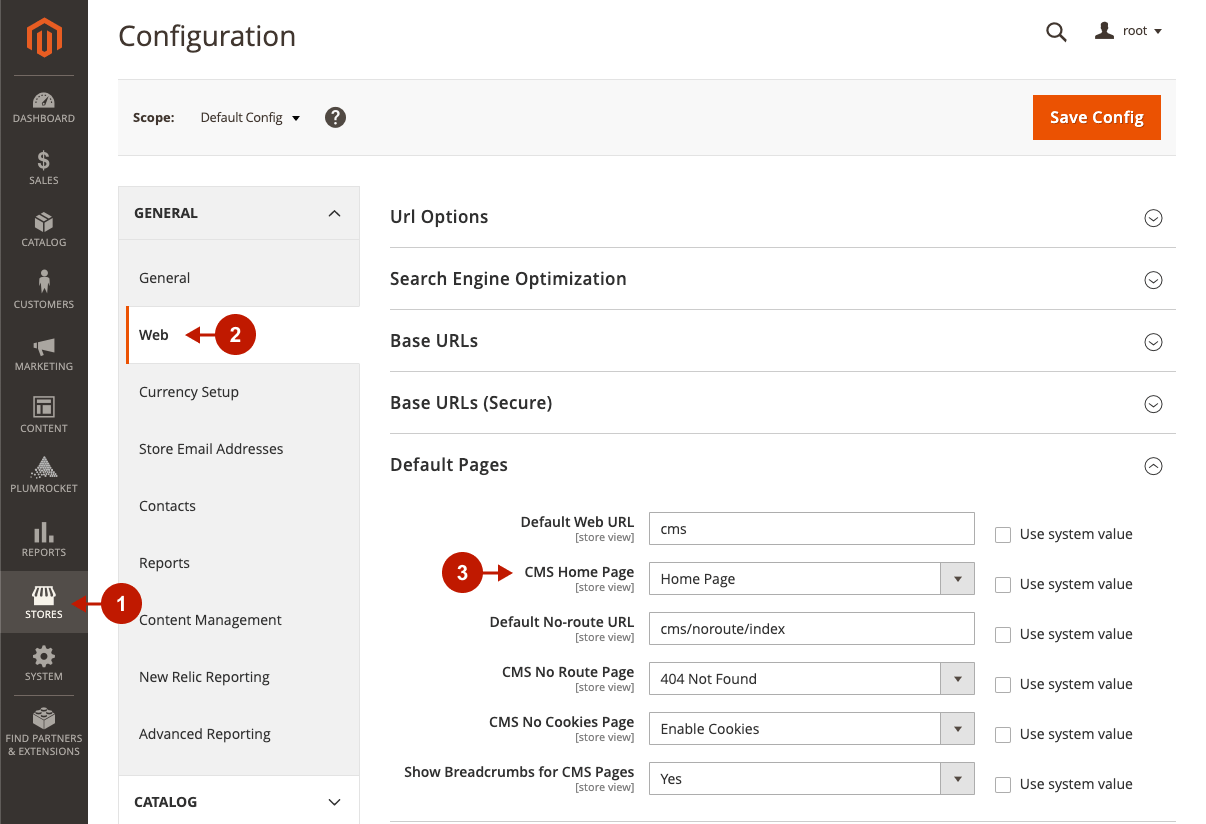
- In the main Magento menu, go to Stores -> Settings -> Configuration.
- Navigate to General tab -> Web.
- Under the Default Pages, see which CMS page is selected for the CMS Home Page option. This Homepage is used on your main website.
Then, you need to add AMP content to this Homepage.
Step-by-step guide:
- In the main Magento menu, go to Content -> Elements -> Pages.
- In a grid with the available CMS pages, find the Homepage you use for your regular website and click Select -> Edit in the corresponding record.

Step-by-step guide:
- Scroll down to the AMP Content section and specify your AMP content in this field. Please note that you have to keep the AMP HTML specification and text formatting.
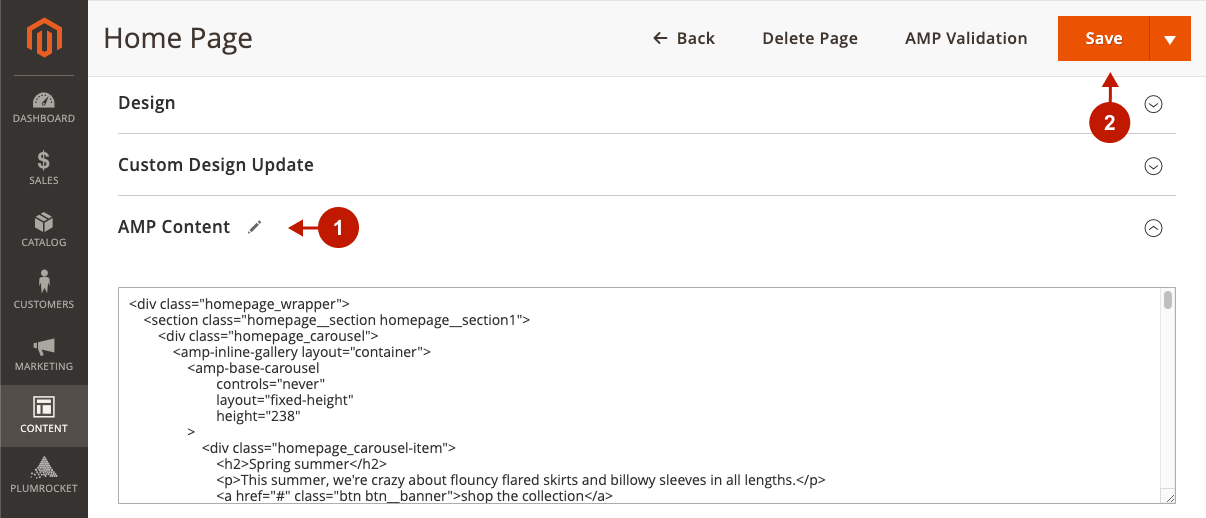
You can specify the AMP content yourself (we recommend checking AMP HTML code in AMP playground) or use fragments from the demo AMP Theme One Homepage.
Step 2. Assign Homepage in the Magento 2 AMP extension
Step-by-step guide:
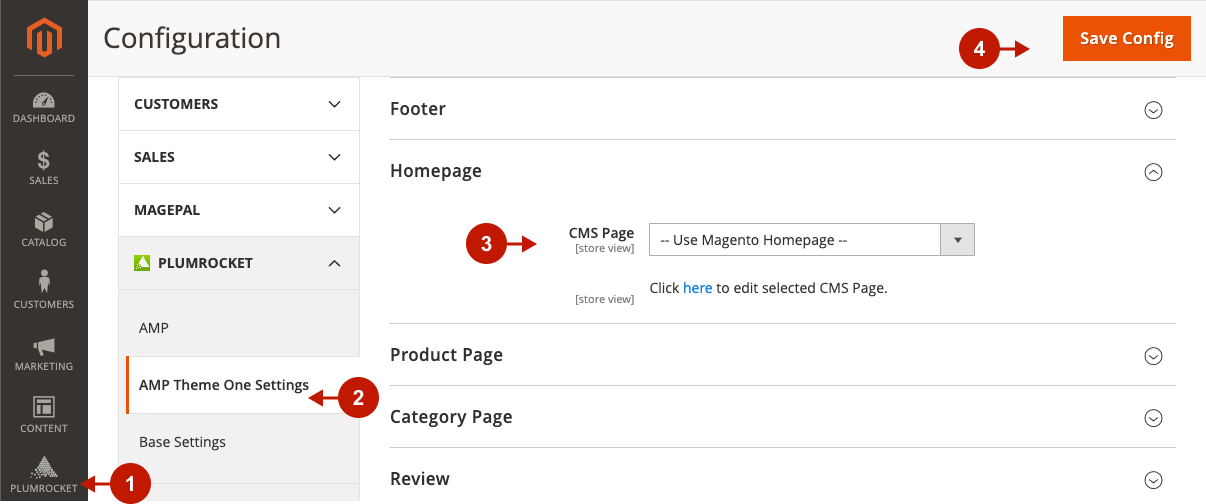
- In the main Magento menu, go to Plumrocket -> AMP -> Configuration.
- Switch to the AMP Theme One Settings tab.
- In the CMS Page field, under the Homepage tab, select the Homepage you use for your regular Magento website. If you select the — Use Magento Homepage — option, the extension will automatically use Homepage from the Magento Homepage configuration.
- Click Save Config to apply changes.
How to Translate Magento 2 AMP Homepage
If you have two or more store views (e.g., English and German), you can translate your AMP Homepage into German and apply it for the German store view:
- Enable AMP Homepage for English store view only.
- Create a new CMS page with the same URL key and enable it for German store view.
- Specify AMP content in the German language, change metadata if necessary, etc.
How to Add AMP Widgets to Magento 2 AMP Homepage
The Magento 2 AMP extension also provides AMP widgets that you can insert into the Homepage and other CMS pages/blocks. Follow the instruction to add AMP widgets in Magento 2.
How to Use AMP v2 Homepage Template
When you install AMP v3 extension, the new Homepage template is set. It contains more dynamic elements and looks differently. However, if you used the AMP v2 extension, you can also use a similar template on your new AMP Homepage.
To implement it, you need to add a Subcategory widget with a List Template to your new AMP Homepage (see the article on adding AMP widgets in Magento 2):
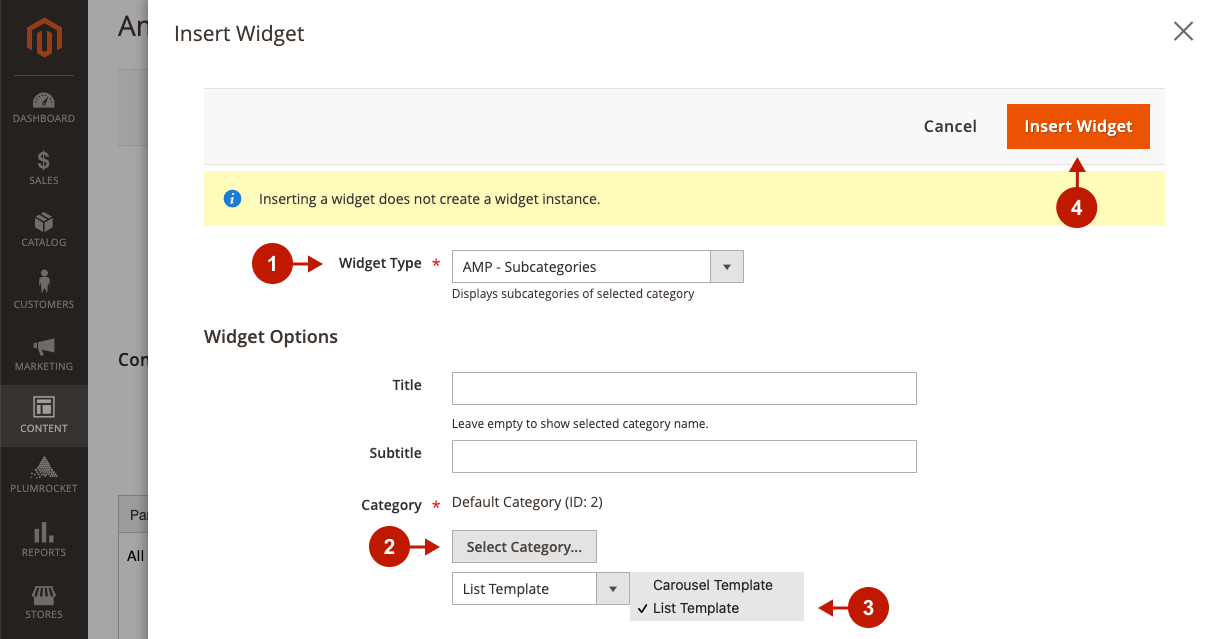
Step-by-step guide:
- Set the Widget Type option to AMP – Subcategories.
- Choose the Default Category to show all main categories in the widget.
- Make sure to select List Template for the Default Category.
- Click Insert Widget to save changes.
After inserting this widget, you can remove other unnecessary content from the Homepage v3.