In this article, you will learn how to configure Magento 2 AMP v3 Extension. Please check the guide below in order to configure it properly.
Configuring Magento 2 AMP Extension
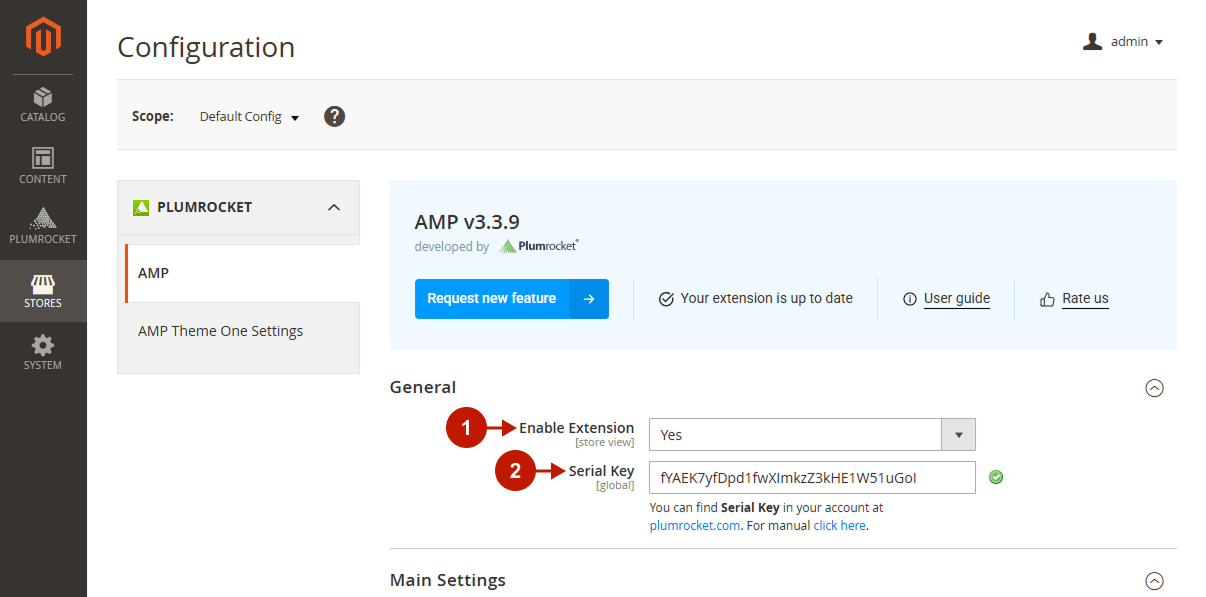
Go to the Plumrocket tab in the main Magento menu -> navigate to AMP -> select Configuration.
General
Step-by-Step actions:
- Enable Extension: this option allows you to enable or disable this Magento 2 AMP plugin.
- Serial Key: enter the unique serial key provided to you after purchasing the extension. Please note: in most cases, this field will be pre-filled with a serial key automatically, and the green checkmark will be displayed. To find and paste your serial key manually, read the Serial Key Activation article.
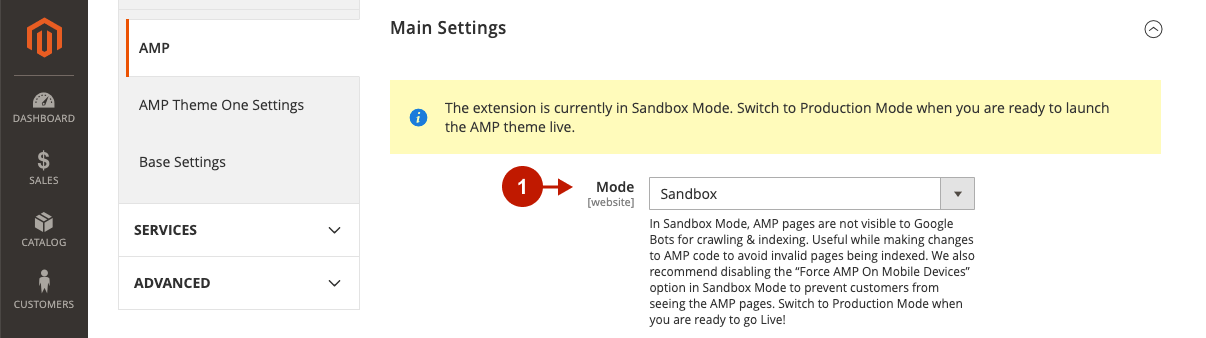
Main Settings
Step-by-Step actions:
- Mode: two modes are available for AMP pages:
- Sandbox mode allows you to hide AMP pages from visitors and prevent them from crawling & indexing by Google Bots. You can use this mode when creating and testing AMP pages until you make them valid. We also recommend disabling the Force AMP On Mobile Devices option to avoid displaying invalid AMP pages to customers.
- Switch to the Production mode when the AMP pages are valid and ready to go live.
Step-by-step guide:
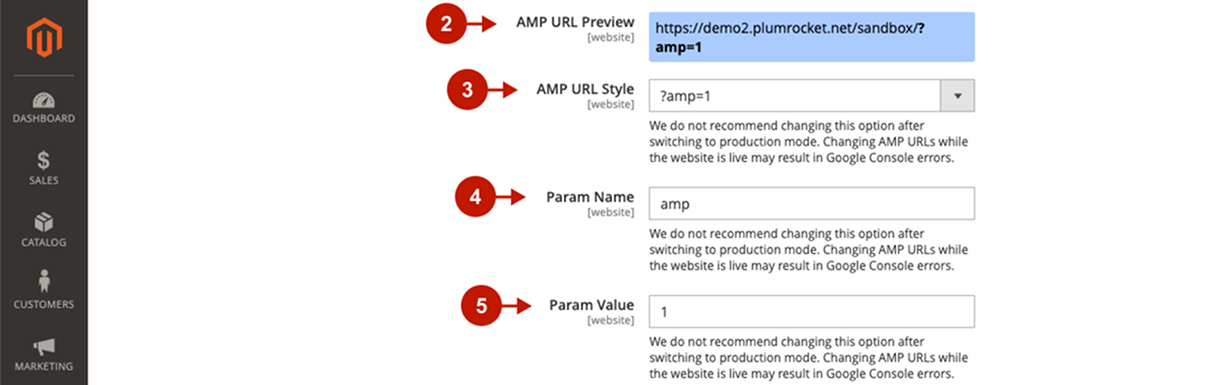
- AMP URL Preview: this GET parameter displays the URL of the AMP version of your website’s homepage. This URL automatically changes when the AMP URL Style and its parameters (Param Name, Param Value, Path Prefix) change.
- AMP URL Style: this is the style of the AMP version of your website pages. We strongly recommend not to change this option after switching to production mode, as this may lead to Google Console errors. The following AMP URL styles are available:
- ?amp=1 – this option is set by default. It is most useful when you upgraded the AMP extension from version 2, since the AMP URL Style was exactly ?amp=1. Now, you can change Param Name (amp) and Param Value (1).
- /amp/ – this URL style is more user-friendly. If you use the Store Code, the amp identifier is added after it (https://your-domain.com/us/amp/).
- Param Name (for AMP URL Style set to ?amp=1): this is the parameter name of the AMP URL Style. We do not recommend changing this option after switching to production mode, as this may lead to Google Console errors.
- Param Value (for AMP URL Style set to ?amp=1): this is your AMP pages value of AMP parameter. Please note that changing this option after switching to production mode may result in Google Console errors.
Step-by-Step actions:
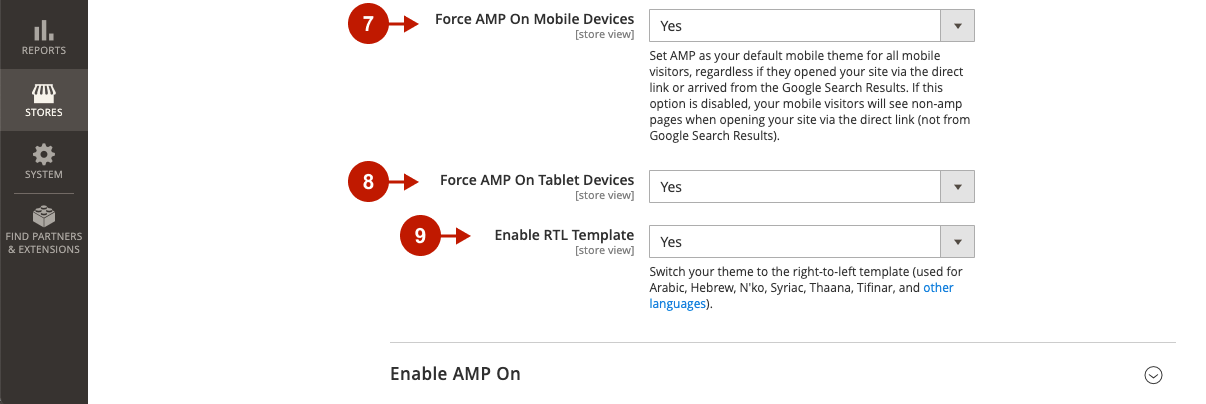
- Force AMP On Mobile Devices:
- Set to Yes to make the AMP version of your website as default for mobile devices. Both visitors who opened your website from a direct link, and those who came from Google Search Results, will arrive on the AMP version of the website.
- Set to No to show non-amp pages for visitors who open your website from a direct link on mobile devices. Those who arrive from Google Search Results Page will see AMP pages.
- Force AMP on Tablet Devices:
- Set to Yes to make the AMP version of your website as default for tablet devices. Both visitors who opened your website from a direct link, and those who came from Google Search Results, will arrive on the AMP version of the website.
- Set to No to show non-amp pages for visitors who open your website from a direct link on tablet devices. Those who arrive from Google Search Results Page will see AMP pages.
- Enable RTL Template: this option allows you to switch your AMP pages script to Right-To-Left.
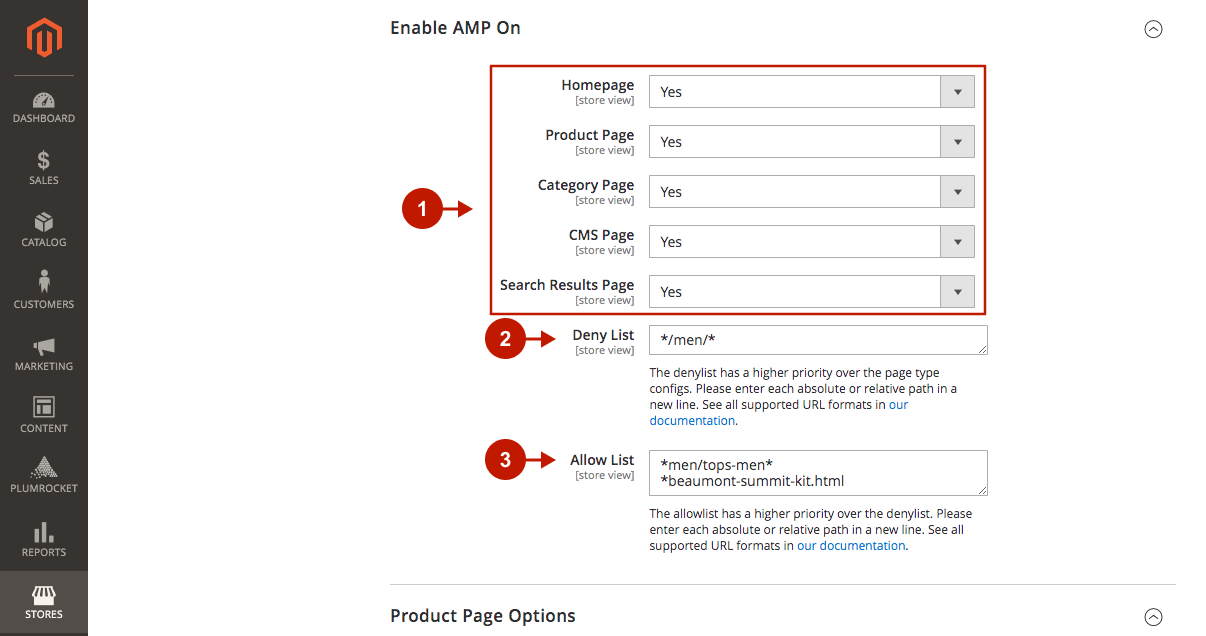
Enable AMP On
Step-by-Step actions:
- Set to Yes for those pages, where you want to enable the AMP mode.
- Deny List: please enter page paths where you want to disable AMP mode. This list has a higher priority over the page type configurations specified in the previous option. The Deny List is useful, for instance, when you want to disable AMP mode for a specific product, category, etc., in case custom functionality is not supported in AMP.
- Allow List: please enter the paths for pages where you want to allow the AMP mode. The Allow List has a higher priority over the Deny List. Moreover, it is useful when enabling AMP only for a specific product/category/CMS page to test.
Product Page Options
Step-by-Step actions:
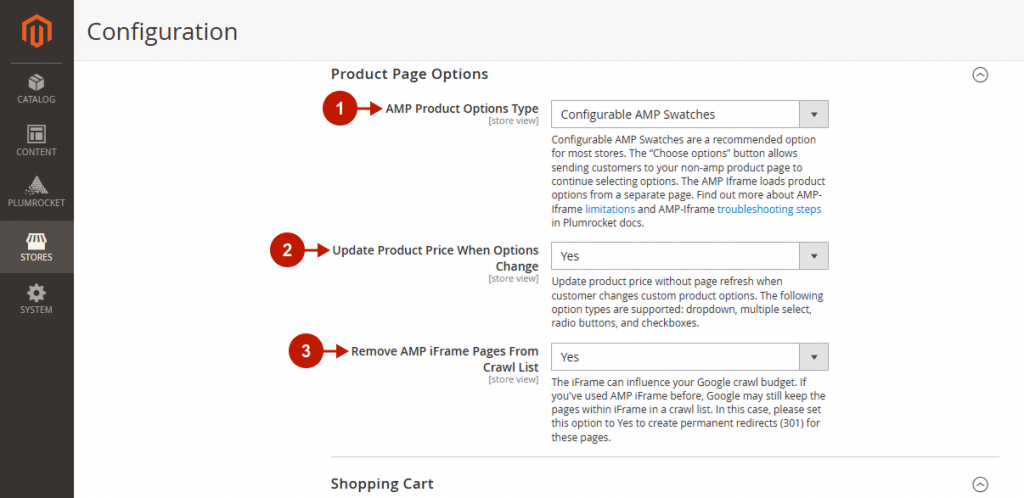
- AMP Product Options Type: please select the type for the AMP product options display. Each type is suitable for a specific type of product:
- The Configurable AMP Swatches option is recommended for most Magento stores. It allows displaying product options in AMP swatches to look like native Magento functionality. Although AMP Swatches are designed to increase the Core Web Vitals score, all custom product options must be implemented manually.
- Set to Choose Options Button to send your visitors to non-amp pages in order to continue selecting product options. This option is useful if custom functionality cannot be implemented in AMP swatches or AMP iFrame takes too long to load product options.
- AMP iFrame allows you to display any custom functionality on your AMP pages in an iFrame, and use any custom javascript. However, this leads to a decrease in the Core Web Vitals score, and the number of products in the cart will not dynamically change.
- Update Product Price When Options Change: set to Yes to update product price instantly, without the page refresh. Importantly, this will only work for the AMP Product Options Type set to Configurable AMP Swatches. Please note that only specific option types are supported: dropdown menu, multiple select, radio buttons, and checkboxes.
- Remove AMP iFrame Pages From Crawl List: set to Yes to remove the AMP iFrame Pages from the crawl list.
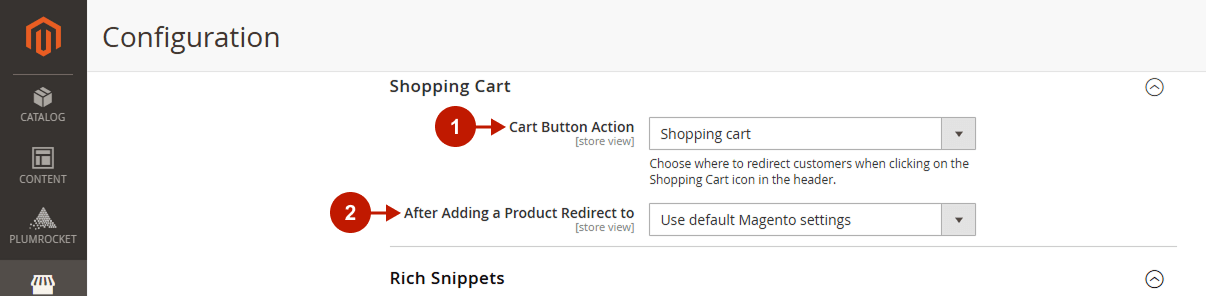
Shopping Cart
Step-by-step guide:
- Cart Button Action: select where customers should be redirected after clicking on the Shopping Cart icon in the header.
- After Adding a Product Redirect to: select where customers should be redirected after adding a product to their cart.
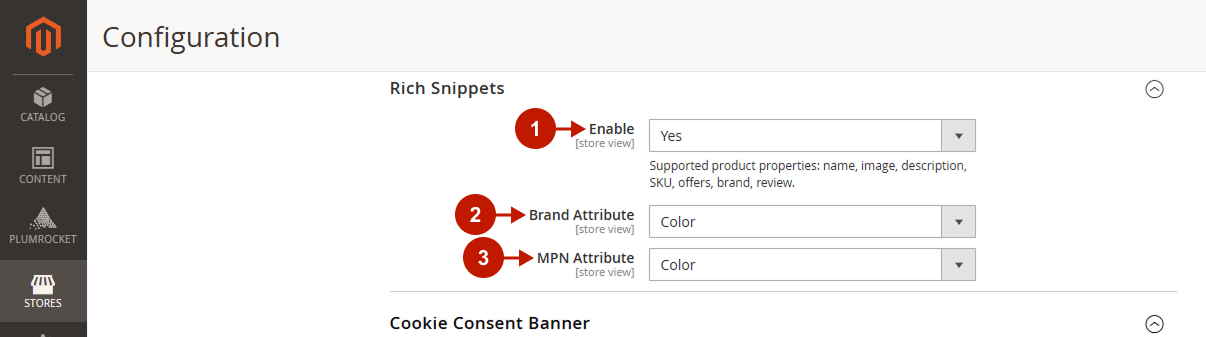
Rich Snippets
Step-by-Step actions:
- Enable: set to Yes to enable rich snippets for AMP pages.
- Brand Attribute: select the brand attribute.
- MPN AAttribute: select the MPN attribute.
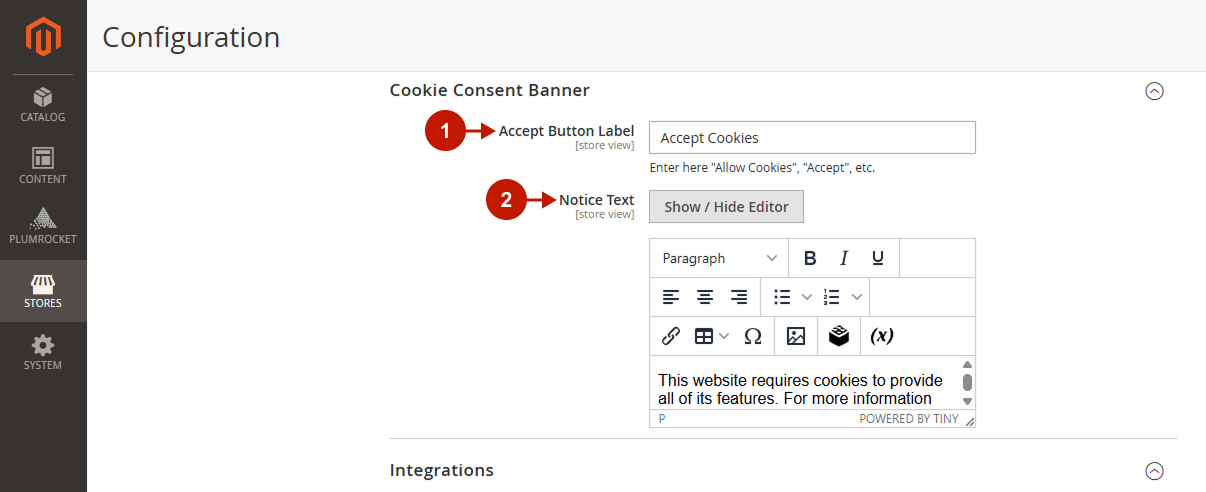
Cookie Consent Banner
Step-by-step guide:
- Accept Button Label: specify the label that should be displayed on the Cookie Acceptance button here.
- Notice Text: type here a text that should be displayed as a cookie notice text.
Integrations
The AMP extension has built-in support of chats, as well as statistics and analytics tools. Go to the AMP integrations page for detailed instructions on how to configure each integration.
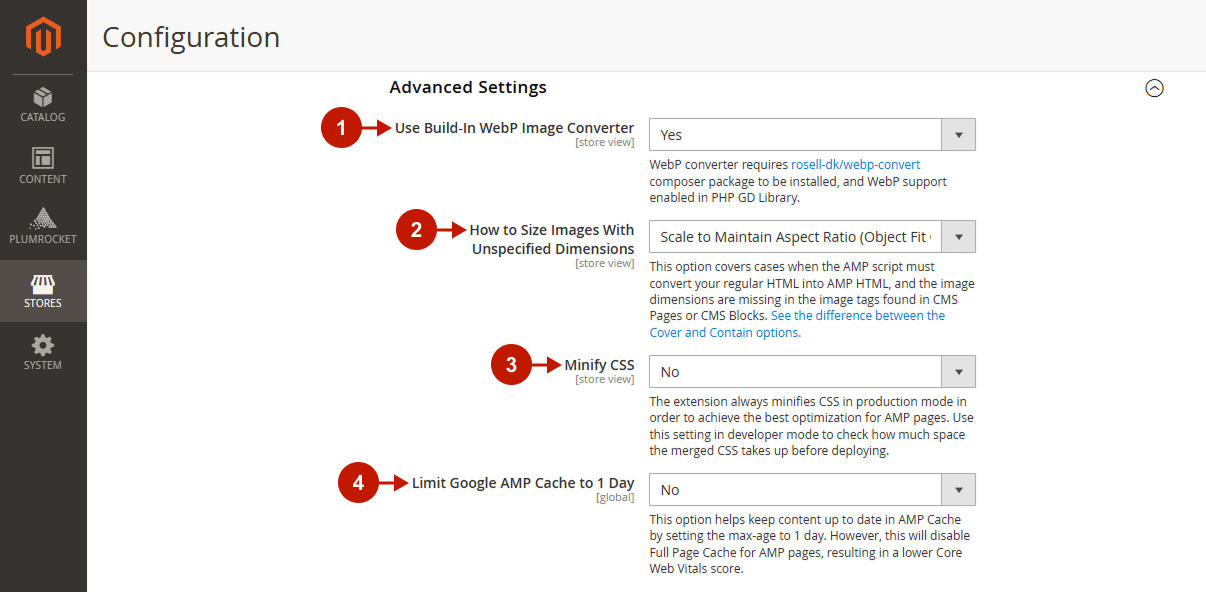
Advanced Settings
In this section, learn how to optimize images for your AMP pages in order to speed up page load and thus achieve a higher Core Web Vitals score.
Step-by-Step actions:
- Use Build-In WebP Image Converter: set to Yes to convert images to a WebP format with a built-in converter.
- How to Size Images With Unspecified Dimensions: select the action to be executed when converting your website from HTML to AMP HTML, if the image dimensions are missing in the image tags of CMS pages or CMS blocks:
- Scale to Maintain Aspect Ratio (Object Fit Contain): select this option in order to increase or decrease the size of images with unknown dimensions to fill the container while preserving the image’s aspect ratio.
- Fill Entire Content Box (Object Fit Cover): select this option to crop images with unknown dimensions to fill the height and width of its container, but maintain the aspect ratio.
- Minify CSS: choose whether the Minify CSS functionality should be enabled while your store is in developer mode. If enabled, you can check how much space the merged CSS takes up before deploying.
- Limit Google AMP Cache to 1 Day: if enabled, it keeps content up to date in AMP Cache by setting the max-age to 1 day. Important Note: this will disable Full Page Cache for AMP pages.
Configuring AMP Theme One
Go to the Plumrocket tab in the main Magento menu -> navigate to AMP Themes -> select Theme One Settings.
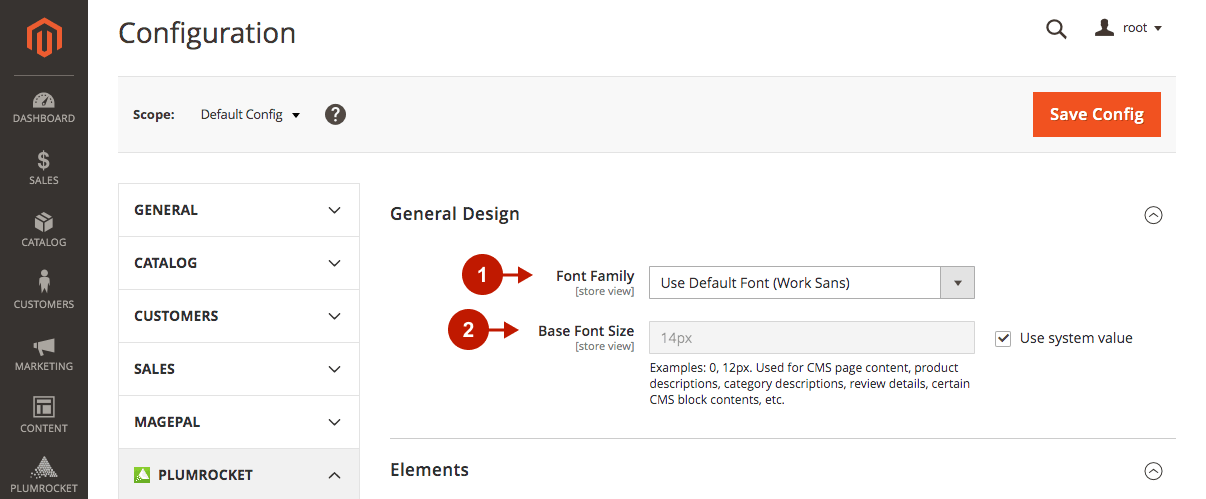
General Design
Step-by-Step actions:
- Font Family: select the Font Family you want to use in your AMP theme.
- Base Font Size: by default, the system value is used. If you want to specify a different font size for AMP pages, uncheck the Use System Value box, and enter the font size in pixels. The font size will be applied for the CMS page content, product and category descriptions, review details, certain CMS block contents, etc.
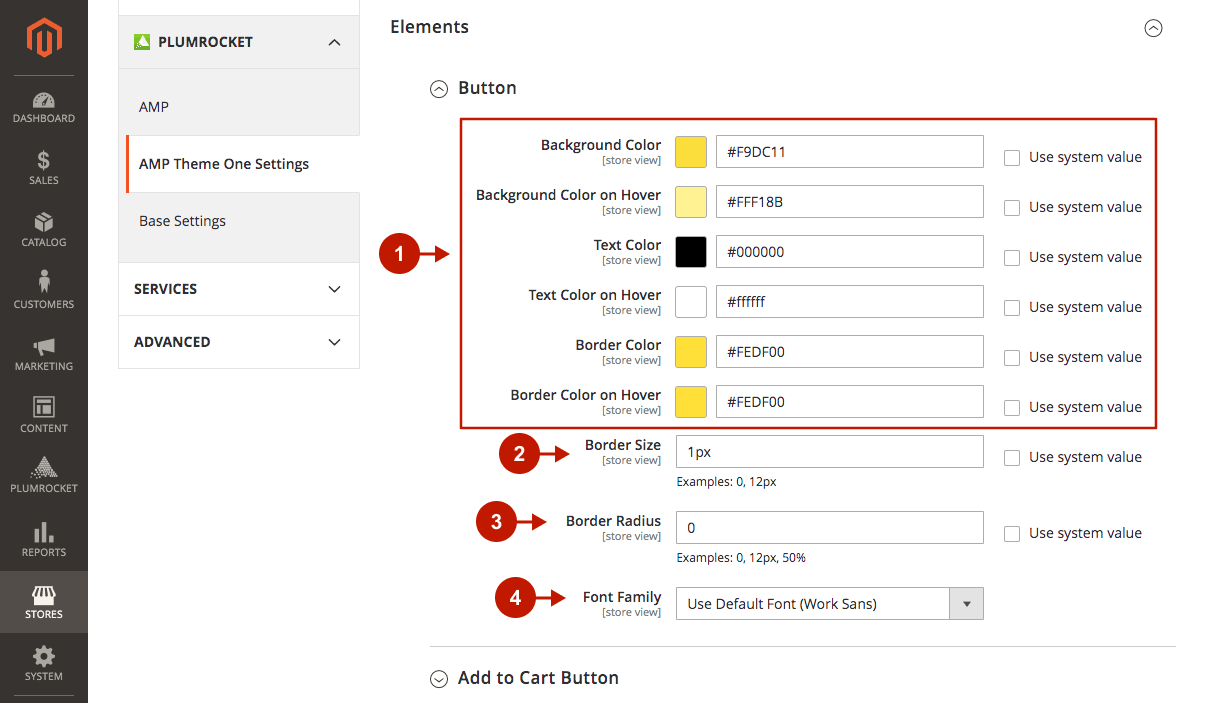
Elements
Button
Step-by-Step actions:
- Configure the appearance of buttons on your Magento AMP theme. Check the Use System Value box if you want to use the default AMP Theme One settings.
- Border Size: specify the size of the button border.
- Border Radius: specify the radius of the button border.
- Font Family: select the font family to use in the button text.
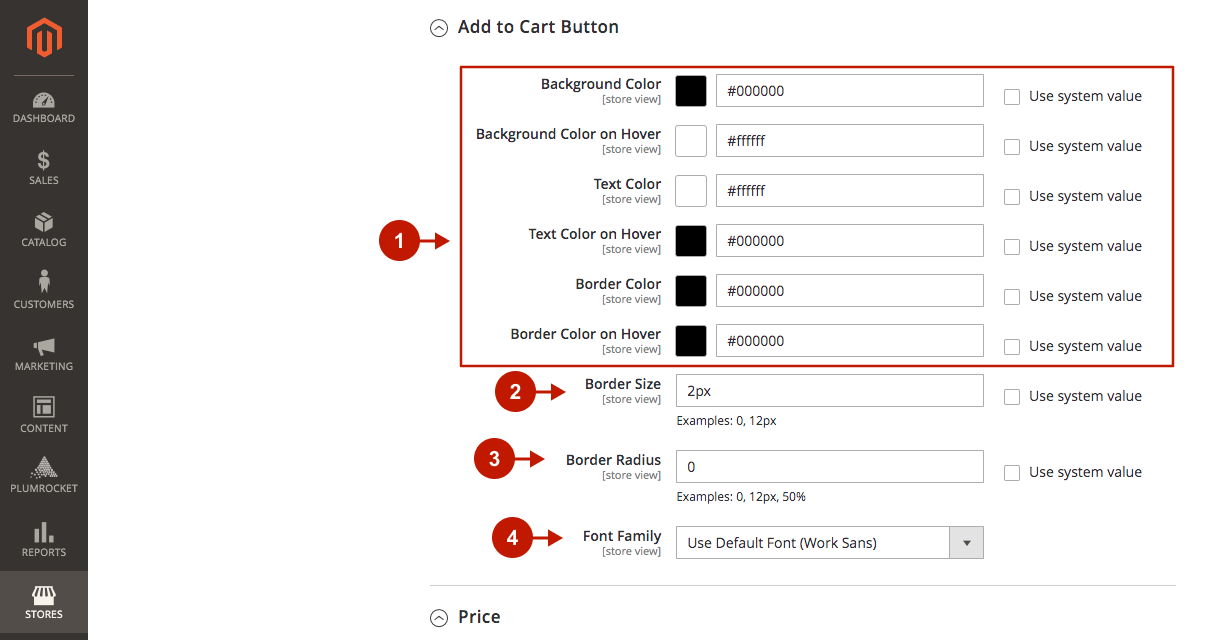
Add to Cart Button
Step-by-Step actions:
- Configure the appearance of Add to Cart buttons on your Magento AMP theme. By checking the Use System Value box, you will use the default AMP Theme One settings.
- Border Size: specify the size of the button border.
- Border Radius: specify the radius of the button border.
- Font Family: select the font family to use in the button text.
Price
Step-by-Step actions:
- Base Color: select the color for the price displayed on products. By checking the Use System Value box, you will use the default AMP Theme One settings.
- New Price Color: select the color for the new price when the discount is applied.
- Old Price Color: select the color for the old price.

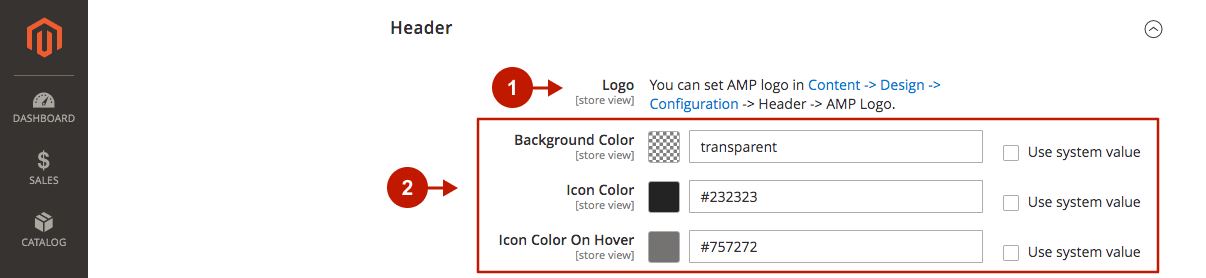
Header
Step-by-Step actions:
- Logo: follow the instructions in order to set your website’s logo for AMP pages. Check the Use System Value box if you want to use the default AMP Theme One settings.
- Specify colors for the header’s background and icons (menu, wishlist, cart).
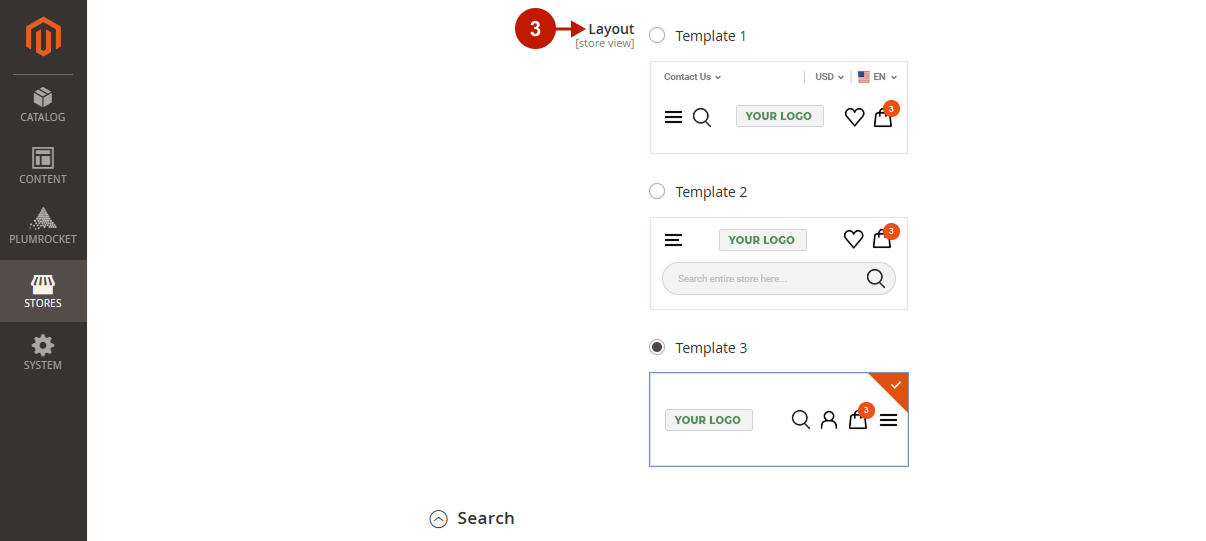
Step-by-Step actions:
- Layout: select the layout template of the header with a different arrangement of search, menu, wishlist, cart, and other icons.
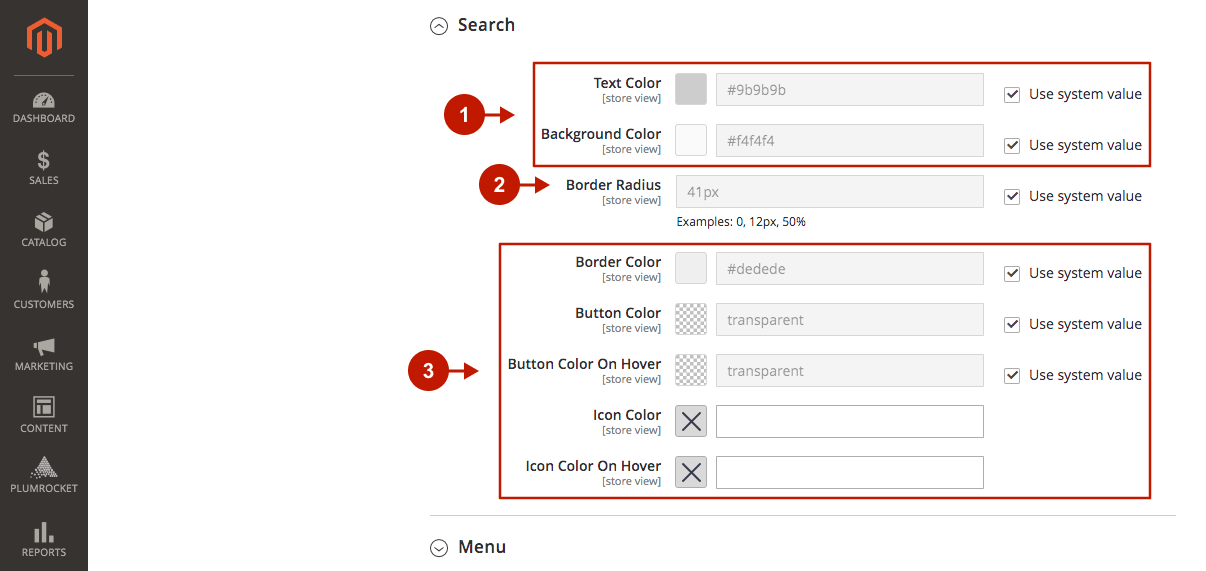
Search
Step-by-Step actions:
- Please specify the text and background color of the search bar that opens when clicking on the search icon in the header. By checking the Use System Value box, you will use the default AMP Theme One settings.
- Border Radius: Please specify the border radius of the search bar in pixels.
- Please select the colors of the border, buttons, and icons displayed on the search bar.
Menu
Step-by-Step actions:
- CMS Block: here, you can select your custom CMS block displayed in the menu below the website navigation.

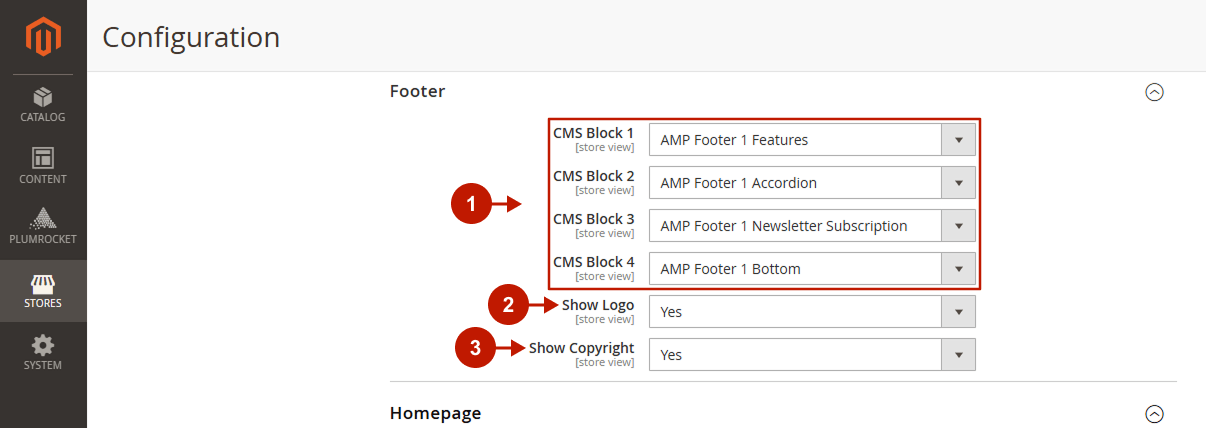
Footer
Step-by-Step actions:
- CMS Block: you can build your own website footer by selecting four custom CMS blocks.
- Show Logo: choose whether the store logo should be displayed in your AMP Theme One footer.
- Show Copyright: choose whether the copyright should be displayed in your AMP Theme One footer.
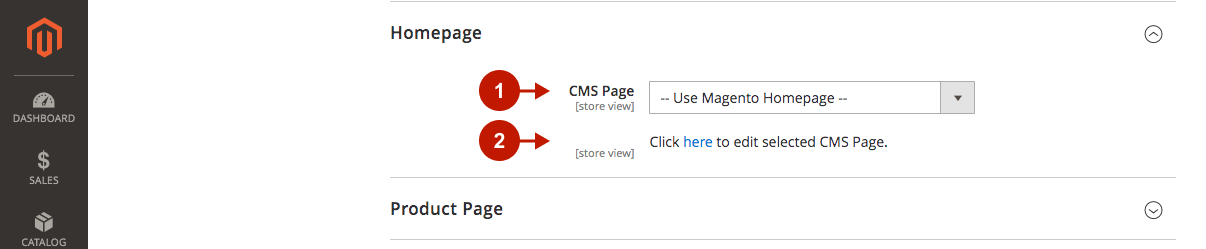
Homepage
Step-by-Step actions:
- CMS Page: select the CMS page that will be displayed in the AMP version of your AMP pages. If you choose to use Magento Homepage, the content will be automatically converted to the AMP format. Also, you can choose the AMP Theme One Homepage template that will display the content directly in the AMP format.
- Click on the provided link to edit the selected CMS page. There, you can specify different content for AMP pages.
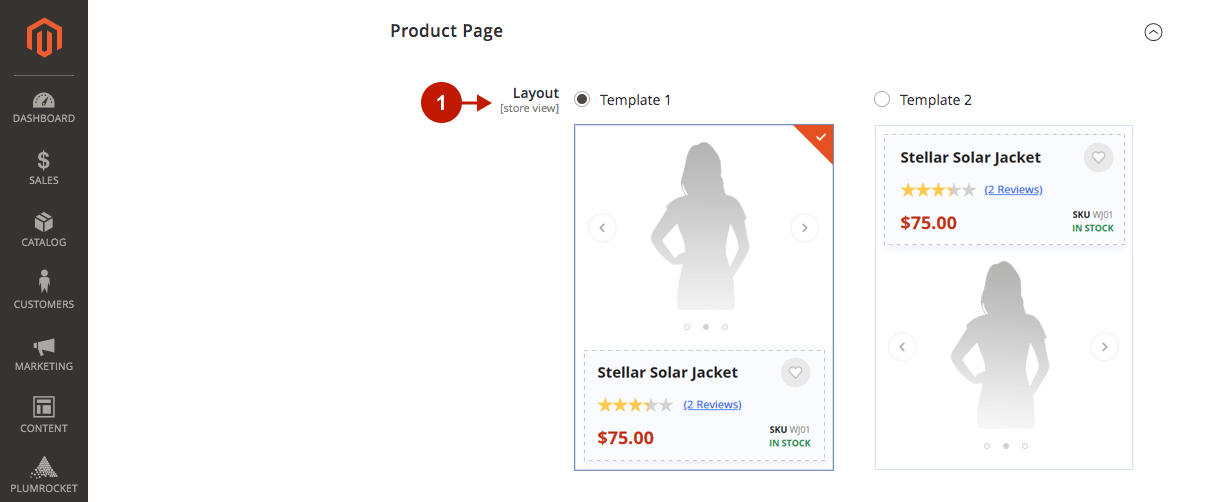
Product Page
Step-by-Step actions:
- Layout: please select the template for the Product Page layout.
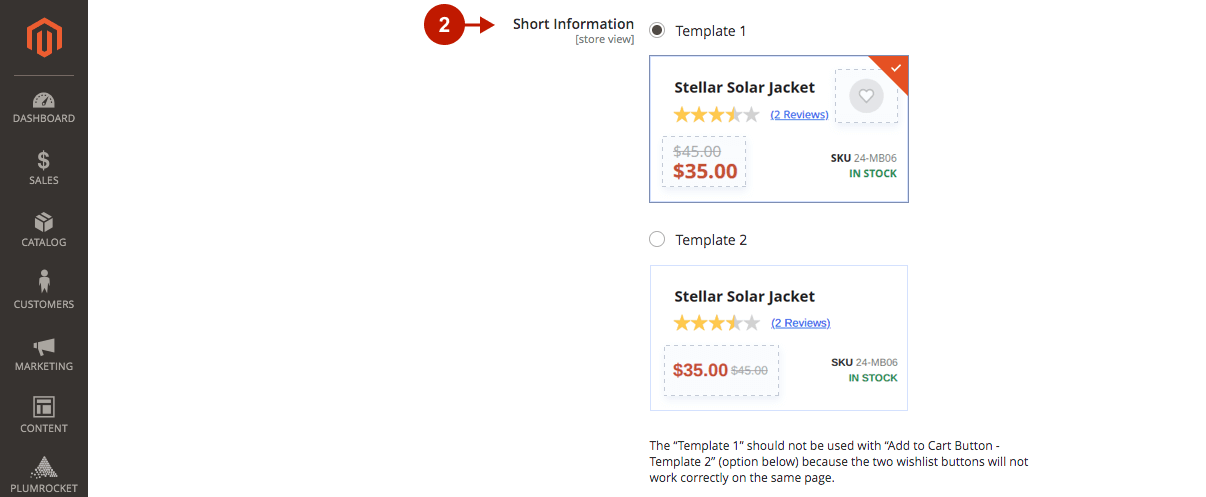
Step-by-Step actions:
- Short Information: select the template for product short information display. Please note that Template 1 should not be used whe Template 2 for the Add to Cart Button option is selected, as the two wishlist buttons will not work correctly.
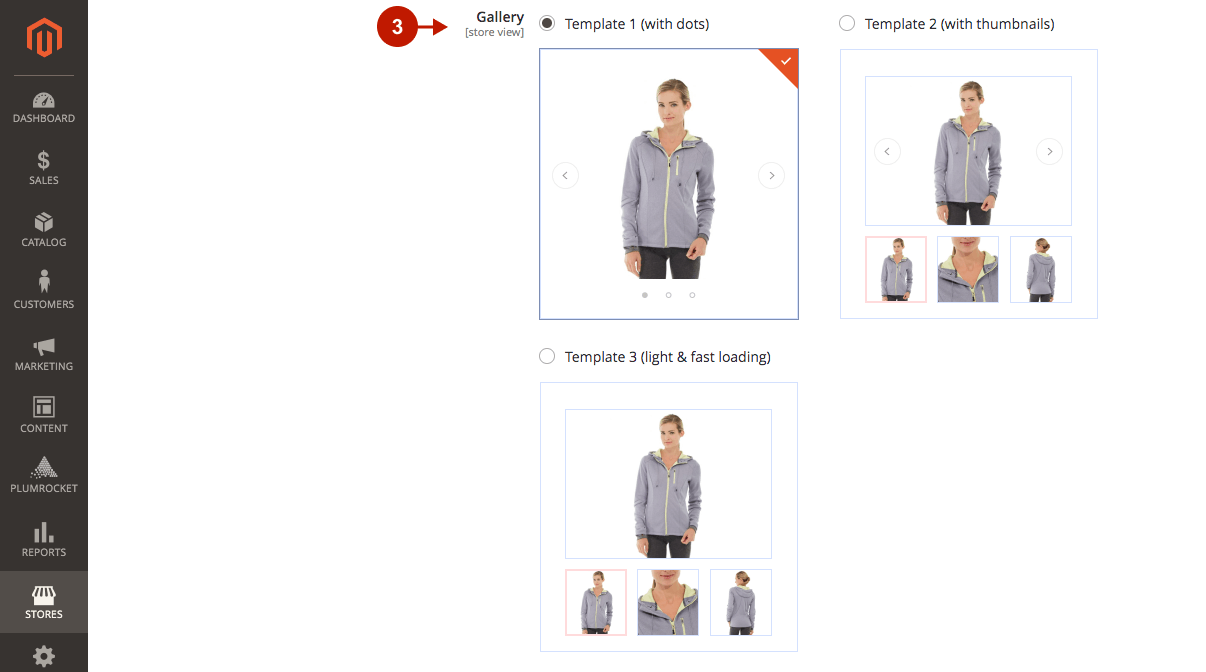
Step-by-Step actions:
- Gallery: please choose the template for product gallery. Template 3 is the most lightweight and helps reach a higher Core Web Vitals score.
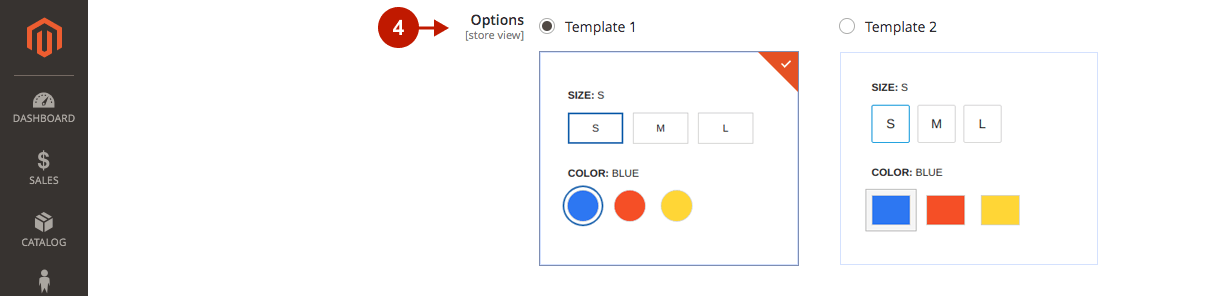
Step-by-Step actions:
- Options: please select the template for product custom options.
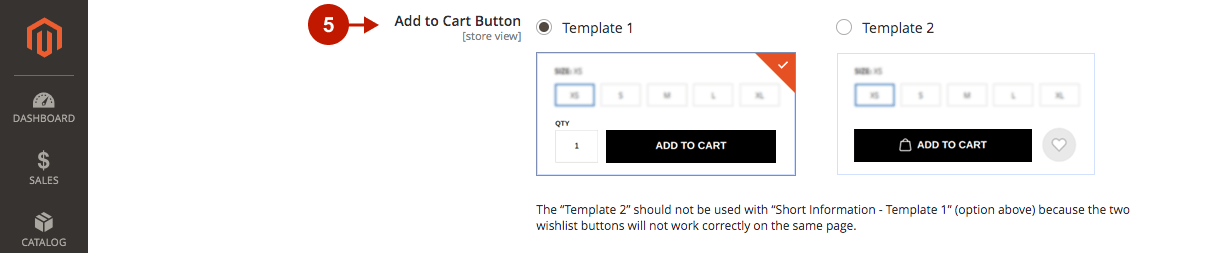
Step-by-Step actions:
- Add to Cart Button: select the template for Add to Cart button display. Please note that Template 2 should not be used with Template 1 for the Short Information option, as the two wishlist buttons will not work correctly.
Step-by-Step actions:
- Details: please choose the template for the display of product details.

Step-by-Step actions:
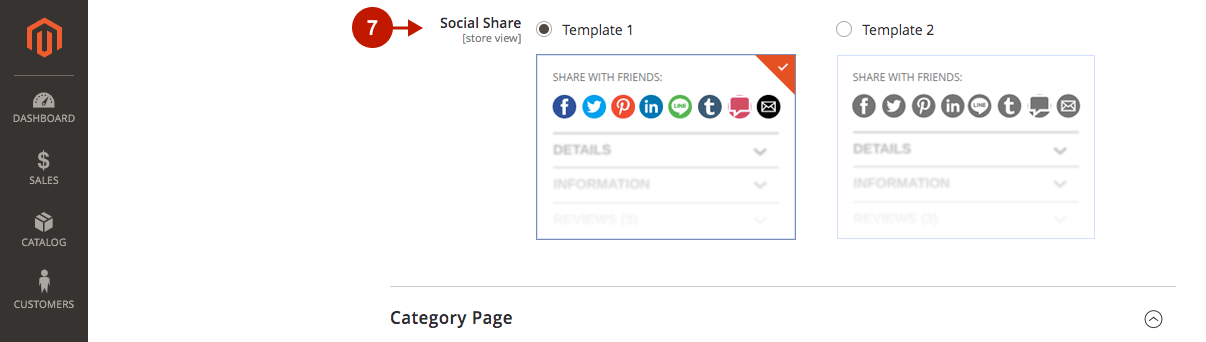
- Social Share: please select the display of social share buttons on the AMP Theme One.
Category Page
Product List
Step-by-Step actions:
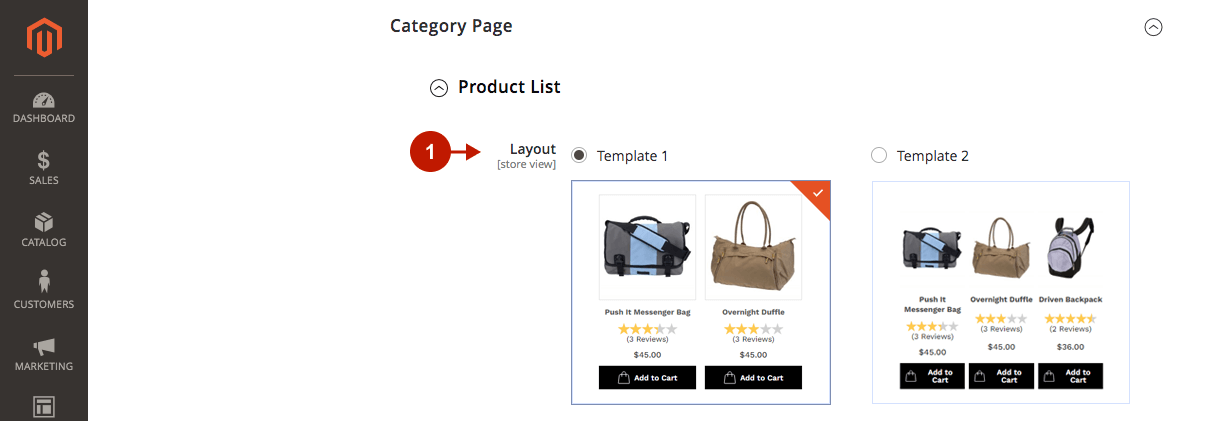
- Layout: here, you can select the layout template of the product list display.
Step-by-Step actions:
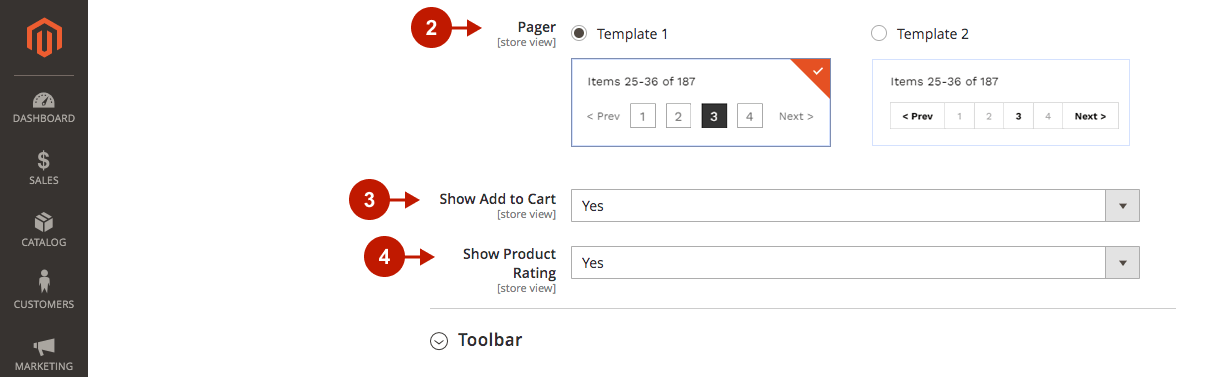
- Pager: please select the pager template for the Magento AMP Theme One.
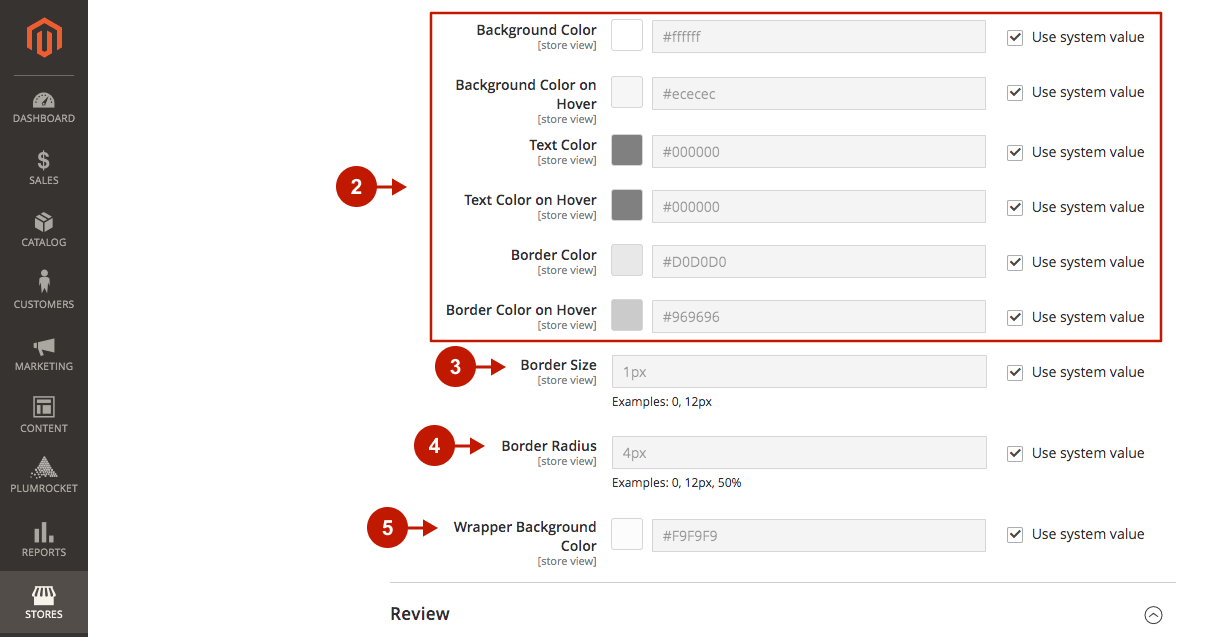
Toolbar
Step-by-Step actions:
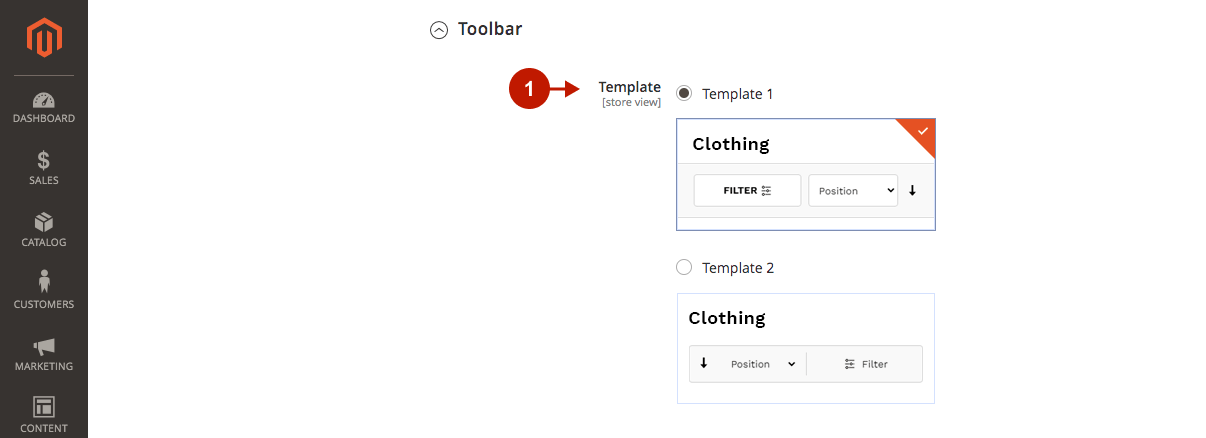
- Template: please choose the display of the site toolbar.
Step-by-Step actions:
- You can customize the look of the toolbar by changing the colors of the background, text, and border.
- Border Size: specify the toolbar border size in pixels.
- Border Radius: select the border radius of the toolbar in pixels or percentages.
- Wrapper Background Color: you can change the background color of the toolbar wrapper.
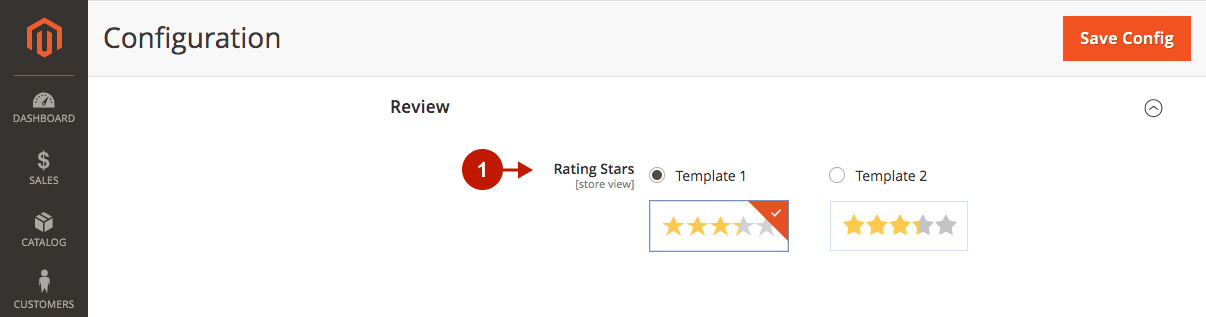
Review
Step-by-Step actions:
- Rating Stars: you can select or change the template for the rating stars in the AMP Theme One.