Creating Zanox Affiliate Program in Magento 2
In this article, you will learn how to create and configure Zanox Marketing Network in the Magento 2 Affiliate Programs module. Please, check the following step-by-step guide.
Step-by-Step actions:
- Go to the “Plumrocket” tab in the main menu.
- Navigate to the “Affiliate Programs” tab > select “Manage Affiliate Programs”.

Step-by-Step actions:
- Press on the “Add New Affiliate” button.

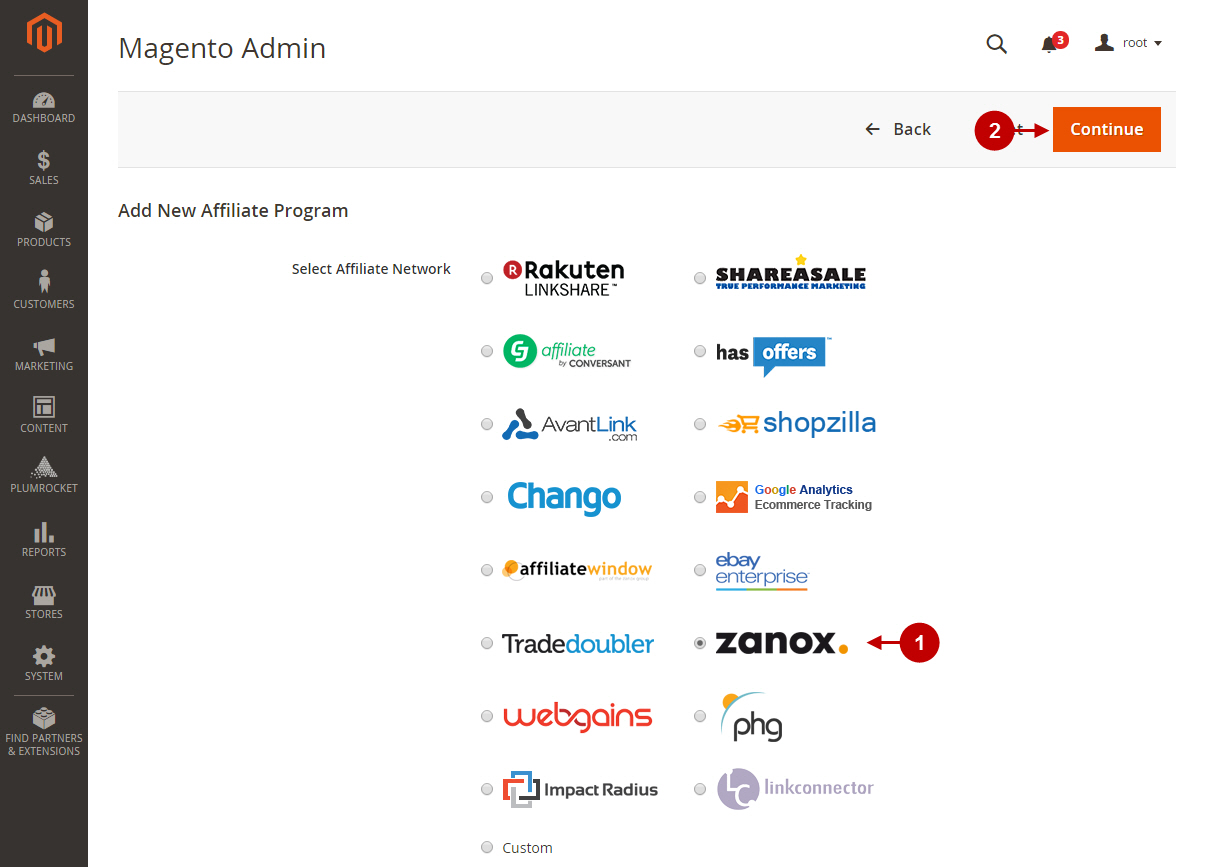
Step-by-Step actions:
- From the list of the affiliate programs select “Zanox”.
- Press the “Continue” button.
Configuring Zanox Affiliate Program in Magento 2
After you created new Zanox affiliate program in Magento 2, you need to configure it. Please, follow the steps below.
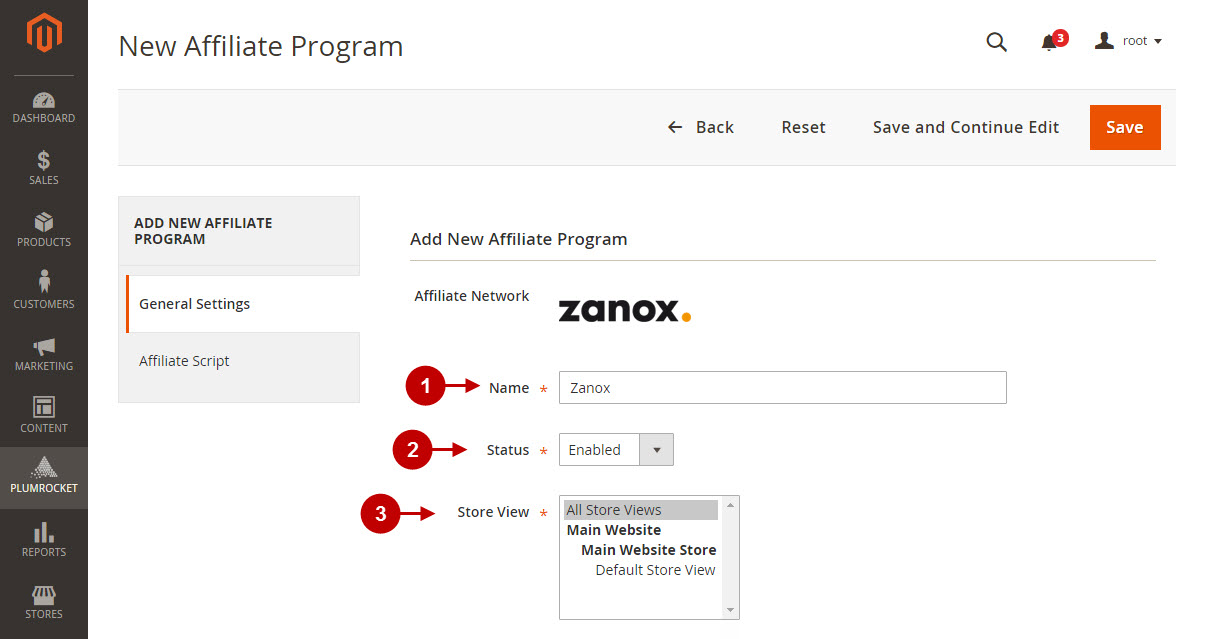
Step-by-Step actions:
- Specify the “Name” of your Affiliate Program.
- The “Status” option allows you to enable or disable the Affiliate Program.
- In the “Store View” section you may select the store view(s) where your Magento 2 Affiliate Program will be executed.
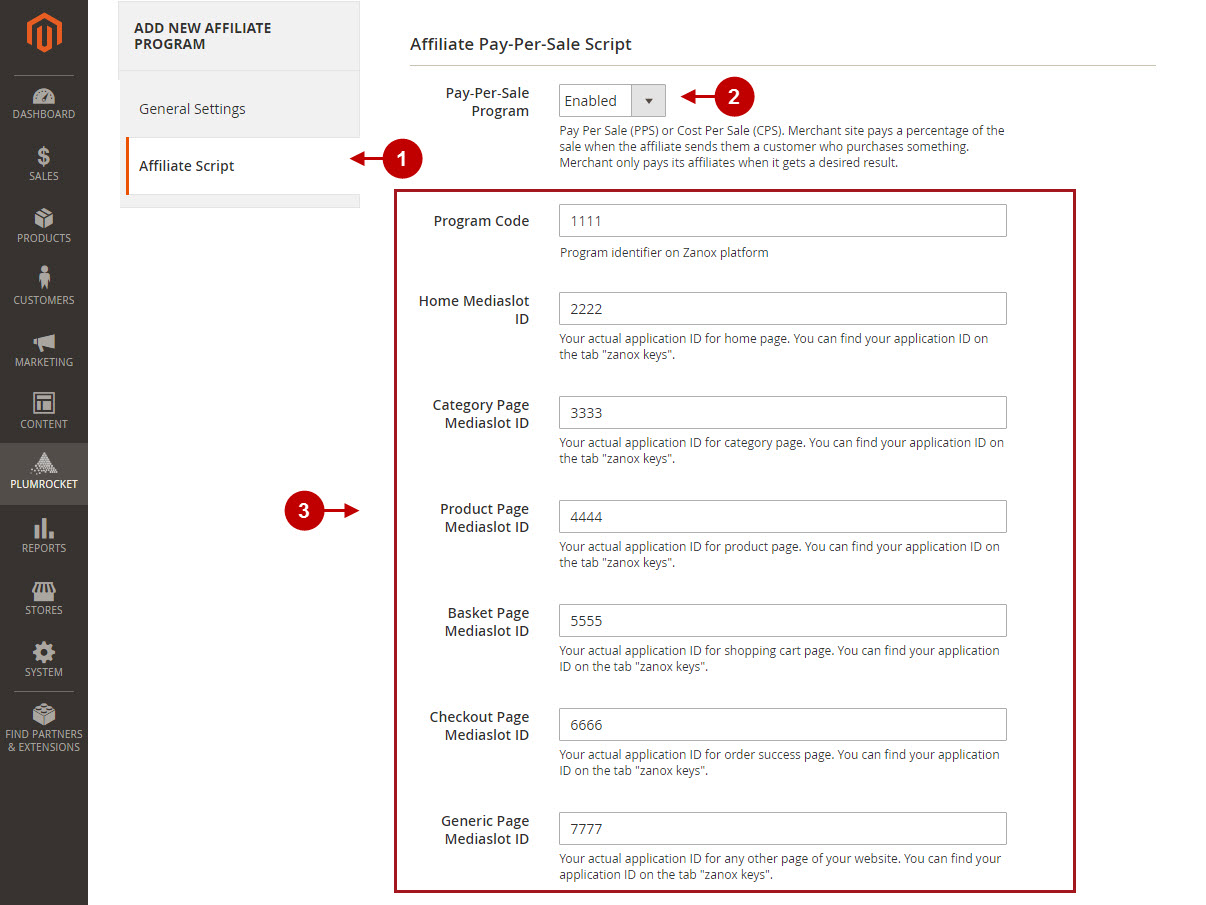
Step-by-Step actions:
- Navigate to the “Affiliate Script” tab.
- “Pay-Per-Sale Program” allows you to enable or disable Pay Per Sale (PPS) or Cost Per Sale (CPS) Zanox program on your website.
- In this section you can set up “Program ID”, as well as “Mediaslot IDs” for various pages of your Magento store. These IDs can be found in your Zanox configuration.
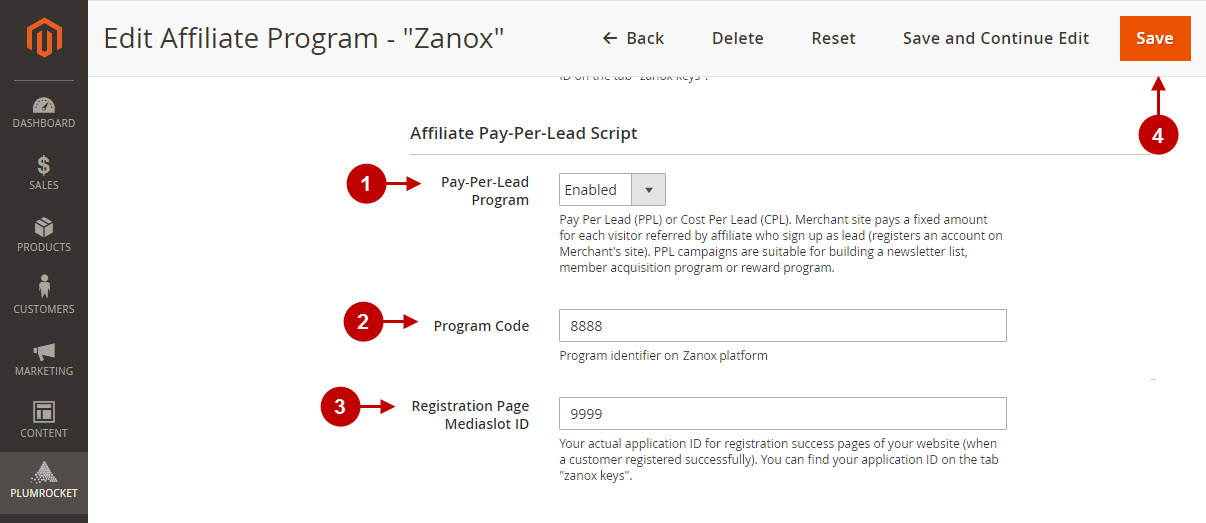
Step-by-Step actions:
- “Pay-Per-Lead Program” allows you to enable or disable Pay Per Lead (PPL) or Cost Per Lead (CPL) Zanox program on your website.\
- “Program Code”: enter the program identifier which can be found in your Zanox configuration.
- “Registration Page Mediaslot ID”: this ID can be found in your Zanox configuration.
- Save your settings by pressing the “Save” button.
Testing Zanox Affiliate Tracking Code in Magento 2
In order to test and check whether your Magento 2 Affiliate Program has been installed properly, please follow the step-by-step guide below.
Step-by-Step actions:
- Create a test order at your Magento 2 frontend. Then proceed to Order Success Page.
- Using your browser’s Developer Tool (“F12” key on your keyboard) open search bar (“Ctrl+F” keys on your keyboard) and look for Conversion Tag which contains api.zanox.com.
- Your Conversion Tag will appear.
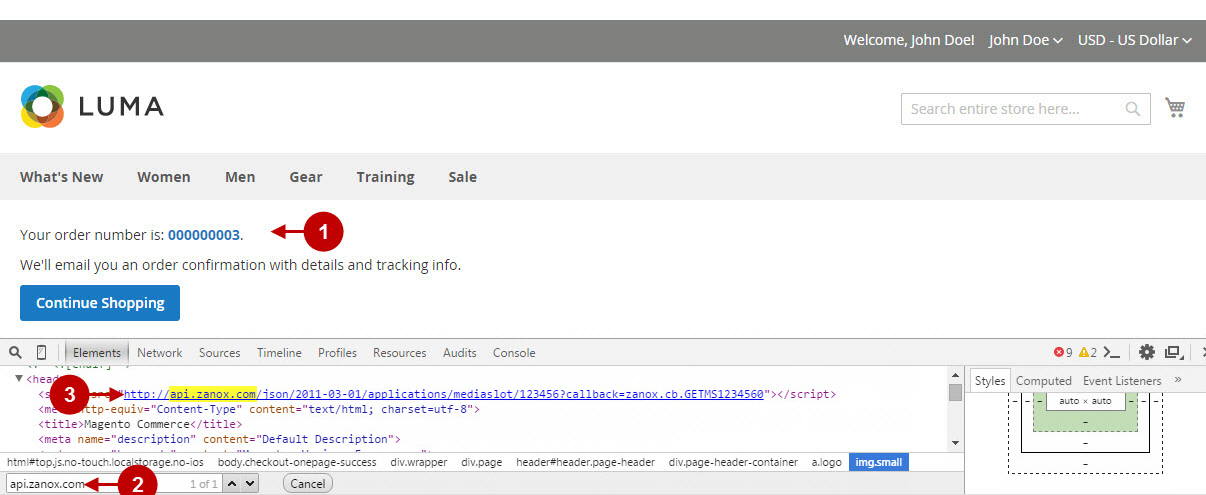
Once you locate the Conversion Tag – this means your Zanox Affiliate Marketing Network has been set up correctly. Now log into your account at zanox.com and verify that your transactions are being tracked correctly.