Installation
Here you will learn how to correctly install the Magento Newsletter Popup Extension.
Important Information:
- First of all make sure your system requirements meet the ones necessary for the correct functioning of our Magento Newsletter Popup Extension. For more details on system requirements read Magento system requirements.
- Before you proceed with extension installation – you need to make sure that Compilation is disabled in your Magento. Please follow the steps outlined in this Wiki article to disable Compilation. Note: You don’t have to make step 2 if Compilation is permanently disabled in your Magento.
- Before you proceed with the installation – please, make sure to enable Magento Cache.
Manual Installation
To install this magento popup newsletter extension, you will need the archive containing it. The unpacked archive and catalog of files are shown below.
Detailed description:
- This is the original archive to be unpacked.
- This is the unpacked catalog of files.

In order to perform FULL installation of Magento Newsletter Popup v1.x Extension, please do the Step 1 and Step 2 below:
Step 1
Detailed description:
- In the extracted folder navigate inside “step1” directory and upload its content into your store root.

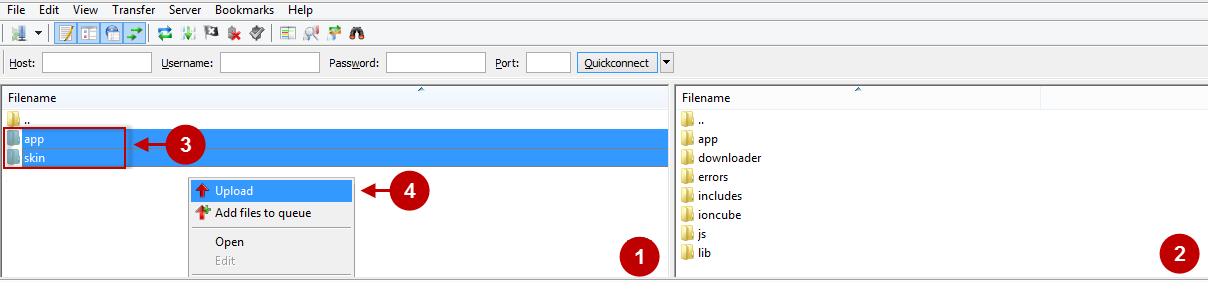
You may use any FTP-client in order to upload files to the server. (To show how it works we used the FTP-client FileZilla.)
Detailed description:
- This is your client side. You will see the unpacked catalog containing the Magento Newsletter Popup Extension.
- This is your root directory on server side. This is where the files should be uploaded.
- All the files must be uploaded to the server. Select files and press the right mouse button.
- Select the “Upload” option for these files.
Step 2
Detailed description:
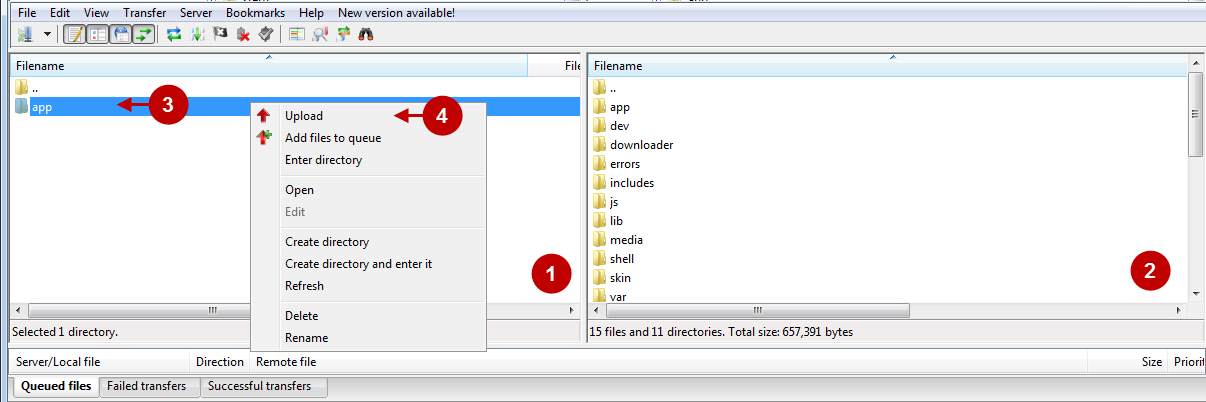
- In the extracted folder navigate inside “step2” directory and upload its content into your store root.

Detailed description:
- This is your client side. You will see the unpacked catalog containing the extension.
- This is your root directory on server side. This is where the files should be uploaded.
- All the files must be uploaded to the server. Select files and press the right mouse button.
- Select the “Upload” option for these files.
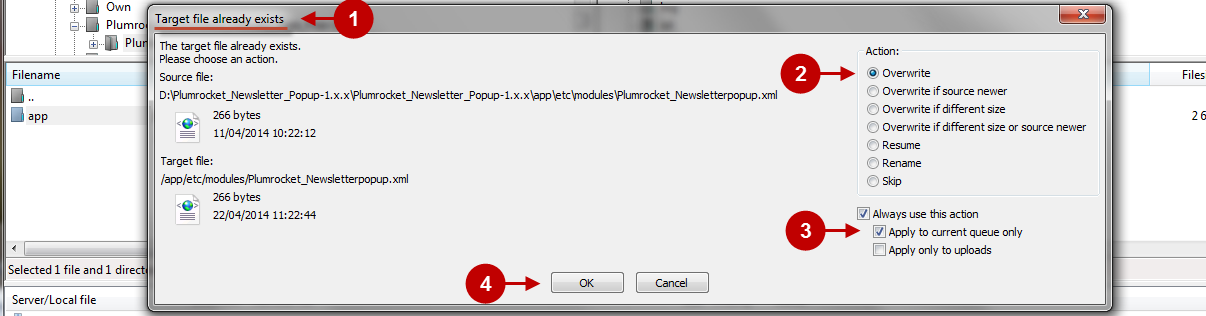
The screenshot below depicts possible difficulties that can occur when you upload the files. In case there are identical files on the server, they should be overwritten. Below you will find detailed tips on how to overwrite files (when using the FTP-client FileZilla):
Step-by-Step action:
- If you receive the notification “Target file already exists” from your FTP-client, please, follow the tips described below.
- Select the “Overwrite” radio button in order to overwrite files.
- Tick the “Apply to current queue only” ?heckbox in order to save these settings for all similar cases of current queue configuration in the future.
- Press “OK”.
Clear Magento Cache
When the magento email popup is installed, don’t forget to clear Magento cache.
To do this, follow the instructions below:
Step-by-Step action:
- Go to the Admin Panel >> System.
- Click on Cache Management.
Step-by-Step action:
- Press the “Flush Magento Cache” button.
Important Information:
After the extension is installed successfully you can enable the magento compilation. Note: You don’t have to enable compilation if it was disabled prior to extension installation. Please follow the steps outlined in this Wiki article if you decide to run the compilation.
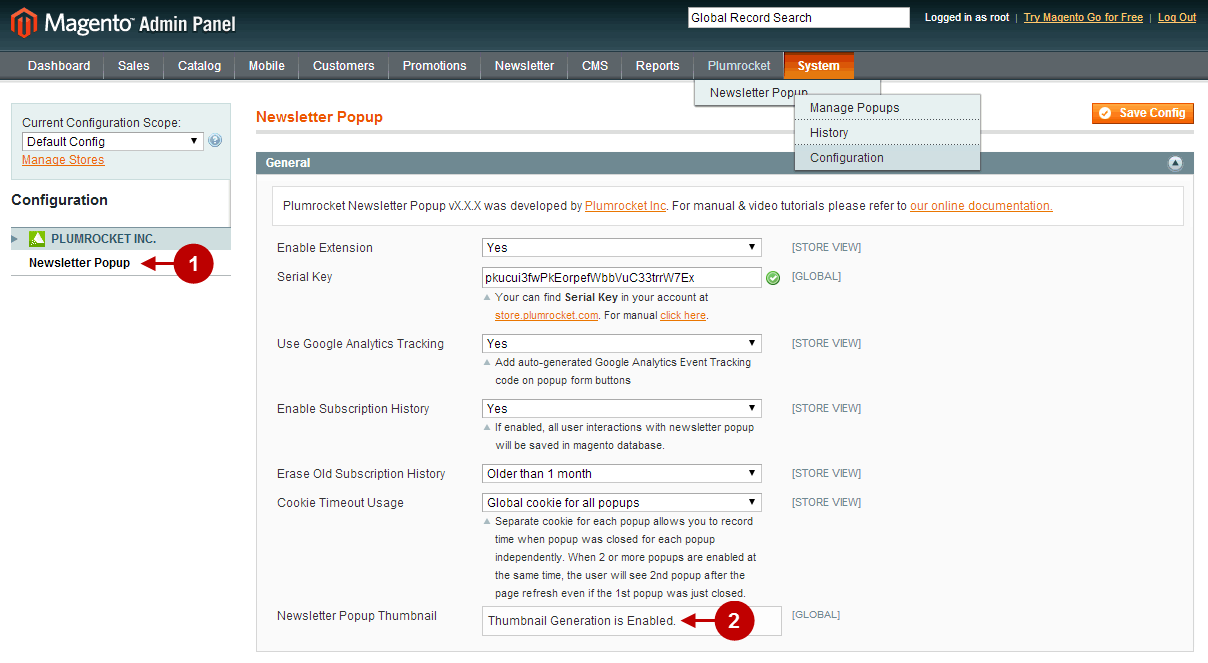
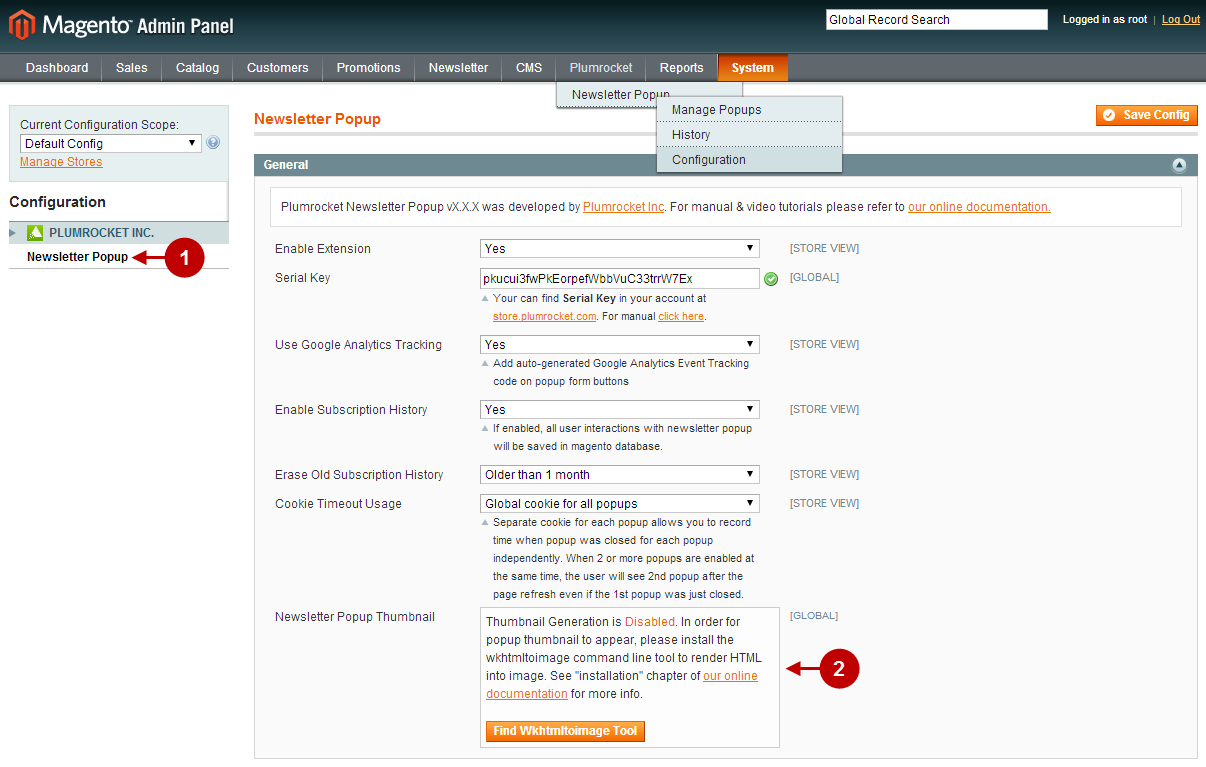
Sign-out and Sign-in back to Admin Panel. Then you will see the installed Magento Newsletter Popup Extension as shown below. For more information on our Newsletter Popup Magento Extension’s preview and settings visit our “Configuration” section.
Detailed description:
- Click on “Plumrocket”.
- If there is “Newsletter Popup” tab in the list, it means that the Newsletter Popup Module from Plumrocket Inc. has been successfully installed.

License Installation
Important Information:
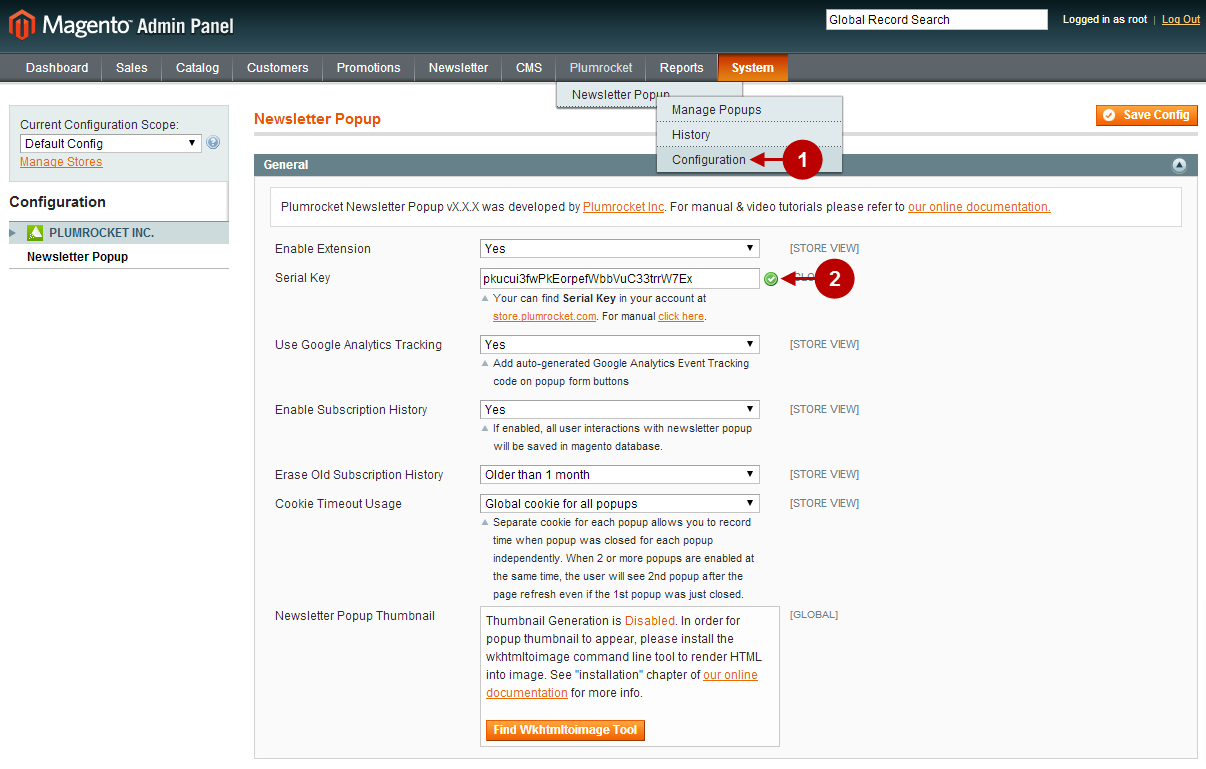
- Click on “Plumrocket -> Newsletter Popup -> Configuration”.
- In most cases your Serial Key should appear automatically. If you see this green check mark – this means that product Serial Key has been successfully activated. Now it is safe to enable the extension. However, if the green check mark is not there – you will need to enter your product Serial Key manually. In order to find and activate your Serial Key – please follow the License Installation instructions.
Next Step > Configuring and Enabling Newsletter Popup Extension
Newsletter Popup Thumbnail Generation
At some point in order to enable Newsletter Popup thumbnail generation you will need to install the wkhtmltoimage command line tool (which is a part of wkhtmltopdf command line tool). This option is disabled by default as shown below.
Step-by-Step action:
- In your Magento backend please go to the “Configuration” section of the Newsletter Popup Extension.
- You will see that the option “Thumbnail Generation” is disabled by default.
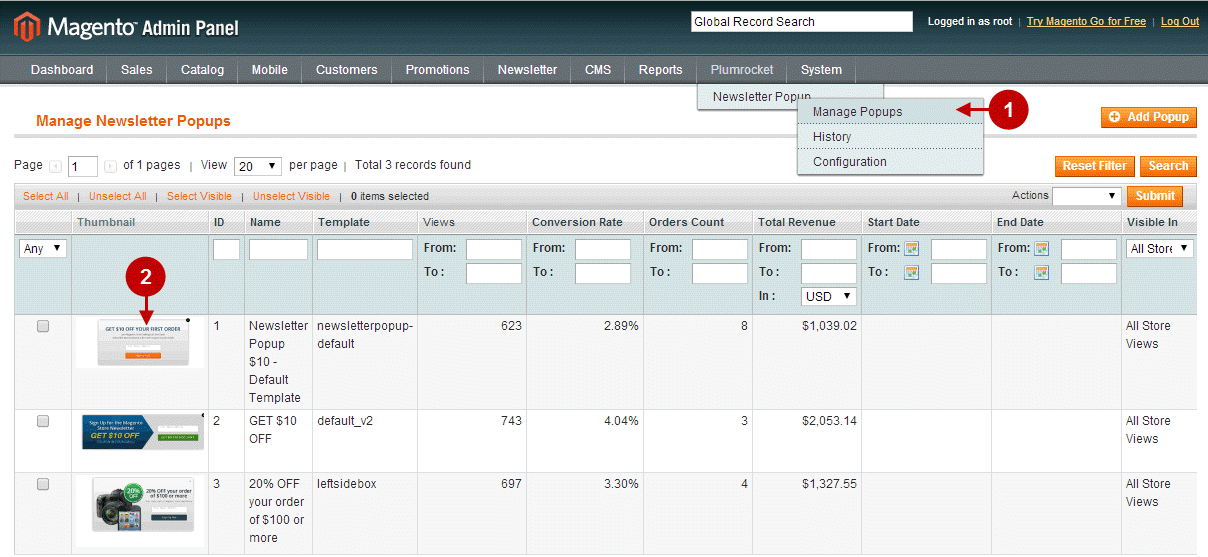
This option is used for generating Newsletter Popup thumbnails that display in the “Manage Popups” grid as shown below.
Step-by-Step action:
- Go to “Manage Popups” section of Newsletter Popup extension.
- Thumbnails of your Newsletter Popups will be available in the grid once this option is enabled.
Important Information:
Please note that enabling this option is not obligatory , however it is a useful tool that will help admin to visually distinguish multiple popups at the backend.
In order to enable Newsletter Popup Thumbnail Generation option, please follow the step-by-step instructions below.
Step-by-Step action:
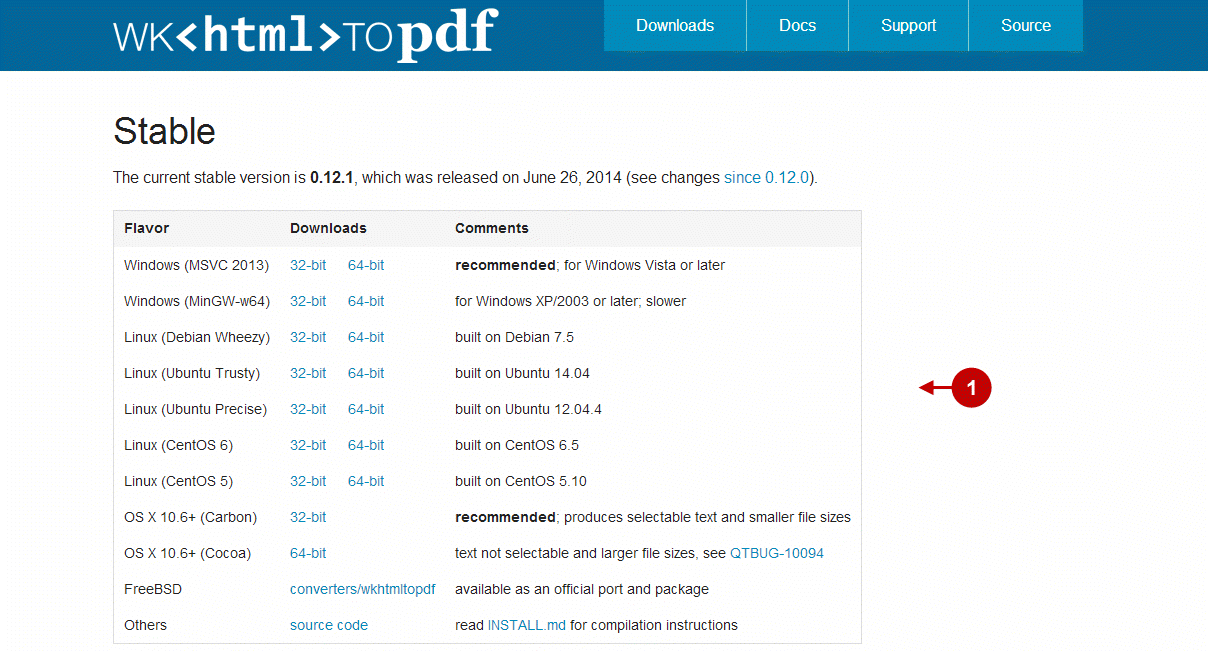
- Go to wkhtmltopdf official page and click on the “Downloads” link .
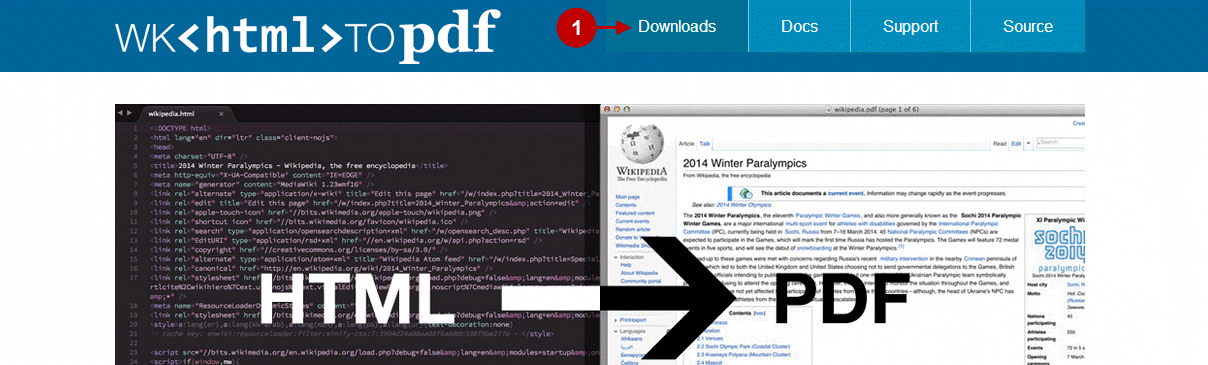
Step-by-Step action:
- Choose and download the needed archive from the list.
Important Information:
Once you’ve downloaded the archive/file – you will need to pass it to your server administrator (or to your hosting support) with a request to install it on your server .
After successful installation of wkhtmltopdf command line tool for Newsletter Popup Thumbnail Generation the according option should become enabled in your Magento backend as shown below.
Step-by-Step action:
- In your Magento backend please go to the “Configuration” section of the Newsletter Popup Extension.
- You will see that the option “Thumbnail Generation” is now enabled.