Managing Criteo in Magento
In this article, you will learn how to create and configure the Criteo Affiliate Program in the Magento Affiliate Programs extension. Please follow the step-by-step instructions below.
Step-by-Step action:
- In your Magento Backend please go to “Plumrocket” in the main menu.
- From the list of extensions select “Affiliate Programs” Magento Affiliate Extension.
- Click on “Manage Affiliate Programs”.

Step-by-Step action:
- Press on “Add New Affiliate Program”.

Step-by-Step action:
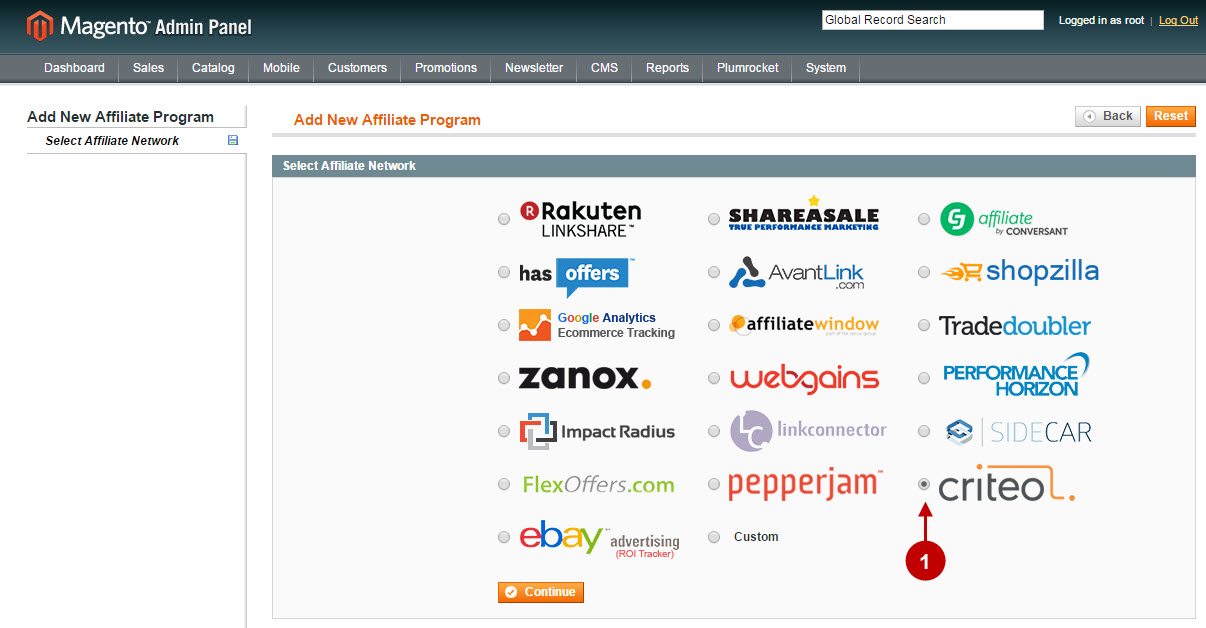
- Select “Criteo”.
- Press “Continue” button.

Configuring Criteo Network in Magento
Once you created the Affiliate by Criteo Affiliate Program, you will need to configure it. Please follow the step-by step instructions below.
Step-by-Step action:
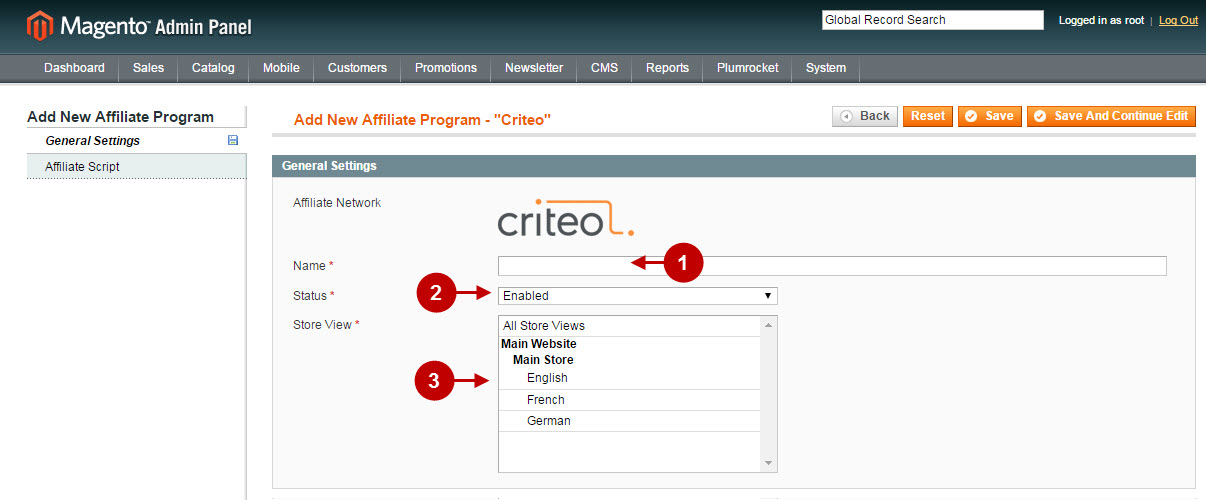
- Name: allows you to set the name of your Affiliate Program.
- Status: allows to enable or disable your Affiliate Program.
- Store View: allows you to select the Storeview(s) where your Affiliate Program will be executed.

Step-by-Step action:
- “Criteo Partner ID”: allows you to indicate the “Criteo Partner ID” of your Affiliate Network. This information must be provided by Criteo Affiliate Network.
- Click “Save” button to save your settings.

Important Information:
How to test if your Affiliate Program is installed properly? Please follow the instructions below.
Testing Criteo in Magento
Step-by-Step action:
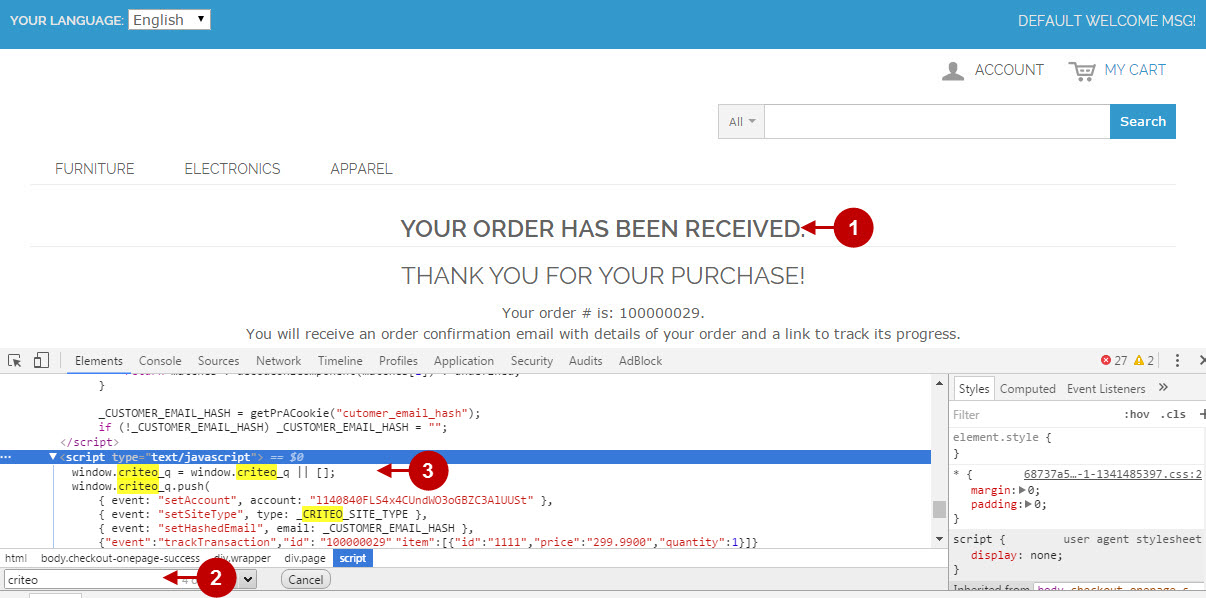
- Create a test order at your Magento Frontend and proceed to Order Success page.
- Using your browser’s Developer Tool (“F12” key on your keyboard) open search bar (“Ctrl+F” keys on your keyboard) and look for the Conversion Tag (Pixel) which contains www.criteo.com.
- Your Conversion Tag (Pixel) will appear.

Once you locate the Conversion Tag (Pixel) – this means that your Criteo Affiliate Program has been set up correctly. Now log into your account at www.criteo.com and verify that your transactions are being tracked correctly.
