Magento Slider Banner Configuration
In this article you will learn how to create Slider Banner in your Magento Banner Pro Extension.
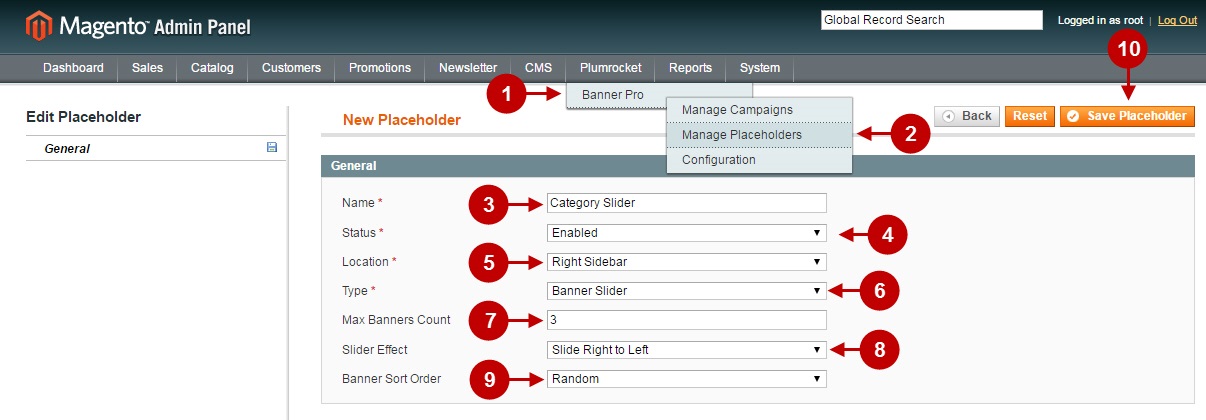
Creating Placeholder
In order to create a slider banner, you need to create a specific type of a placeholder for you banner.
Detailed description:
- In your Magento admin panel go to “Plumrocket” tab.
- Select “Manage Placeholders” section. In this tab press on the “Add New Placeholders” button.
- “Name”: specify the name of a placeholder.
- “Status”: option allows to enable or disable a placeholder.
- “Location”: option allows you to set the location of a placeholder. As an example we have set “Right Sidebar” location for a slider banner.
- “Type”: select “Banner Slider” type for a slider banner.
- “Max Banner Count” : option allows you to set the maximum amount of banners displayed for a slider banner.
- “Slider Effect” : set the slider effect in this field. Choose among the “Slide Right to Left” and “Fade In & Out” effects.
- “Banner sort order:” specify the sort order for the banners display in this placeholder: “By Priority or “Random” .
- Save your placeholder by pressing on the “Save Placeholder”‘ button.
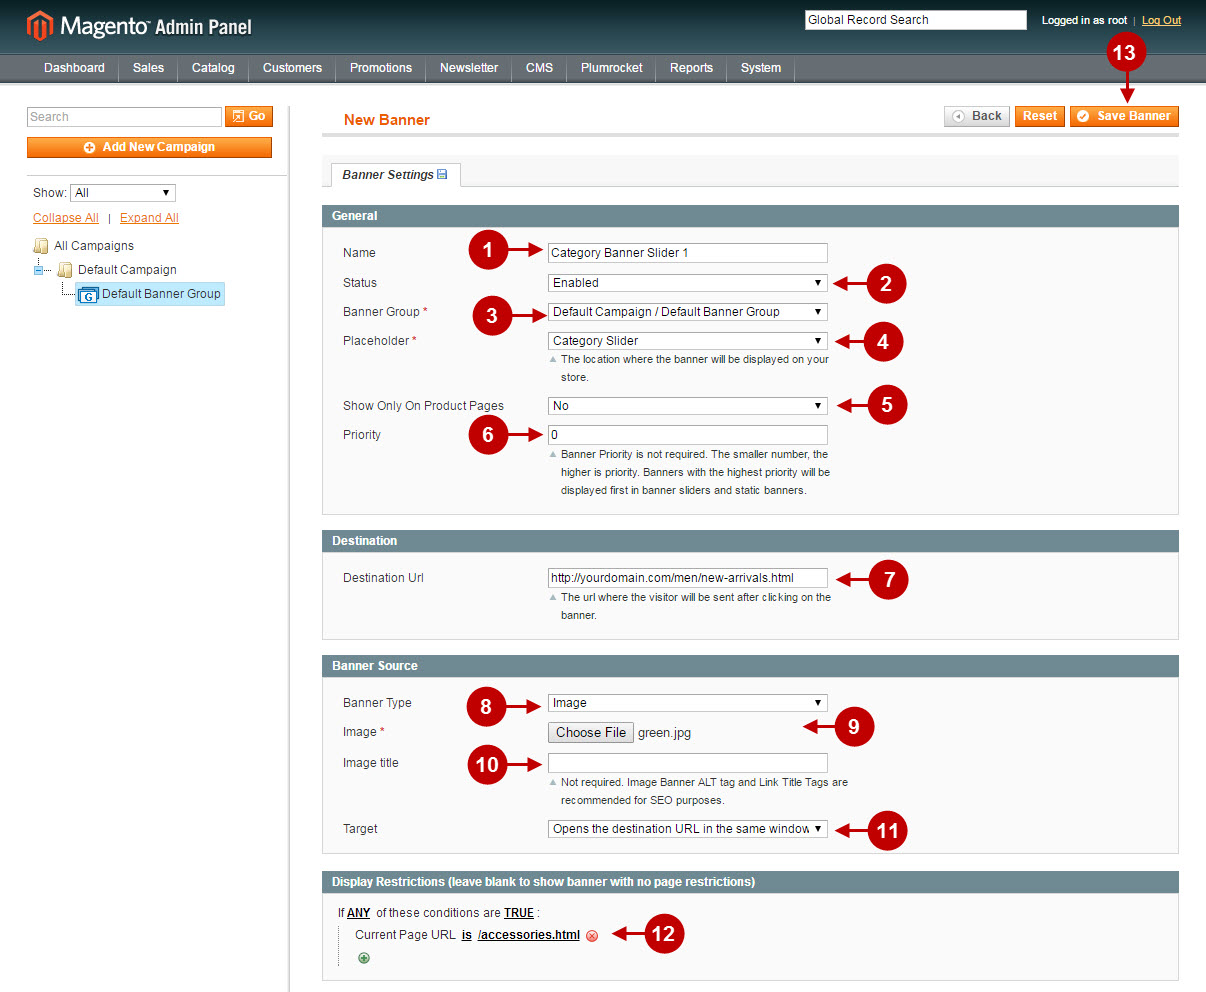
Creating Slider Banner
Important Information:
Before you proceed with creating Magento Slider Banner – please make sure you have created a campaign and a banner group for this banner.
Detailed description:
- “Name”: specify the name of a banner in this field.
- “Status”: option allows you to enable or disable a banner.
- “Banner Group”: field shows you the banner group this banner is assigned to.
- “Placeholder”: in this filed you need to select the newly created placeholder. In our case it is a “Category Slider” placeholder.
- In the “Show Only On Product Pages” field you may choose whether the banner will be displayed only on the product pages only.
- Input the number in the “Priority” field. Note: The smaller the number – the higher is the priority. Banners with the highest priority will be displayed in banner sliders, and static banners first.
- “Destination URL”: enter the url where the visitor will be redirected to after clicking on the banner.
- Select “Image” or “HTML” banner type in the “Banner Type” field.
- After you selected “Image” banner type, upload the image file of your banner.
- For SEO purposes you can specify the alt tag and link title in the “Image Title” field.
- “Target”: field allows you to select which way the destination URL will be opened in (e.g. in a new window or new tab).
- “Display Restrictions” field allows to set restrictions for a banner by pages. Specify rules to select the pages to display the banner on.
- Press “Save Banner” to save your settings.
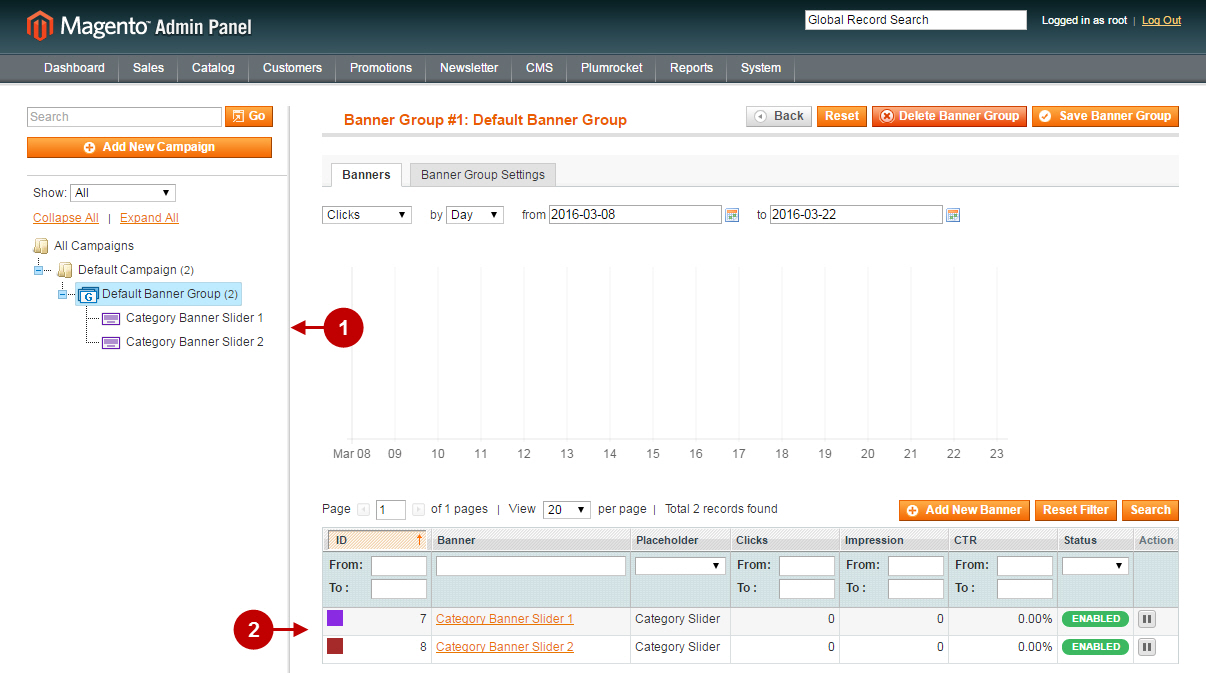
Detailed description:
- In the campaign tree you may see the list of created campaigns and banner groups.
- If you select a banner group from the category tree, you may check the statistics and list of banners assigned to this banner group.
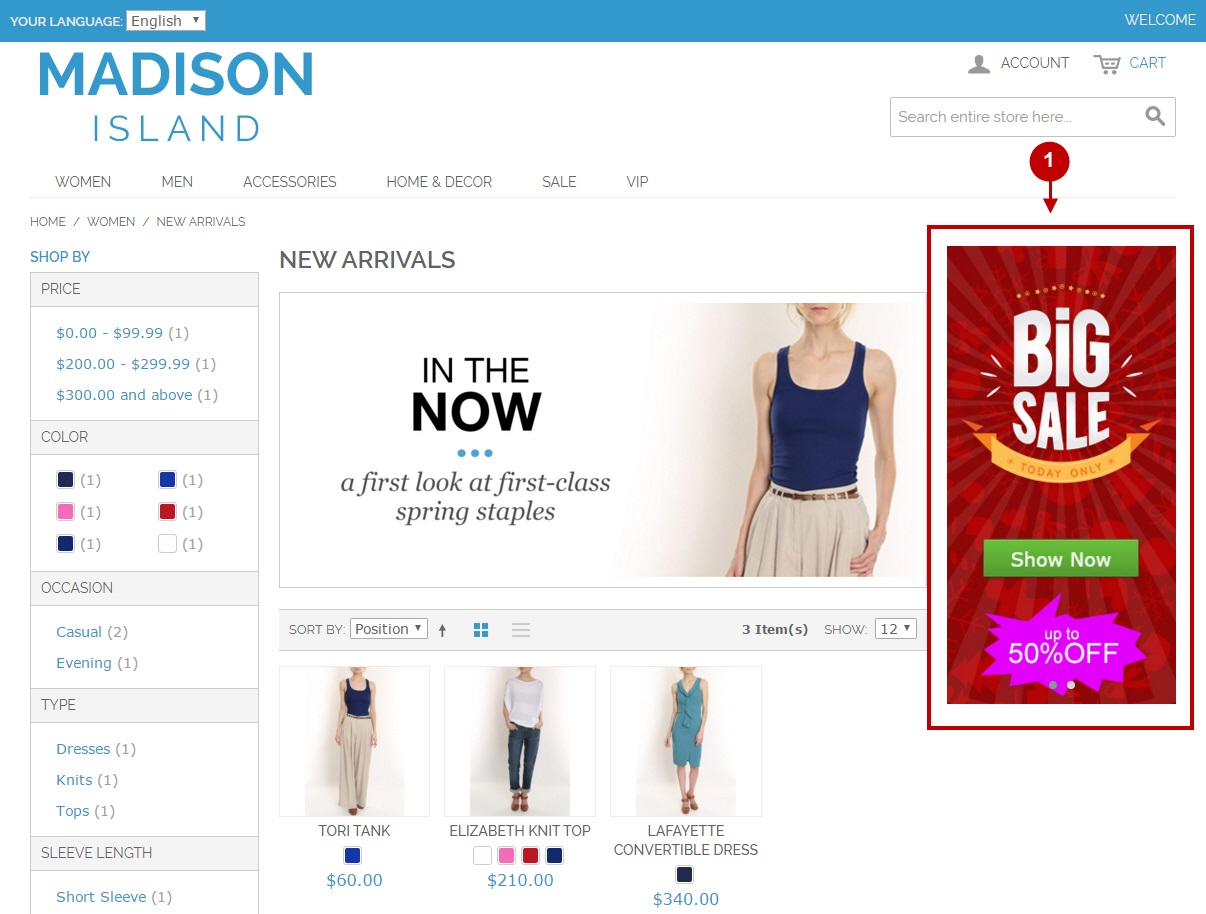
Detailed description:
- This is how your Magento Slider Banner will be displayed on your store frontend.
Was this article helpful?