In this article you will learn how to use “Banner Tracking URL” functionality in your magento email marketing. Please, follow the guide below to configure your Magento Banner Pro Extension correctly.
Creating Placeholder
Before you proceed with creating a banner – first you need to create a placeholder.
Detailed description:
- In your Magento admin panel go to “Plumrocket” tab.
- Select “Manage Placeholders” section. In this tab press on the “Add New Placeholders” button.
- “Name”: specify the name of a placeholder.
- “Status”: option allows to enable or disable a placeholder.
- “Location”: option allows you to set the location of a placeholder. As an example we have set “Custom (For Developers)” location for this banner.
- “Type”: select “Static” type for this banner.
- “Banner sort order:” specify the sort order in which banners will be displayed in this placeholder: “By Priority or “Random” .
- Save your placeholder by pressing on the “Save Placeholder”‘ button.

Creating Banner
Now you need to create a banner in order to get the tracking URL. Please follow the guide below.
Important Information:
Before you proceed with Magento Banner creating, please, make sure you have created a campaign and a banner group for this banner.
Detailed description:
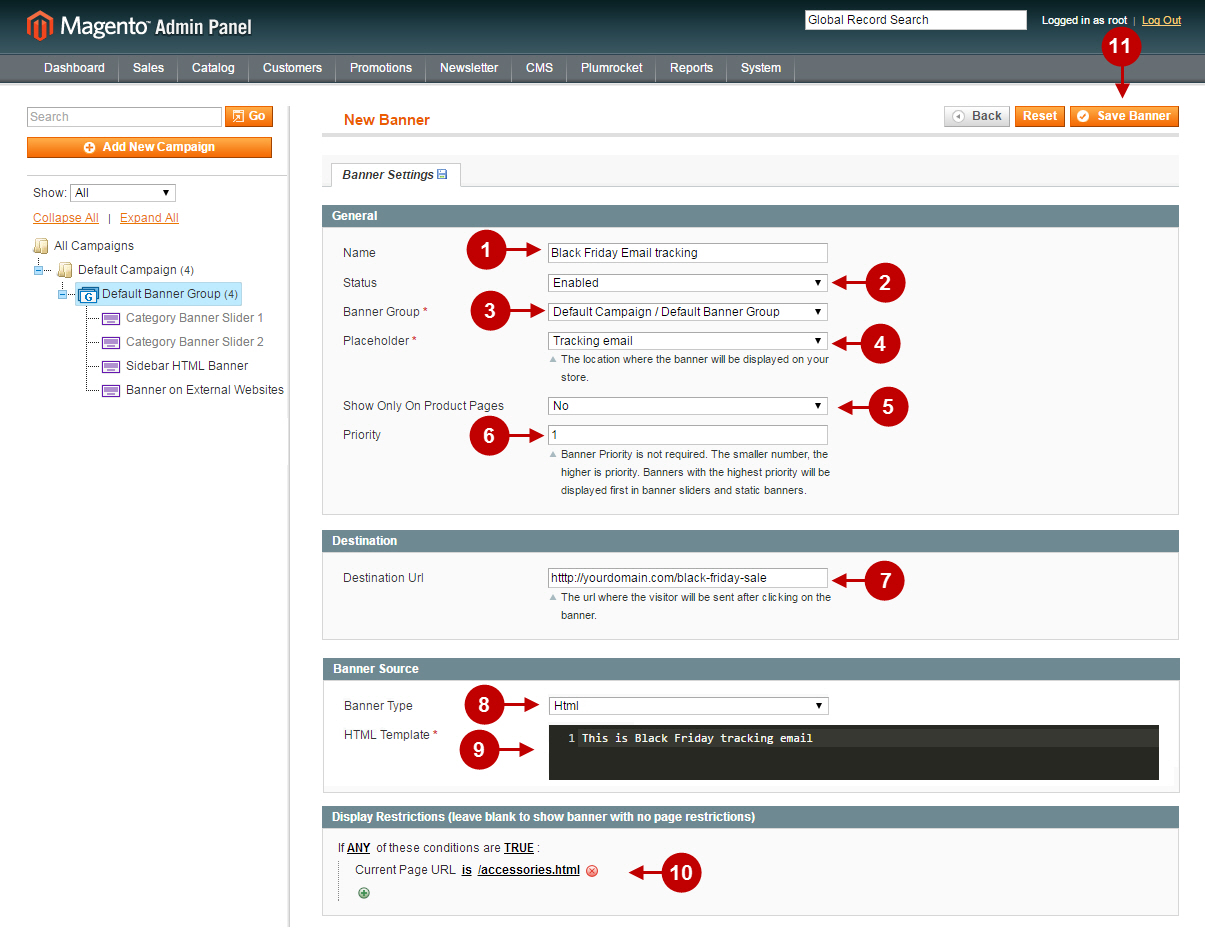
- “Name”: specify the name of a banner in this field.
- “Status”: option allows you to enable or disable a banner.
- “Banner Group”: field shows you the banner group this banner is assigned to.
- “Placeholder”: in this filed you need to select the newly created placeholder. In our case it is a “Tracking email” placeholder.
- In the “Show Only On Product Pages” field you may choose whether the banner will be displayed on the product pages only.
- Input the number in the “Priority” field. Note: The smaller the number – the higher is the priority. Banners with the highest priority will be displayed in banner sliders and static banners first.
- “Destination URL”: enter the url where the visitor will be redirected to after clicking on the banner.
- Select “Image” or “HTML” banner type in the “Banner Type” field. Note: It is not mandatory to upload an image here. You can select HTML image type and enter any text to fill in this field.
- Paste HTML code in the “HTML Template” field.
- “Display Restrictions” field allows to set restrictions for a banner by pages. Specify rules to select the pages to display the banner on.
- Press “Save Banner” to save your settings.

Placing Banners in the Emails
Detailed description:
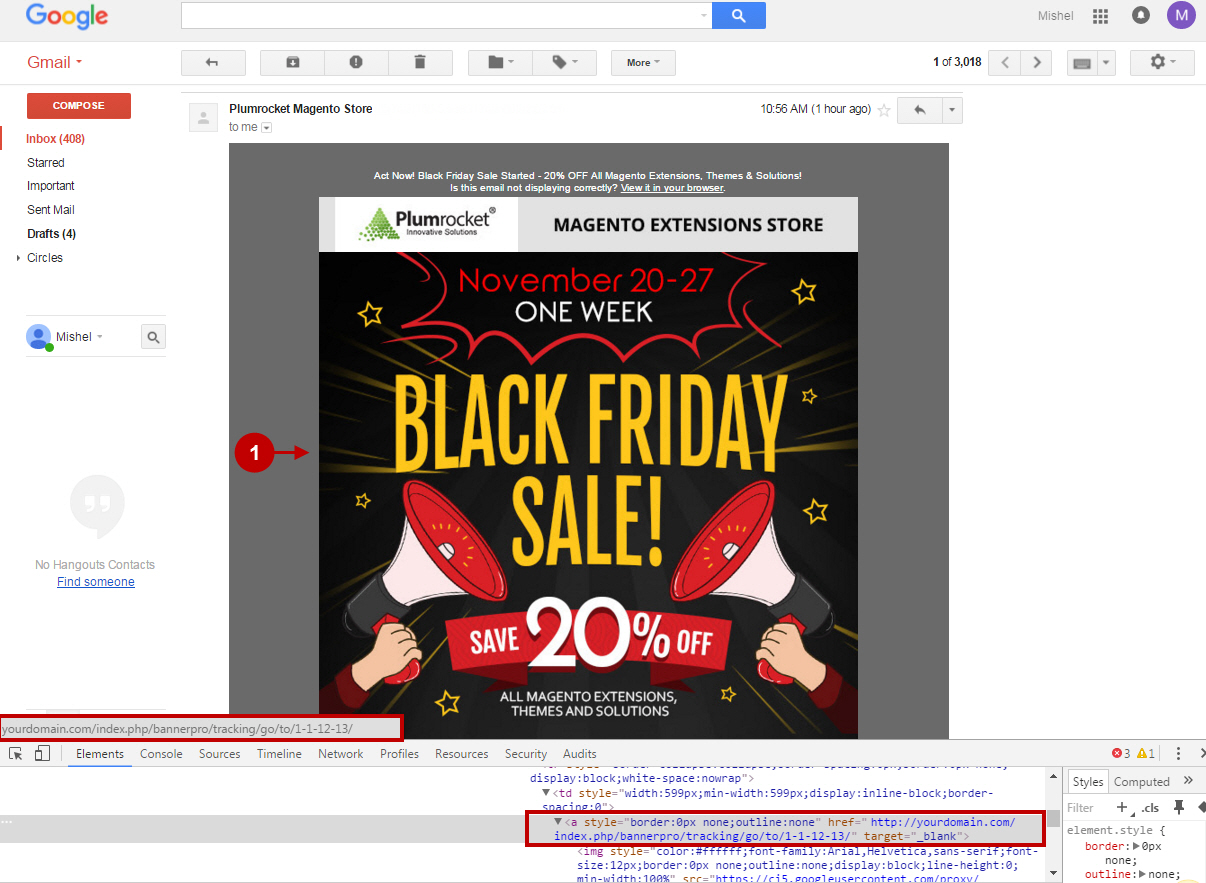
- When you save all changes, you will be able to see the auto-generated banner tracking URL. Copy this link and paste it while creating your custom email.

Detailed description:
- This is an example of the banner in the email. All the clicks will be tracked in one place through Magento Banner Pro Extension.

Was this article helpful?
