In this article, you will learn how to integrate Zendesk Chat into Magento 2 AMP Extension. Please follow the steps below to configure it correctly.
Step-by-step guide:
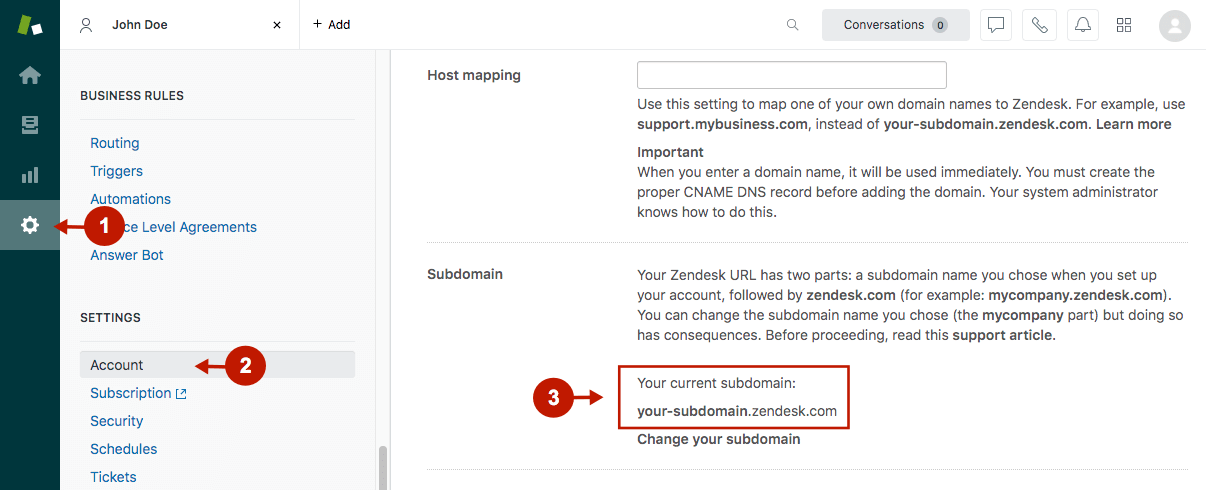
- Log in to your Zendesk account and go to the Admin tab.
- Navigate to Settings -> Account.
- This is your Zendesk account Subdomain. You will need this in your Magento 2 backend when configuring Zendesk integration with AMP pages.
Step-by-step guide:
- You can also find your Zendesk subdomain in the URL address when logged in to your Zendesk account.

How to Integrate Zendesk Chat With Magento 2 AMP Extension
Step-by-step guide:
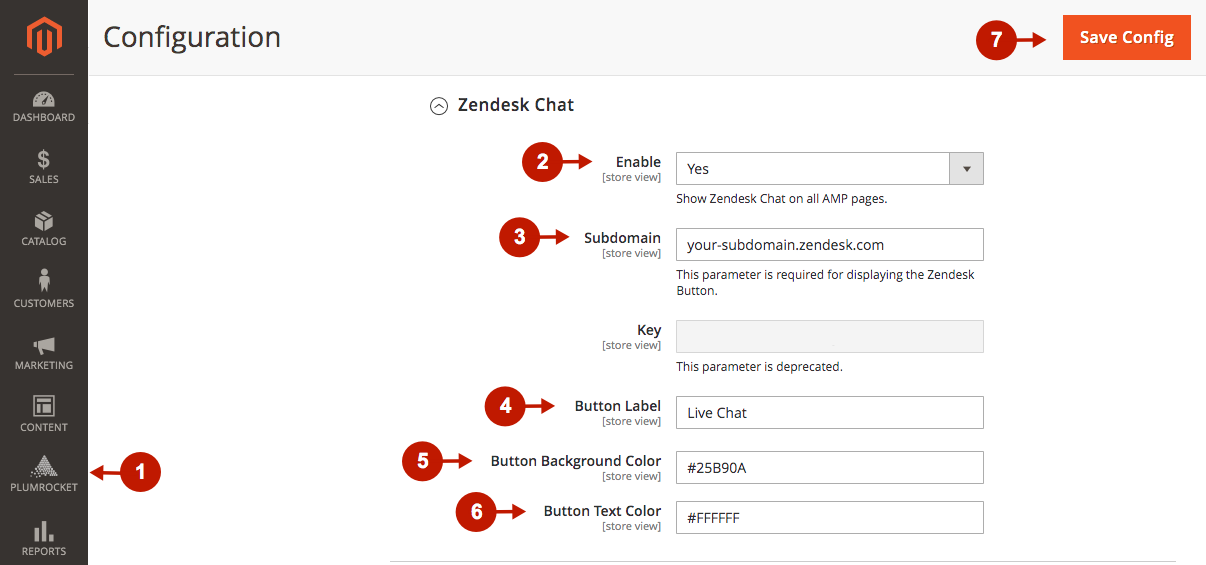
- In the main Magento menu, go to the Plumrocket -> AMP -> Configuration, and scroll down to Integrations -> Zendesk Chat.
- Enable: set to Yes to enable Zendesk chat on your AMP pages.
- Subdomain: insert your Zendesk subdomain in this field.
- Button Label: enter the Zendesk chat button text to display on AMP pages.
- Buton Background Color: specify the background color of your Zendesk chat button.
- Button Text Color: specify the text color of the Zendesk chat button.
- Press the Save Config button to apply settings.
Zendesk Chat integration with the Magento 2 AMP extension is now completed.
Was this article helpful?