In this article, you will learn how to integrate Google reCAPTCHA into Magento 2 AMP plugin. Please follow the steps below to configure it correctly.
Google reCAPTCHA helps you protect your website from fraudulent activities, spam, and abuse. You can also enable it on the Newsletter subscription form to prevent spam submissions on AMP pages. Please note that for AMP pages, Google reCAPTCHA v3 is required.
Please follow the guide below in order to create a Google reCAPTCHA Site Key and Secret Key for your AMP pages correctly. If you already use Google reCAPTCHA v3 for your website, skip to how to find the Site Key and Secret Key.
How to Generate Google reCAPTCHA Keys
Step-by-step guide:
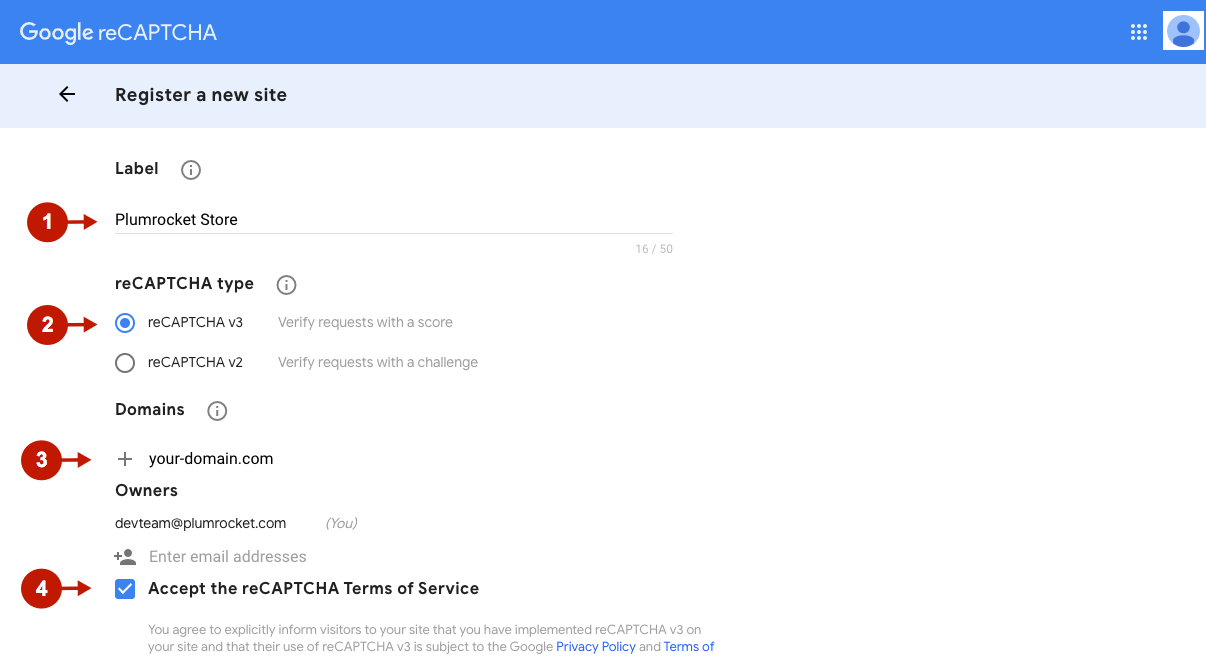
Go to the Google reCAPTCHA site and sign in to your Google Account.
- Label: enter a label to easily identify your website later.
- reCAPTCHA type: choose a reCAPTCHA v3 type that is required for AMP pages.
- Domains: specify domains where you want to register reCAPTCHA.
- Accept the reCAPTCHA terms of service to use reCAPTCHA for your site.
- Click Submit.
Step-by-step guide:
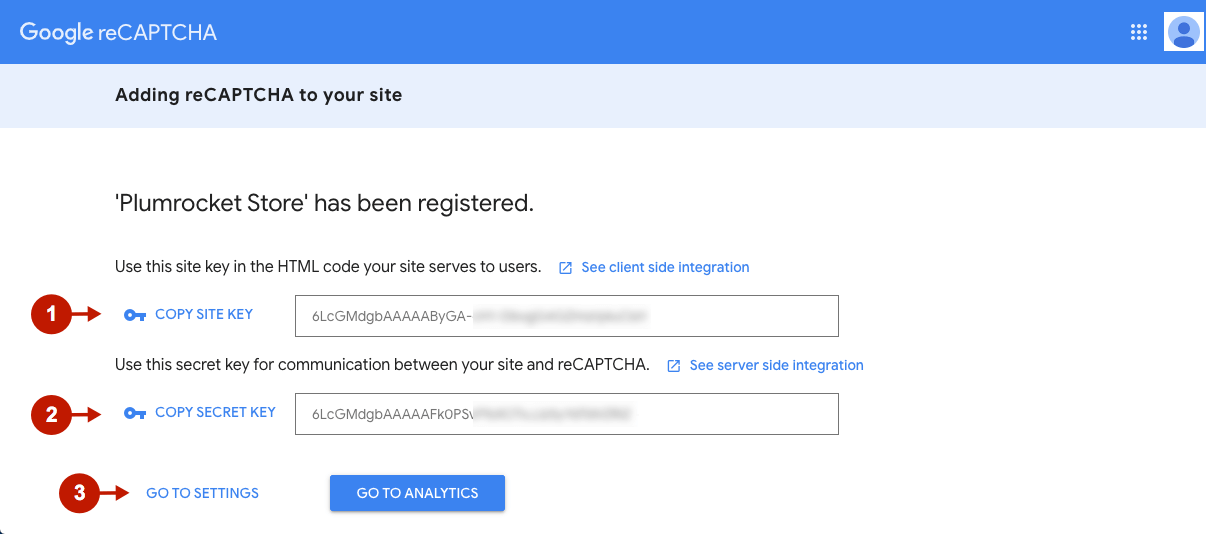
- Copy the newly generated Site Key to paste in the Magento admin panel when integrating reCAPTCHA with your AMP pages.
- Copy the newly generated Secret Key to paste in the Magento admin panel when integrating reCAPTCHA with your AMP pages.
- Click Go to Settings for more configurations.
Step-by-step guide:
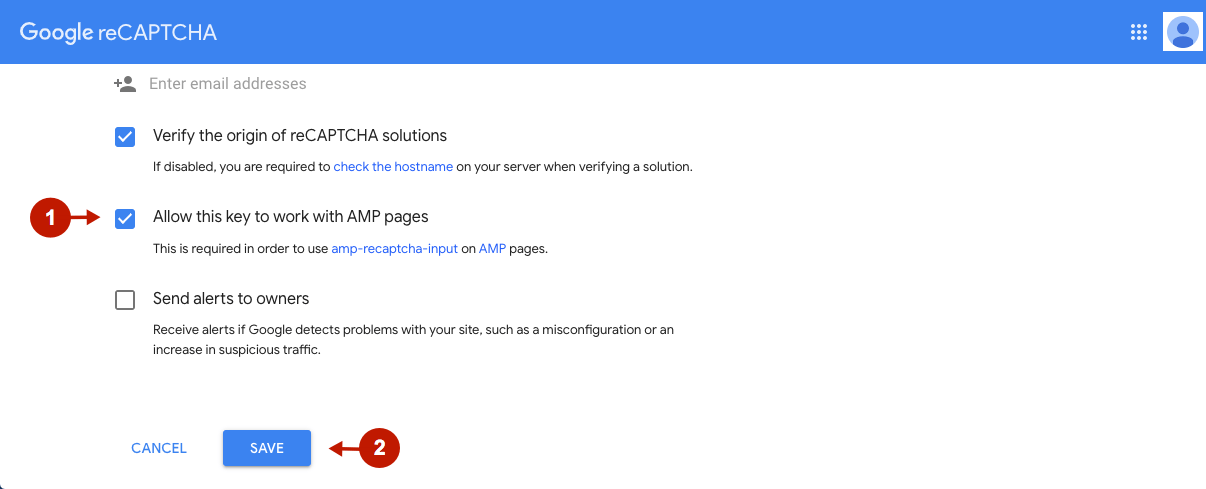
- Check the Allow this key to work with AMP pages box in order for Google reCAPTCHA to work properly on your AMP pages.
- Click Save.
How to Find Google reCAPTHCA Keys
If you already use Google reCAPTCHA v3 on your website, you can enable it on your AMP pages instead of generating new keys. Follow the steps below to find your Google reCAPTCHA keys and enable them on your AMP pages.
Step-by-step guide:
- Go to the Admin Console and select your site.
- Go to settings by clicking the gear icon and check the Allow this key to work with AMP pages box in order to enable Google reCAPTCHA on your AMP pages. You can also find your reCAPTCHA Keys (Site key and Secret key) on this page.

How to Integrate Google reCAPTCHA With Magento 2 AMP Extension
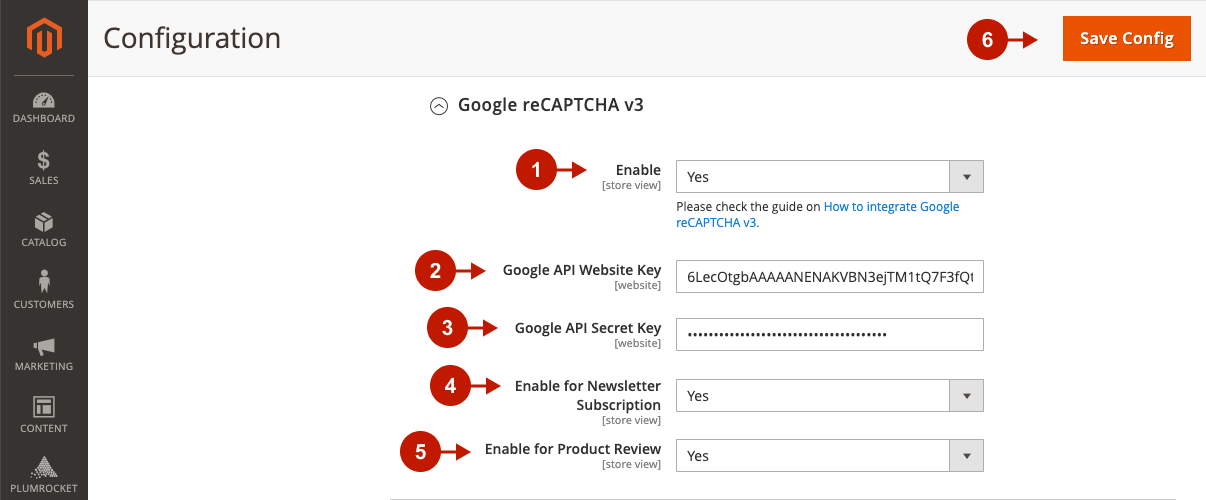
In the main Magento menu, go to the Plumrocket -> AMP -> Configuration, and scroll down to Integrations -> Google reCAPTCHA v3.
Step-by-step guide:
- Enable: set to Yes to enable Google reCAPTCHA on your AMP pages.
- Google API Website Key: insert your Google reCAPTCHA Site Key in this field.
- Google API Secret Key: insert your Google reCAPTCHA Secret Key in this field.
- Enable for Newsletter Subscription: set to Yes if you want to enable reCAPTCHA for the Newsletter Subscription form to prevent spam subscriptions.
- Enable for Product Review: set to Yes to enable reCAPTCHA for product review form to prevent spam submissions.
- Click Save Config to apply settings.
Google reCAPTCHA integration with the Magento 2 AMP extension is now completed.