In this article, you will learn how to integrate Google Analytics into Magento 2 AMP Extension. Please follow the steps below to configure it correctly.
First, you need to log in to your Analytics account. You can use the same account for your AMP pages or create a new one. If you do not have a Google Analytics account yet, or you want to create a new one, please follow the official guide on how to create a Google Analytics account.
Next, make sure to set up a property in Google Analytics for the website you want to collect data for. Please follow the quick guide below on how to get a Measurement ID and set up Google Analytics for your Magento store.
Where to Get Google Analytics Measurement ID
In order to integrate Google Analytics into your AMP pages, you need to get your Measurement ID and paste it into Magento 2 AMP Extension backend. Please follow the steps below to find Google Analytics Measurement ID.
Step-by-step guide:
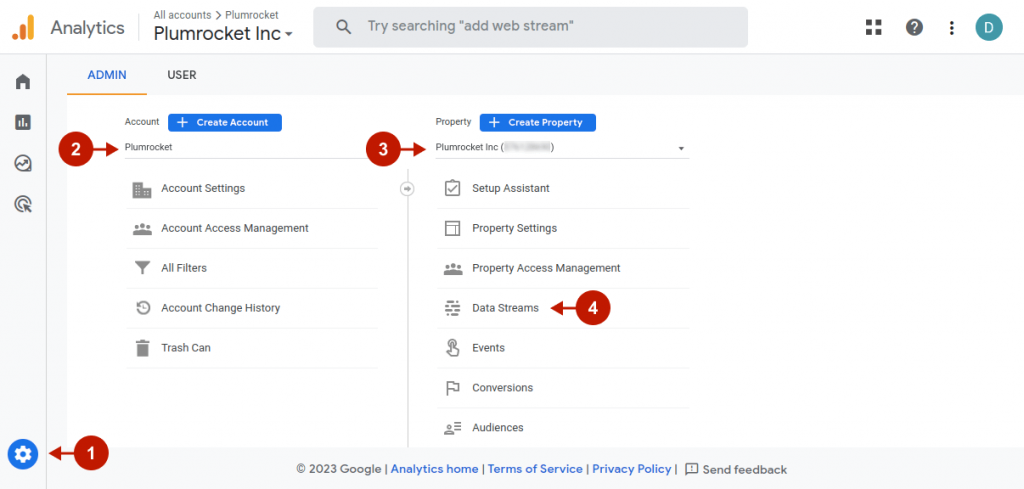
- Log in to your Google Analytics account and click Admin.
- Select an account from the menu in the Account column.
- Select a property from the menu in the Property column.
- Under Property, click Data Streams.

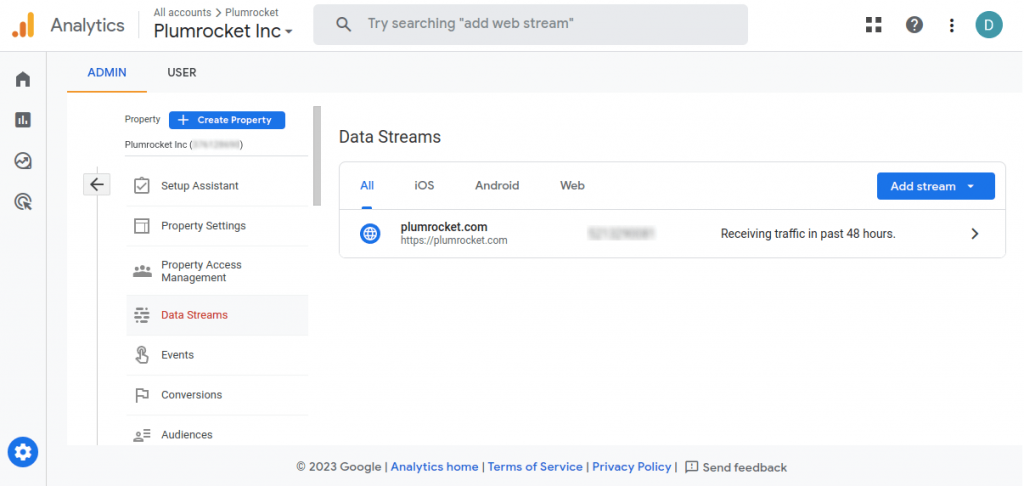
Afterward, you will be redirected to the Data Streams page, where all the configured data streams are displayed.

Step-by-step guide:
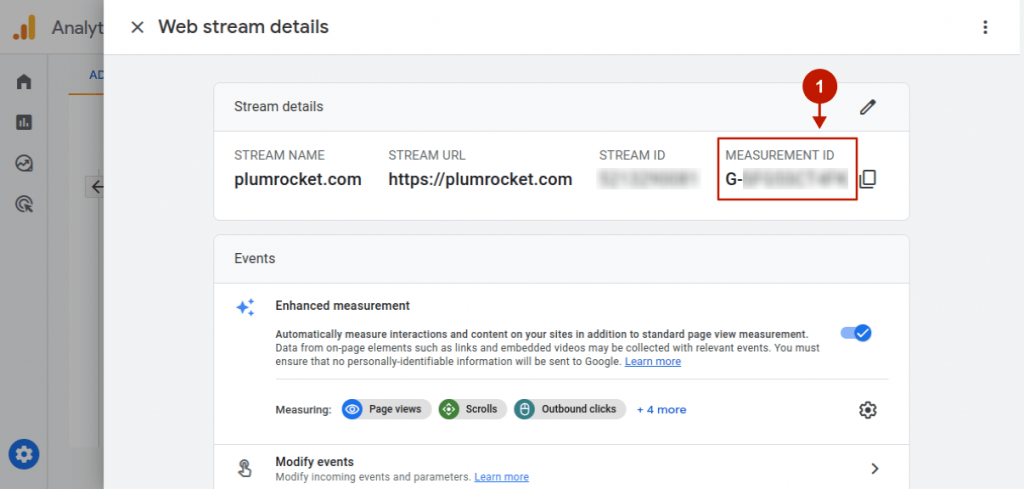
- Select the desired stream, and copy the Measurement ID under the “Stream details”.

How to Integrate Google Analytics With Magento 2 AMP Extension
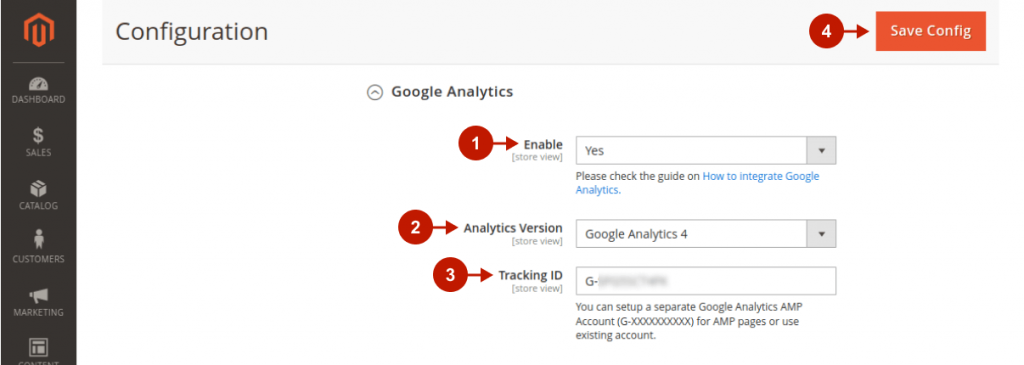
In the main Magento menu, go to the Plumrocket -> AMP -> Configuration, and scroll down to Integrations -> Google Analytics.
Step-by-step guide:
- Enable: set to Yes to enable Google Analytics on your AMP pages.
- Analytics Version: choose the Google Analytics version which will be used (Google Analytics V4 is described in the documentation).
- Tracking ID (Account Number): insert your Google Analytics Measurement ID code in this field.
- Click Save Config to apply settings.

Google Analytics integration with the Magento 2 AMP extension is now completed.
