In this article, you will learn how to integrate Facebook Pixel into Magento 2 AMP extension.
By using Facebook Pixel on your AMP pages, you can easily track conversions from Facebook ads, build targeted audiences, retarget people who have already chosen to visit your website, and more to optimize ads and make more sales. Facebook Business Manager interface allows you to conveniently manage and optimize your Facebook ads campaigns in one place. Please follow the guide below to learn how to implement Facebook Pixel on your AMP pages.
How to Create Facebook Pixel
First, you need to create a Facebook Pixel to generate a Pixel ID required for integration with Magento 2 AMP pages. Please follow the instructions below in order to create Facebook Pixel correctly. If you have already created one, skip to the Where to Find Facebook Pixel ID step.
Step-by-step guide:
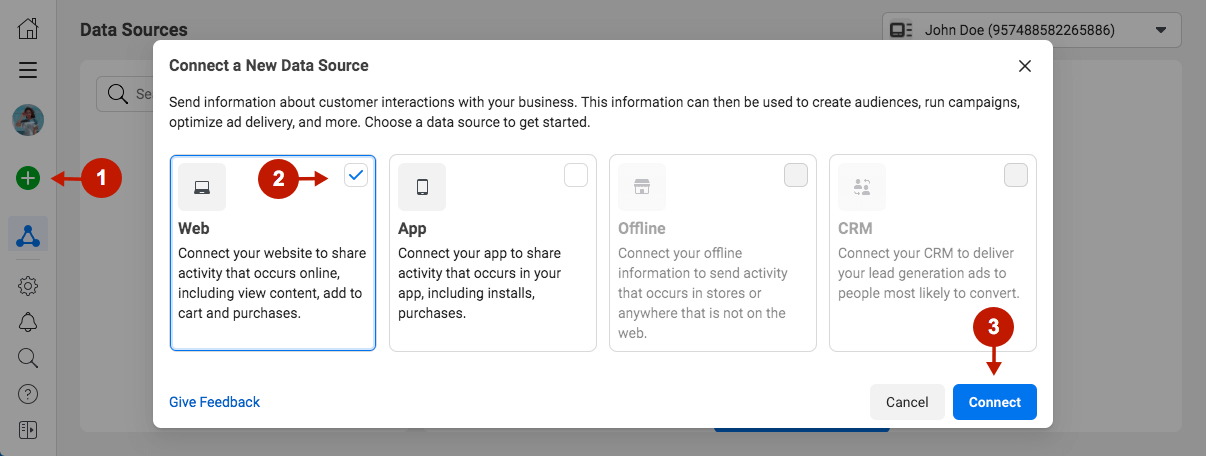
- Go to Events Manager and click Connect Data Sources in the left tab.
- Select Web.
- Click Connect.

Step-by-step guide:
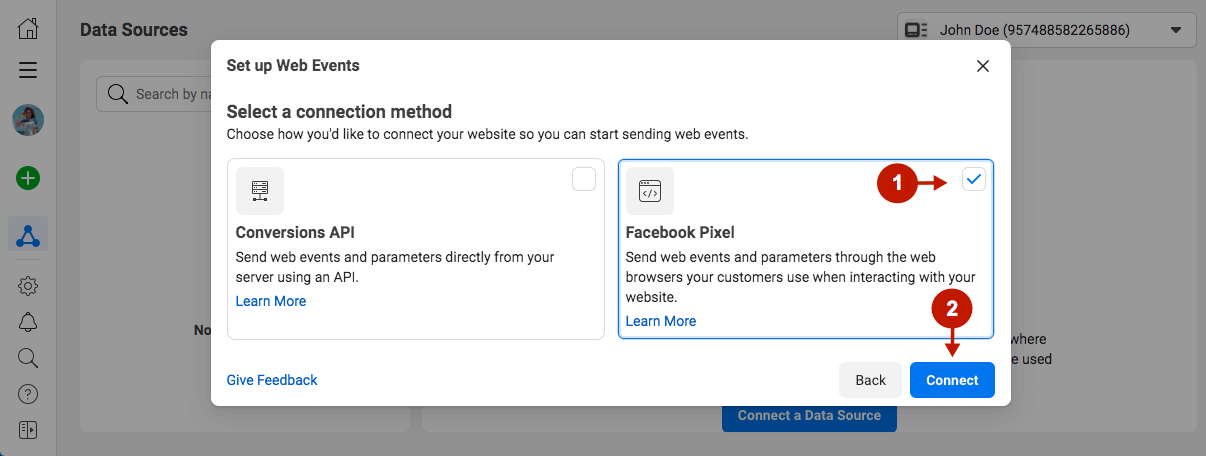
- Select Facebook Pixel.
- Click Connect.

Step-by-step guide:
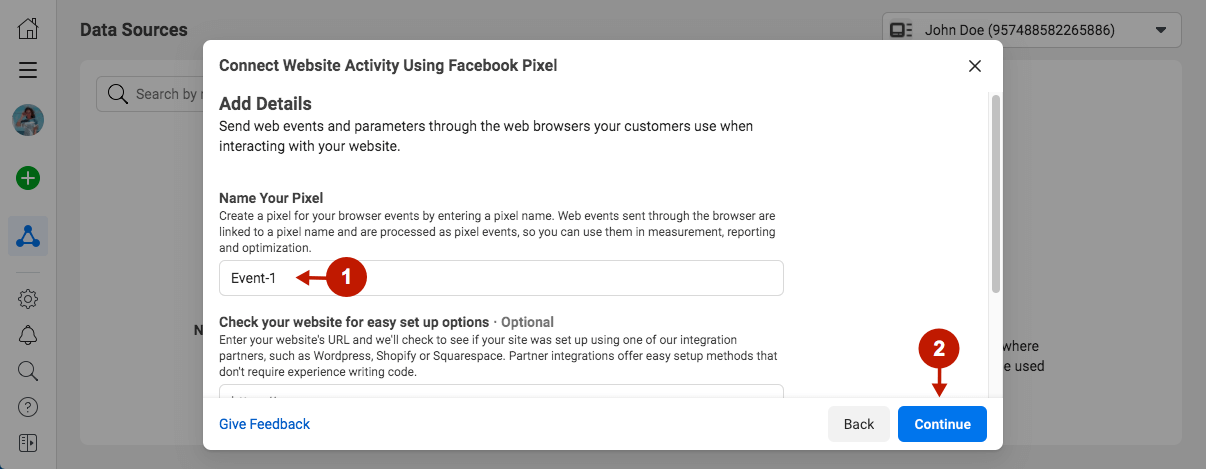
- Add your Pixel Name.
- Click Continue.

Step-by-step guide:
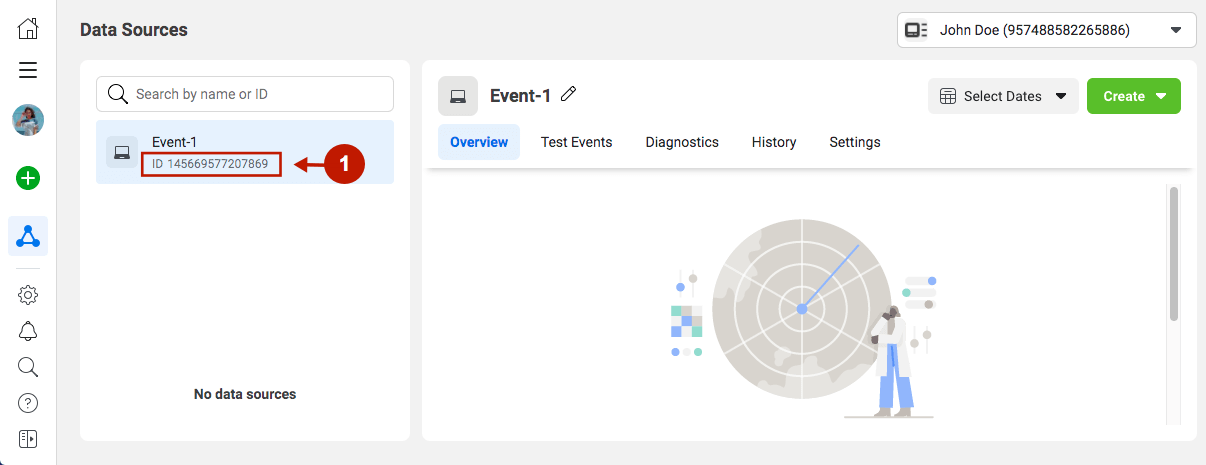
- You have just created a Pixel. Copy the Pixel ID and jump to the Magento 2 AMP configuration step to integrate Facebook Pixel with your Magento 2 AMP pages.

Where to Find Facebook Pixel ID
If you have already created your Facebook Pixel, you can find the Pixel ID in the Events Manager below the site name.
How to Integrate Facebook Pixel With Magento 2 AMP Extension
In the main Magento menu, go to Plumrocket -> AMP -> Configuration. Scroll down to Integrations -> Facebook Pixel.
Step-by-step guide:
- Enable: set to Yes to enable Facebook Pixel on your Magento AMP pages.
- Pixel ID: paste your Facebook Pixel ID in this field.
- Press the Save Config button to apply settings.

Facebook Pixel integration with the Magento 2 AMP extension is now completed.
