Configuring Store Credit Magento 2
In this article you will learn how to configure our Store Credit Magento 2 Extension correctly. Please, follow the instructions below.
Step by Step Guide
General
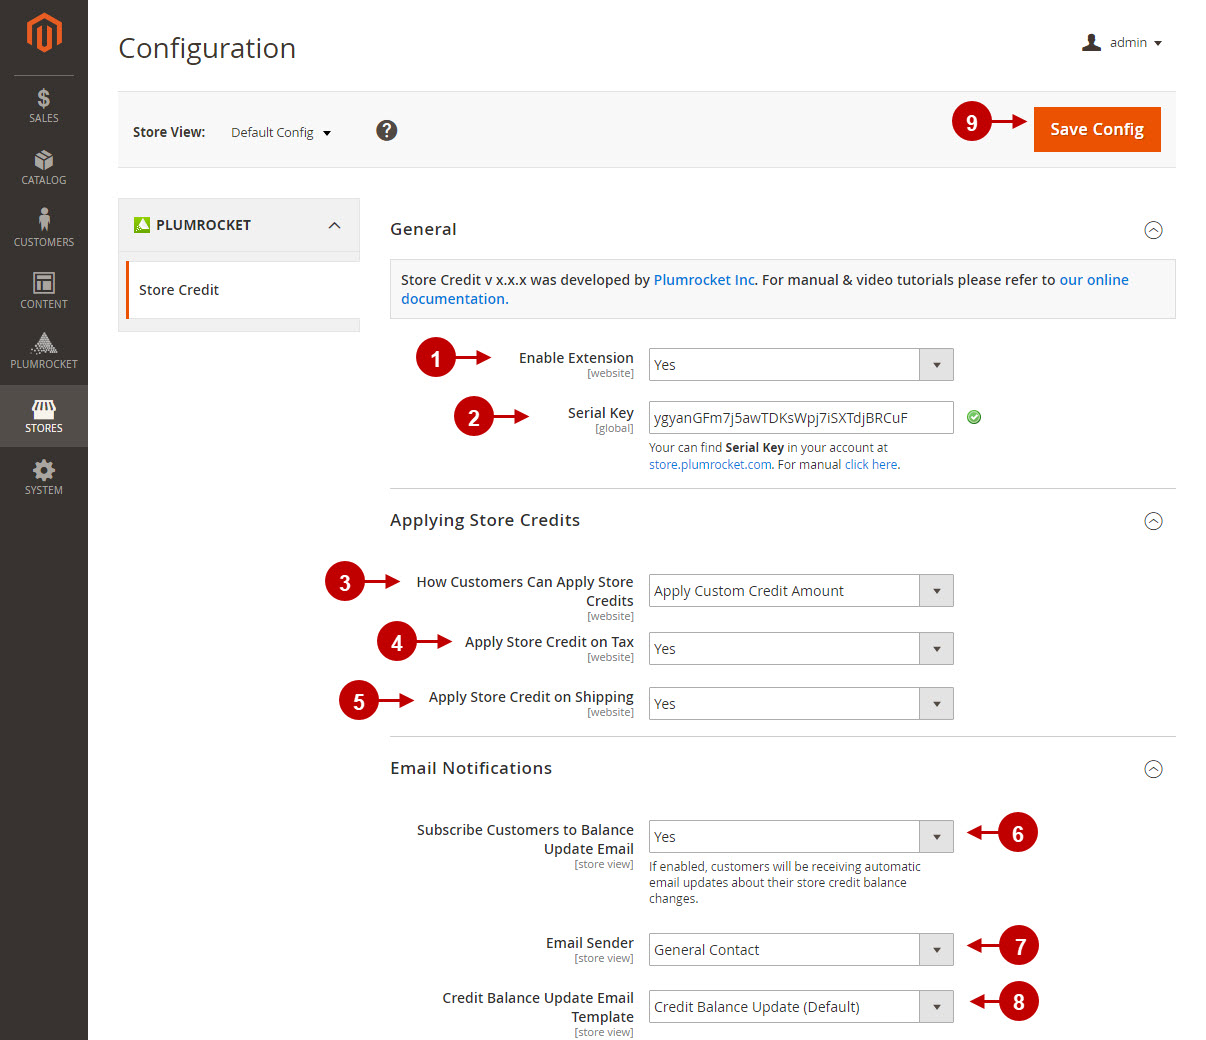
- Enable Extension: Select “Yes” to enable the extension or “No” to disable it.
- Option “Serial Key”: enter unique serial key provided after the purchase for legitimate and proper functioning of your extension. Note: In most cases this field will be pre-filled with serial key automatically and the green check mark will be displayed. Otherwise please read article Serial Key Activation in order to find and paste your serial key manually.
Applying Store Credits
- “How Customers Can Apply Store Credits”: this option allows admin to configure the way the store credits will be applied by a customer on the Checkout Page. The following options are available:
- Apply Custom Credit Amount – a customer can manually enter the required Store Credit amount to be applied.
- Manually Apply Available Credits – a customer can manually apply all available Store Credits.
- Auto-Apply Credits to an Order – the available Store Credit amount will be auto-applied on the Checkout of a customer.
- “Apply Store Credit on Tax”: allows admin to enable or disable store credit application on tax.
- “Apply Store Credit on Shipping”: allows admin to enable or disable store credit application on shipping.
Email Notifications
- “Subscribe Customers to Balance Update Email”: this options allows admin to enable or disable an automatic Balance Update Email sending to the customers about their store credit balance changes.
- “Email Sender”: select the contact the email will be sent from.
- “Credit Balance Update Email Template”: allows admin to choose the Credit Balance Update Email template.
- Press the “Save Config” button to save your settings.
Manage Customer Credits
Step by Step Guide
Manage Customer Credits
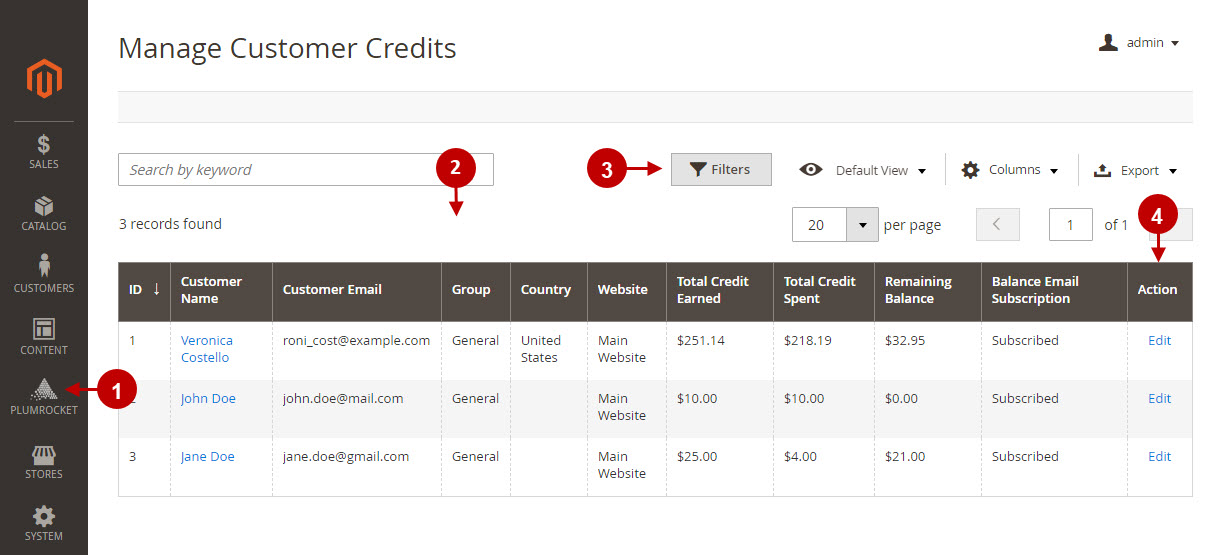
- Navigate to the Plumrocket tab in the main menu > go to the “Manage Customer Credits” section.
- This grid allows admin to view and manage customers who have store credits.
- Admin can search for the required customer using the default Magento 2 filters.
- “Action”: admin can view and manage store credits of each customer using this option.
Step by Step Guide
Store Credits
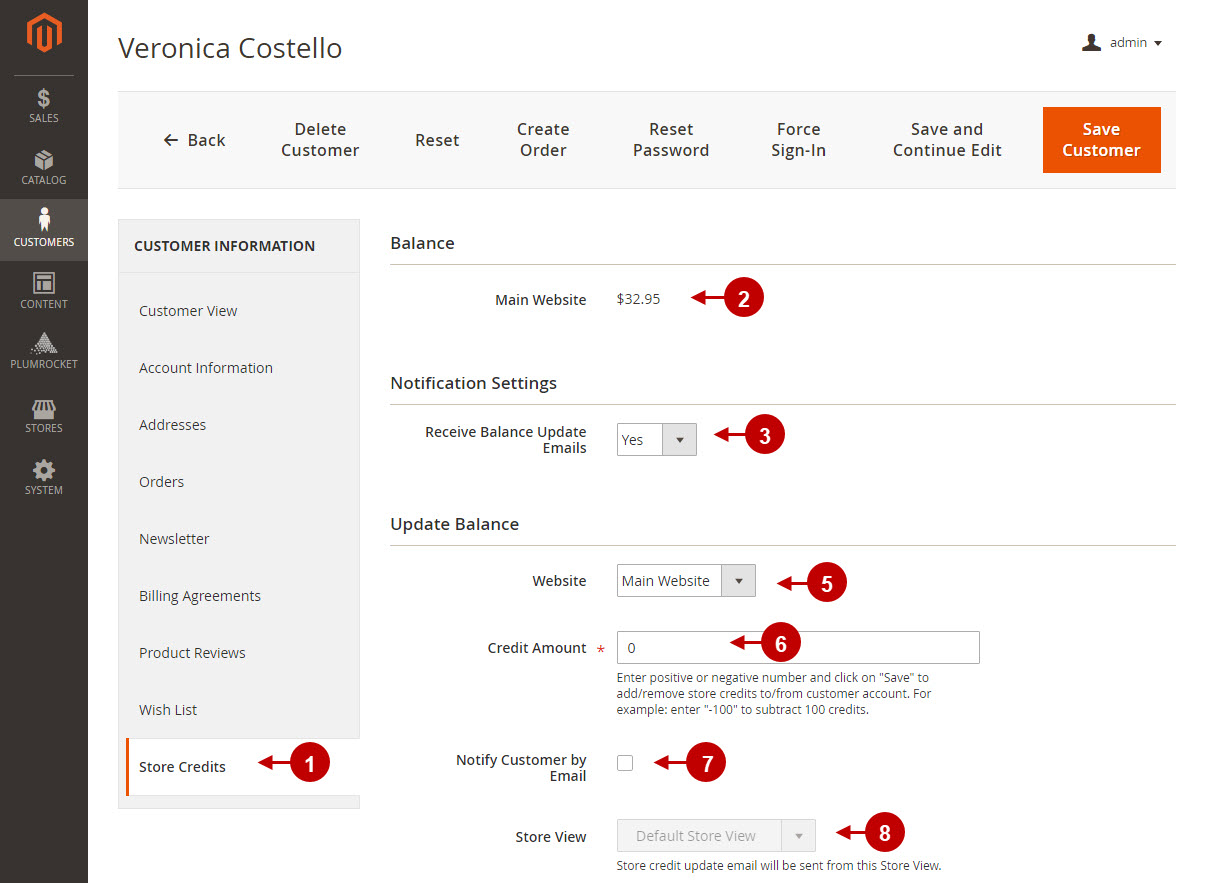
- Navigate to “Store Credits” section in the Customer Information tab.
- “Balance”: admin can view customer’s store credit balance in this section.
Notification Settings
- “Receive Balance Update Emails”: this option allows admin to enable or disable Balance Update Emails sending to each separate customer.
Update Balance
- “Website”: this option allows admin to choose the website the store credit balance will be updated on.
- “Credit Amount”: admin can add/remove credits to/from customer account by entering positive or negative number in this field, and clicking the “Save” button.
- “Notify Customer by Email”: check this checkbox in order to notify the customer of his store credit balance updates.
- “Store View”: the store credit update email will be sent from this Store View.
Step by Step Guide
Update Balance
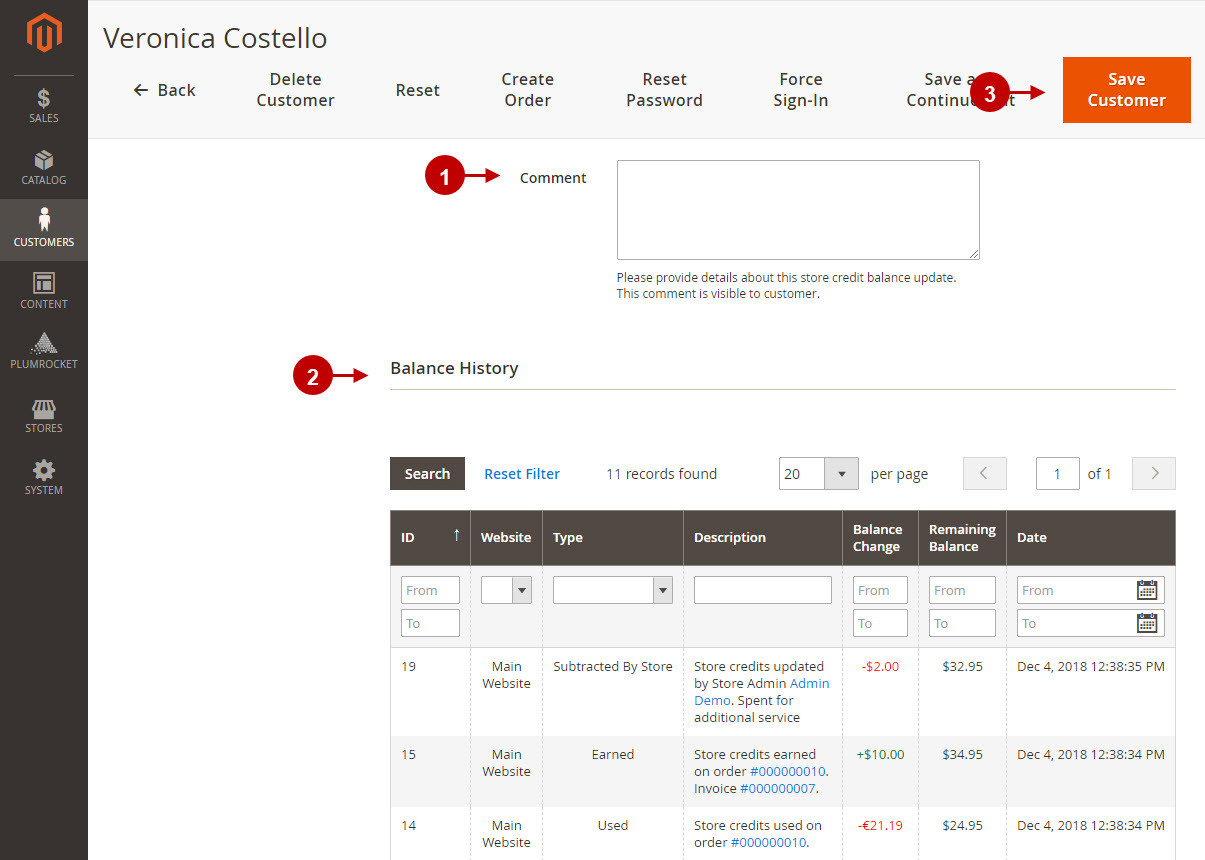
- “Comment”: admin can leave a comment that will be added to the transaction. The comment will be visible to a customer.
- “Balance History”: allows admin to track the history of all transactions made by the customer.
- Press the “Save Customer” button to save your settings.
Transaction History
Step by Step Guide
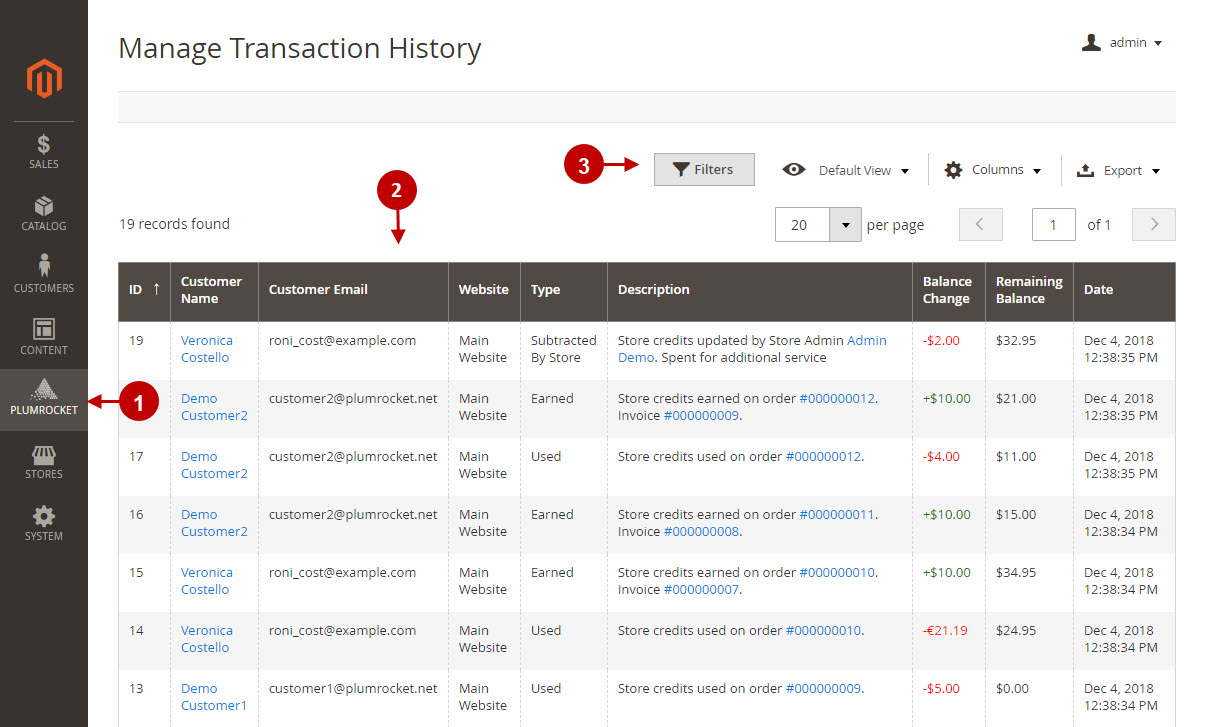
Manage Transaction History
- Navigate to the Plumrocket tab in the main menu > go to the “Transaction History” section.
- This section allows admin to track the transactions of all customers in one grid.
- Admin can search for the required transactions using the default Magento 2 filters.
Manage Earn Rules
Step by Step Guide
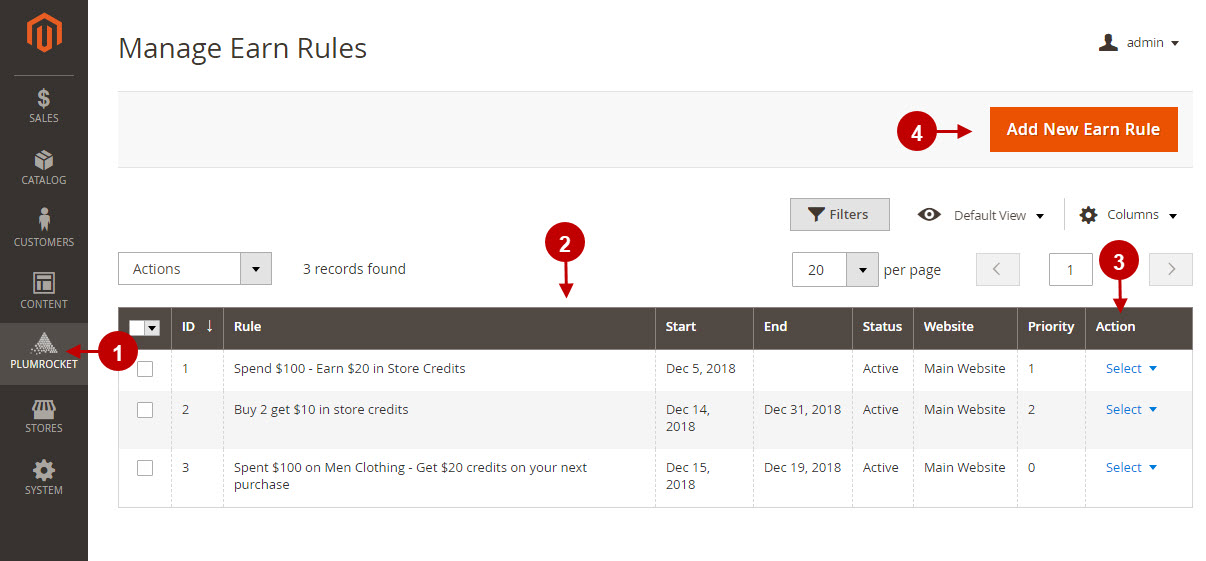
Manage Earn Rules
- Navigate to the Plumrocket tab in the main menu > go to the “Credit Earn Rules” section.
- This section allows admin to view and manage Credit Earn Rules in one grid.
- “Action”: admin can edit or delete the existing Earn Rules using this option.
- “Add New Earn Rule”: press this button to create new Credit Earn Rule.
Step by Step Guide
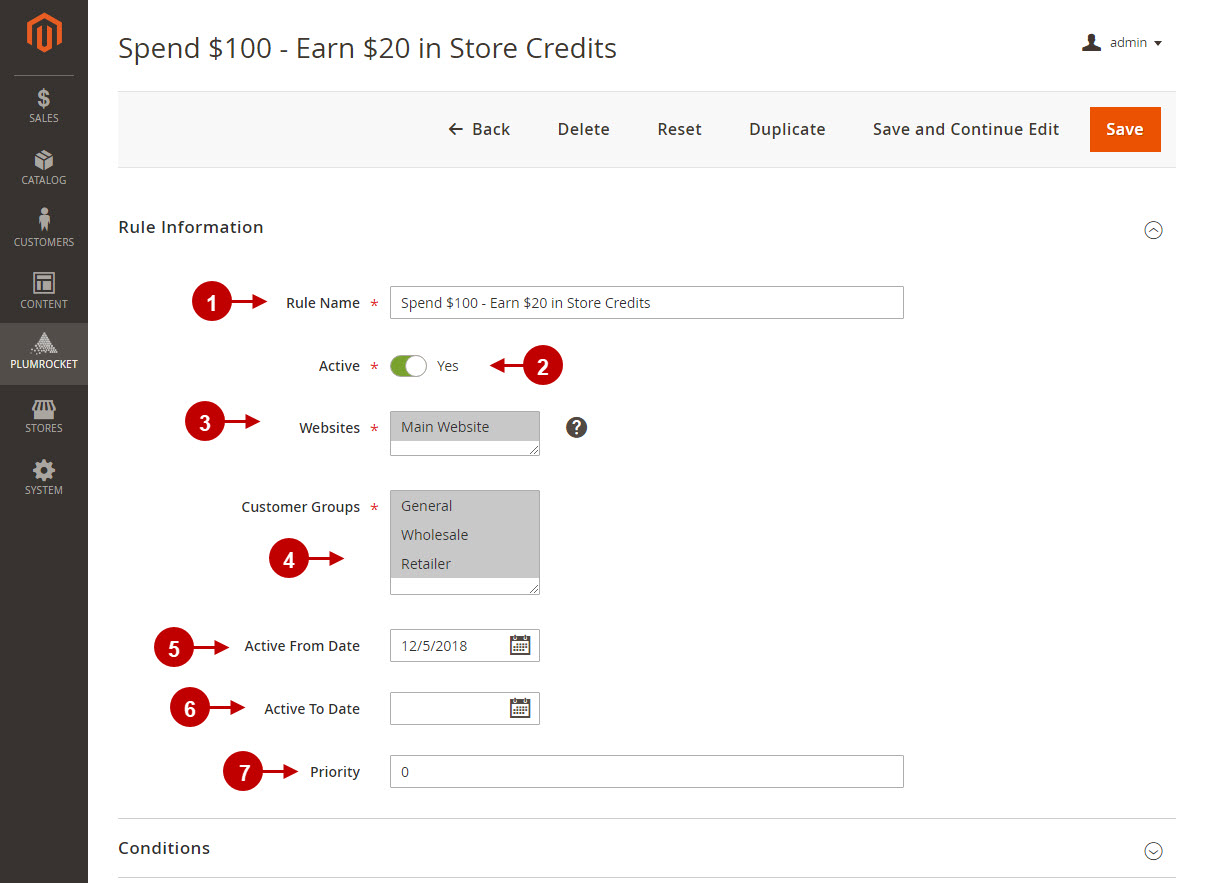
Rule Information
- “Rule Name”: enter the name of this rule.
- “Active”: this option allows admin to enable or disable the rule.
- “Websites”: admin can select the website(s) the Earn Rule will be applied on.
- “Customer Groups”: admin can select the customer group(s) the Earn Rule will be applied to.
- “Active From”: enter the date the Earn Rule will be active from.
- “Active To”: enter the date the Earn Rule will be active to.
- “Priority”: set the priority of the rule.
Step by Step Guide
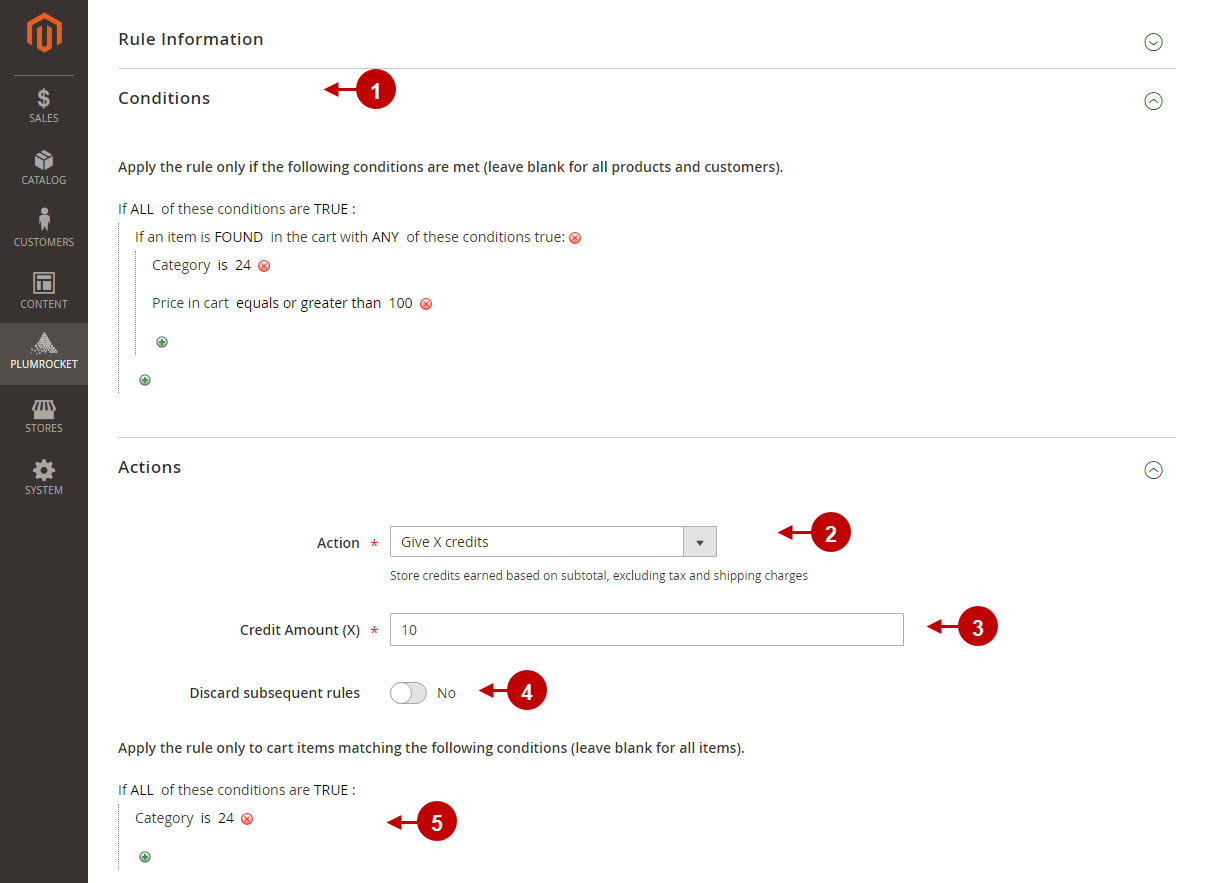
Conditions
- Admin can configure the conditions to be met while rule application.
Actions
- “Action”: admin can apply a specific action to each Earn Rule making it more precise. The following actions are available to apply: “Give X credits”, “Give X percent of product price in credits”, “For every Y amounts in price, give X credits”, “For every Y qty purchased, give X credits”.
- “Credit Amount X”: depending on the action selected, this option will be available allowing admin to set the credit amount.
- “Discard subsequent rules”: enable to discard the subsequent rules.
- “Condition: admin can configure the conditions to be matched by the cart items while rule application.
Step by Step Guide
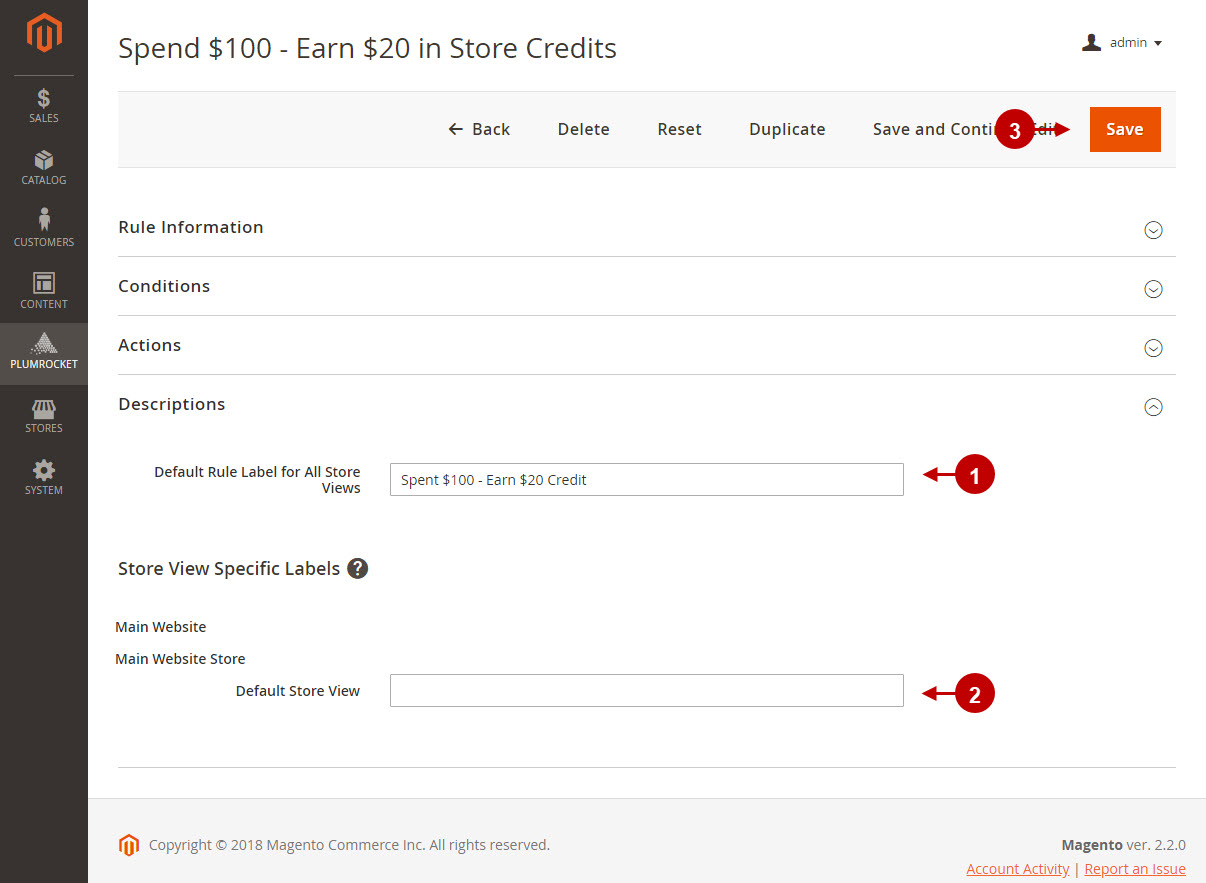
Descriptions
- “Default Rule Label for All Store Views”: this option allows admin to add the default rule label for all store views.
- “Default Store View”: enter the rule label for the specific Store View.
Store Credit on Order
Step by Step Guide
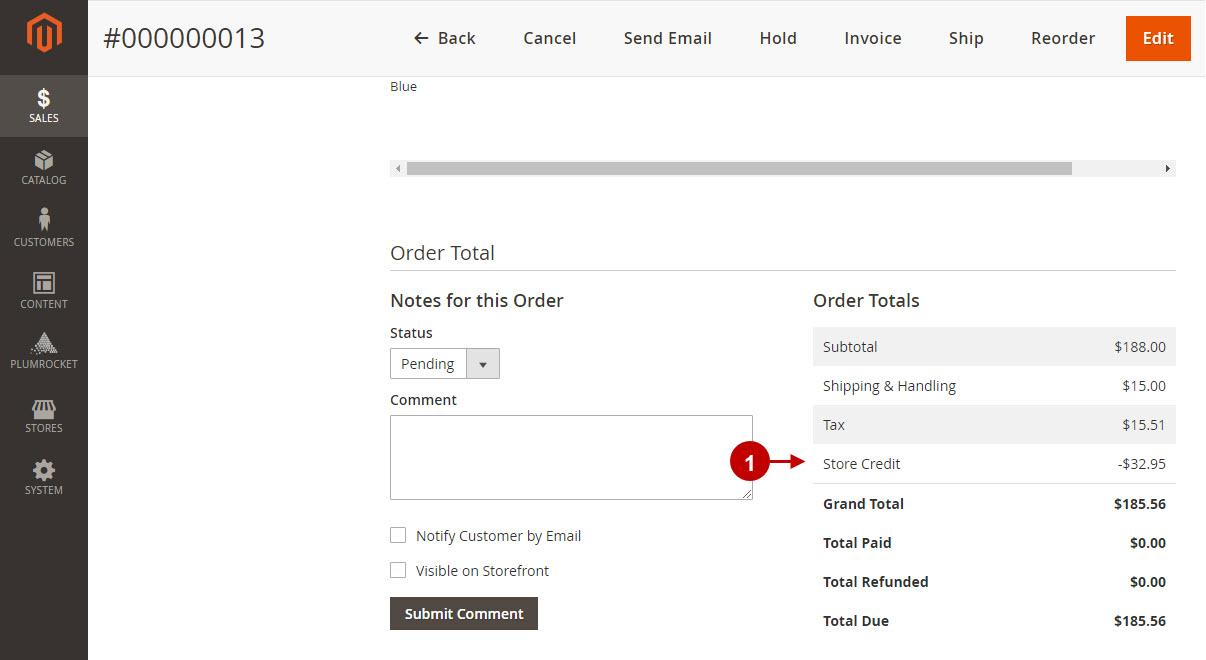
Order View Page
- Admin can check the Store Credits applied to an order on the Order View Page.
Step by Step Guide
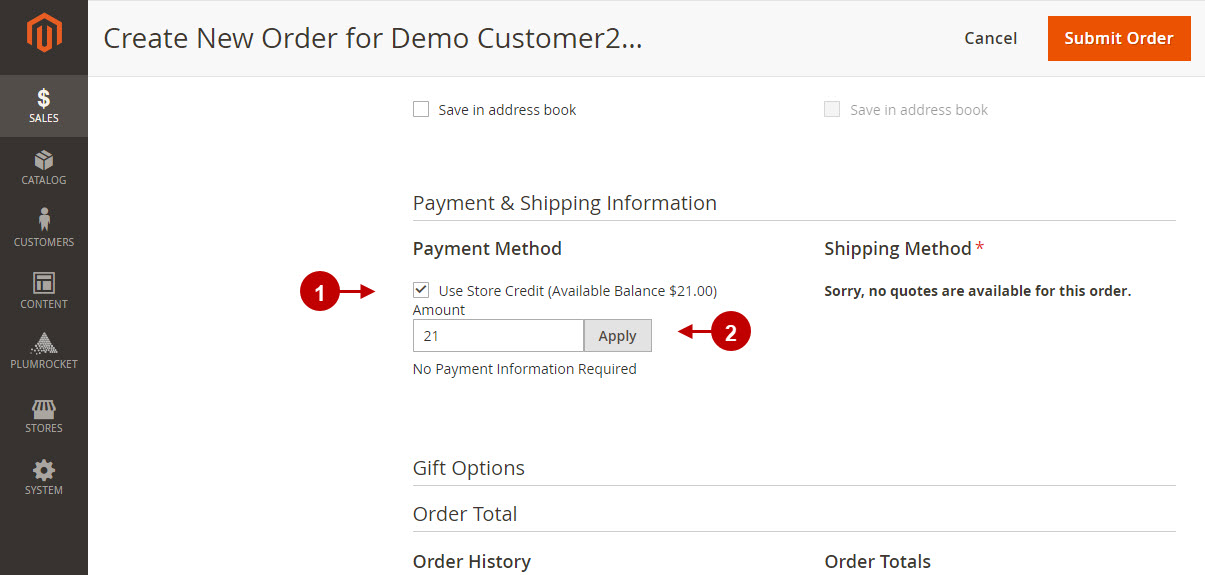
Order Create Page
- Admin can use customer’s Store Credit Balance while creating an order in the Magento 2 backend.
- Enter the required amount of store credits and press the “Apply” button.
Was this article helpful?