In this article, you will find step-by-step instructions on how to properly configure the Magento 2 Rich Snippets extension. Please follow this guide after installing the plugin.
Configuring Magento 2 Rich Snippets Extension
In the main Magento menu, go to the Plumrocket tab > select Rich Snippets > Configuration.
General
Step-by-step guide:
- “Enable“: set the option to Yes to enable the Rich Snippets extension on your Magento 2 store.
- “Serial Key“: enter the unique serial key provided to you after purchasing the extension. Please note: in most cases, this field will be pre-filled with a serial key automatically, and the green checkmark will be displayed. To find and paste your serial key manually, read the Serial Key Activation article.

Main Settings
Step-by-step guide:
- “Clean Up HTML Microdata“: enable this option to remove the default Magento structured data from your store so that there’s no duplication or other conflicts with the structured data provided by this extension.

Product

Step-by-step guide:
- “Enable“: this option allows you to add structured data to your product pages and thus display rich snippets on the search results page.
- Attributes: match the attributes that will appear in rich snippets with those of your Magento products to display the correct information.
- “Custom Properties“: use this field to display other attributes in rich snippets. You need to manually map the schema.org property with your product attribute or a static text – just list them each in a new line, separated by colons, as shown in the example:
gtin12:gtin_12

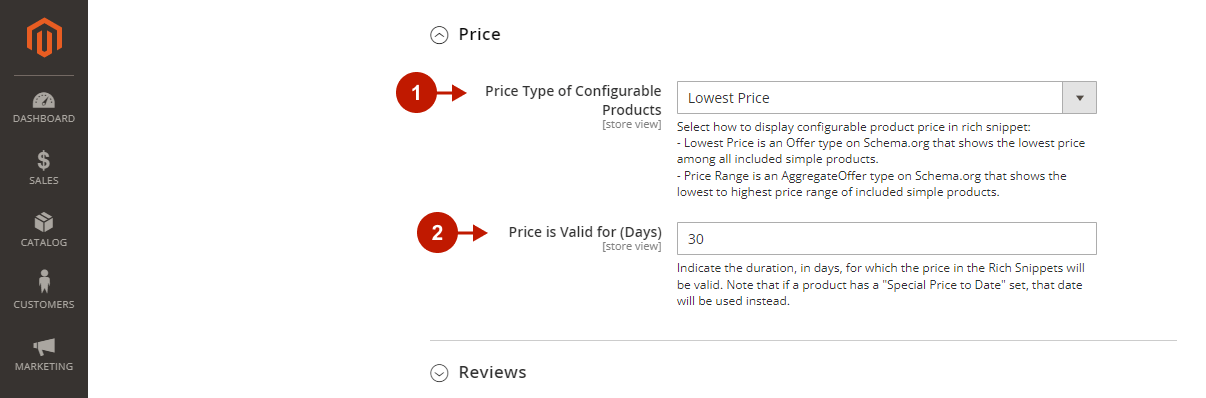
Price
Step-by-step guide:
- “Price Type of Configurable Products“: select how you want to display price in rich snippets for configurable products, which consist of simple products with different prices:
- Price Range – this option displays the price range from lowest to highest (for example, $50 to $85).
- Lowest Price – this option displays the lowest price of all included simple products (for example, $50).
- “Price is Valid for (Days)“: this option sets the ‘priceValidUntil’ Schema.org property. and indicates the date after which the price is no longer valid for structured data. The date is dynamically updated every day, so that your product price is always displayed in rich snippets. Note that if a product has a “Special Price to” date set (Catalog > Products > Selected Product > Special Price To), it will be used instead to correctly display prices during sales.
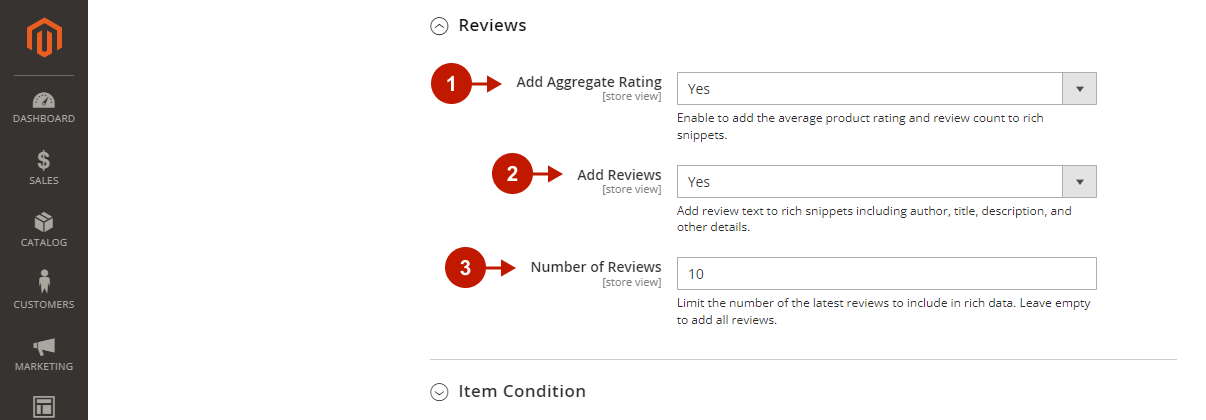
Reviews
Step-by-step guide:
- “Add Aggregate Rating“: this option allows you to add the average product rating (yellow stars) and review count (e.g. “16 reviews”) to rich snippets.
- “Add Reviews“: enable to add the review details to structured data, which will be displayed in the Knowledge Panel (the information box to the right of the search results that describes organizations, people, places, entities, etc.). Review details include average rating, publication date, review author, title, description, and more.
- “Number of Reviews“: specify how many reviews you want to display in the reviews block in the Knowledge Panel. Leave empty to show all reviews.
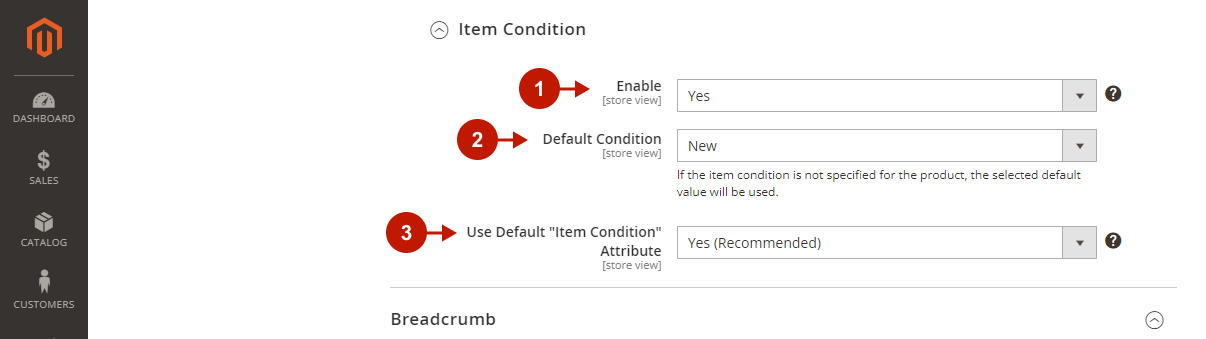
Item Condition
Step-by-step guide:
- “Enable“: this option allows you to display the item’s condition (such as New, Refurbished, Damaged, etc.)
- “Default Condition“: if the item condition is not specified for the product (Catalog > Products > Selected Product > Product Condition), the selected default value will be used.
- “Use Default ‘Item Condition’ Attribute“:
- Set it to Yes (Recommended) to use the default “Item Condition” product attribute and its options provided by this extension, which are already mapped with the following schema.org condition subtypes: ‘new’, ‘damaged’, ‘used’, and ‘refurbished’.
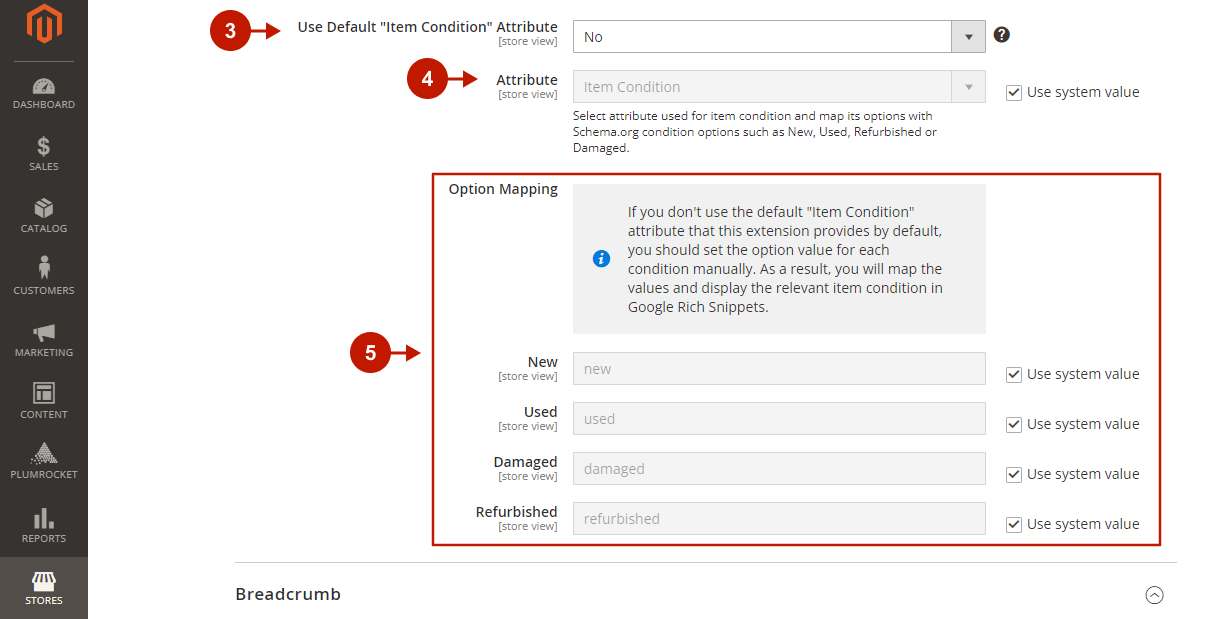
Step-by-step guide:
- Use Default ‘Item Condition’ Attribute“:
- Set to No to use your custom product condition attribute, which you will need to select in the next field.
- “Attribute“: select the custom attribute you use for item condition.
- “Option Mapping“: provide you custom option values for item conditions displayed in Rich Snippets, corresponding the schema.org’s New, Used, Damaged, and Refurbished.
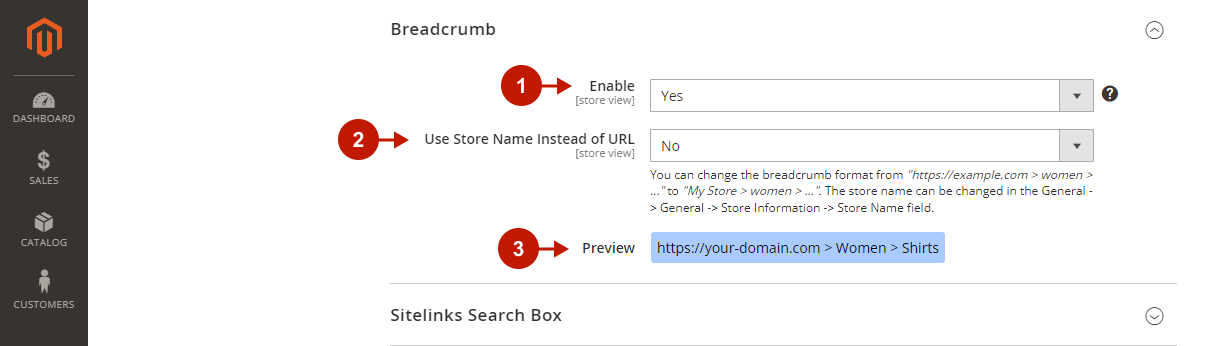
Breadcrumb
Step-by-step guide:
- “Enable“: this option allows you to add breadcrumbs to structured data and show the page’s position in the site hierarchy on the search results page.
- “Use Store Name Instead of URL“: set to Yes if you want to display your store name (General > General > Store Information > Store Name) instead of the full website link in the breadcrumbs.
- “Preview“: see what your breadcrumb looks like in this preview box.
Sitelinks Search Box
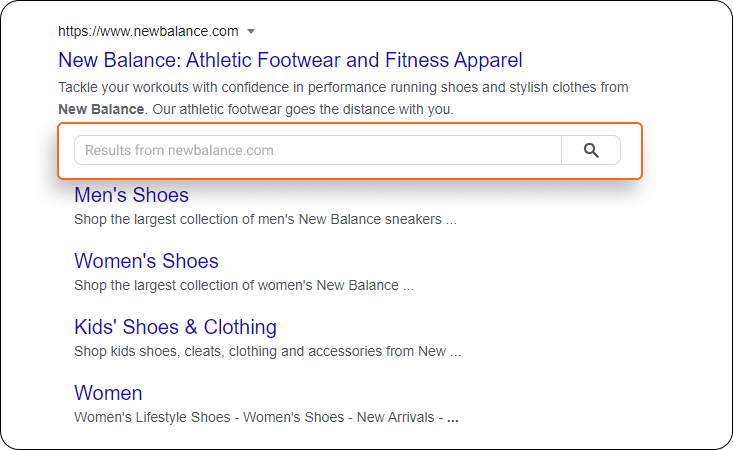
Step-by-step guide:
- “Enable“: enable this option to add a search box when your website appears on the search results page.

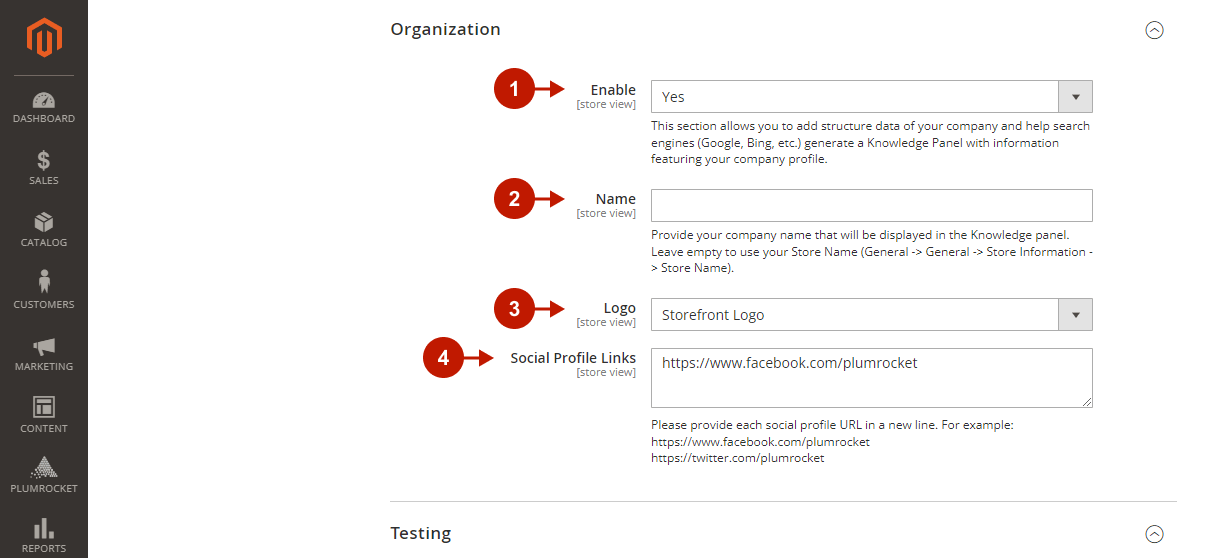
Organization

Step-by-step guide:
- “Enable“: by enabling this option, you will add structure data of your company and help search engines (Google, Bing, etc.) generate a Knowledge Panel with information featuring your company profile.
- “Name“: provide your company name that will be displayed in the Knowledge panel. Leave empty to use your Store Name (General -> General -> Store Information -> Store Name).
- “Logo“: select your company’s logo that will be displayed in the knowledge panel.
- Use your Storefront Logo
- Upload the Custom Logo
- “Social Profile Links“: add a Profiles section to the knowledge panel showing your social media presence. Provide each social profile URL in a new line.
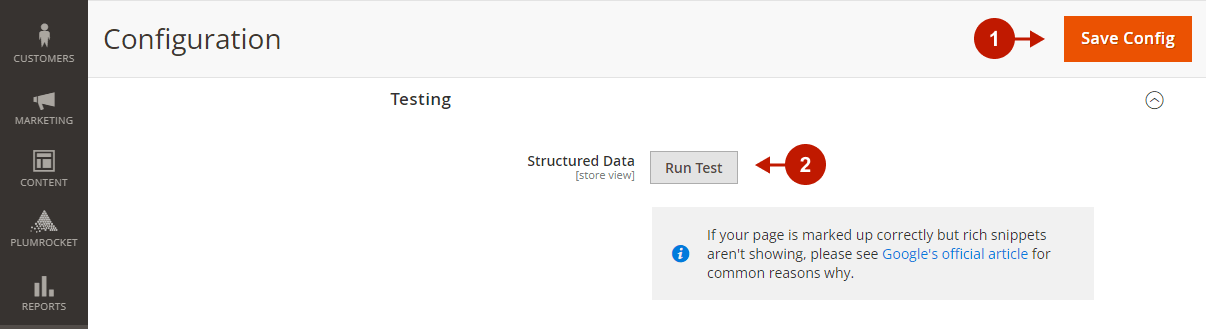
Testing Magento 2 Rich Snippets Extension
Testing
Step-by-step guide:
- Click Save Config to apply all the configurations you’ve made, and clear the Magento cache.
- Click Run Test, after which you will be redirected to the Google Rich Results test. In the Detected Structured Data section, you can see what structured data was found on the page, as well as review possible issues.
Was this article helpful?