In this article, you will learn how to refresh and flush Magento 2 Cache in a few steps. Please check the steps below.
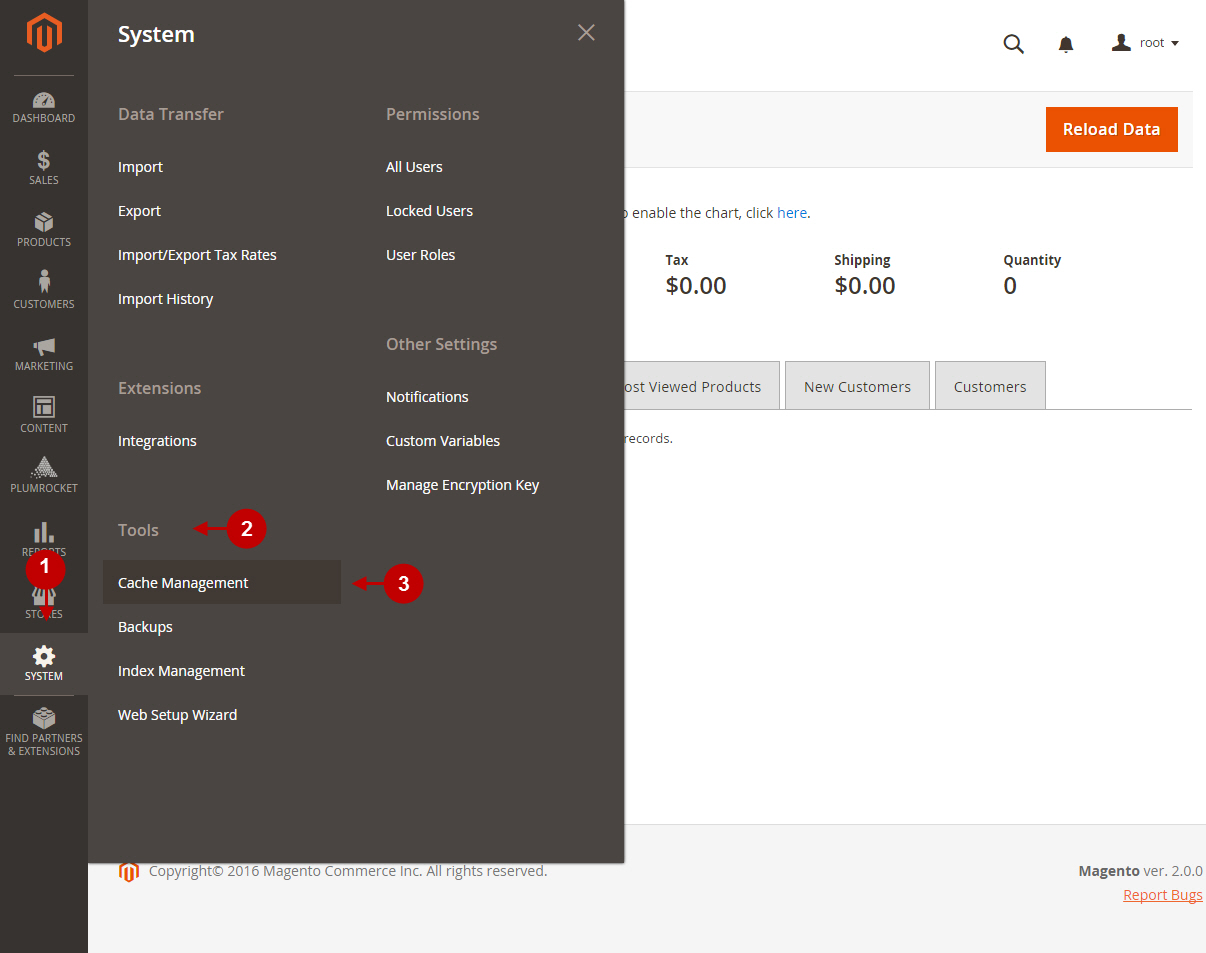
Step 1. Go to System > Tools > Cache Management
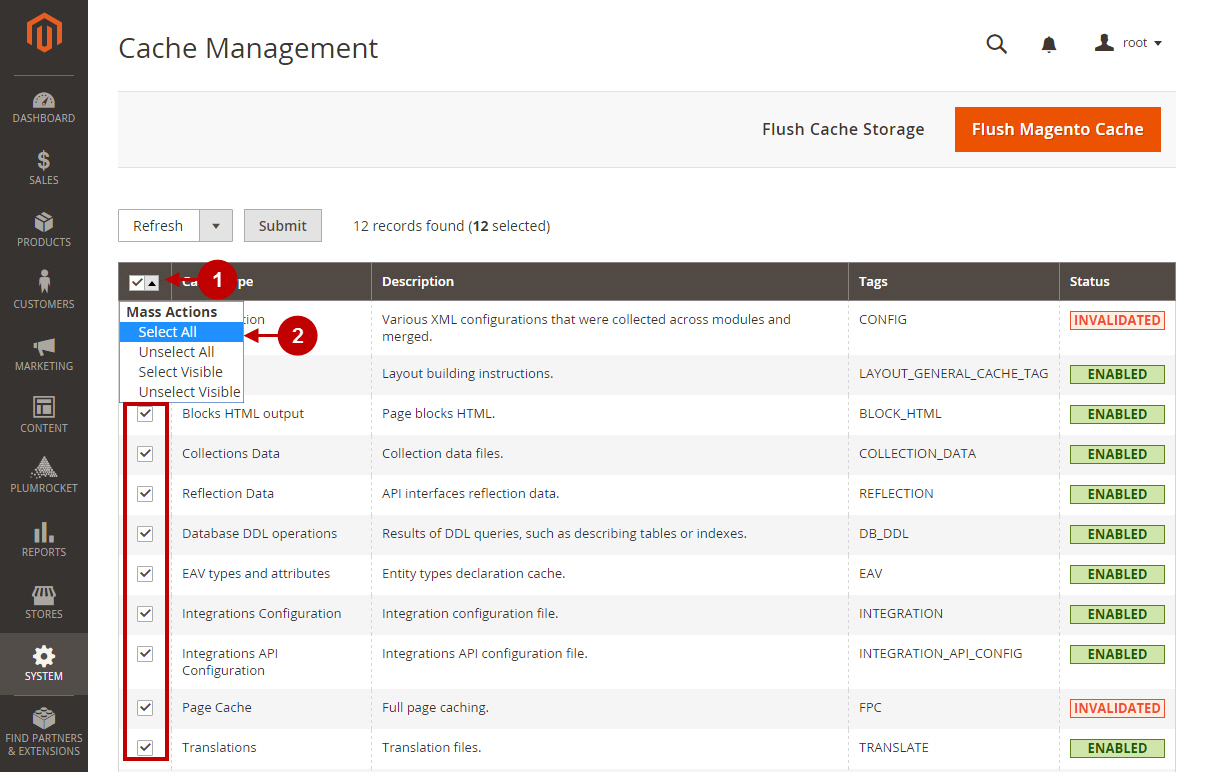
Step 2. Select all cache types and click “Refresh”
Step-by-Step action:
- Go to the drop down menu in the grid.
- Choose the Select All option and all the fields will be checked accordingly.
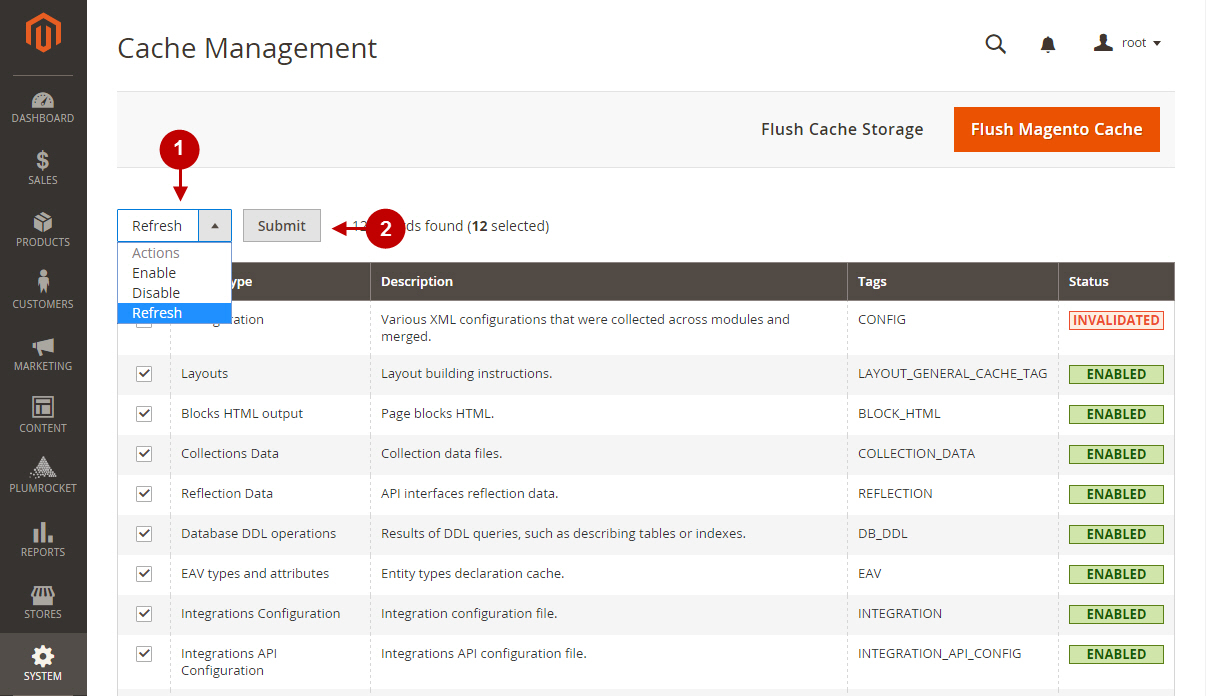
Step-by-Step action:
- Go to the drop-down menu above the grid and select the Refresh option.
- Press the Submit button to confirm your changes.
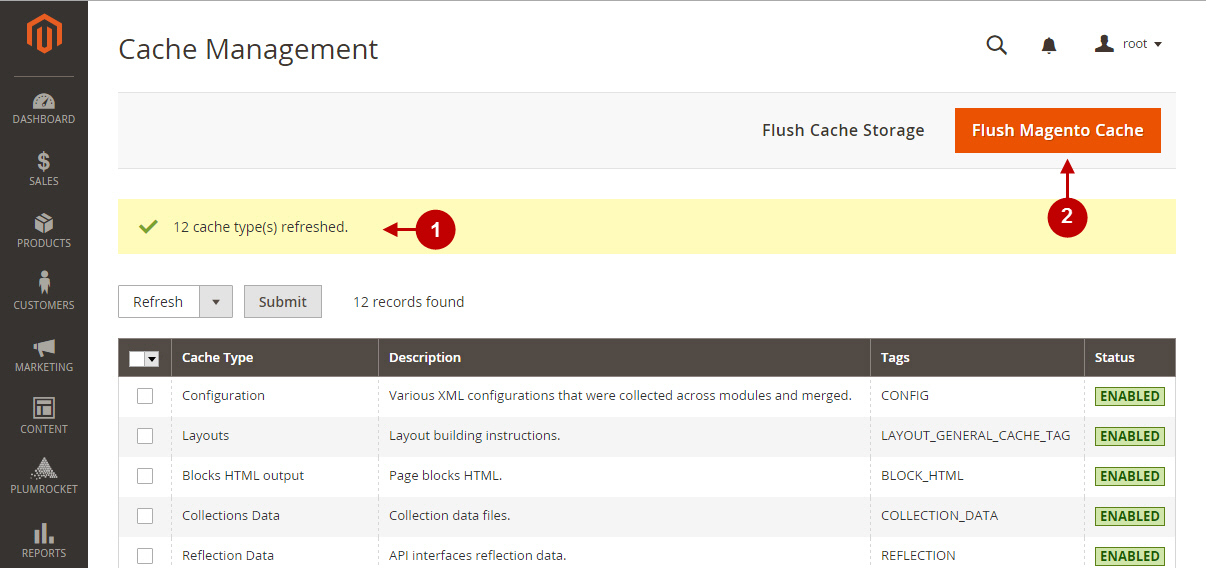
Step 3. Click the Flush Magento Cache button
Step-by-Step action:
- In this field, you can see the number of cache type(s) refreshed.
- To make sure the cache has been fully cleared, it is also recommended to flush cache storage by pressing the Flush Magento Cache button.