In this article, you will find step-by-step instructions on how to properly configure the Magento 2 Page Speed Optimizer extension. Please follow this guide after installing the plugin.
Configuring Magento 2 Google Page Speed Optimizer Extension
In the main Magento menu, go to the Plumrocket tab > select Google Page Speed Optimizer > Configuration.
General
Step-by-step guide:
- “Enable“: set the option to Yes to enable the Page Speed Optimizer extension on your Magento 2 store.
- “Serial Key“: enter the unique serial key provided after the purchase for the legitimate and proper functioning of your extension. Note: in most cases, this field will be pre-filled with the serial key automatically, and the green check mark will be displayed. Otherwise, please read the Serial Key Activation article in order to find and paste your serial key manually.
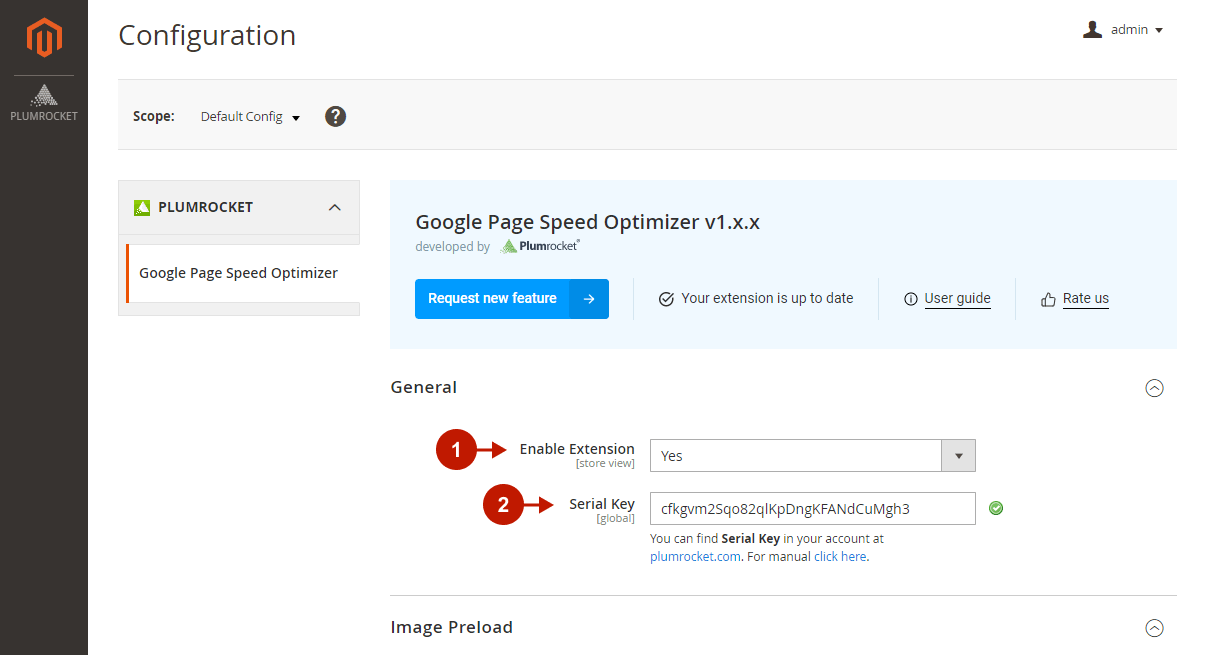
Image Preload
Step-by-step guide:
- “Enable“: set to Yes to enable image preloading on your store. This option allows you to speed up the initial page display by loading the main images on the page before any other resources.
- Please specify the number of images you want to preload on the Category Page, CMS Page, and other pages. It is recommended to preload only above-the-fold and the most important images on pages in order not to slow down the loading of important resources and ensure the fastest possible page rendering.
- “Minimum Image Width (px)“: ignore only small and minor images during preloading by setting minimum width and height for images in this field.
- “Preload by Image Attribute“: add a data-hero image attribute to your HTML code to manually mark images as the ones that should be preloaded first, ignoring size restrictions set in the previous option.
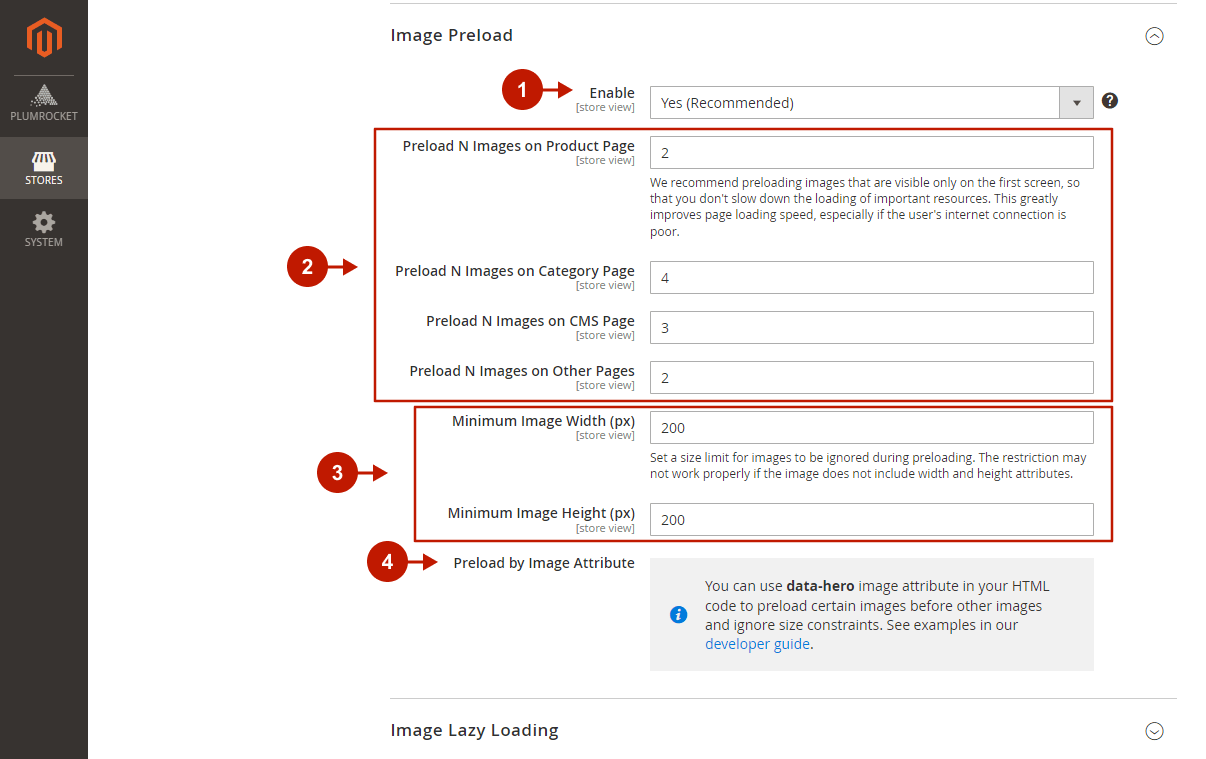
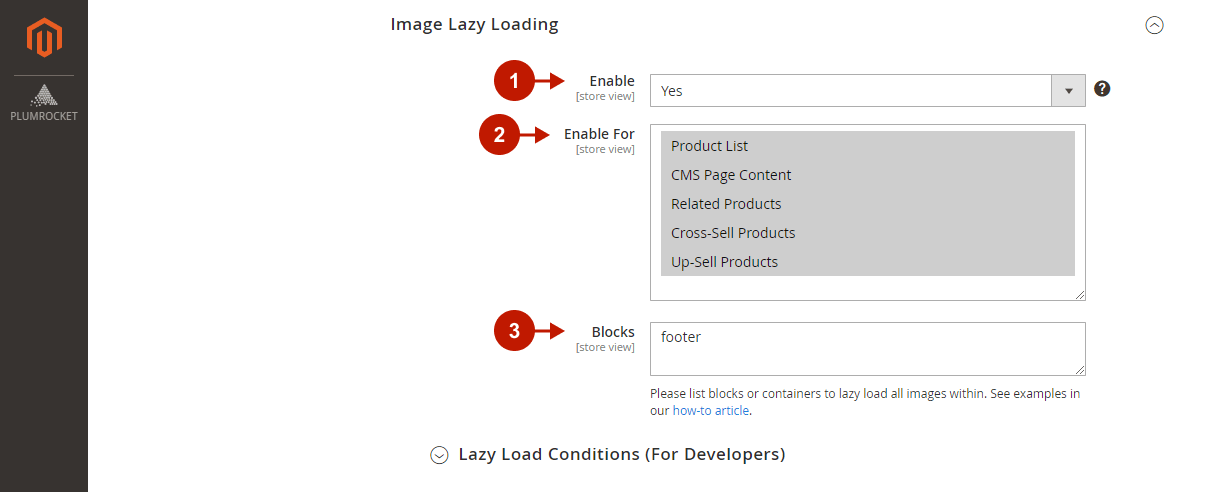
Image Lazy Loading
Step-by-step guide:
- “Enable“: set to Yes to enable image lazy loading on your store. Lazy loading defers loading of non-critical (off-screen) images at page load time until they are needed, which greatly improves LCP Core Web Vital score.
- “Enable For“: select the pages/lists you want to apply lazy loading to.
- “Blocks“: please specify the container/block to preload all images inside.
Lazy Load Conditions (For Developers)
Step-by-step guide:
- “Lazy Load by CSS Class“: please provide CSS class(es) to lazy load all images that contain it.
- “Lazy Load by URL“: enter URL pattern(s) to lazy load all images that contain it. Learn more about URL pattern formats in our developer guide.
- “Exclude by CSS Class“: exclude some images from lazy loading by specifying their CSS class in this field. This option may be useful for carousels or any third-party elements that already have lazy loading built-in to ensure full compatibility with the extension.

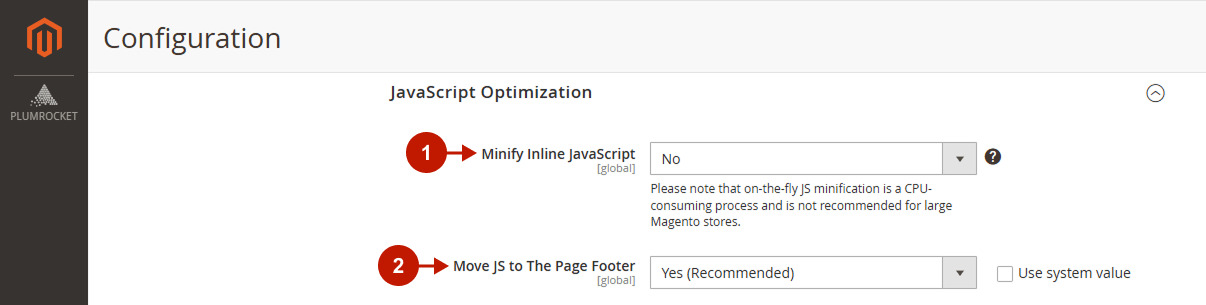
Javascript Optimization
Step-by-step guide:
- “Minify Inline JavaScript“: by enabling this option, the content inside <script> tags will be minified to reduce the page weight and speed up the page loading.
- “Move JS to The Page Footer“: by default, JS files may be executed or processed before loading the page content, which slows down the page rendering. Enable this option to move JS to the bottom of the page so your web server would quickly render the page and only then the user’s browser would execute JavaScript. This will significantly boost the page loading time and Core Web Vitals score.
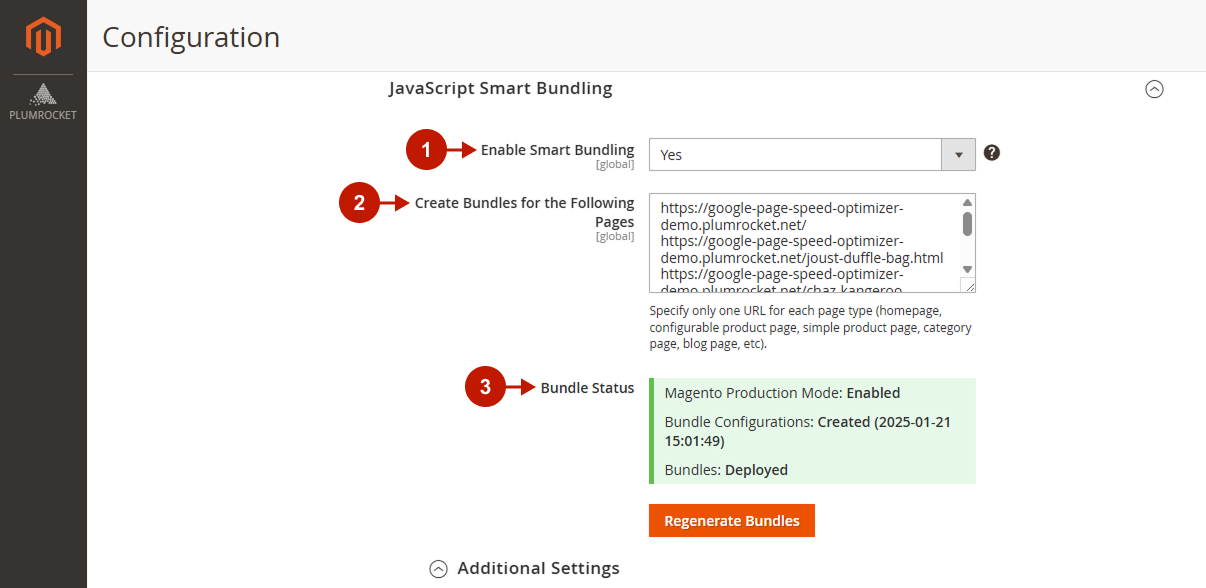
JavaScript Smart Bundling
Smart Bundling from Plumrocket is the most efficient and fast way to load JavaScript files. The extension not only bundles JS files to reduce the network requests, but it also creates different bundles for each page type to load only those files that are required for a specific page type.
This allows for minimum network requests and increases the Total Blocking Time (TBT), Time To Interactive (TTI), and First Input Delay (FID) metrics of Web Vitals. As a result, the page becomes interactive for users much faster.
Step-by-step guide:
- “Enable Smart Bundling“: enable this option to start the automatic bundle generation of JS files for your website.
- “Create Bundles for the Following Pages“: specify the pages for which bundles should be created.
- “Bundle Status“: here you can see the status of the bundle generation. Bundles are generated and run properly if all three warnings are green.
- If creating bundles for the first time, click Generate Bundles and follow the steps in the quick wizard.
- If you created bundles before but see the red alerts, click Regenerate Bundles to go through the bundle creation process again. Note that it’s recommended to regenerate bundles every time you install new extensions to include any additional JS files they may provide.
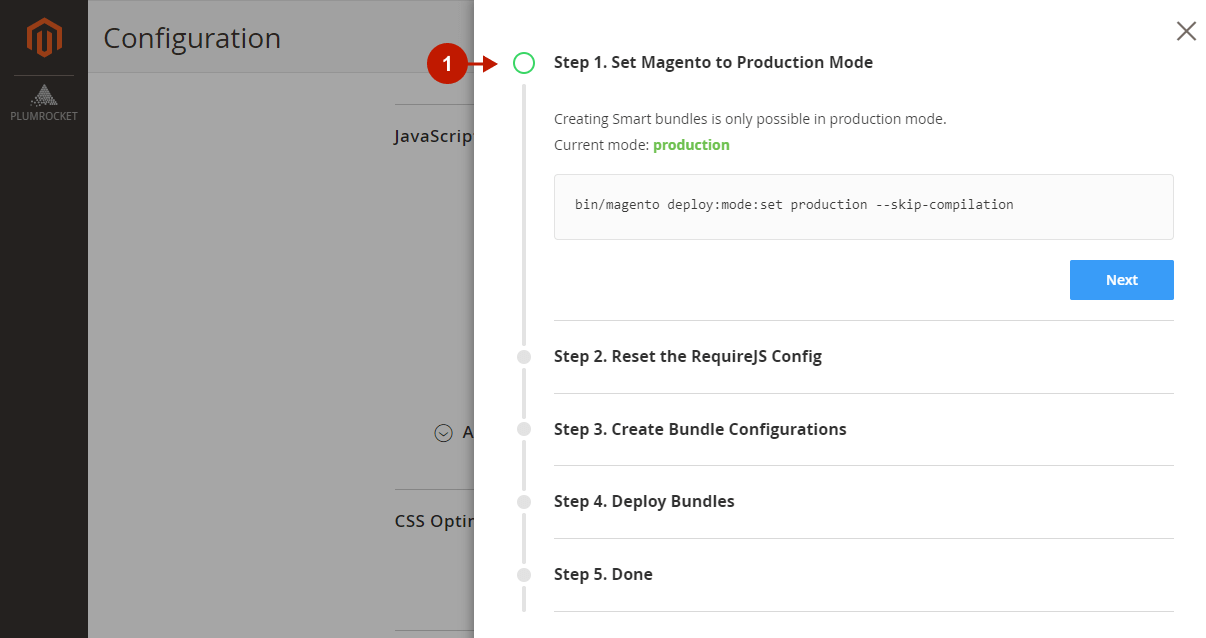
Step-by-step guide:
- When clicking Generate Bundles, you will be prompted to complete 5 simple steps with our quick wizard.
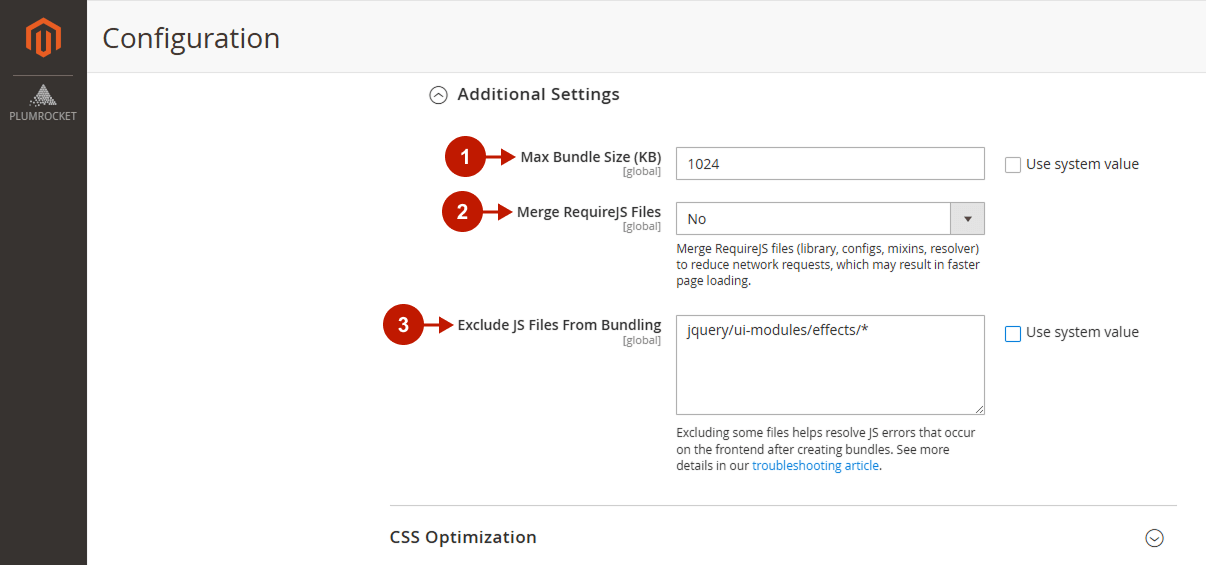
Additional Settings
Step-by-step guide:
- “Max Bundle Size (KB)“: change the maximum bundle size if necessary.
- “Merge RequireJS Files“: enable this option to combine all RequireJS files, improving page load speed by reducing the number of HTTP requests. Make sure to test after enabling to ensure that no JavaScript errors occur.
- “Exclude JS Files From Bundling“: you may need to exclude JS files from bundling that are causing JS errors. Please follow the troubleshooting guide provided in the field comment to get it right.
CSS Optimization
Step-by-step guide:
- “Minify Inline CSS“: minify CSS content in <style> tags to reduce the page weight and speed up page load time.

Font Optimization
Step-by-step guide:
- “Preload Fonts“: preload your web fonts by entering the font URL in this field. This helps avoid layout shifts and improves the Cumulative Layout Shift (CLS) Core Web Vital score.

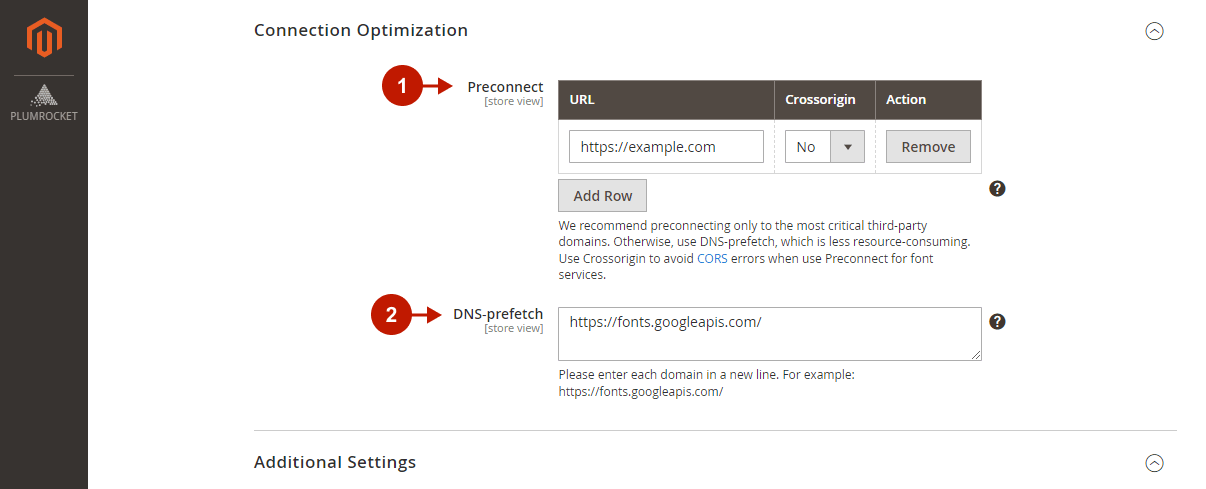
Connection Optimization
Step-by-step guide:
- “Preconnect“: preconecting to third-party domains allows you to establish early server connections with that domains (before the content is requested), which saves time later and renders the page faster. Note that preconnect is a resource-consuming process and is only efficient when preconnecting to the most critical domains. Click Add Row to provide the domain URL.
- “DNS-prefetch“: unlike Preconnect that establishes a full server connection to third-party domains early in the page load, DNS-prefetch performs only the first part of that connection (DNS-resolve). This is a less resource-consuming process to speed up the rendering of the content from third-party domains.
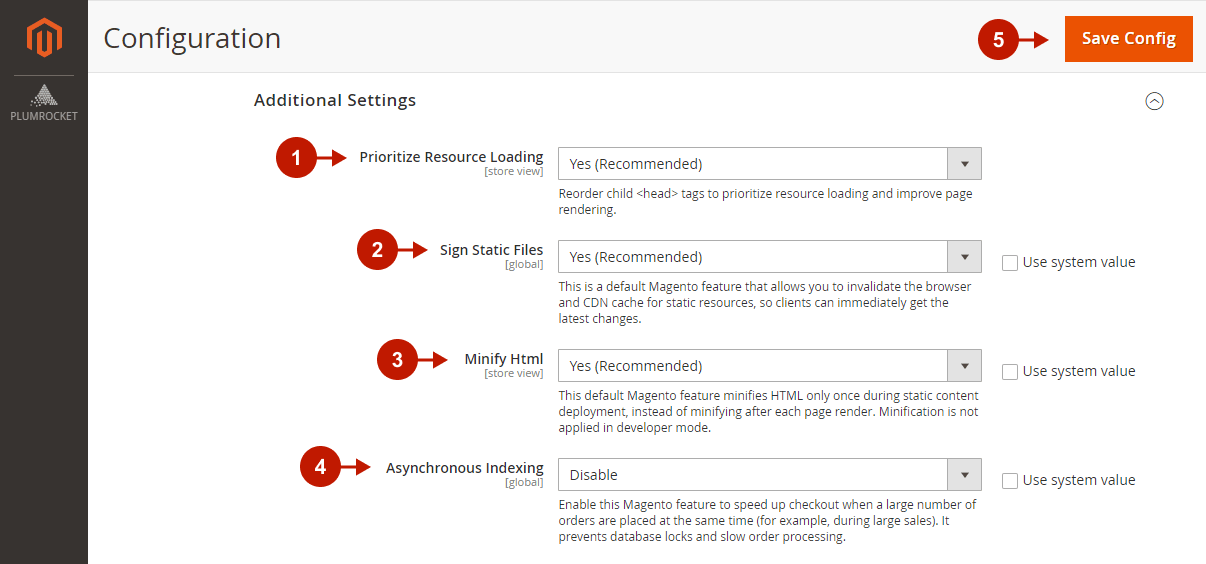
Additional Settings
Step-by-step guide:
- “Prioritize Resource Loading“: it is recommended to set this option to Yes to reorder child <head> tags and ensure that page resources are more efficiently loaded and lazy loading works properly.
- “Sign Static Files“: set to Yes to invalidate the browser and CDN cache for static resources and immediately display changes on the website. This is a default Magento feature that is recommended to be enabled to improve page speed.
- “Minify Html“: set to Yes to minify HTML only once during static content deployment, speeding up page rendering.
- “Asynchronous Indexing“: enable this option to prevent database locks and slow order processing during checkout, when a large number of orders are placed at the same time (for example, during large sales).
- Click Save Config to save all your configurations.
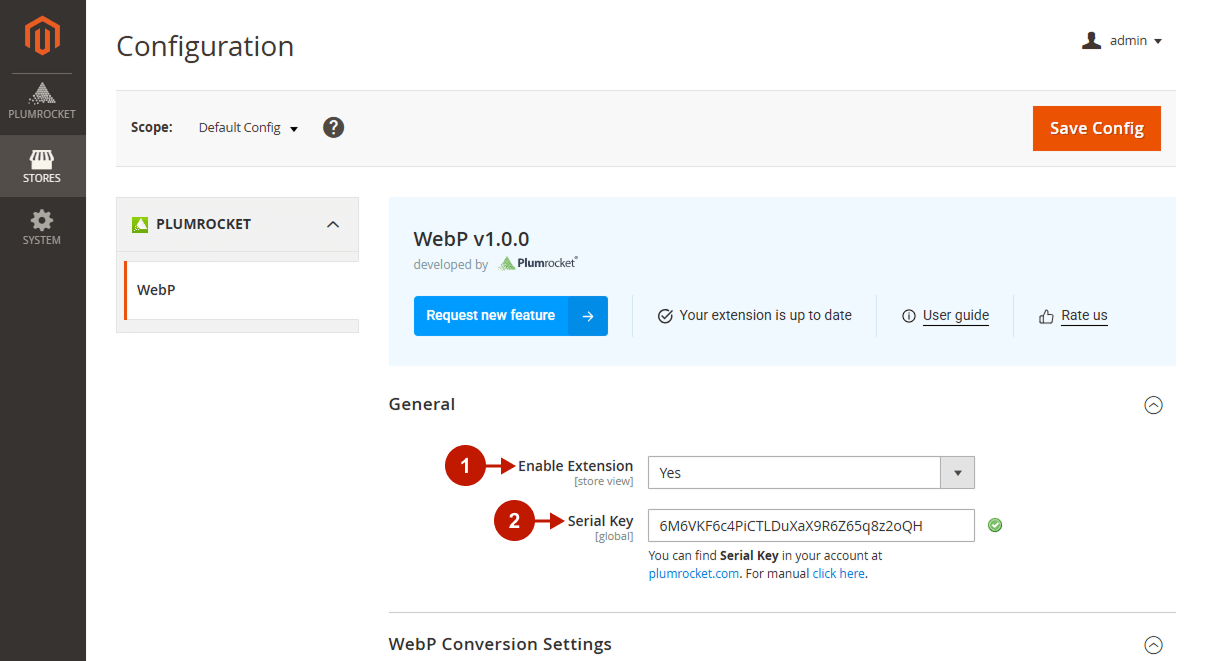
Configuring WebP Image Optimizer
In the main Magento menu, go to the Plumrocket tab > select WebP > Configuration.
General
Step-by-step guide:
- “Enable“: set the option to Yes to enable the WebP Image Optimizer extension on your Magento 2 store.
- “Serial Key“: enter the unique serial key provided to you after purchasing the extension. Please note: in most cases, this field will be pre-filled with a serial key automatically, and the green checkmark will be displayed. To find and paste your serial key manually, read the Serial Key Activation article.
WebP Conversion Settings
Step-by-step guide:
- “Conversion Mode”: choose the conversion mode that will be used for the WebP images generation:
- On Page Load – Images convert the first time they are viewed. This may slow the first load slightly but saves resources by processing only used images and showing them instantly.
- “Conversion Engine“: select the conversion engine you would like to use:
- Cwebp – a command-line utility that provides fast conversion with good image quality. Recommended when server installation is possible.
- GD – a built-in PHP graphics library. Supported almost everywhere, but typically slower compared to other engines.
- Imagick – a PHP extension based on ImageMagick. Offers high-quality results and advanced features but requires ImageMagick to be installed on the server.
- “Image Quality”: specify the generated images quality.

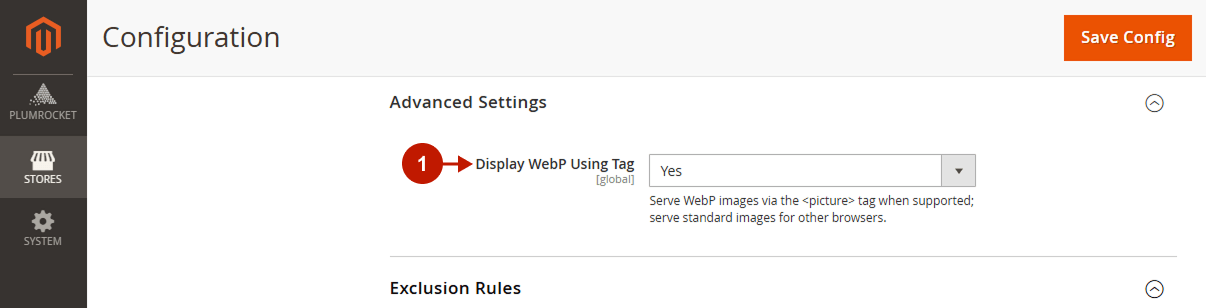
Advanced Settings
Step-by-step guide:
- “Display WebP Using Tag“: when enabled, all images processed by the module are added to the page using the HTML element. This ensures that browsers supporting WebP will load the optimized version, while others will fall back to the original image format, preserving the correct page appearance.
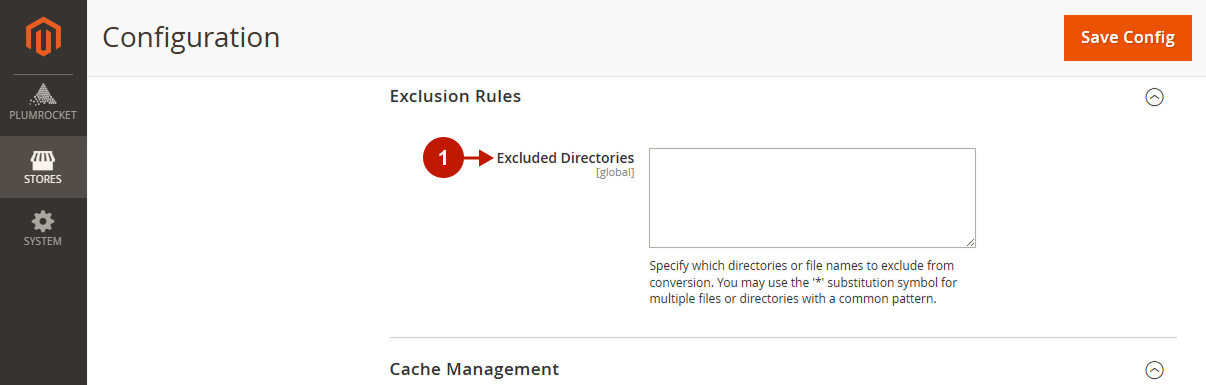
Exclusion Rules
Step-by-step guide:
- “Excluded Directories“: define directories or file names that should be skipped during conversion.
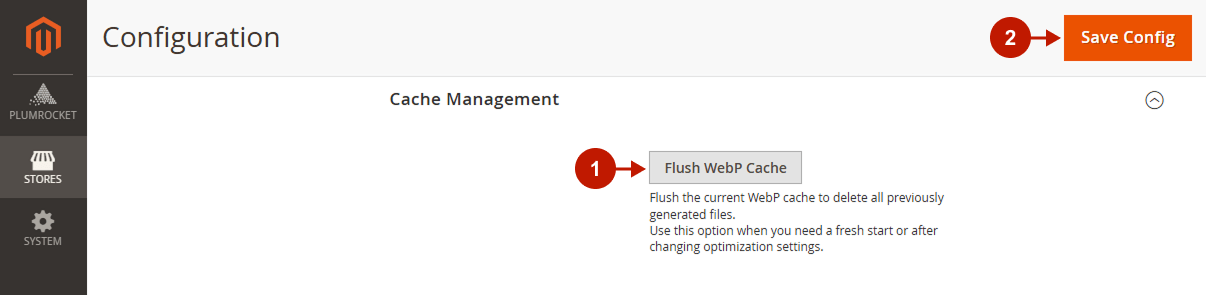
Cache Management
Step-by-step guide:
- “Flush WebP Cache“: clear all previously generated WebP files. Use this option to start fresh or after updating optimization settings.
- Save your changes.