In this article, you will learn how to configure the Magento 2 Layered Navigation extension (FREE).
General
Step-by-step guide:
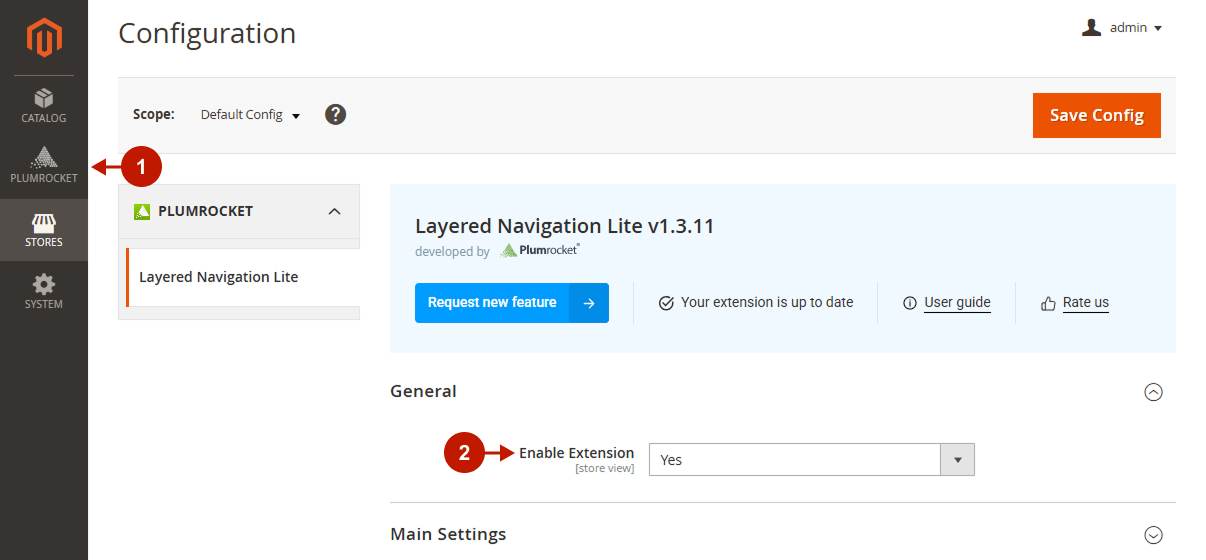
- In the main Magento menu, go to the Plumrocket tab -> Layered Navigation Lite -> Configuration.
- “Enable extension“: activate the Magento 2 Layered Navigation Lite extension.

Main Settings
Step-by-step guide:
- “Scroll Up After Filtering“: set it to Yes to jump to the top of the filter results list when the filter options are applied.

Attribute Filters
Step-by-step guide:
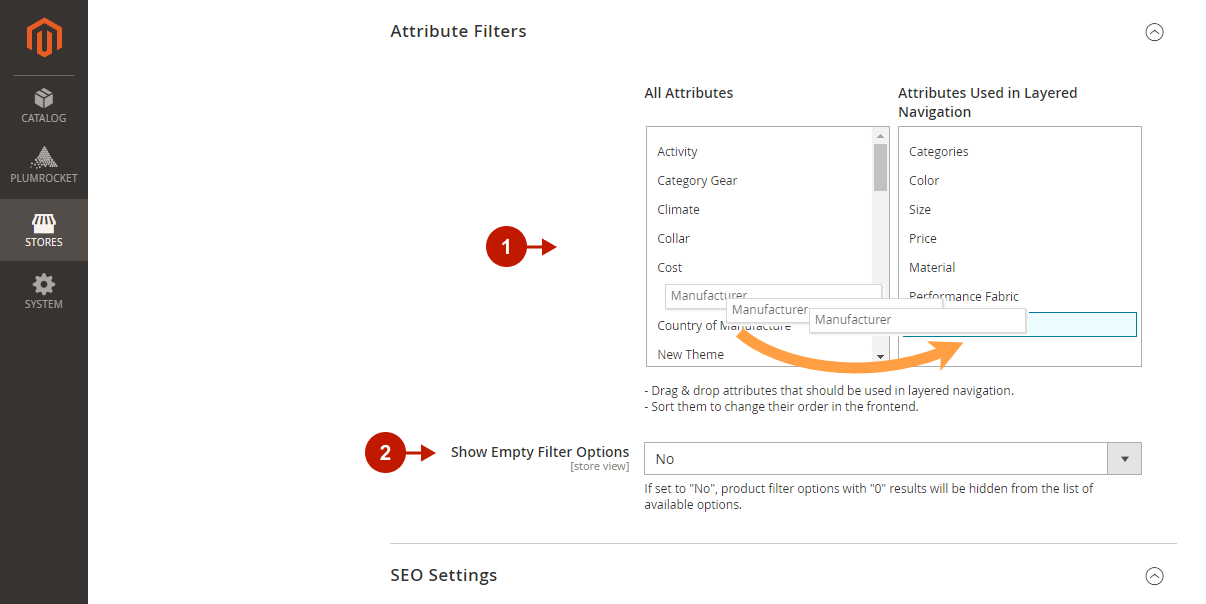
- Conveniently enable the filter attributes for layered navigation and sort them on the frontend. Just drag and drop them from the list of all available attributes to the “Attributes Used in Layered Navigation” column. NOTE: this functionality was designed to visualize and speed up the process of enabling filter attributes for layered navigation. It automatically changes the “Use in Layered Navigation” option to Filterable (with results) in the Stores -> Attributes -> Product -> [selected attribute] -> Storefront Properties.
- “Show Empty Filter Options“: set it to No to hide the product filter options with “0” results from the list of available options.

Seo Settings
SEO-Friendly URLs
Step-by-step guide:
- “Insert Filters In“: choose whether the filters should be inserted in the URL path or GET parameters.
- Check the URL Preview.

Category Page Heading
Step-by-step guide:
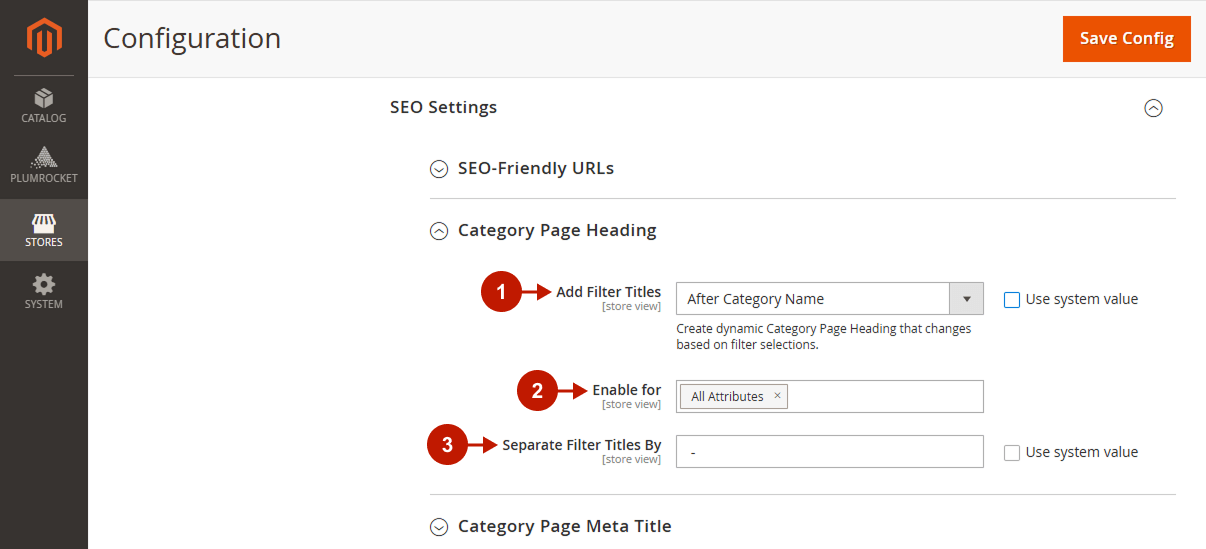
- “Add Filter Titles“: choose where to place the filter titles in the Category page Heading (After Category Name or Before Category Name), or set the option to No to disable it.
- “Enable for“: select the attributes whose options are to be added to the dynamic heading.
- “Separate Filter Titles By“: specify a separator for the filter options in the Category page heading.

Category Page Meta Title
Step-by-step guide:
- “Add Filter Titles“: choose where to place the filter names in the Category page meta titles (After Meta Title or Before Meta Title), or set the option to No to disable it.
- “Enable for“: select the attributes whose options are to be added to the page meta title.
- “Separate Filter Titles By“: specify a separator for the filter options in the Category page meta title.

Was this article helpful?
