In this article, you will learn how to configure Magento 2 Custom Order Number extension. Please check the guide below in order to configure it properly.
Configuring Custom Order Number Extension for Magento 2
Go to the Plumrocket tab in the main Magento menu -> navigate to Custom Order Number -> select Configuration.
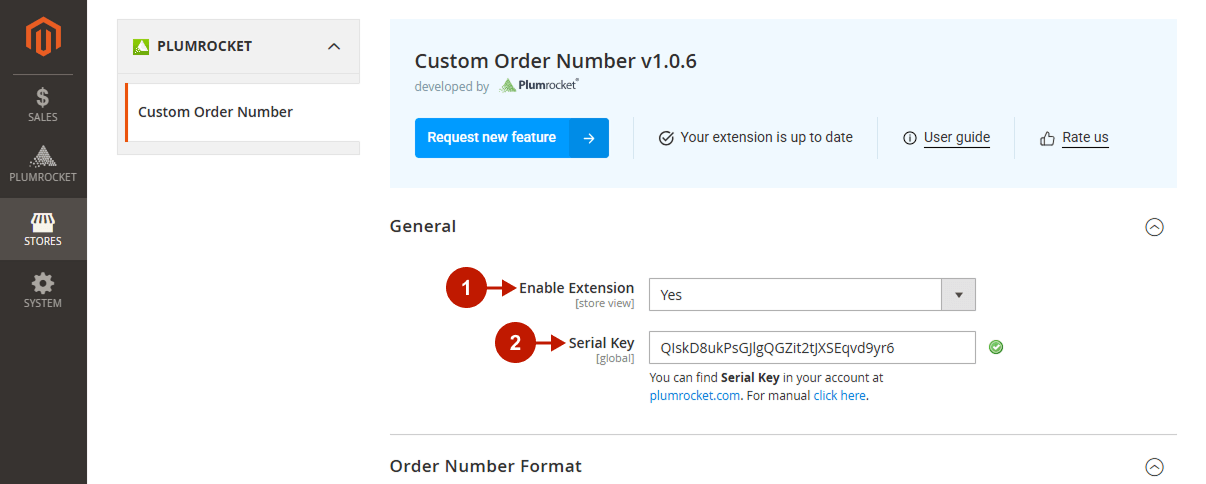
General
First, learn how to enable and activate the extension.
Step-by-step guide:
- Enable Extension: set to Yes to enable the extension.
- Serial Key: enter the unique serial key provided to you after purchasing the extension. Please note: in most cases, this field will be pre-filled with a serial key automatically, and the green checkmark will be displayed. To find and paste your serial key manually, read the Serial Key Activation article.

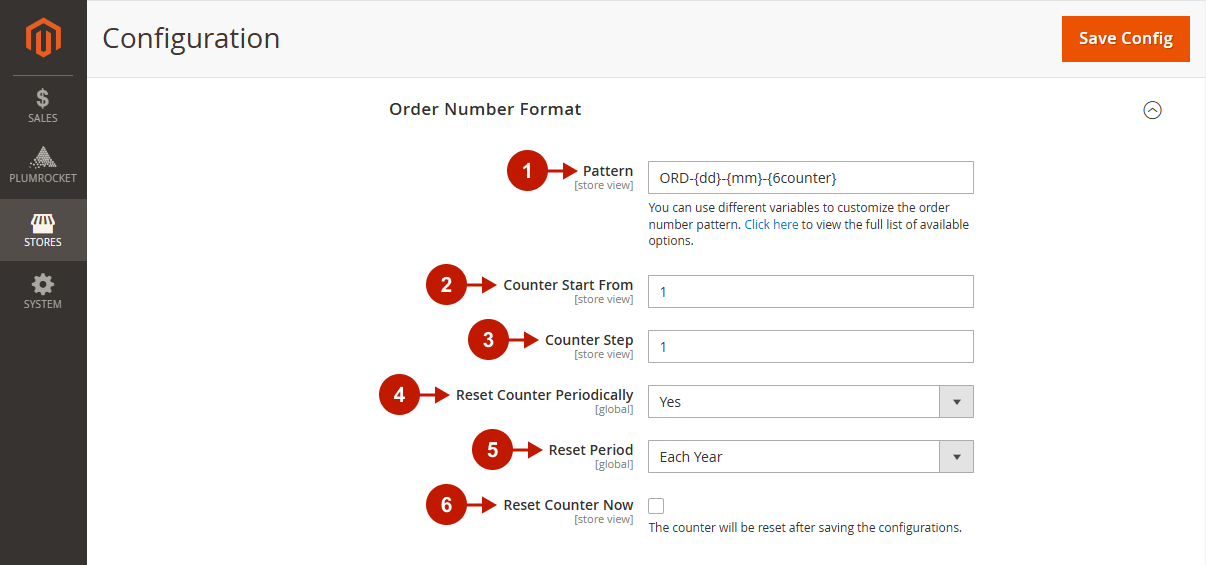
Order Number Format
This section allows you to fully configure your custom order numbering.
Step-by-step guide:
- Pattern: specify your custom Order Number pattern to replace the default Magento order numbers. You can set the order number prefix, suffix, and use different variables. The available variables are:
- Counter: the formula is {number + counter}, including the counter length (the number of digits of the counter) and the counter itself
- Date information: {d}, {dd}, {m}, {mm}, {M}, {MM}, {y}, {yy}, {yyyy}
- Store: {store_code}, {store_id}
- Please find more information about variables in our Variables Guide for Creating Custom Number Patterns.
- Counter Start From: set the starting number for the order counter. If you enter 1200, the first order placed gets the number 1201.
- Counter Step: set the interval between consecutive order numbers. For example, if the counter step is 3, consecutive orders will have the numbers #0005 and #0008.
- Reset Counter Periodically: set to Yes to enable automatic counter reset.
- Reset Period: set the time period to automatically reset the counter: Every Year, Every Month, or Every Day.
- Reset Counter Now: check the box and click Save Config to manually reset the counter.

Invoice / Credit Memo / Shipment Number Format
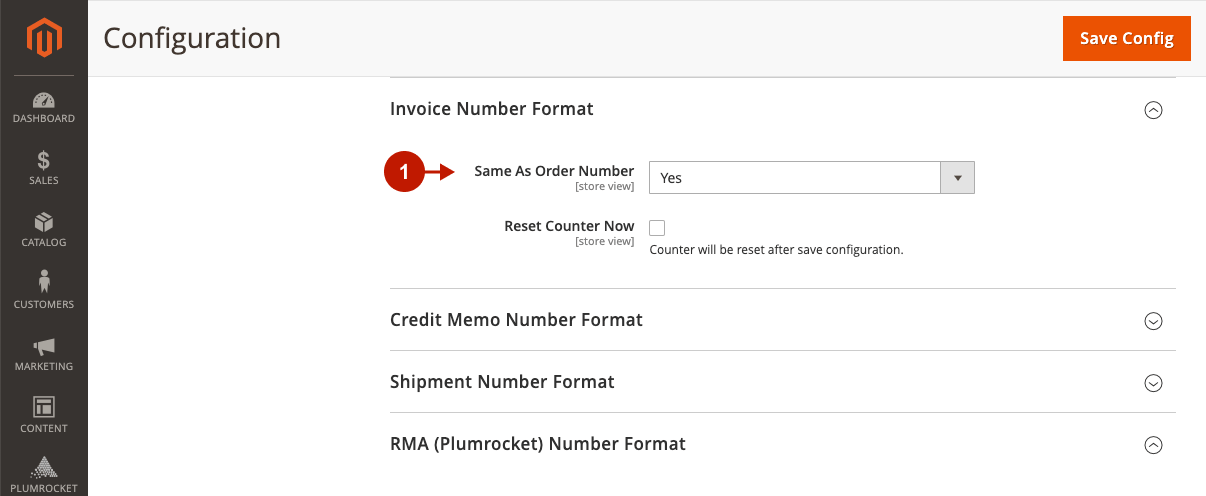
Learn how to set up custom numbering patterns for the Invoice Number Format, Credit Memo Number Format, and Shipment Number Format sections in the same way as the previous Order Number Format section.
Step-by-step guide:
- Same as Order Number: set to Yes to use the same numbers for invoices / credit memo / shipment and orders to meet your local record-keeping standards. Otherwise, set to No to configure new numbering pattern, following the instructions of the Order Number Format section.

RMA (Plumrocket) Number Format
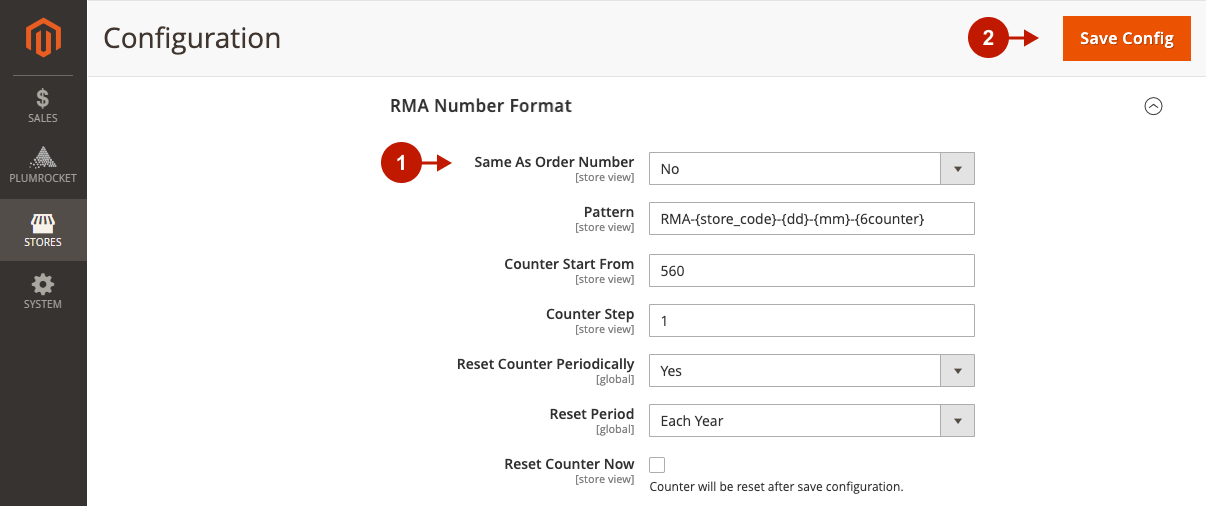
Leverage the integration with the Plumrocket RMA plugin, and set up a custom numbering pattern for RMA returns. Before proceeding, please make sure the Plumrocket RMA extension is installed.
Step-by-step guide:
- Same as Order Number: set to Yes to use the same numbers for RMA Returns and orders to meet your local record-keeping standards. Set to No to configure a new numbering pattern for RMA Returns, following the instructions of the Order Number Format section.
- Click Save Config to save all configurations.

The configuration of the Magneto 2 Custom Order Number extension is now complete.
