In this article, you will learn how to update your Custom Order Number extension for Magento 2 correctly. Please follow this step-by-step guide below.
You can choose one of the following two methods to update the extension on your Magento 2 store:
Update Extension via Composer
In order to update your Magento 2 Custom Order Number extension via Composer, open the console (SSH terminal) and follow commands:
1. In the terminal, switch to your Magento 2 root directory using the command:
cd /FULL_PATH_TO_YOUR_MAGENTO2where “FULL_PATH_TO_YOUR_MAGENTO2” is the path to your Magento 2 folder on your server.
2. Update your Plumrocket extension to the latest version:
composer update plumrocket/module-custom-order-numberAfter running this command, you will be prompted to enter the username and password (skip this step if your credentials were saved during the installation).

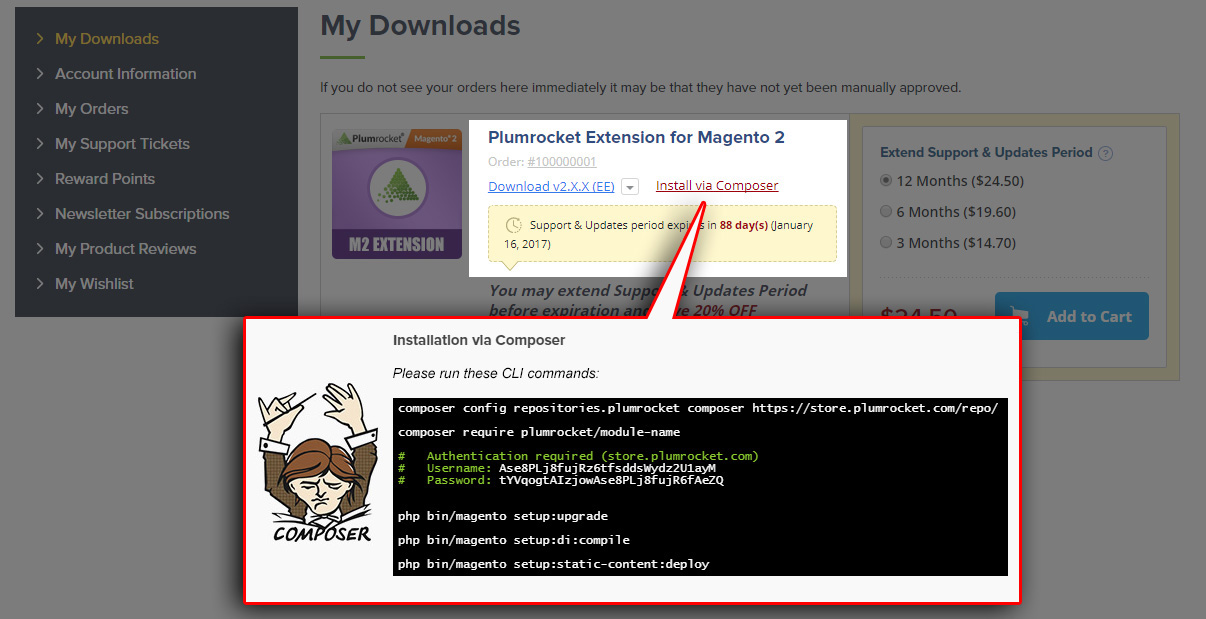
In order to find your personal Username and Password to update the extension via Composer, go to your account at https://plumrocket.com > select My Account in the header menu > select the My Downloads tab > find the required Plumrocket extension in the list > press the Install via Composer link. Please see the screenshot below.
Step-by-step guide:
- Copy the Username key from the popup window.
- Copy the Password key from the popup window.
3. Run the next four Magento 2 commands:
php bin/magento cache:flush
php bin/magento setup:upgrade
php bin/magento setup:di:compile
php bin/magento setup:static-content:deploy
After running these commands, the extension should be updated successfully. A similar message should be displayed in your console as displayed below:

Next Step > Magento 2 Custom Order Number v1.x Configuration
Update Extension via FTP
Step 1. Download and unzip the Magento 2 Custom Order Number Extension’s files
Step-by-step guide:
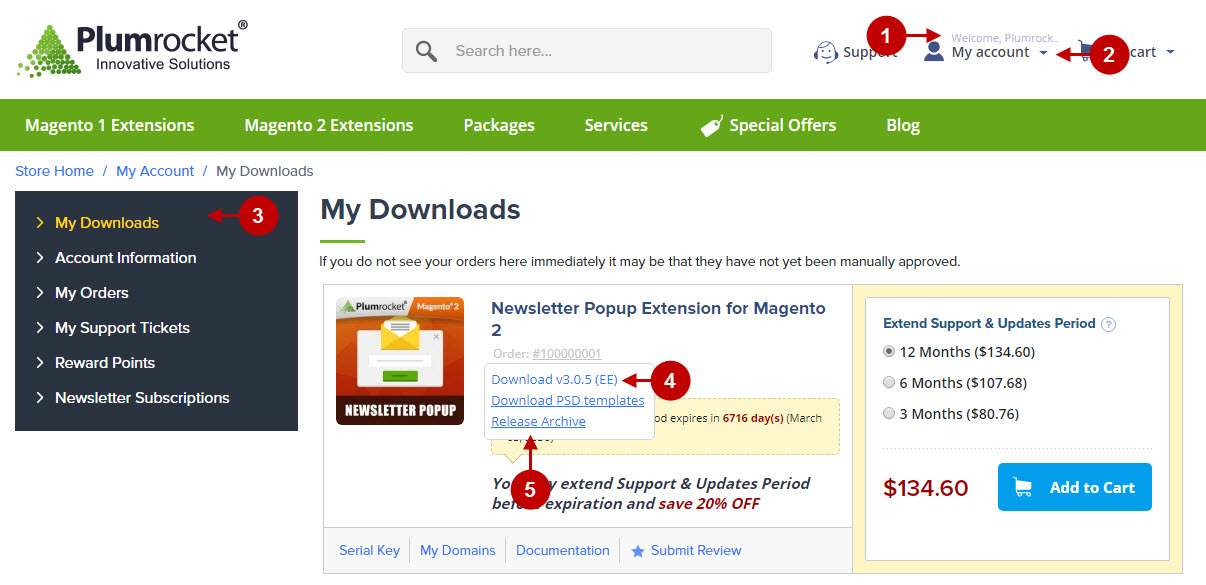
- Login to your Plumrocket store account: https://plumrocket.com
- Select My Account in the menu (to open this page, you have to log in first).
- Select My Downloads.
- Press on the Download link to download the latest version of your extension.
- If you need to download one of the previous versions of your extension or to check the change logs, please, click the Release Archive link.
Step-by-step guide:
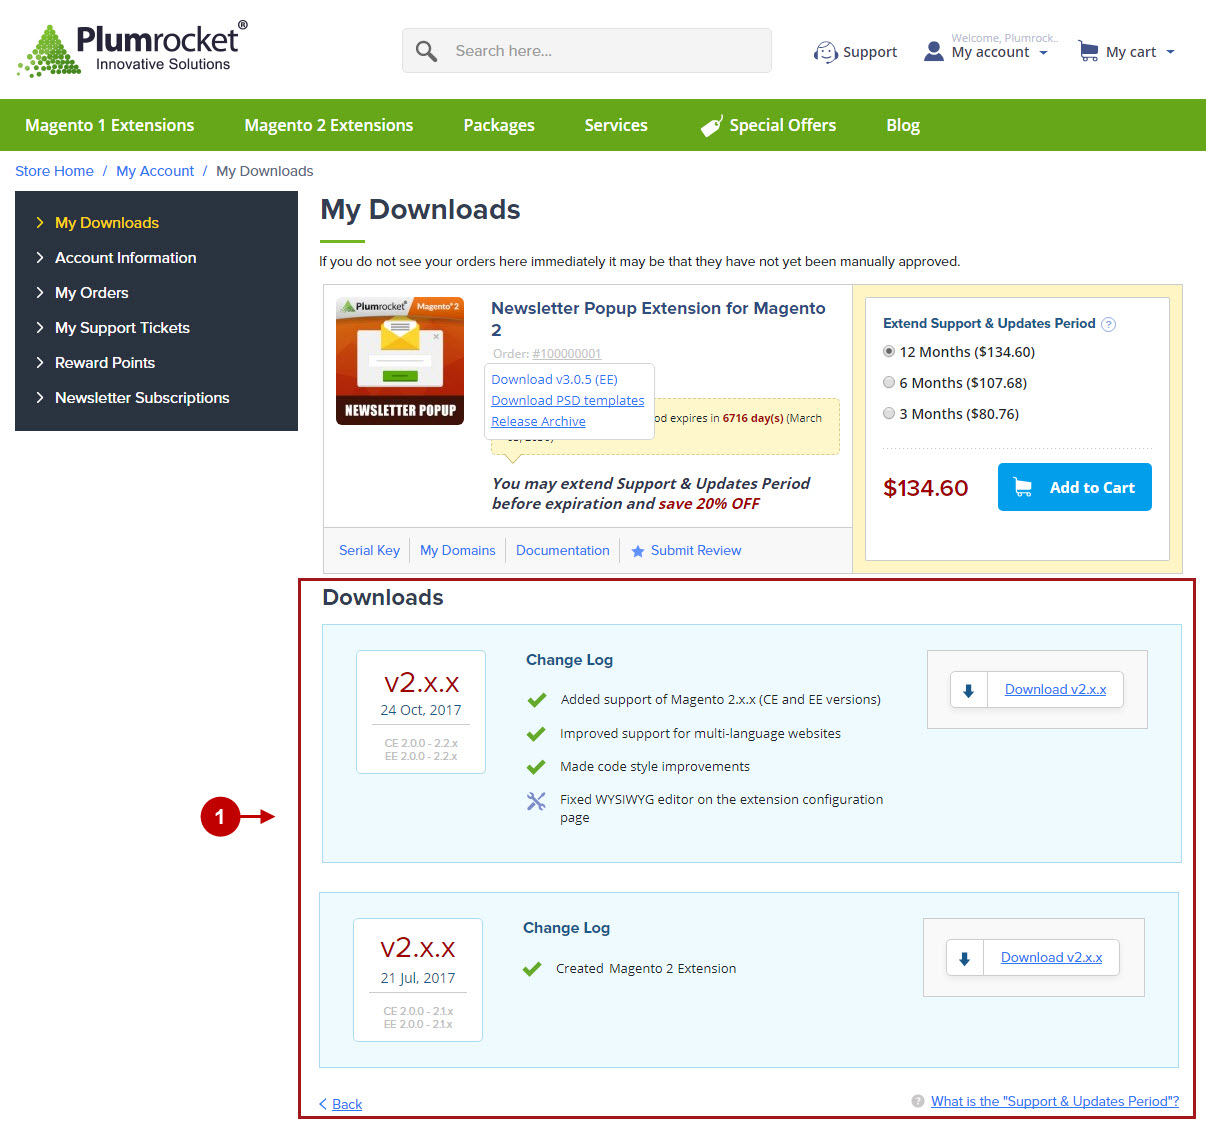
- In the Release Archive section you can see the list of available versions, read the change logs and download one of the previous versions.
Important Information:
We strongly recommend that you backup all your Magento 2 files and folders before you proceed with updating the extension.
Step 2. To upload files to the server, you may use any FTP-client
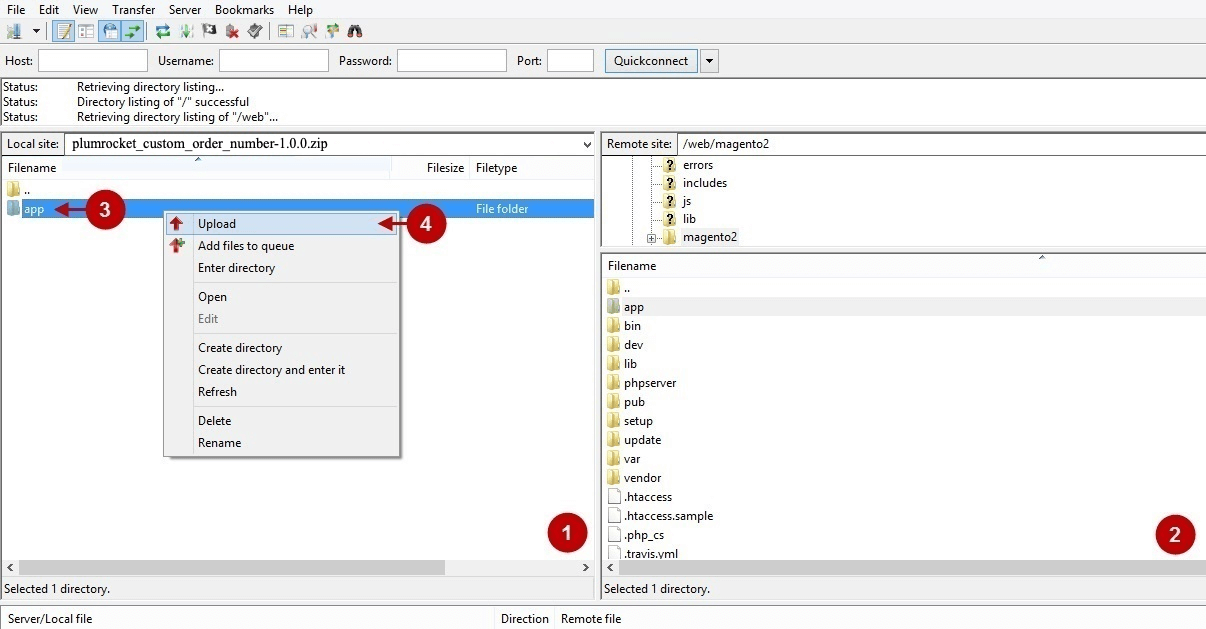
We used the FileZilla FTP client to show you how to upload files to the server.
Step-by-step guide:
- This is your client side. Here you will see the unpacked catalog containing Magento 2 Custom Order Number extension.
- This is your root directory on the server side. The files should be uploaded here.
- All the files have to be uploaded to the server. Select the files and press right button of your mouse.
- Choose the Upload option for these files.
Step 3. SSH Installation (requires SSH access to your webserver)
1. In the terminal, switch to your Magento 2 root directory using the command:
cd /FULL_PATH_TO_YOUR_MAGENTO2where “FULL_PATH_TO_YOUR_MAGENTO2” is the path to your Magento 2 folder on your server.
2. Run the next four Magento 2 commands:
php bin/magento cache:flush
php bin/magento setup:upgrade
php bin/magento setup:di:compile
php bin/magento setup:static-content:deploy
After running these commands, the extension should be updated successfully. A similar message should be displayed in your console as displayed below:

Next Step > Magento 2 Custom Order Number v1.x Configuration