Configuring Twitter & Facebook Login Extension for Magento 2
Follow the instructions below to learn how to configure Twitter & Facebook Login Extension for Magento 2.
General
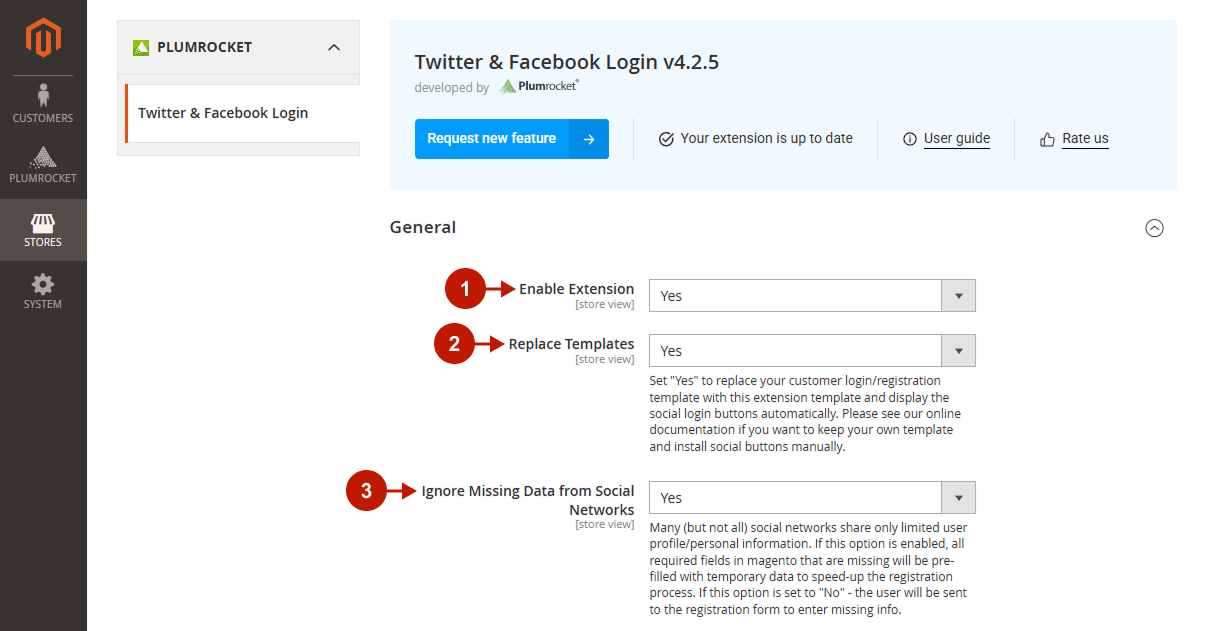
In the main menu, go to the “Plumrocket” tab > select “Twitter & Facebook Login” extension > navigate to the “Configuration” section.
Step-by-Step actions:
- The “Enable Extension” option: set to “Yes” to enable Twitter & Facebook Login extension.
- The “Replace Templates” option: set to “Yes” to replace your customer login/registration template with this extension template and display the social login buttons automatically. Please, see our online documentation if you want to keep your own template and install social buttons manually.
- The “Ignore Missing Data from Social Networks” option: if this option is enabled, all required fields in Magento that are missing will be pre-filled with temporary data to speed-up the registration process. If this option is set to “No” – the user will be sent back to the registration form to enter missing info. Note: This option works with the data required for account creation.
Step-by-Step action:
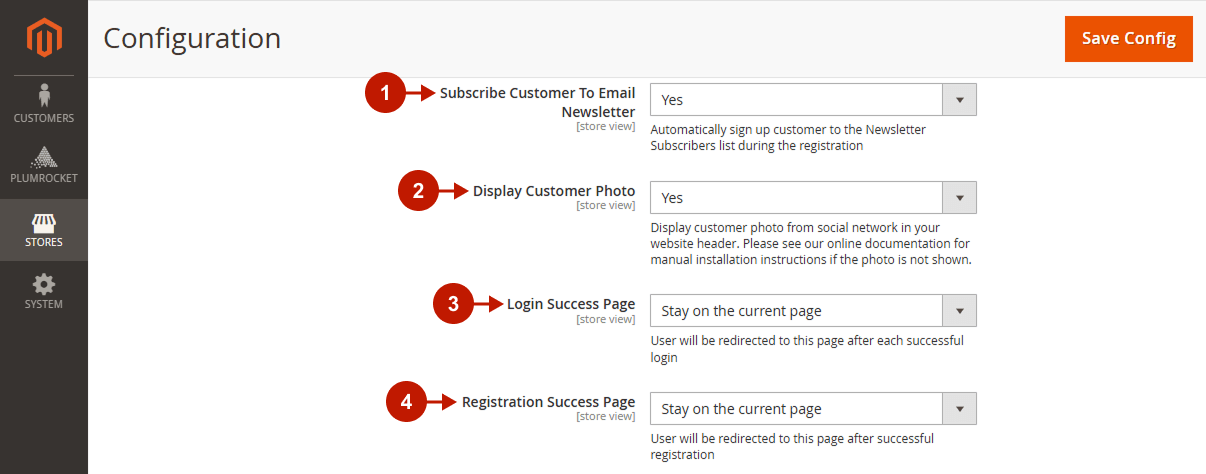
- The “Subscribe Customer To Email Newsletter” option allows you to automatically sign up customers to the Newsletter Subscribers list during the registration.
- The “Display Customer Photo” section allows you to display customer photos from social networks in your website header. Please, check our Magento 2 Twitter & Facebook Login Developer’s Guide, if the photo does not show up for some reason.
- The “Login Success Page” option allows you to select the specific page your customer will be redirected to after each successful login.
- The “Registration Success Page” section lets you select the page the user will be redirected to after successful registration.
Social Login Buttons
Step-by-step guide:
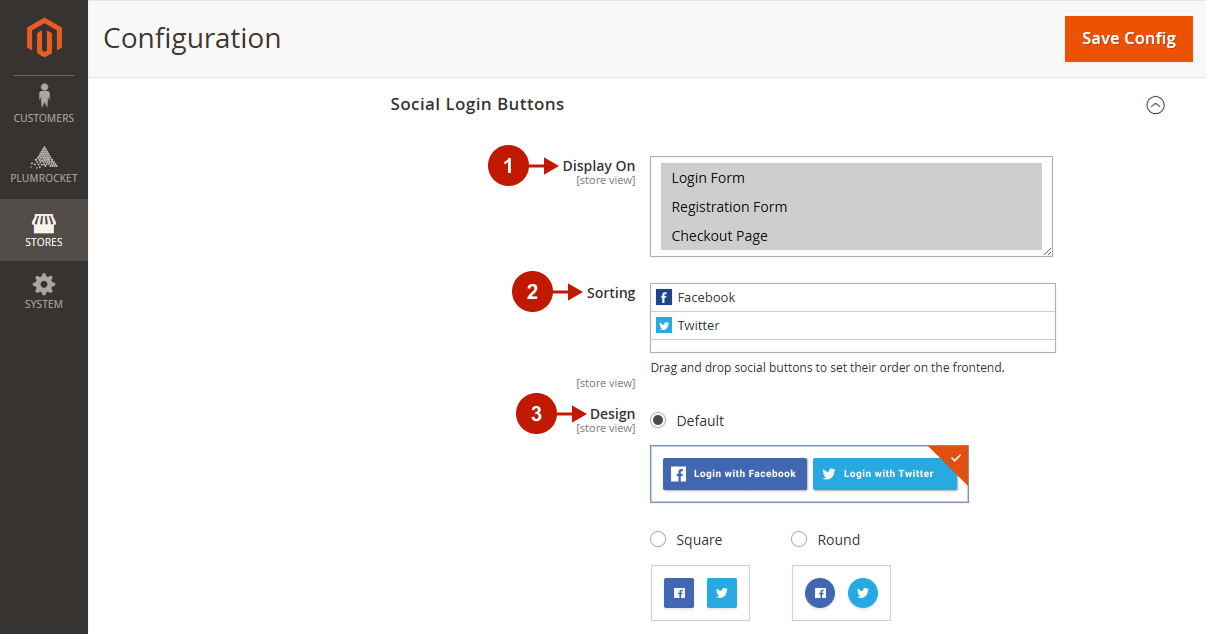
- The “Display On” section lets you select the pages on which Social Login Buttons should be displayed: Login Form, Registration Form, or Checkout page.
- Use the “Sorting” option to set up the sorting of the visual buttons. Visible buttons will be displayed by default. Hidden buttons will be listed under the “Show More” section in the front-end.
- The “Design” option lets you choose the design of the Social Login buttons.
Social Share
Step-by-Step action:
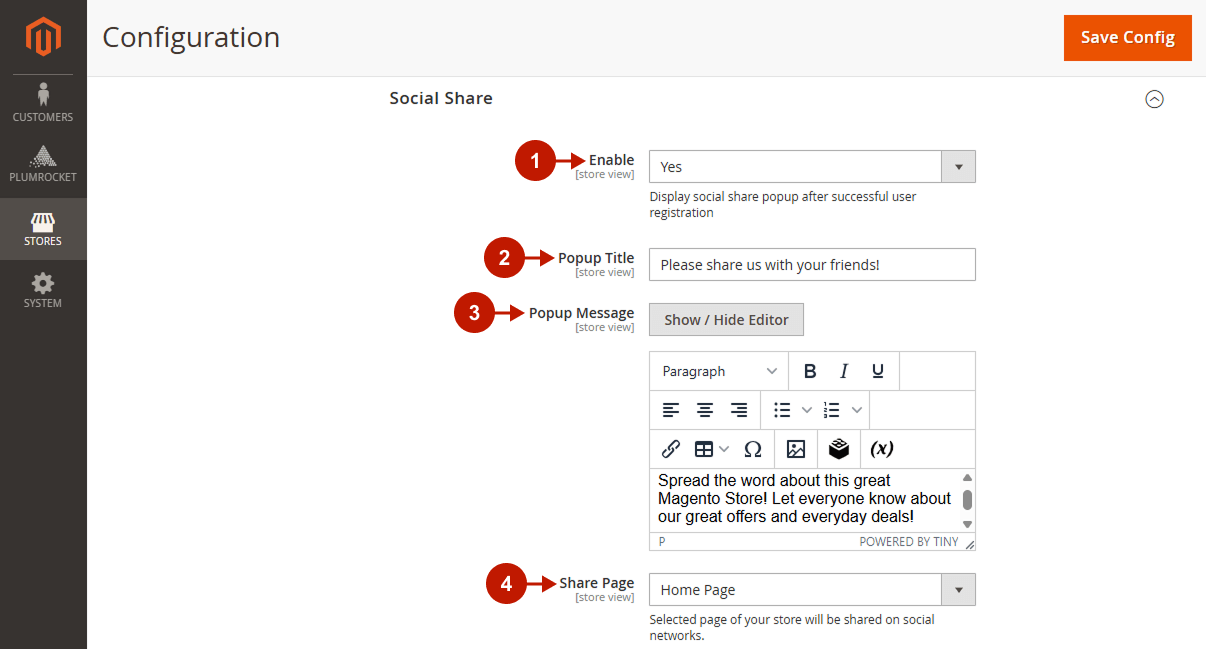
- Use the “Enable” section to display the social share popup after successful user registration.
- Specify the popup title that will appear after your customer’s successful registration in the “Popup Title” section.
- The “Popup Message” section allows you to write the body of the message for the Social Share popup.
- Use the “Share Page” option to select the page on your store that will be shared on social networks.
Advanced Settings
In this section, you can enable error logging returned from a social network and download the Log file. Log files provide a record of every warning sent from a social network, so you could track where the issue occurred.
Step-by-Step action:
- In the “Enable logging” option, set to “Yes” to enable logging of all errors returned by social networks and services.
- In the “Download Log File“, you can download the log file with all errors returned by social networks.

Step-by-Step action:
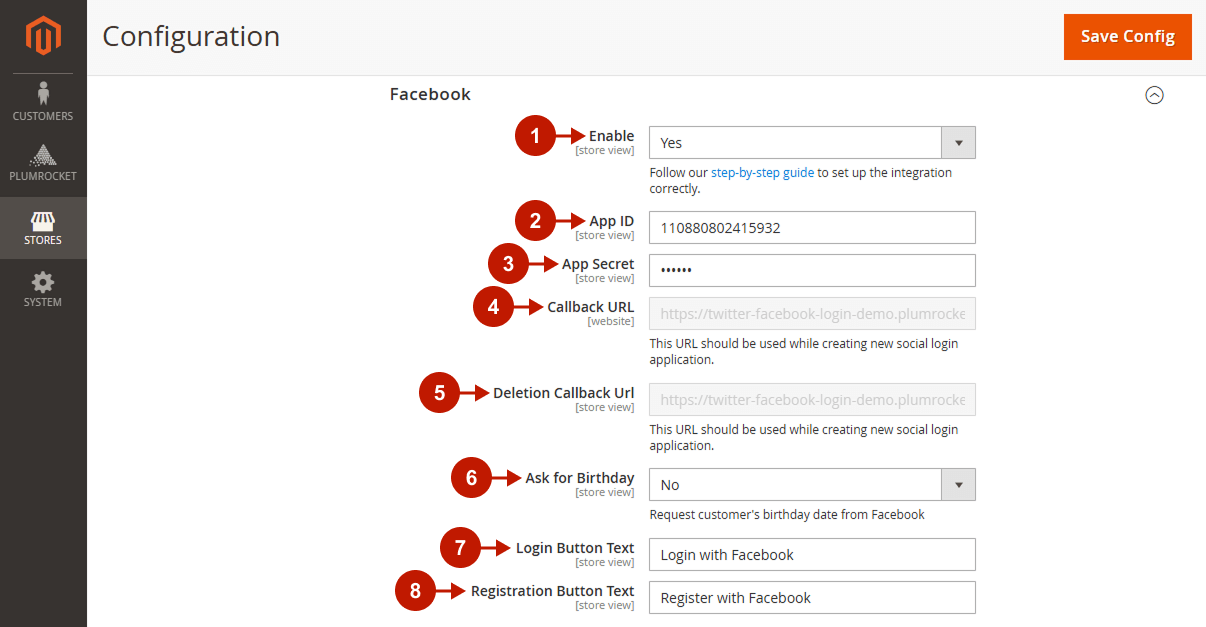
- The “Enable” option allows you to enable Facebook Login functionality for this Magento 2 Social Login extension. Please, check the Magento Facebook Login Configuration to learn how to create and set up the Facebook application properly.
- In the “App ID” field, specify the unique Facebook application ID.
- In the “App Secret” field, enter the secret key provided to you after the Facebook application has been created.
- “Callback URL“: you should use this URL while creating your Facebook social login application.
- “Deletion URL“: you should use this URL while creating your Facebook social login application.
- “Ask for Birthday“: enable this option to get the customer’s birthday date from Facebook. Note: As this is a piece of optional information to be pulled from the Facebook network, you first need to submit this item for review in your Facebook application itself.
- “Login Button Text“: allows you to enter the text that will be displayed on the Facebook login button.
- In the “Registration Button Text” field, you will be able to write the text that will be displayed on the Facebook registration button.
Step-by-Step action:
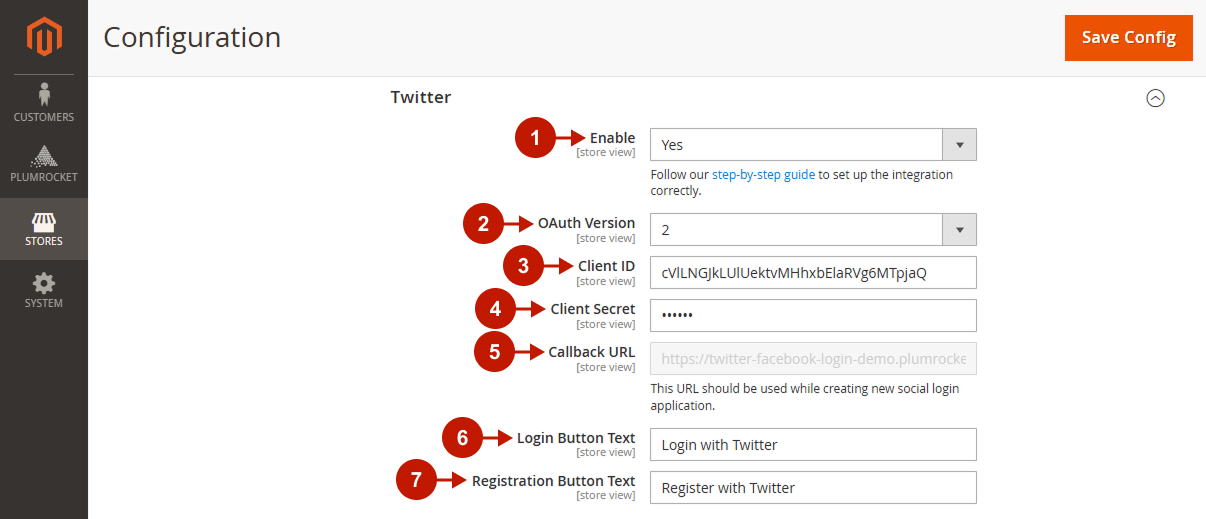
- The “Enable” option allows you to enable Twitter Login functionality for this social login extension. Please, check the Magento Twitter Login Configuration to learn how to create and set up the Twitter application properly.
- The “OAuth Version“: select the OAuth version that should be used during the login process.
- In the “Client ID” field, specify the Client ID provided to you after the Twitter application has been created.
- In the “Client Secret” field, enter the secret key provided to you after the Twitter application has been created.
- “Callback URL“: you can use this URL while creating your Twitter social login application.
- “Login Button Text“: allows you to enter the text that will be displayed on the Twitter login button.
- In the “Registration Button Text” field, you will be able to write the text that will be displayed on the Twitter registration button.
Step-by-Step action:
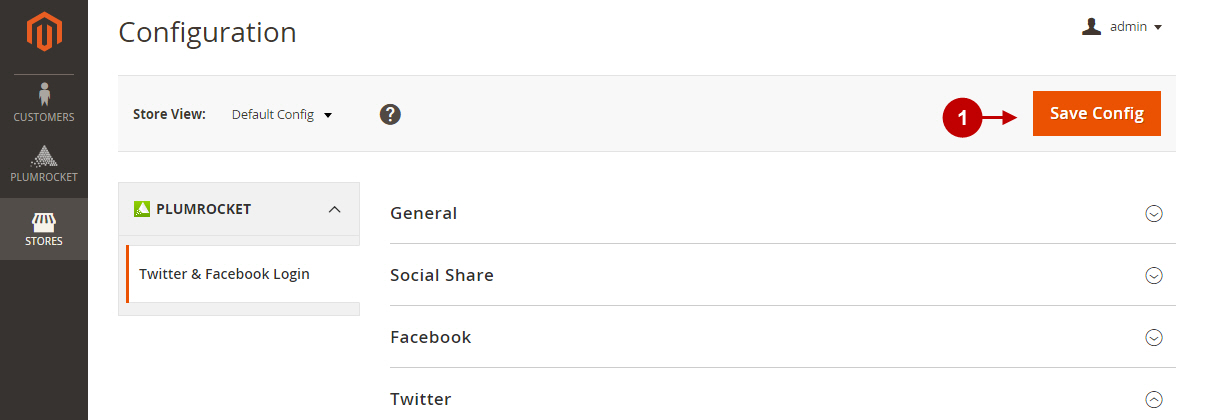
- Having set up all the configurations in the Twitter & Facebook Login Extension for Magento 2, do not forget to save your changes by pressing the “Save Config” button.
Important Information:
After all the changes have been done and saved, you have to clear Magento 2 Cache.
Twitter & Facebook Login API Reference for Magento 2
Twitter and Facebook Login APIs for Magento 2 separately require specific setup in order to work properly. Please click on the links below to setup the needed social login.


