Configuring Magento 2 Size Chart Extension
Follow these steps and you will learn how to configure Magento 2 Size Chart v2.x Extension. Please, check the instructions below.
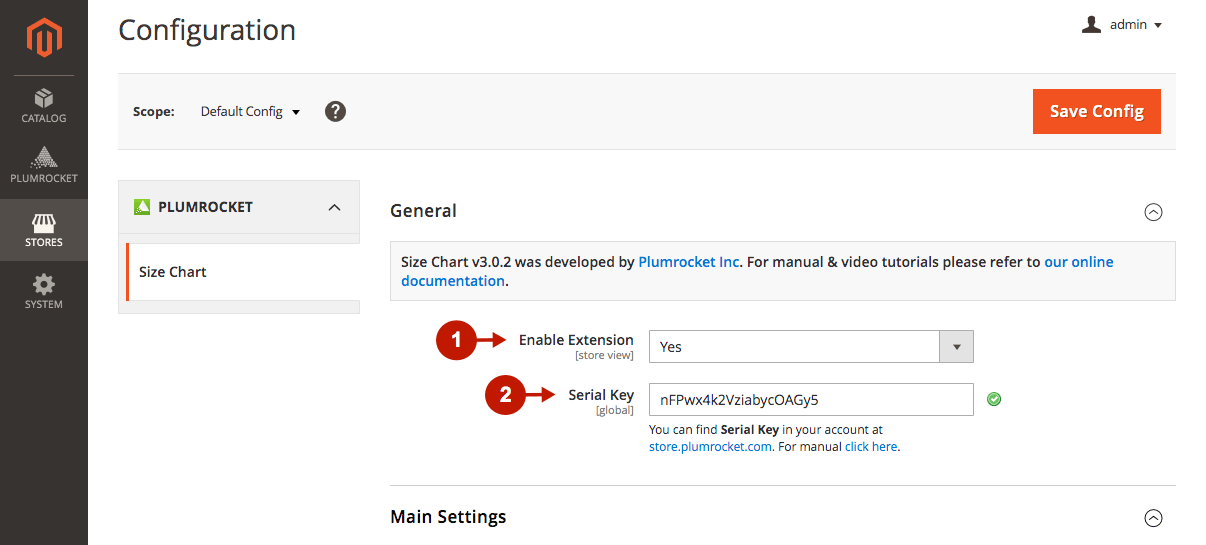
General
Go to the Plumrocket tab in the main menu > navigate to the Size Chart extension > select Configuration.
Step-by-Step actions:
- To enable or disable this extension, set to Yes or No accordingly in the Enable Extension option.
- Please, enter the unique Serial Key received after the purchase of this extension. Note: In most cases, the Serial Key will be filled in automatically, and a green checkmark will be displayed. If there is no key entered, please, read the Serial Key Activation article to get more information on how to insert the key manually.
Main Settings
Step-by-Step actions:
- “Button/Tab Label“: specify the text that will be displayed on the Size Chart button or tab.

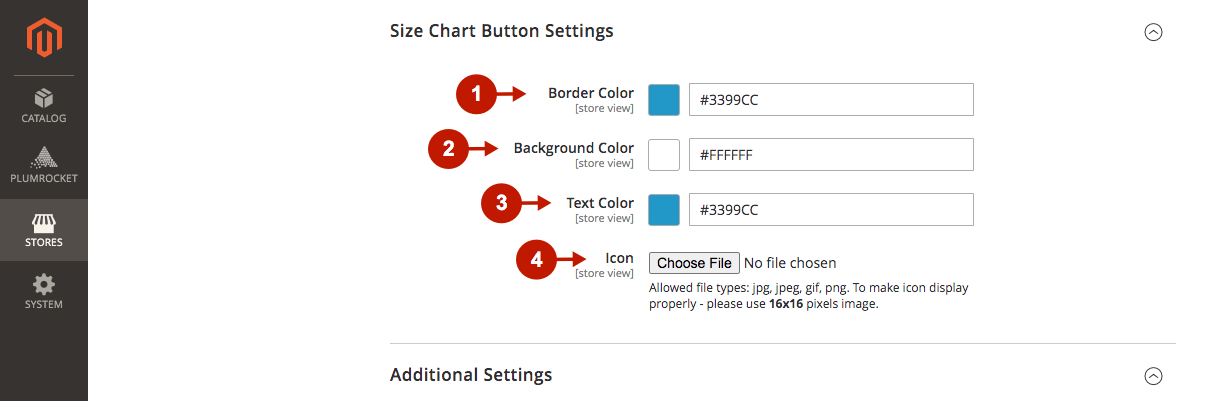
Size Chart Button Settings
Step-by-Step actions:
- “Border Color“: set the color of the Button or Tab border by clicking on the color picker or entering the HEX color.
- “Background Color“: select the color of the Button/Tab background.
- “Text Color“: set the color of the text on the Button/Tab.
- “Icon“: upload the icon of the Size Chart Button/Tab.
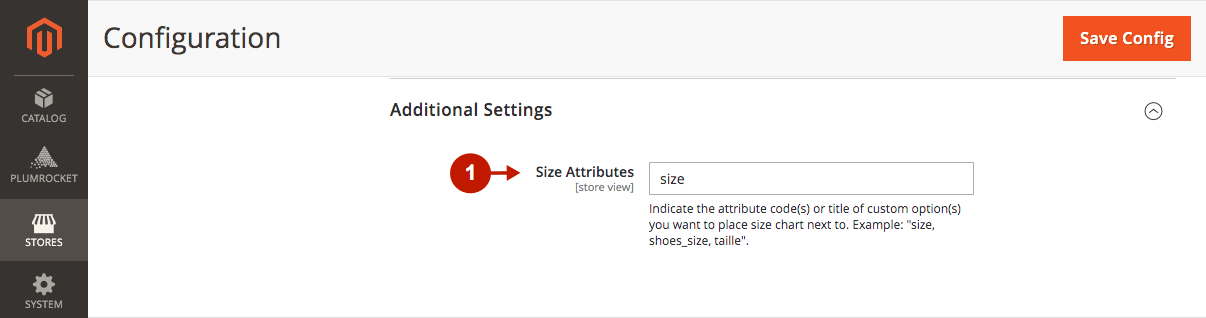
Additional Settings
Step-by-Step actions:
- “Size Attributes“: specify an attribute code or a title of a custom option you want to display the Size Chart button next to on a Product Page.
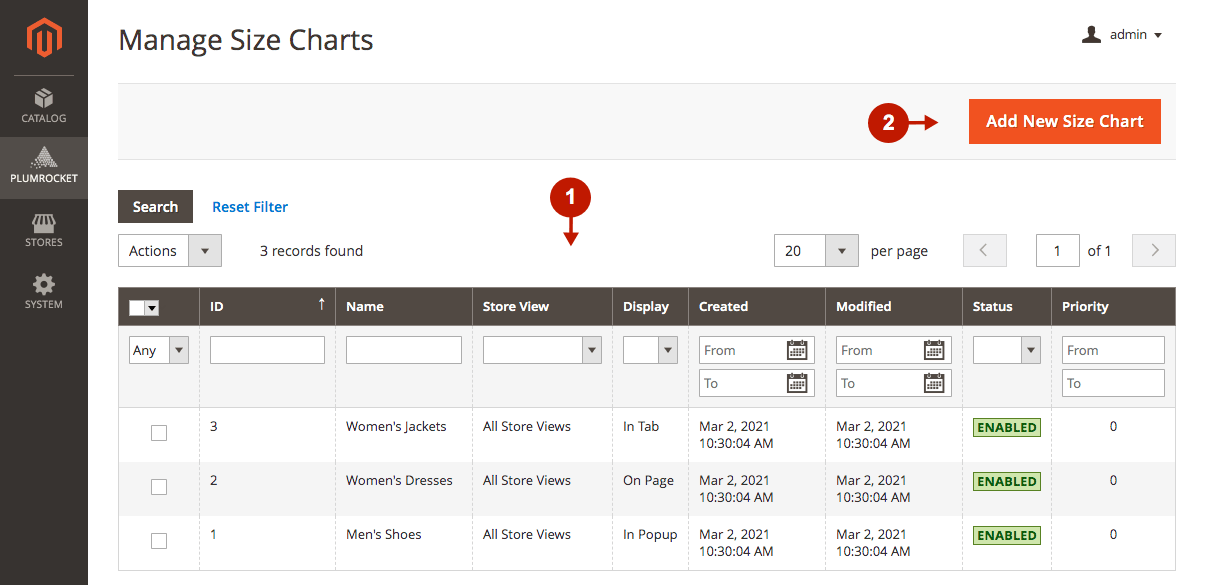
Managing Size Charts
In this section you will be able to view, edit or add new Size Charts. Please, check the following steps.
Go to the Plumrocket tab in the main Magento menu > Size Chart extension > Manage Size Charts.
Step-by-Step action:
- The Manage Size Charts grid displays all created size charts. There are two size charts created by default (Women’s Dresses and Men’s Shoes) with On-Page and Popup display types. You can use them to add your changes or to copy the content and create your own custom size chart.
- Press the Add New Size Chart button to create your new and unique size charts. Please, follow the guide below in order to learn how to edit or create a new Size Chart.
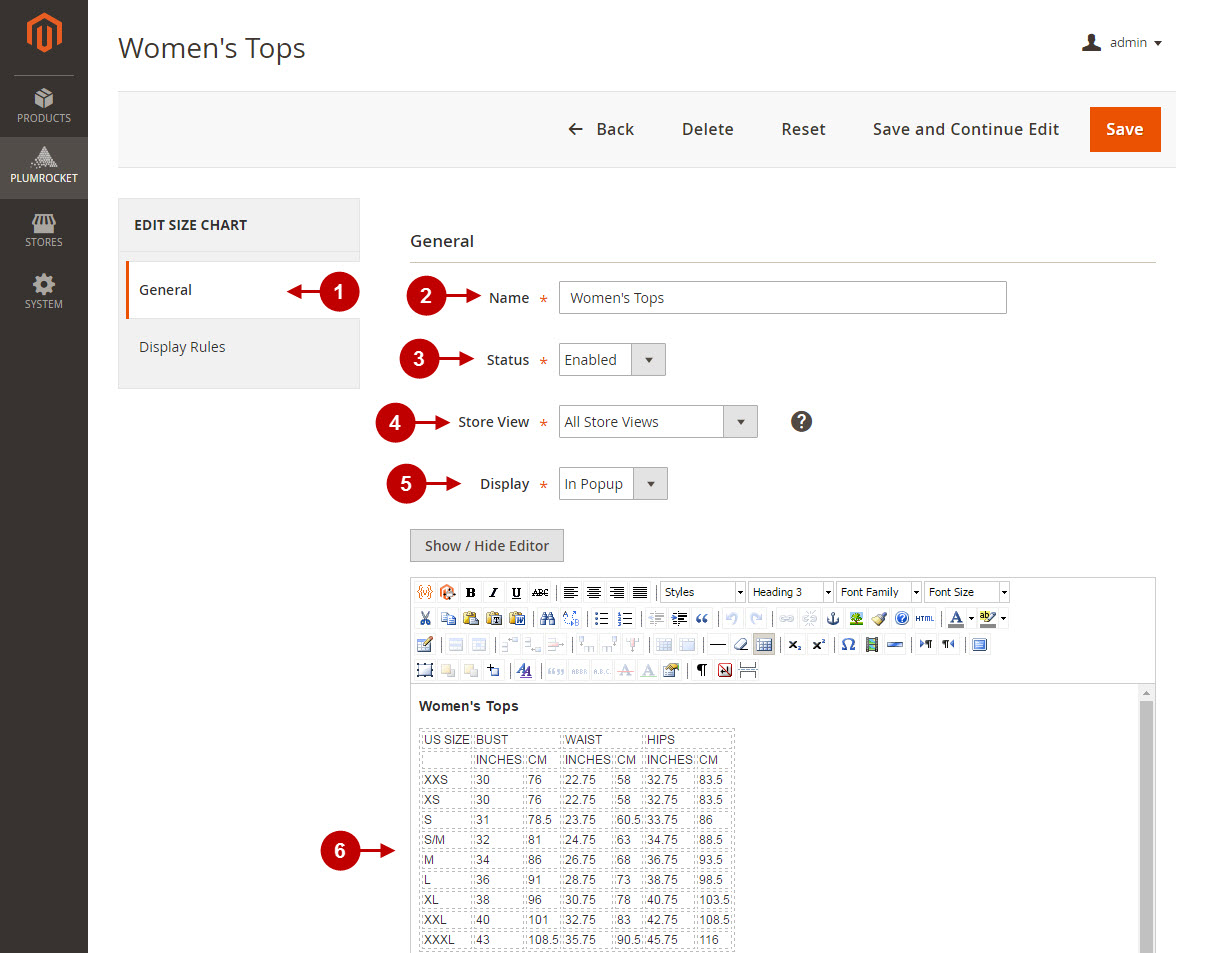
How to edit or create a new Size Chart
In the Manage Size Charts grid, click on the needed size chart to edit, or click on the Add New Size Chart button, and you will be navigated to the Size Chart Management page. Please, refer to the step-by-step guide below for further instructions.
Step-by-Step action:
- Make sure the General tab is selected.
- “Name“: indicate the name of your new size chart.
- “Status“: set the status to Enabled or Disabled according to your requirements.
- “Store View“: select the specific store view you need to assign the size chart to.
- “Display“: select the way the charts should be displayed: In Popup, On Page, or In Tab.
- “Content“: use the extended WYSIWYG editor to enter your custom content of the Size Chart (e.g. tables, texts, images).
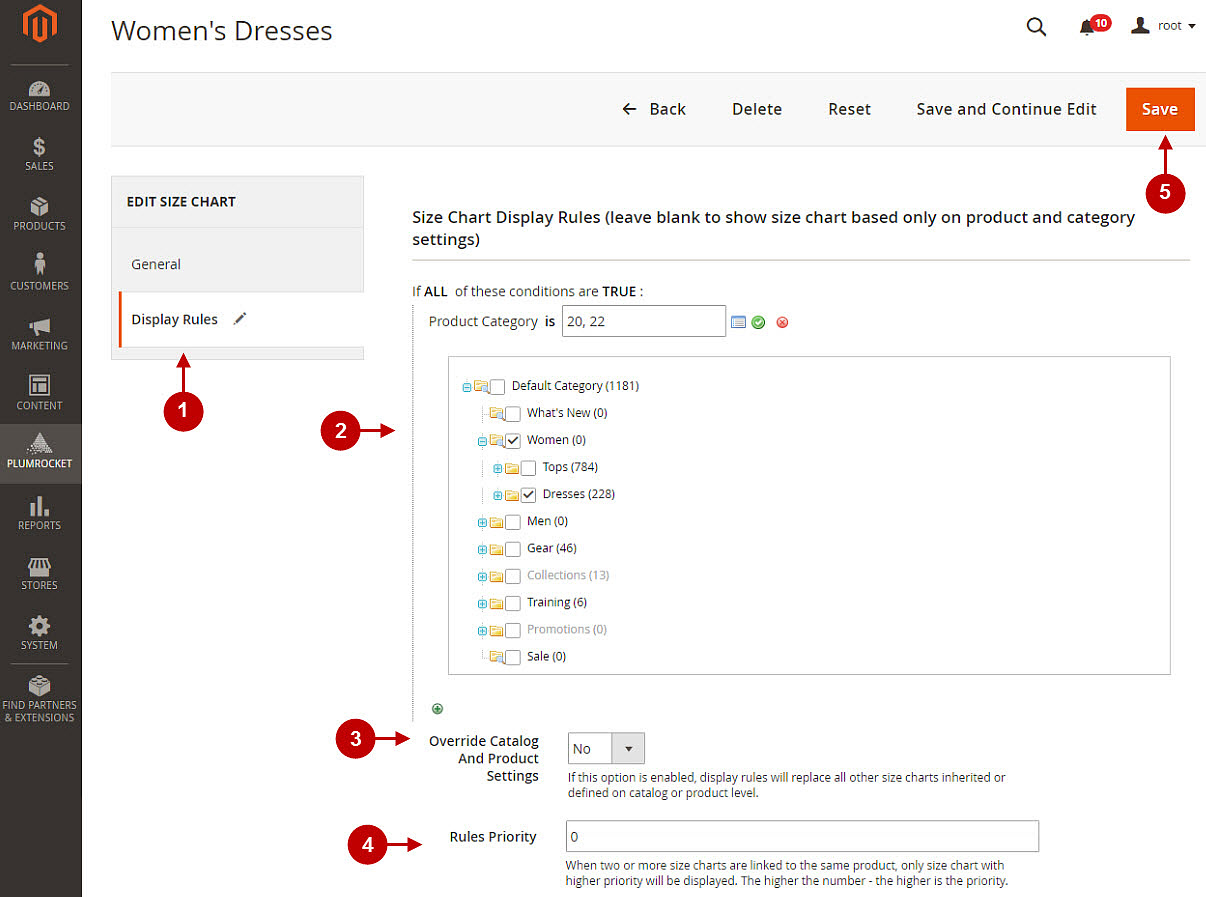
Display Rules
In the following configuration section, you can define the special rules (conditions) for the Size Chart display. This is not a required section, therefore, if you don’t want to set up the display rules – feel free to skip it. Otherwise, if you need to configure your own special size chart display conditions – please follow the steps below:
Step-by-Step action:
- Select the Display Rules tab.
- Size chart can be displayed based on the conditions you specify in these fields.
- “Override Catalog and Product Settings“: set to Yes to prioritize the rule application and replace all other size charts inherited or defined on catalog or product level. Otherwise, set to No in order to use the inherited, product, or catalog size charts despite the rules.
- “Rules Priority“: specify rules priority in this field. When two or more size charts are linked to the same product, only the size chart with higher priority will be displayed. The higher is the number – the higher is the priority.
- Press the Save button to save the changes once you have completed all the fields.
Important Information:
After all the changes have been done and saved, you have to clear the Magento 2 Cache.
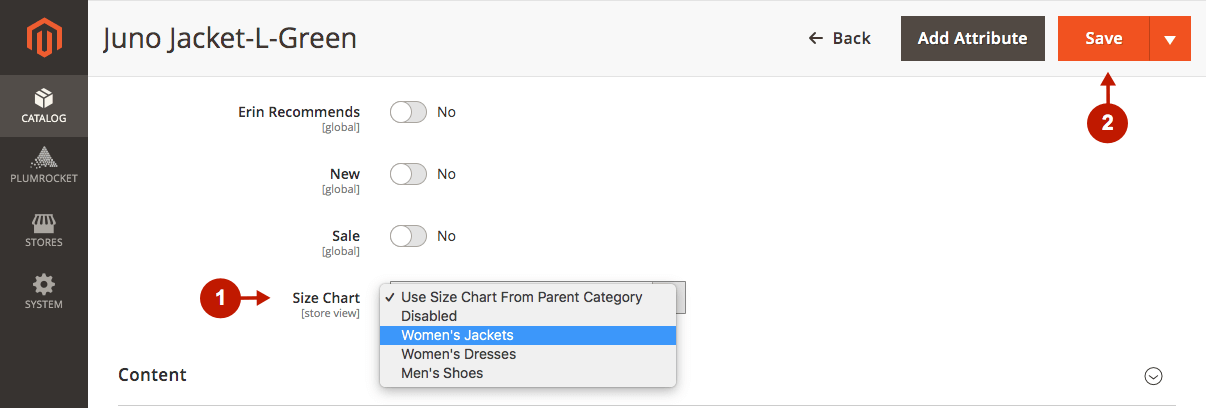
How to Assign Size Charts to Products
Follow the instructions below to learn how to assign the Size Chart to a product.
Go to the Catalog tab in the main Magento menu > Inventory > Products. Then, click on the needed product in the Products grid to edit it.
Step-by-Step action:
- Scroll down to the “Size Chart” option and open the drop-down menu. Here, choose the size chart you want to assign to the product. Note: you can assign the size chart you’ve previously created, or select the Use Size Chart From Parent Category option.
- Once you have configured the size chart for the product, press the Save button to save the changes.
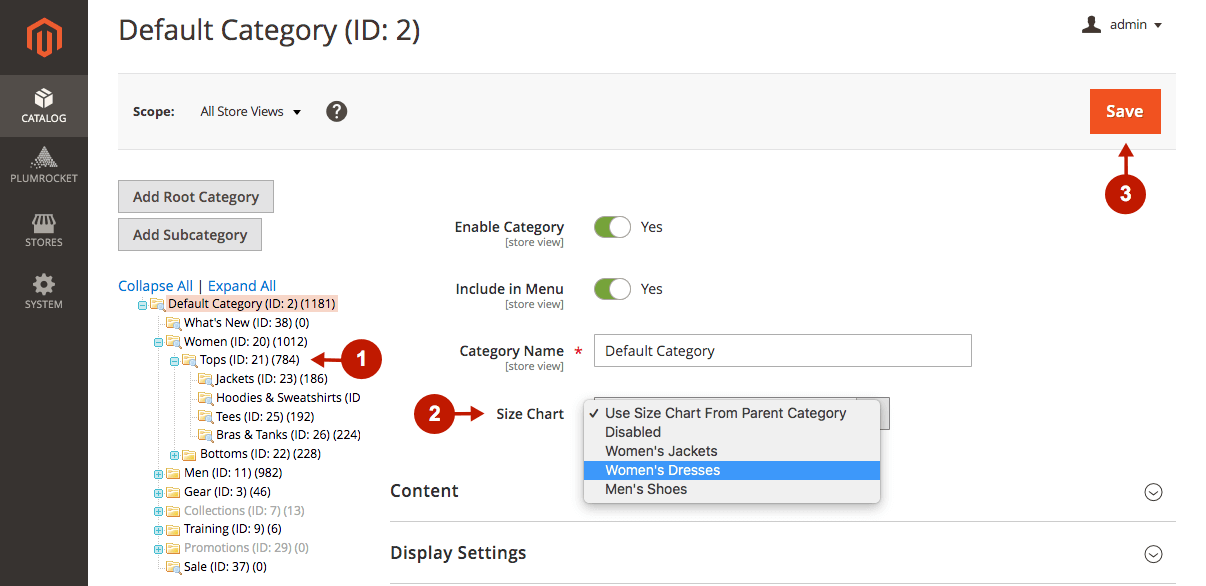
How to Assign Size Charts to Product Categories
Follow the instructions below to learn how to assign a Size Chart to a product category.
Go to the Catalog tab in the main Magento menu > Inventory > Categories. Then, click on the needed product in the Products grid to edit it.
Step-by-Step action:
- In the left navigation bar, select an appropriate category you need to configure the Size Chart for.
- Scroll down to the “Size Chart” option, and from the drop-down menu, select the specific Size Chart required for this category. Note: you can assign your custom size chart for a particular category or select the Use Size Chart From Parent Category option (on the screenshot below, you can see that the Women category is a parent category of Tops).
- Once you have done all changes, press the Save button to finish with your configurations.
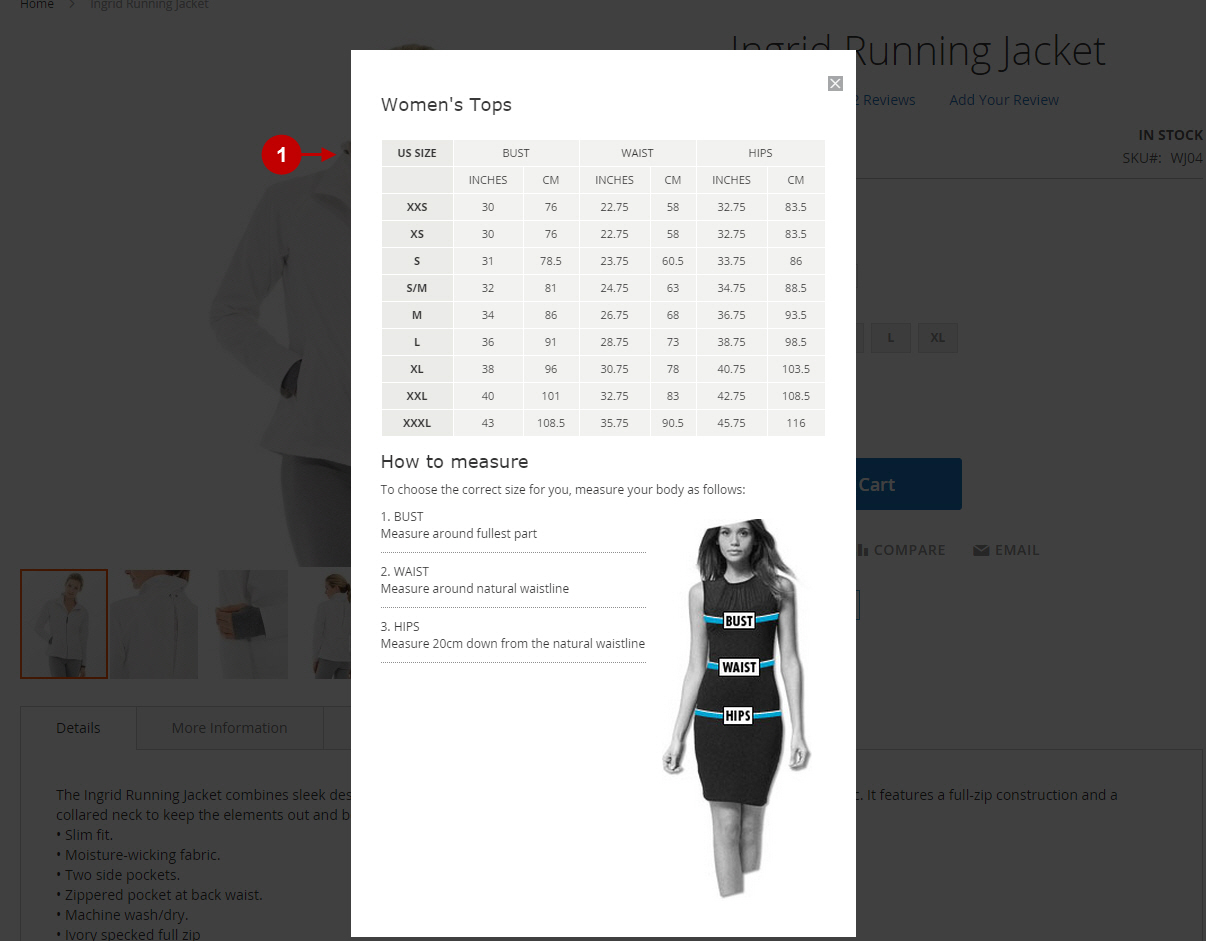
Size Chart example (Popup display)
- The Size Chart button will be shown as a Popup on your frontend if you have previously selected In Popup display option on the Size Chart Edit page.
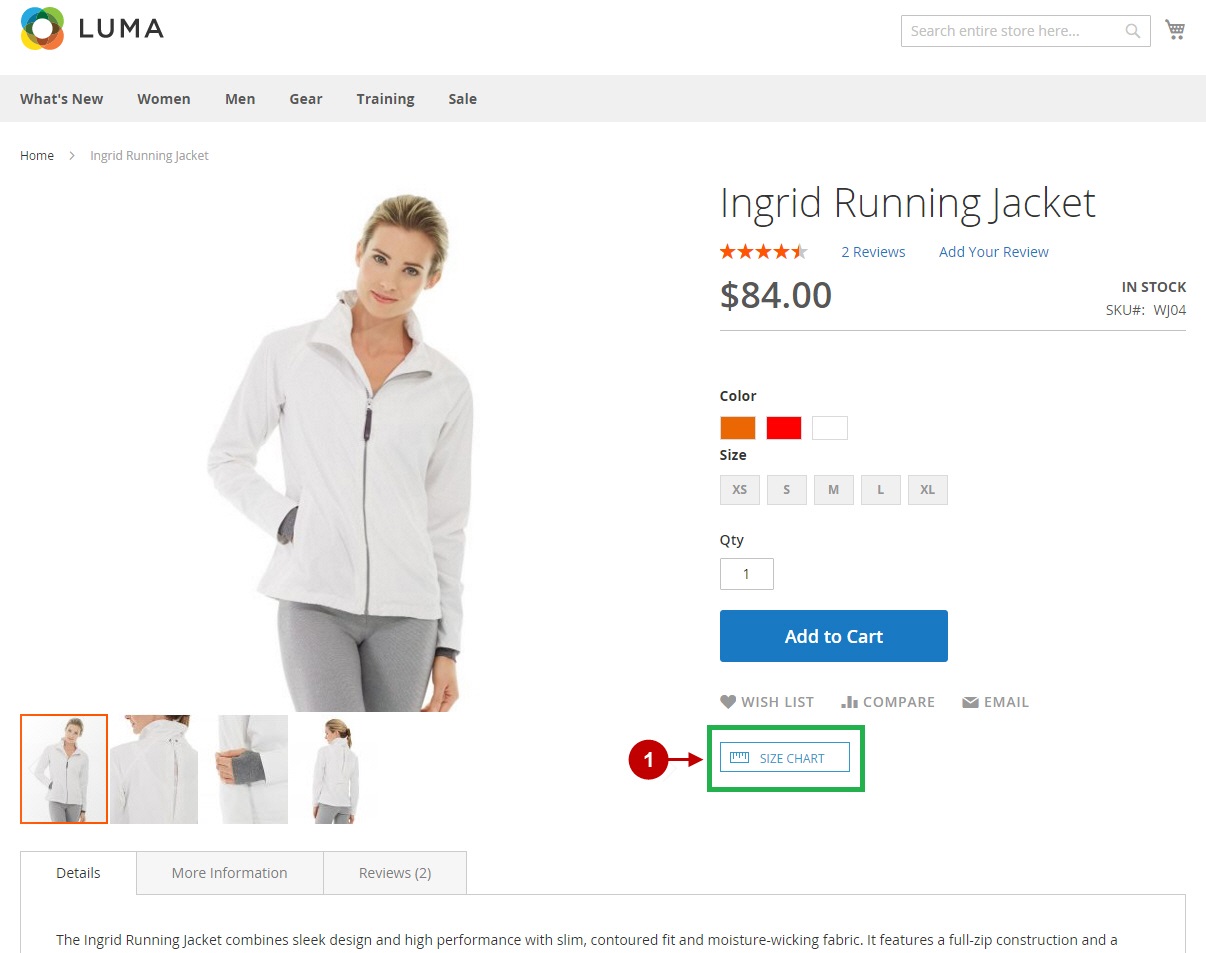
- Once you click on the Size Chart button, the size chart assigned to this product will appear as a popup on the Product Page.
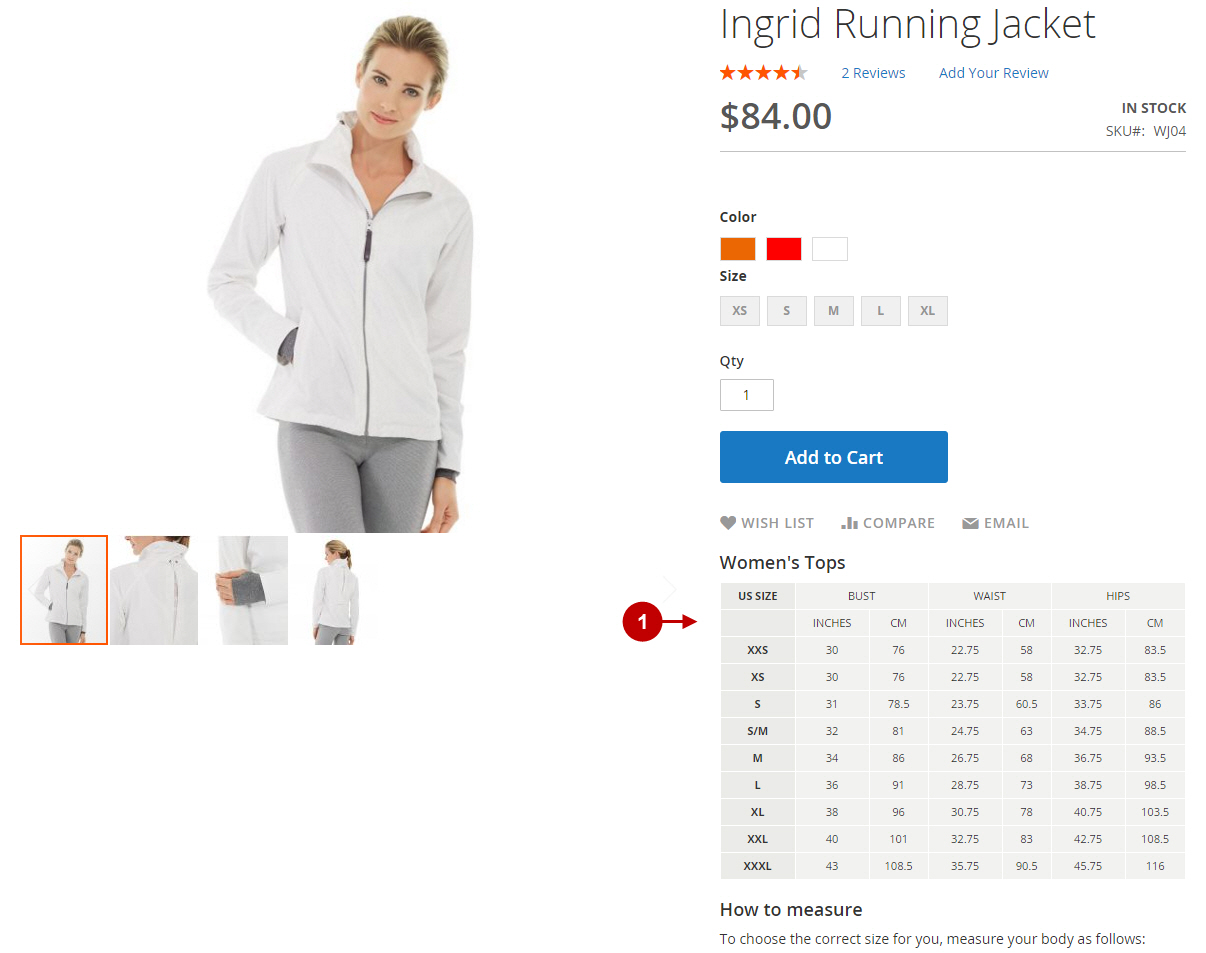
Size Chart example (On Page display)
- If you have selected On Page display type on the Size Chart Edit page, the size chart will be displayed directly on the product page.
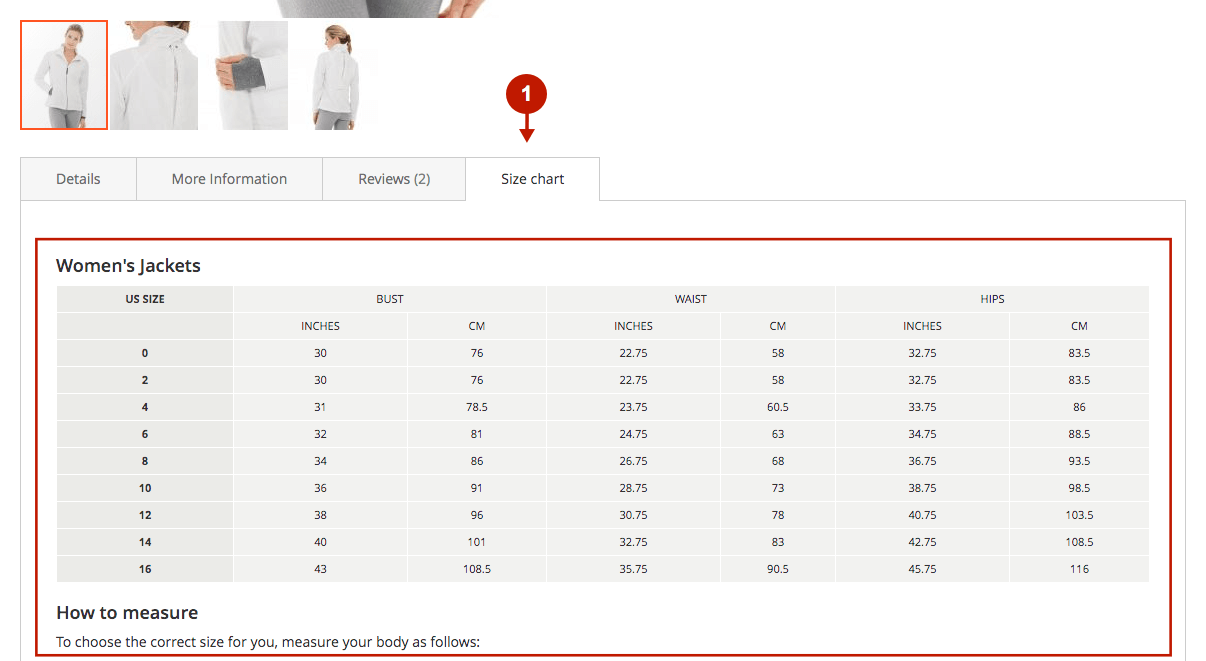
Size Chart example (Tab display)
- If you have selected In Tab display type on the Size Chart Edit page, the size chart will be displayed in a separate tab on the Product Page.