How to Create Salesforce API for Magento 2
In this article, you will learn how to create your Salesforce API Key and set up Magento 2 Salesforce integration. Please, use the following step-by-step guide.
Step-by-Step actions:
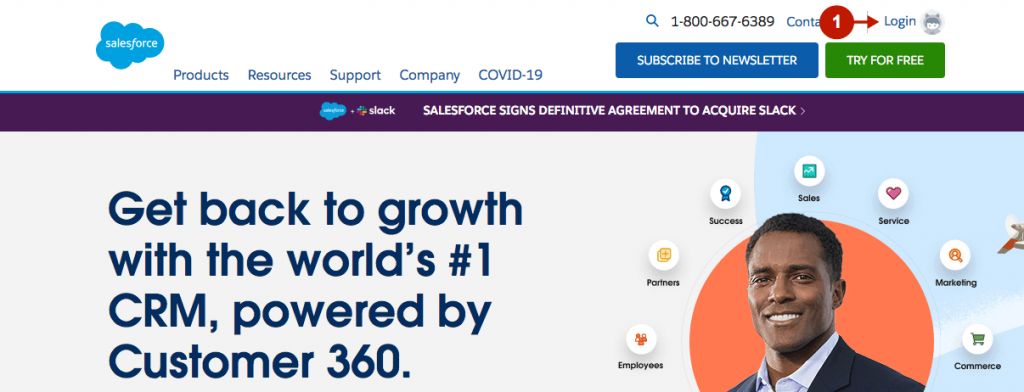
- Login to your account at www.salesforce.com.
Step-by-Step actions:
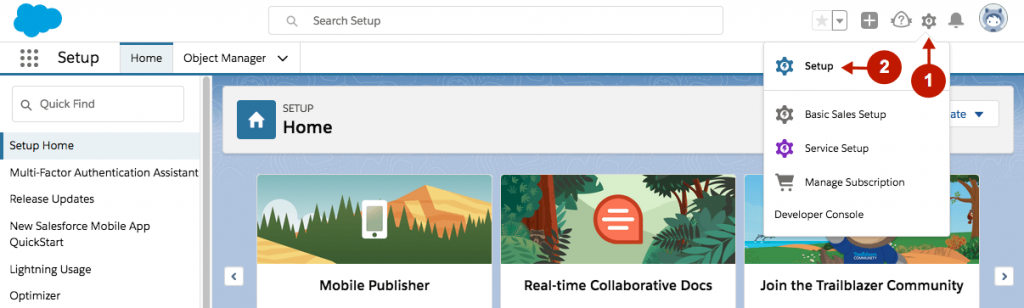
- In the upper right corner of the website, click on the Settings.
- Go to Setup.
Step-by-Step actions:
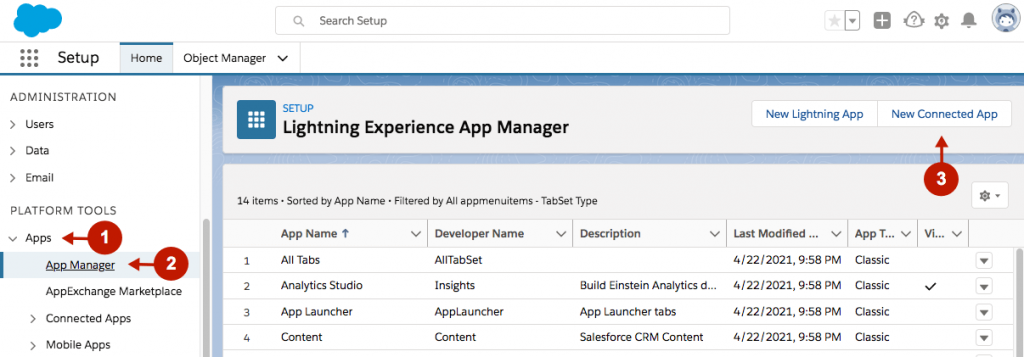
- On the left menu bar, click on Apps.
- Go to the App Manager.
- Click New Connected App ontop right to create a new app.
Step-by-Step actions:
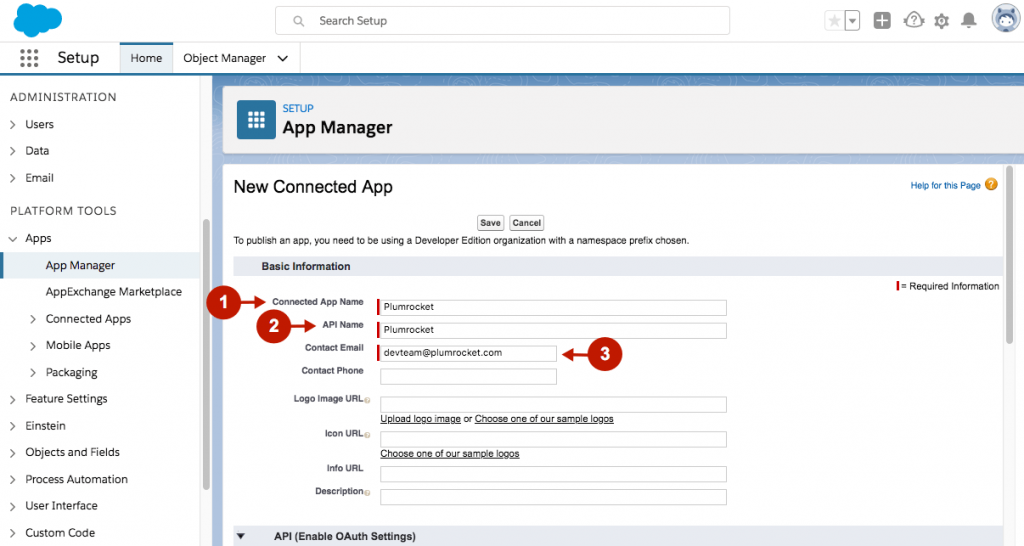
- “Connected App Name“: enter the name for your new connected app.
- “API Name“: this information will be auto-synced from the Connected App Name field.
- “Contact Email“: enter your Salesforce email.
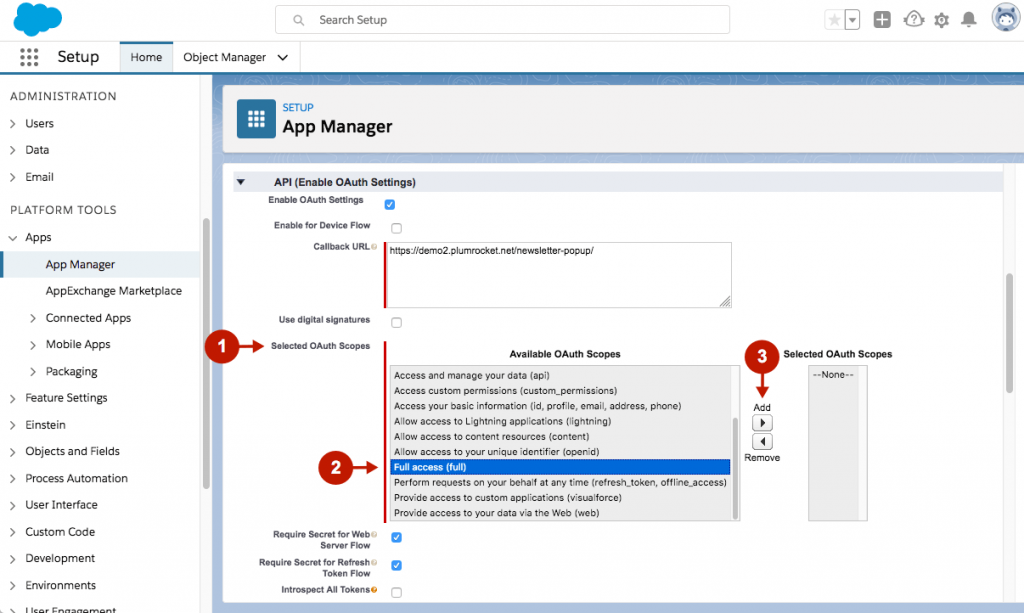
Step-by-Step actions:
- Scroll down to the API (Enable OAuth Settings) section. Check the Enable OAuth Settings checkbox.
- “Callback URL“: enter the URL to your admin panel.
- Go to the Selected OAuth Scopes.
- Select the Full Access (full) option.
- Click on the Add button.
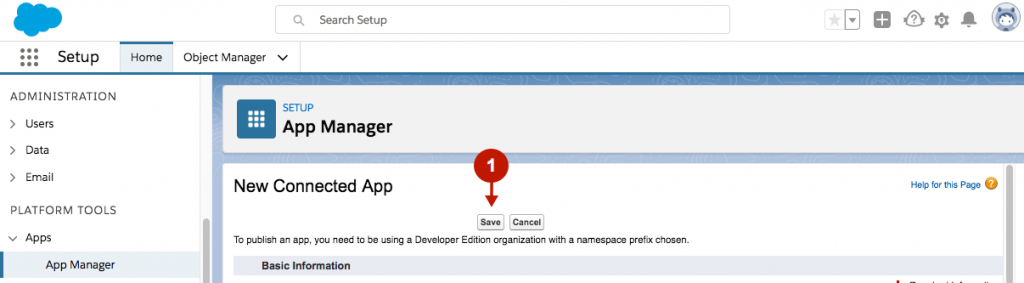
Step-by-Step actions:
- Scroll up and click the Save button. Then, click the Continue button below the information message that your changes will take effect on the server in 2-10 minutes. You will be taken to the Manage Connected Apps page, where you will see your newly created connected app.
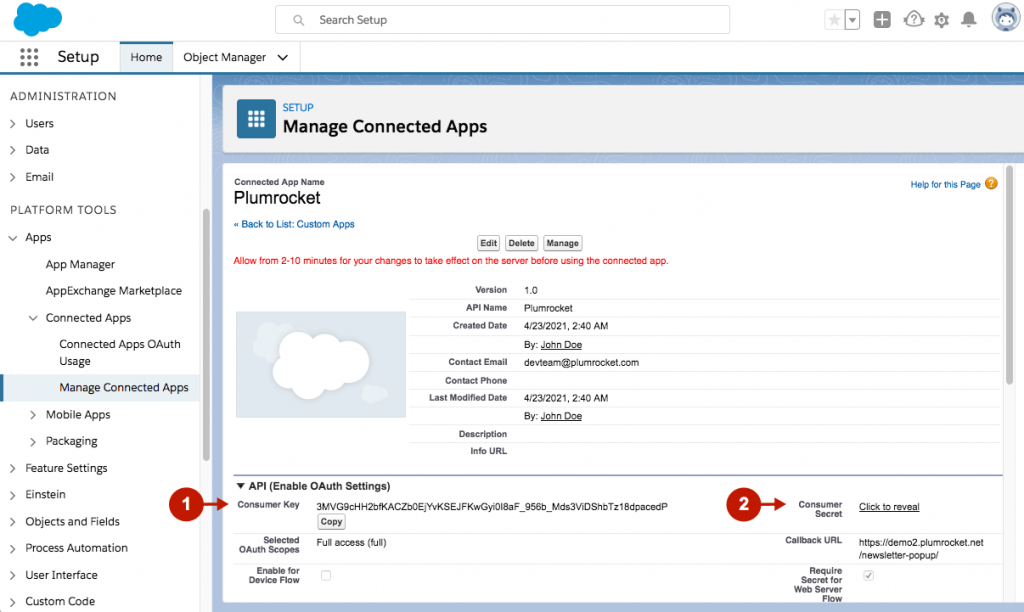
Step-by-Step actions:
- Copy your Consumer Key, which you will use in the Magento configurations.
- “Consumer Secret“: click on the Click to Reveal button to see your Consumer Secret. Copy it, as you will need it in Magento configurations.
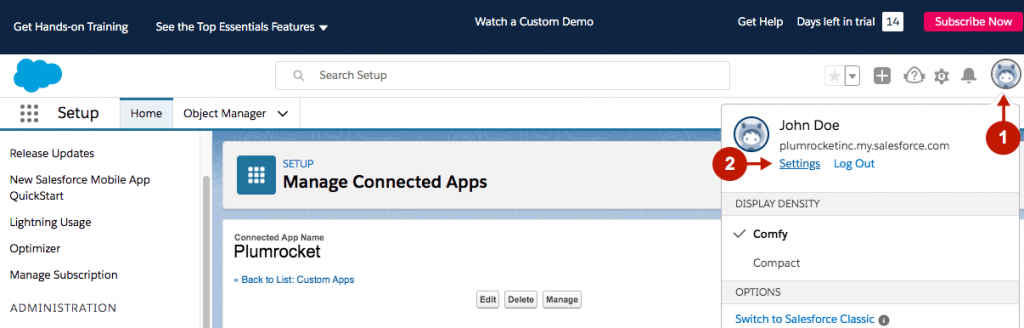
Step-by-Step actions:
- Click on the user icon in the upper right corner of the page.
- Go to Settings.
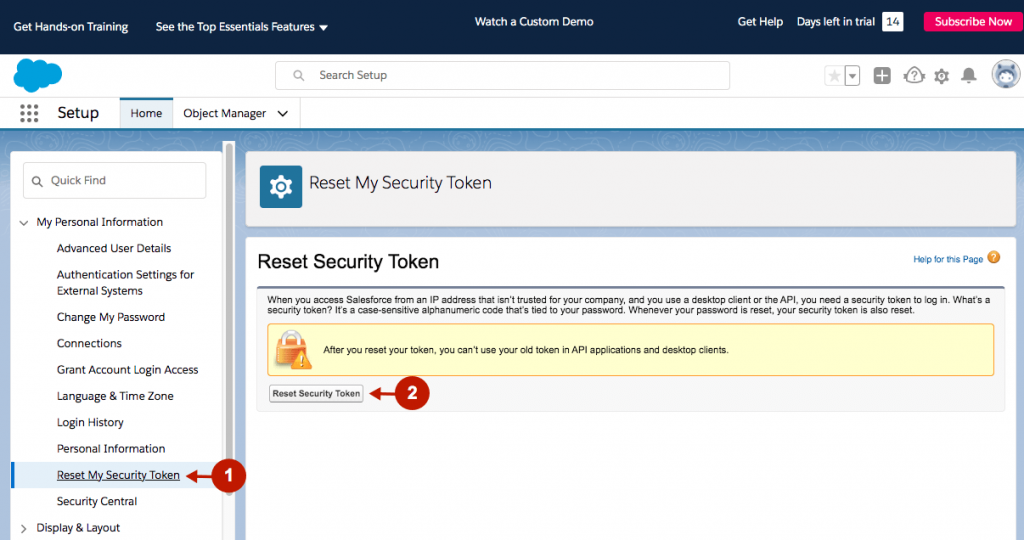
Step-by-Step actions:
- On the left menu bar, go to My Personal Information > Reset My Security Token.
- Click on the Reset Security Token button. The Security Token will be sent to the email you used in Salesforce account.
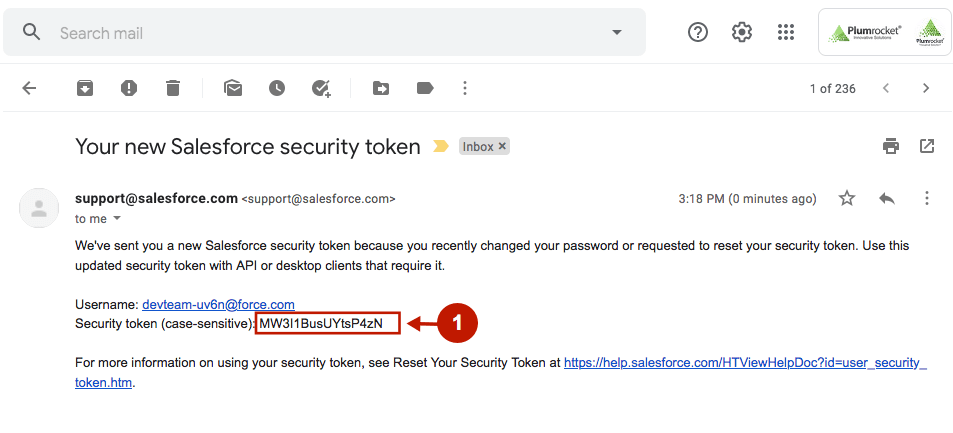
Step-by-Step actions:
- Check your email inbox. Copy the Security Token, which you will need in the Magento configurations.
Configuring Salesforce API in Magento 2 Newsletter Popup Extension
In this section of the article, you will learn how to configure Salesforce API integration in your Magento 2 Newsletter Popup extension. Please, check the following step-by-step guide.
In the main Magento menu, go to the Plumrocket tab > Newsletter Popup > Configuration. Then, scroll down to the Integrations > select Salesforce.
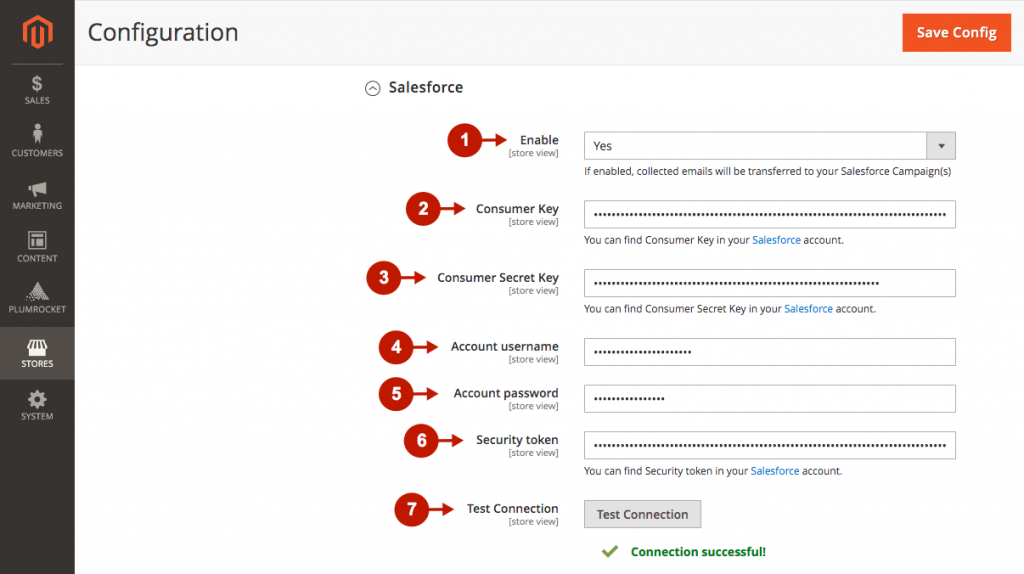
Step-by-Step actions:
- “Enable“: set to “Yes” in order to enable the Salesforce integration.
- “Consumer Key“: paste your Consumer Key received in your Salesforce account.
- “Consumer Secret Key“: paste the Consumer Secret Key received in your Salesforce account.
- “Account username“: enter the Salesforce account username.
- “Account password“: enter the Salesforce account password.
- “Security token“: paste the Security Token you received by email.
- “Test Connection button to test the connection with Salesforce API.
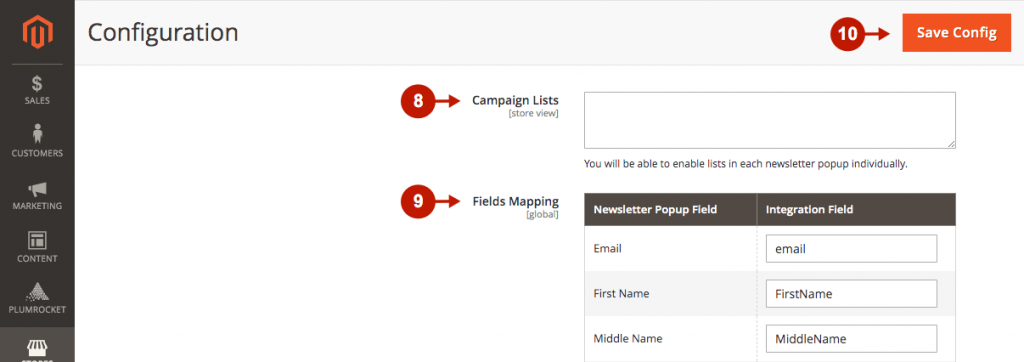
Step-by-Step actions:
- “Campaign Lists“: in this field, you can enable lists in each new popup individually.
- “Fields Mapping“: this field allows you to set up a relation between your Newsletter Popup Fields and Salesforce List Fields. This will allow you to save your newsletter subscribers’ additional data (including Coupon Codes) directly to your Salesforce account.
- Press the Save Config button to save your configurations.
Was this article helpful?