In this article, you will learn how to configure Magento 2 Google Customer Reviews Extension. Please check the guide below in order to configure it properly.
Setting Up Google Integration
To enable the extension, you need to get your Google Merchant ID and enable the Google Customer Reviews program in the Google Merchant Center.
First, proceed to Google Merchant Center and log in (or create a new and set up a Google Merchant Center account if you don’t have one). Then, follow the steps below.
Step-by-step guide:
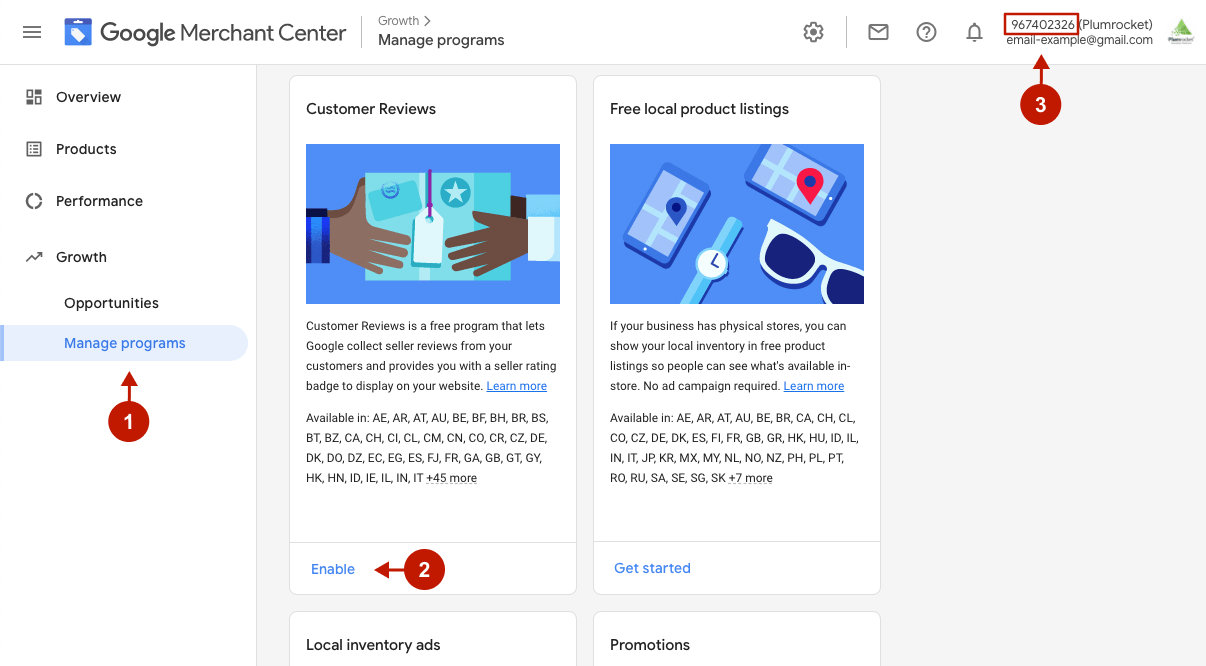
- In your Google Merchant Center account, go to Growth -> Manage Programs.
- Find the Customer Reviews block and click Enable.
- Copy your Merchant ID to paste it later in the extension’s configuration.
Configuring Google Customer Reviews Extension
Once you have set up the Google integration and enabled the Google Customer Reviews program in the Merchant Center, you can start configuring the Google Customer Reviews plugin.
Go to the Plumrocket tab in the main Magento menu -> navigate to Google Customer Reviews -> select Configuration.
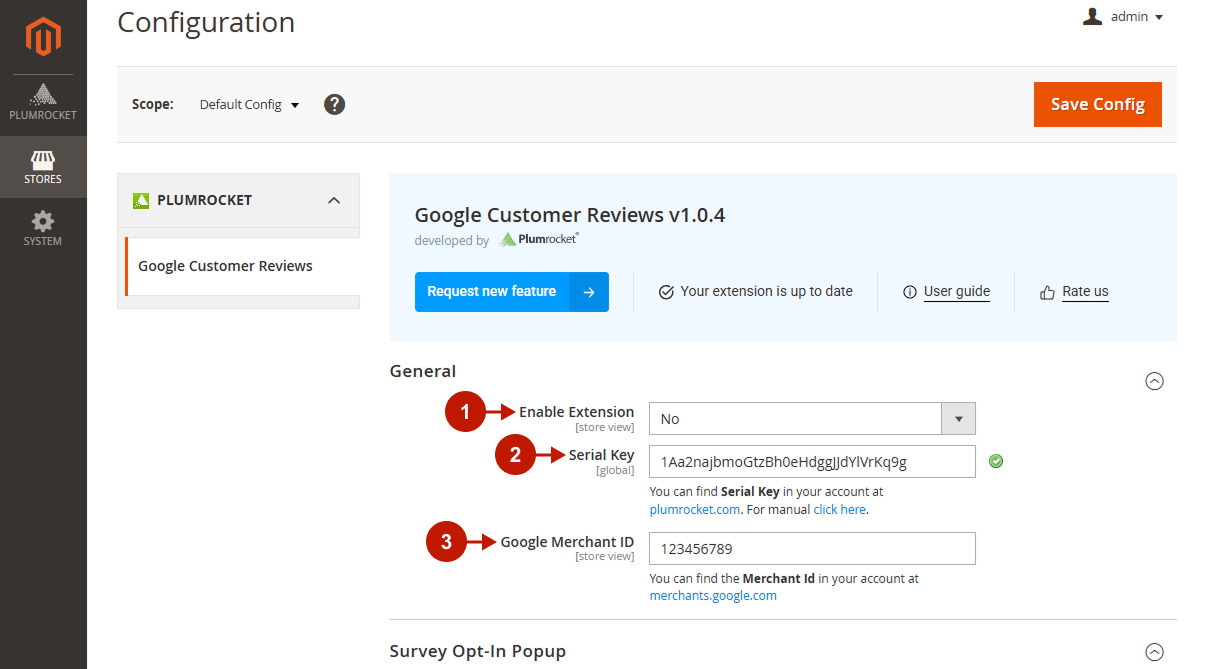
General
Step-by-step guide:
- Enable Extension: set to Yes to enable the extension.
- Serial Key: enter the unique serial key provided to you after purchasing the extension. Please note: in most cases, this field will be pre-filled with a serial key automatically, and the green checkmark will be displayed. To find and paste your serial key manually, read the Serial Key Activation article.
- Merchant Id: paste your Merchant ID you can find in your Google Merchant Center account.
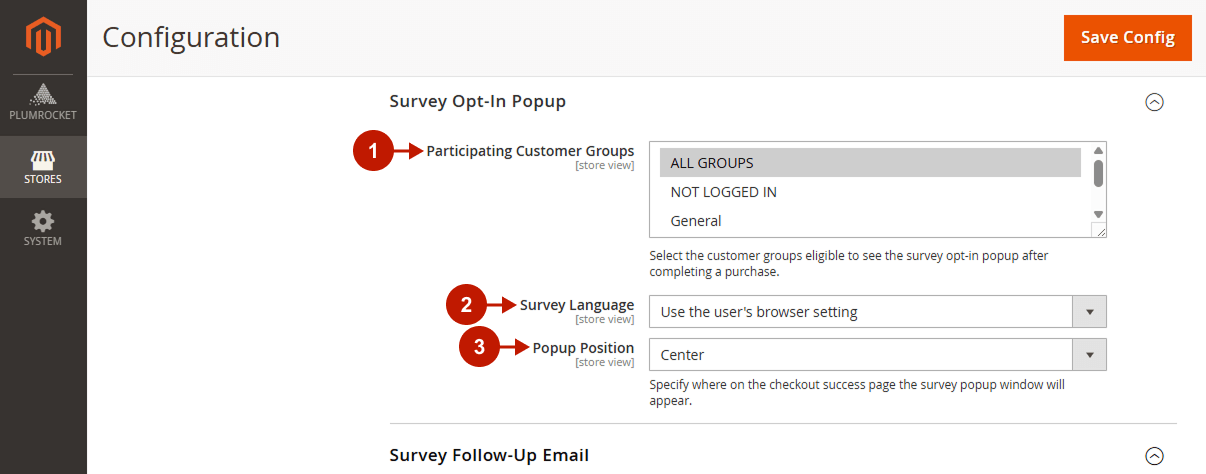
Survey Opt-In Popup
In this section, you can learn how to configure a popup displayed after checkout to collect emails. In this popup, a customer can agree or refuse to receive an email in which he can leave a review.
Step-by-step guide:
- Participating Customer Groups: select specific customer groups for which a survey request will be displayed.
- Survey Language: select the language you want to display the survey opt-in. Choose the Use the user’s browser setting option to automatically detect and use the language of the current browser the client is using.
- Popup Position: set the position of the survey opt-in popup displayed on the Checkout Success Page.
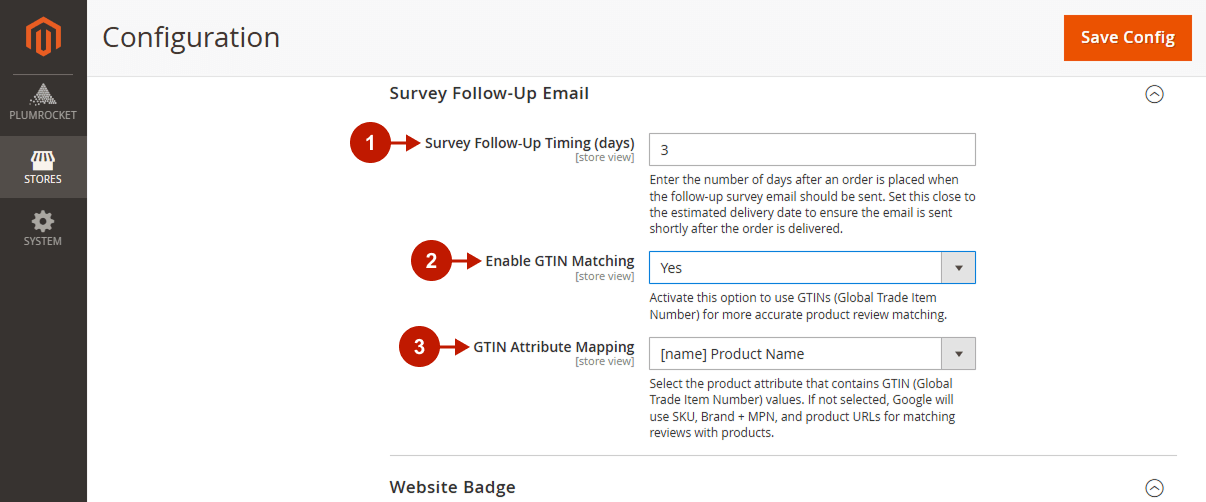
Survey Follow-Up Email
Step-by-step guide:
- Survey Follow-Up Timing: set the number of days after the order day when the Follow-Up email should be sent.
- Enable GTIN Matching: enable or disable the GTIN Matching functionality.
- GTIN Attribute Mapping: Select the product attribute that contains GTIN (Global Trade Item Number) values.
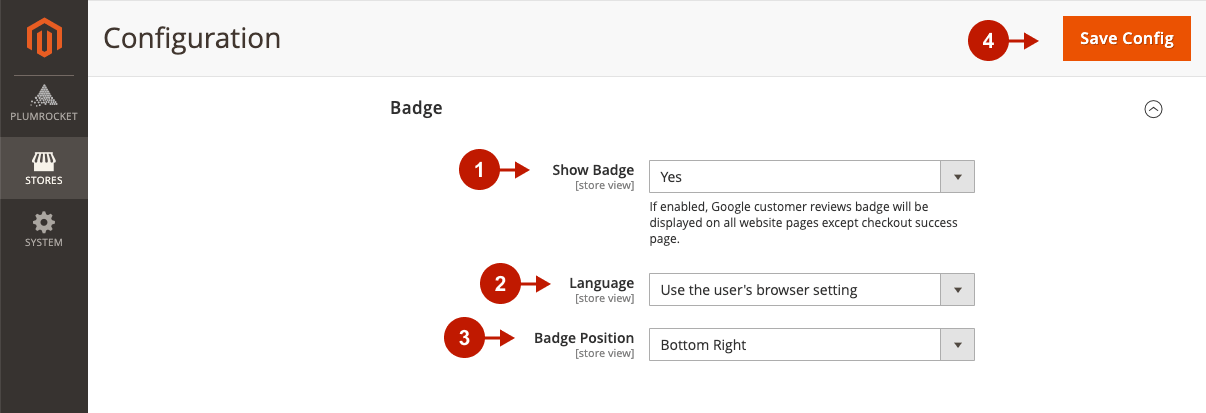
Badge
Step-by-step guide:
- Show Badge: set to Yes to display a badge with your average seller rating on Google Customer Reviews badge.
- Language: select the language you want to display the badge. Choose the Use the user’s browser setting option to automatically detect and use the language of the current browser the client is using.
- Box Position: set the position of the badge on your website pages from the drop-down list.
Please note that you can place your badge anywhere on the page. To do this, follow the Google article on how to add the CGR badge inline. In this case, you should disable the badge in the extension by setting the Show Badge option to No in order to avoid duplicate badge.