Here you will learn how to configure our Magento Landing Pages Extension.
Configuring Landing Pages Extension
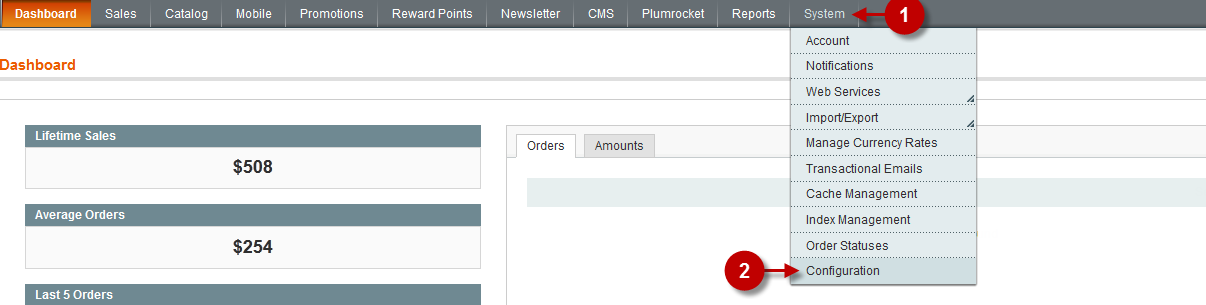
In order to access the module configuration page follow the instructions below:
Step-by-Step action:
- Click on the “System” tab in main menu.
- Choose “Configuration”.
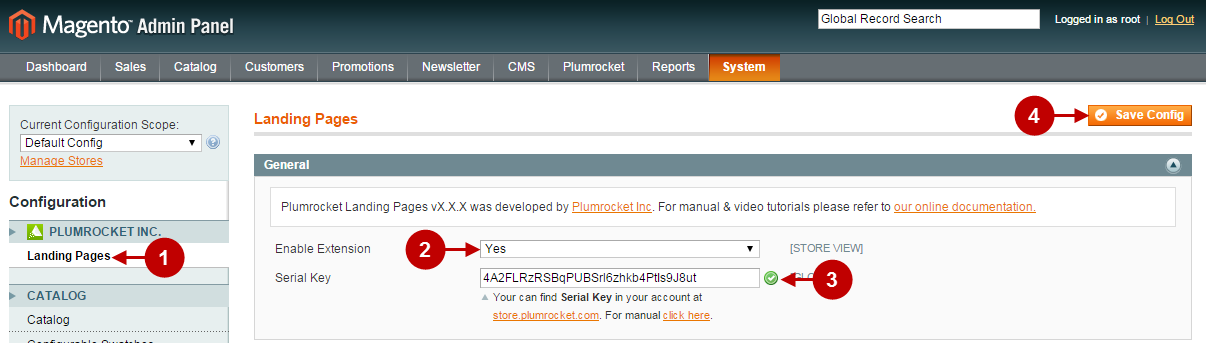
Step-by-Step action:
- Select “Plumrocket Landing Pages”.
- Set “Yes” or “No” in the field “Enable Plumrocket Landing Pages” depending on whether you want to enable or disable the module.
- Option “Serial Key”: enter unique serial key provided after the purchase for legitimate and proper functioning of your extension. Note: In most cases this field will be pre-filled with serial key automatically and the green check mark will be displayed. Otherwise please read article Serial Key Activation in order to find and paste your serial key manually.
- Press the “Save Config” button to save an apply the changes.
Manage Pages
In order to preview the existing landing pages or create a new one follow the instructions below:
Step-by-Step action:
- Click on “Plumrocket”.
- Select “Landing Pages” from the list.
- Click on “Manage Landing Pages”.

Step-by-Step action:
- Select the page you want to edit from the list.
- In order to create a new page press the “Add Page” button.

After you have chosen any action from the screenshot above you will see the landing page management page. The fields to be configured are given below.
Detailed description:
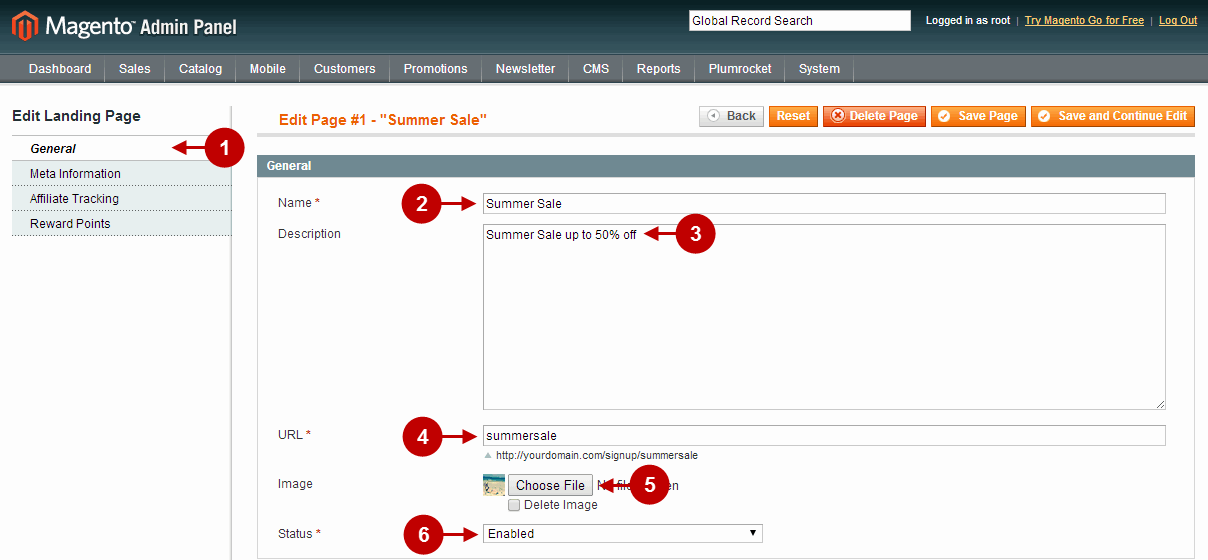
- Select the “General” tab.
- Option “Name”: Enter the name of a new landing page or edit the existing one.
- Option “Description”: Provide page description.
- Option “URL”: Enter the link for this landing page.
- Button “Open”: Press this button to choose the background image for the landing page. Recommeded size of image: Magento Default Theme – 680px*445px, Plumrocket Private Sale Themes – 820px*445px.
- Option “Status”: Select either “Enabled” or “Disabled” to control the page display in the frontend.
Detailed description:
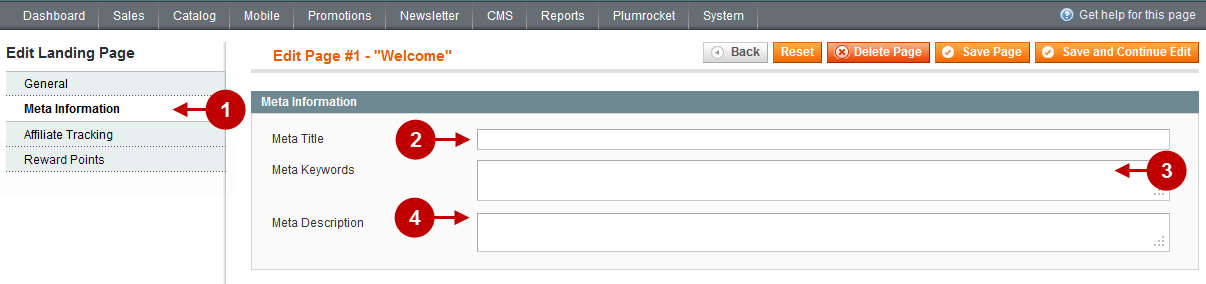
- Select the “Meta Information” tab.
- Option “Meta Title”: allows you to set Meta Title of the landing page.
- Option “Meta Keywords”: allows you to set Meta Keywords of the landing page.
- Option “Meta Description”: allows you to provide Meta Description of the landing page is needed.
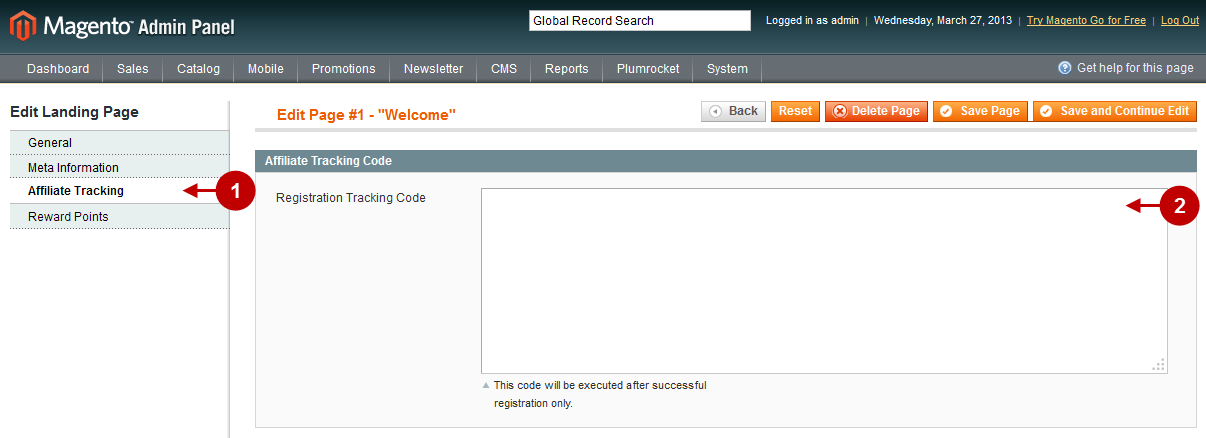
Detailed description:
- Select the “Affiliate Tracking” tab.
- Option “Registration Tracking Code”: allows you to set the Registration Tracking Code that will be displayed on the page after successful registration.
- Press the “Save Page” button to save and apply the changes.
Detailed description:
- Select the “Reward Points” tab.
- Option “Registration Points”: allows you to set amount of point the customer earns for registering at this landing page.
- Press the “Save Page” button to save an apply the changes.

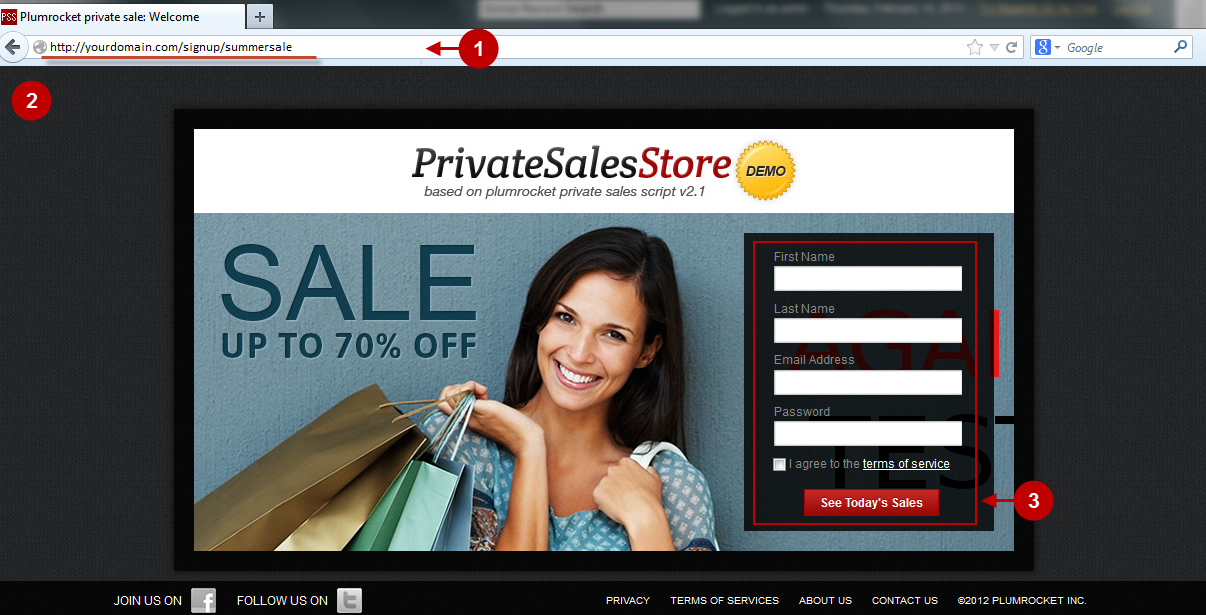
This is what the Magento Landing Pages Extension looks like in the frontend.
Detailed description:
- This link allows to preview the landing page.
- This is the landing page itself.
- You can use the Quick Registration Form and press the button “See Today’s Sales” in order to move to the store and see today’s sales.
Was this article helpful?