Configuring Magento GDPR
In this article, you will learn how to configure our Magento General Data Protection Regulation Extension correctly. Please, follow the instructions below.
Go to the main menu and select “Plumrocket” tab > “GDPR” section.
Step by Step Guide:
General
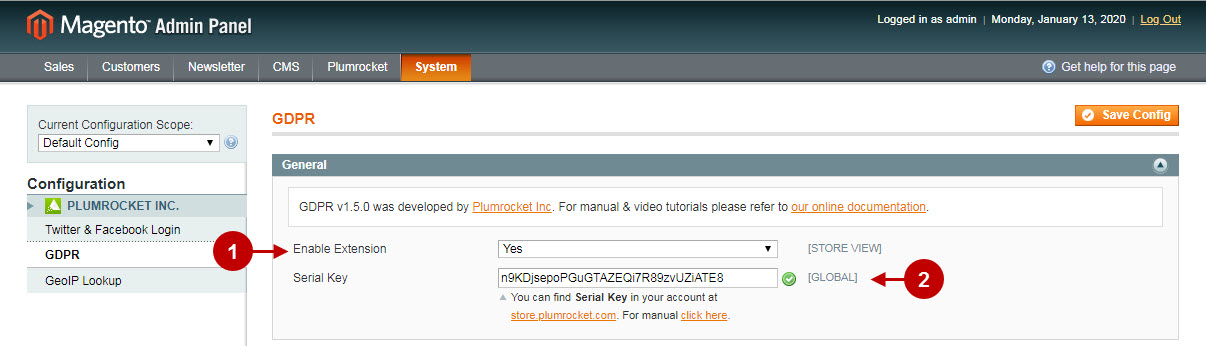
- Enable Extension: select “Yes” to enable the extension or “No” to disable it.
- Option “Serial Key”: enter unique serial key provided after the purchase for legitimate and proper functioning of your extension. Note: In most cases this field will be pre-filled with serial key automatically and the green check mark will be displayed. Otherwise please read article Serial Key Activation in order to find and paste your serial key manually.
Step by Step Guide:
Privacy Center Dashboard
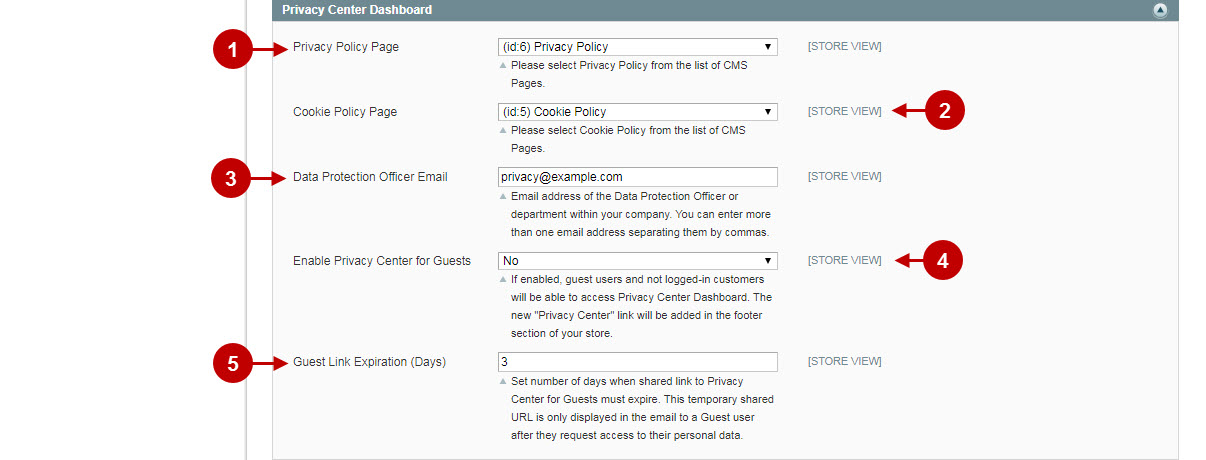
- “Privacy Policy Page”: select the Privacy Policy page from the list of CMS pages.
- “Cookie Policy Page”: select the Cookie Policy page from the list of CMS pages.
- “Data Protection Officer Email”: enter the email address of the Data Protection Officer or the department within your company. This field allows you to enter more than one email address.
- “Enable Privacy Center for Guests”: enable this feature to guest users and not logged-in customers can have access to the Privacy Center Dashboard.
- “Guest Link Expiration (Days)”: set number of days when shared link to Privacy Center for Guests must expire by enabling this feature.
Step by Step Guide:
GDPR Email Setting
- “Anonymization Key”: enter the key that will be used to replace customer data once it is anonymized (e.g. Deleted-123, where “123” is customer ID).

Step by Step Guide:
GDPR Email Setting
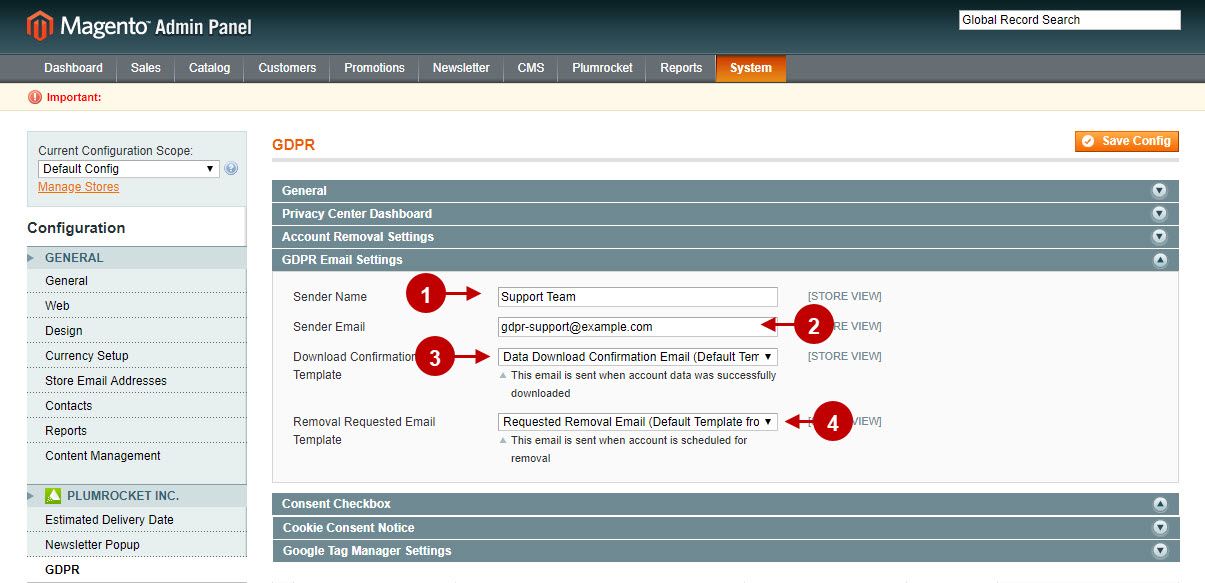
- “Sender Name”: enter the name of the email sender.
- “Sender Email”: specify the email address of the sender.
- “Download Confirmation Template”: select the confirmation email template that is sent when account data was downloaded successfully.
- “Removal Requested Email Template”: select the email template that will be sent when the account is scheduled for a removal.
Step by Step Guide:
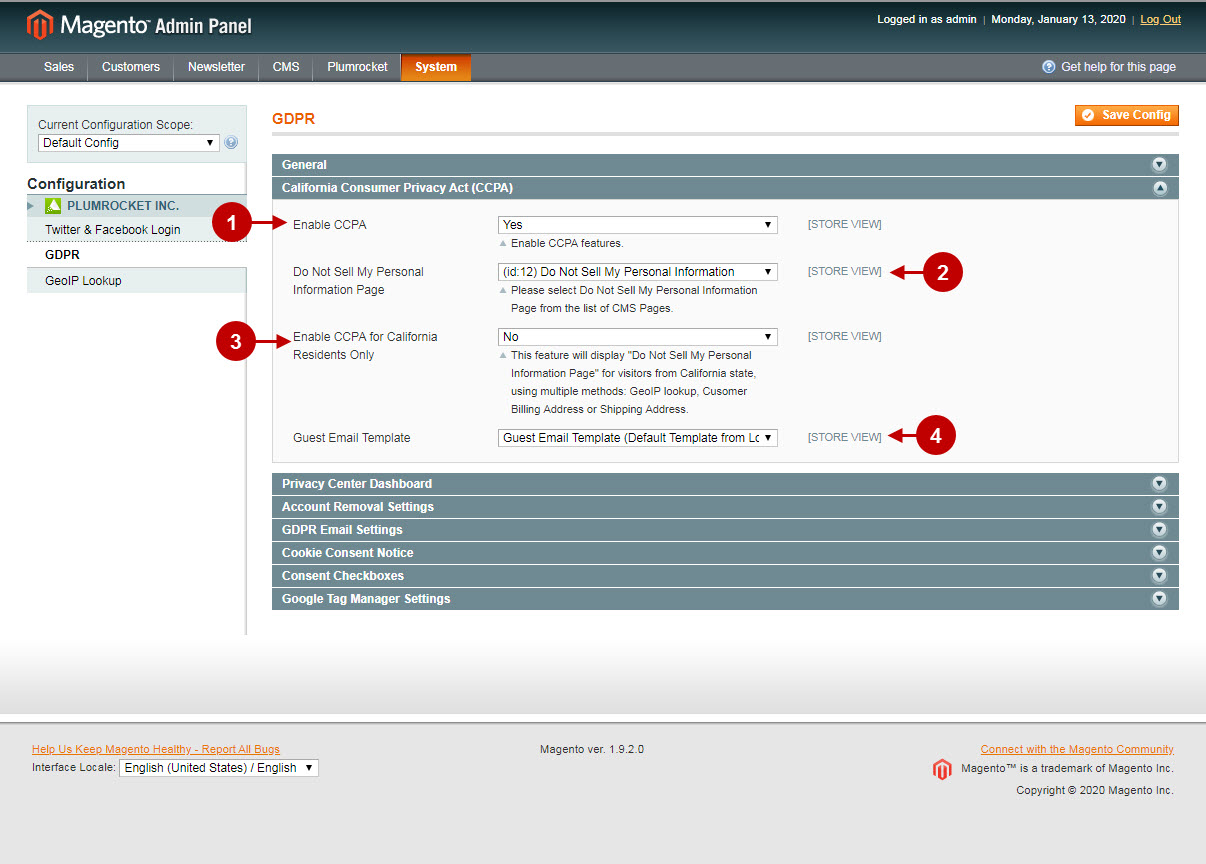
California Consumer Privacy Act
- “Enable CCPA”: select “Yes” to enable the CCPA feature or “No” to disable it.
- “Do Not Sell My Personal Information”: select Do Not Sell My Personal Information Page from the list of CMS pages.
- “Enable CCPA for California Residents only”: select Enable CCPA for California residents only to enable this feature.
- “Guest Email Template”: select Guest Email Template to set the Guest Email Template option.
Step by Step Guide:
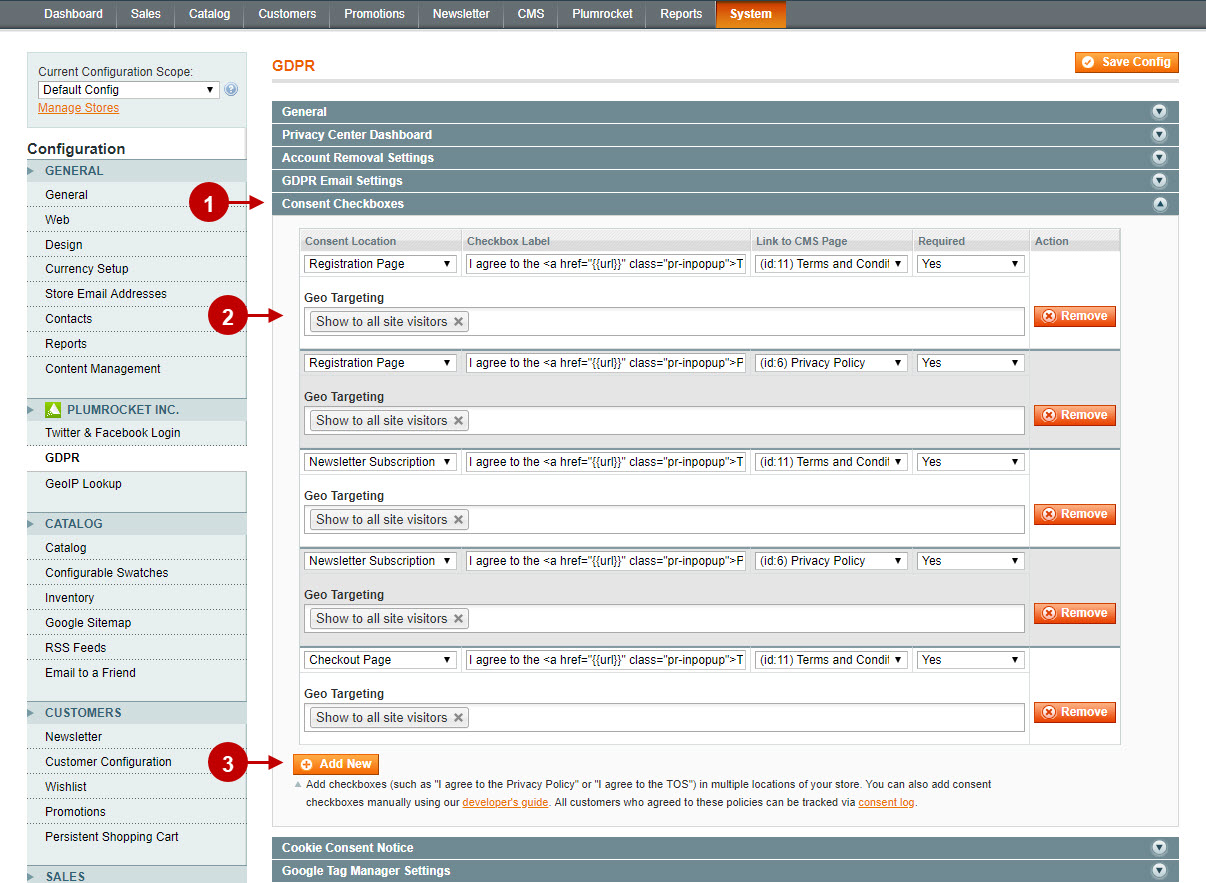
Consent Checkboxes
- This section allows you to set up the Consent Removal check boxes. “Consent location”: select the page to configure the consent checkbox on. “Checkbox label”: specify the checkbox label. “Link to Page”: select the link to the consent page from the list of CMS pages. “Required”: set “Yes” if checking this checkbox is required for a customer, or “No” if it is not. “Action”: this option allows you to remove the page.
- “GeoIP Restrictions”: allows you to display consent checkboxes only to visitors from the selected list of countries.
- Press the “Add New” button to add new consent checkbox.
Step by Step Guide:
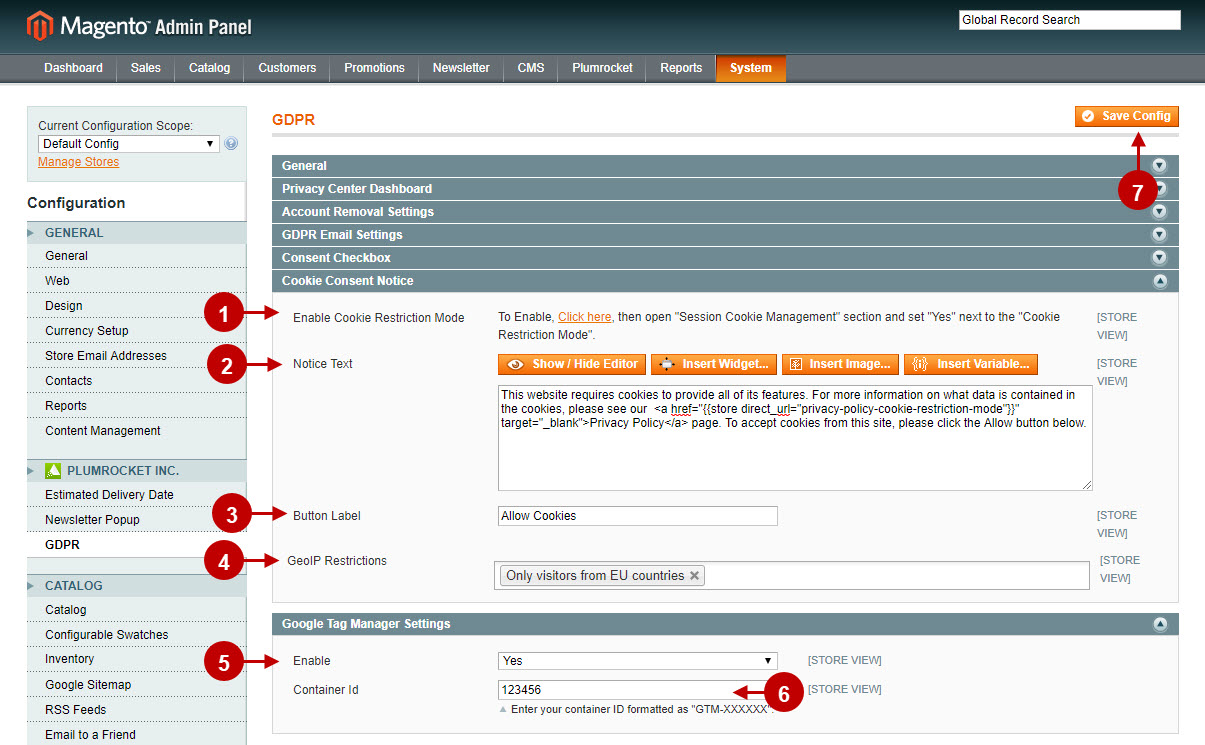
Cookie Consent Notice
- “Enable Cookie Restriction Mode”: this option allows you to enable the cookie restriction mode.
- “Notice Text”: specify the text that will appear in the cookie consent notice.
- “Button Label”: enter the button label of the cookie consent.
- “GeoIP Restrictions”: allows admin to display cookie notice only to the selected list of countries.
Google Tag Manager Settings
- “Enable”: select “Yes” to enable or “No” to disable the Google Tag Manager.
- “Container ID”: enter the Container ID from your Google Tag Manager account, you can find it once you are logged into your GTM account. Click here for more information.
- Press the “Save Config” button to save your settings.
Configuring Magento GDPR for CMS Page
Magento GDPR functionality will be integrated into all CMS pages automatically.
Step by Step Guide:
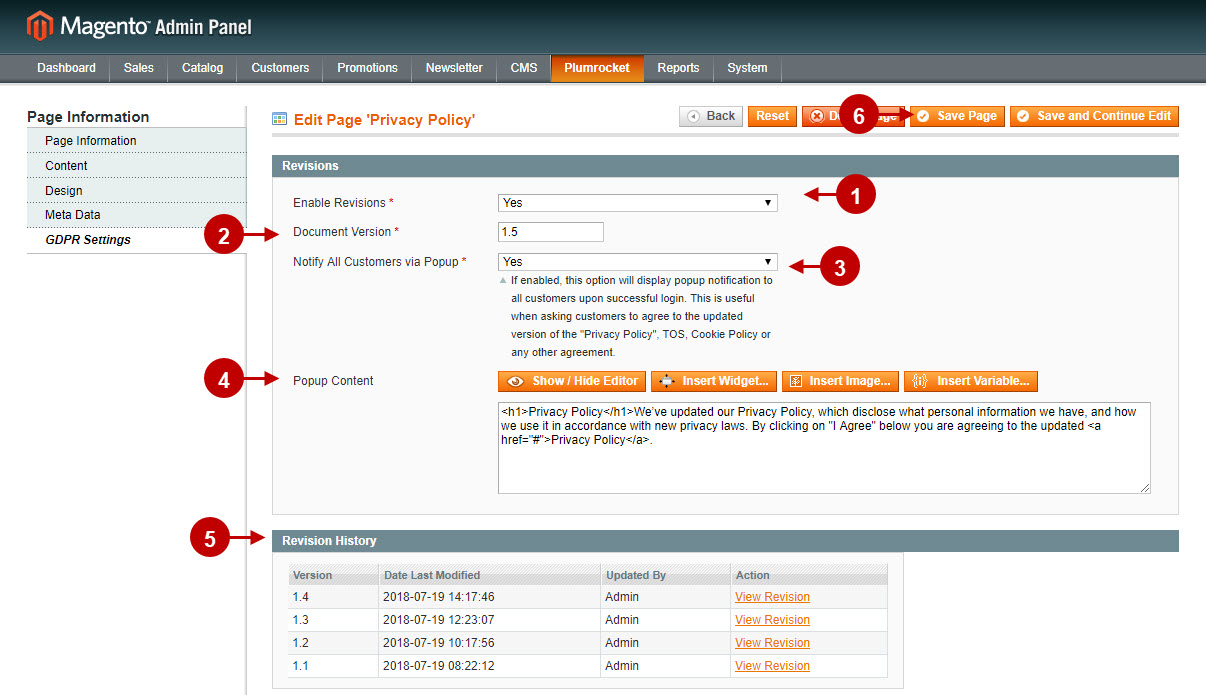
Revisions
- “Enable Revisions”: select “Yes” to enable or “No” to disable the GDPR functionality for this CMS page.
- “Document Version”: specify the version of your CMS page (in this case Privacy Policy page).
- “Notify All Customers via Popup”: enable this option to display the popup notification to all customers upon successful login.
- “Popup Content”: enter the text of the popup notification.
Revision History
- “Revision History”: this section allows you to check the revision history you made to the CMS page.
Step by Step Guide:
- This is how the popup notification looks on the Magento fronted notifying customers when the Privacy Policy is updated.

Magento GDPR Logs
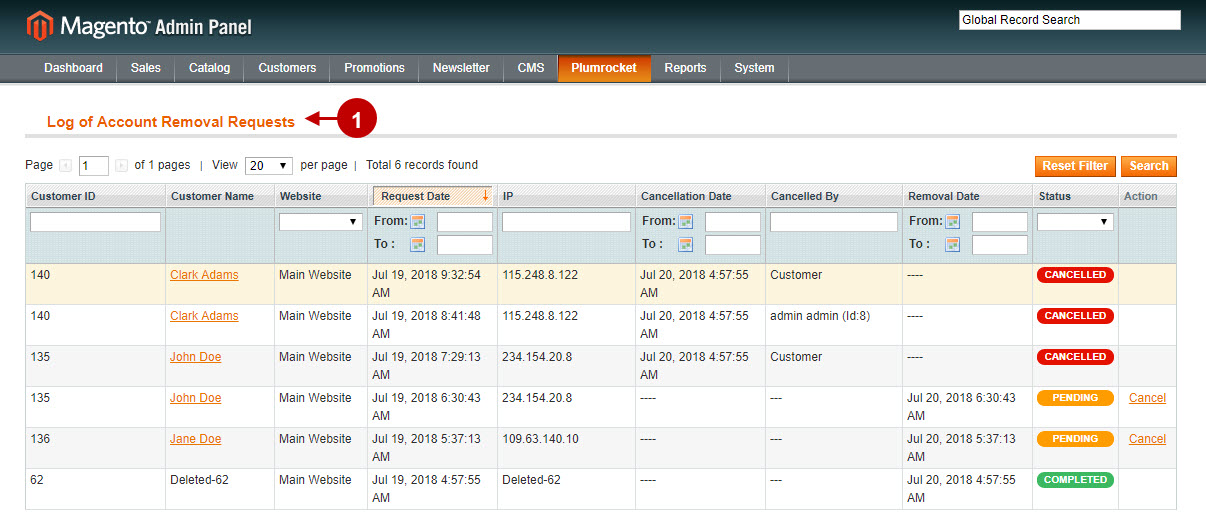
Log of Account Removal Requests
Step by Step Guide:
- This section allows admin to check all the account removal requests and cancel pending requests if necessary. Admin can check or search the removal requests by the following criteria: Customer ID, Customer Name, Website, Request Date, IP, Cancellation Date, Cancellation Date, Cancelled By, Removal Date, Status.
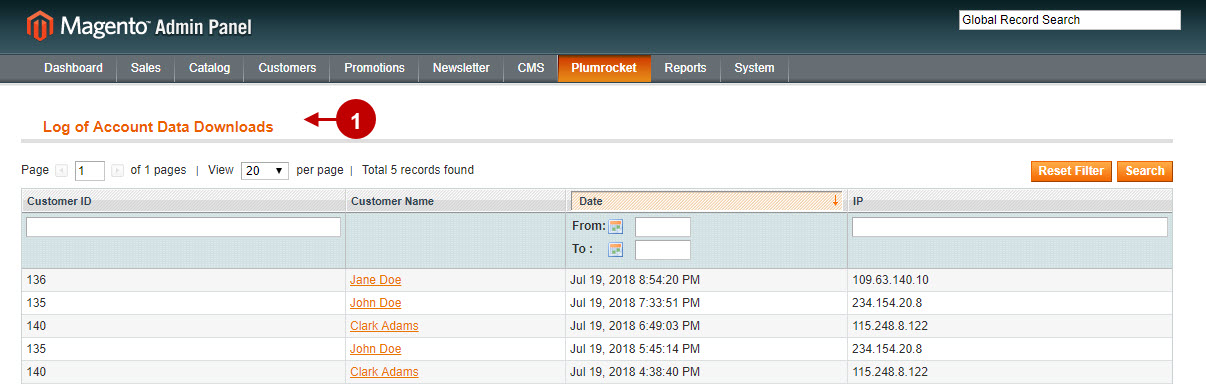
Log of Account Data Downloads
Step by Step Guide:
- This section allows admin to track the customer account data download requests. Admin can check or search the download requests by: Customer ID, Customer Name, Date of the download request, IP.
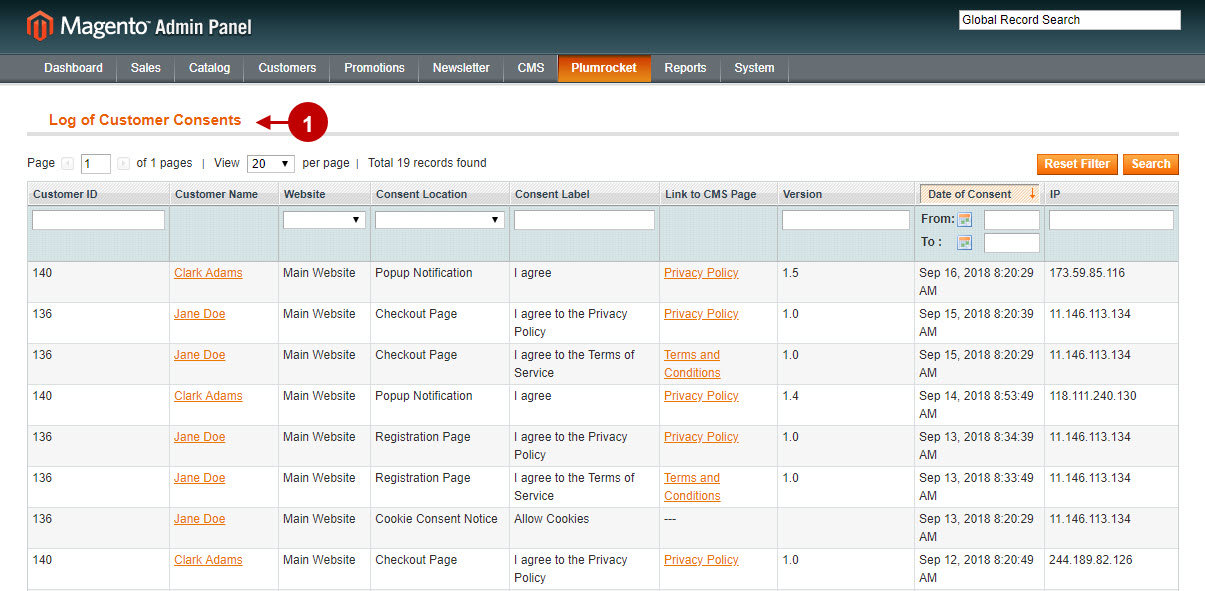
Log of Customer Consents
Step by Step Guide:
- This section allows admin to check and track all customer consents. Admin can search the customer consents by: Customer ID, Customer Name, Website, Consent Location, Consent Label, Link to CMS Page, Version of consent document, Date of Consent, IP.
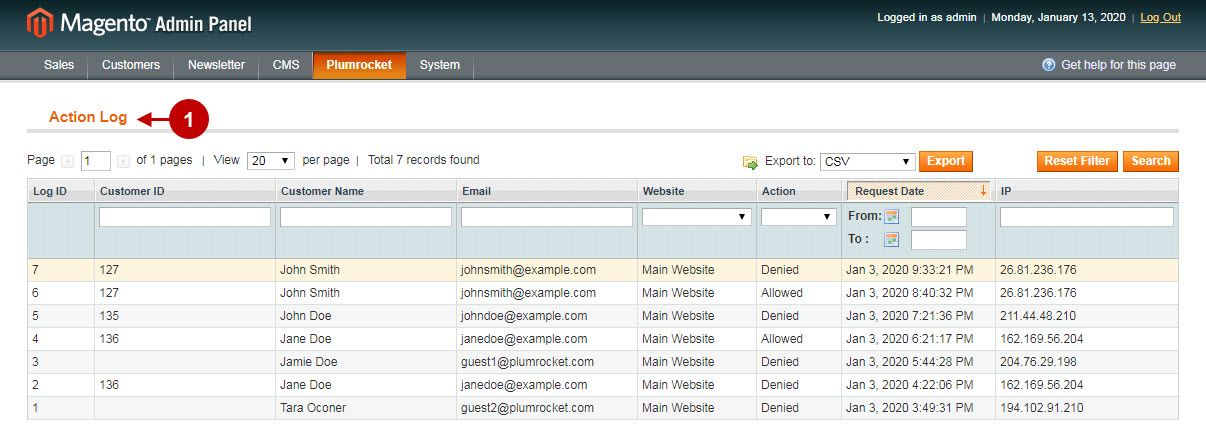
CCPA Action Log
Step by Step Guide:
- This section allows admin to browse the log of customers who have wllowed or denied selling their personal data: Customer ID, Customer Name, Email, Website, Action, Request Date and IP.
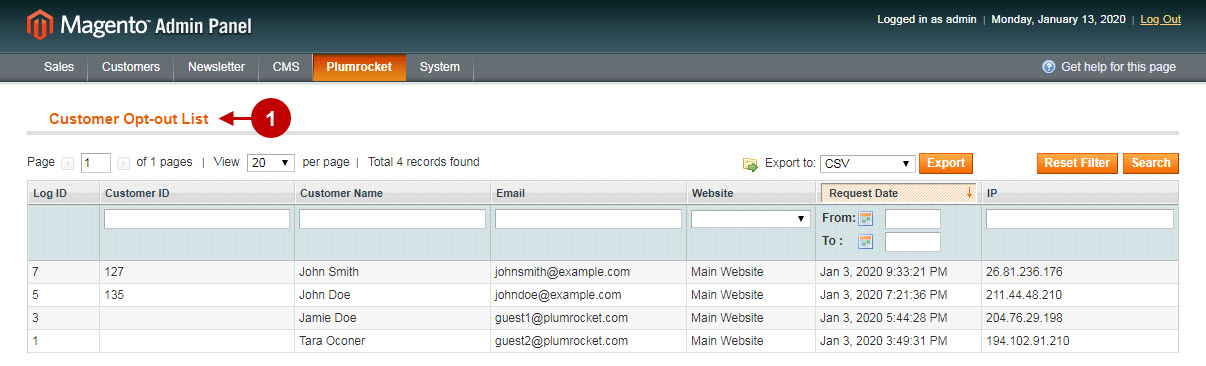
CCPA Customer Opt-Out List
Step by Step Guide:
- This section allows admin to browse the opt-list, who have denied selling their personal data. He also exports data to CSV for future processing.
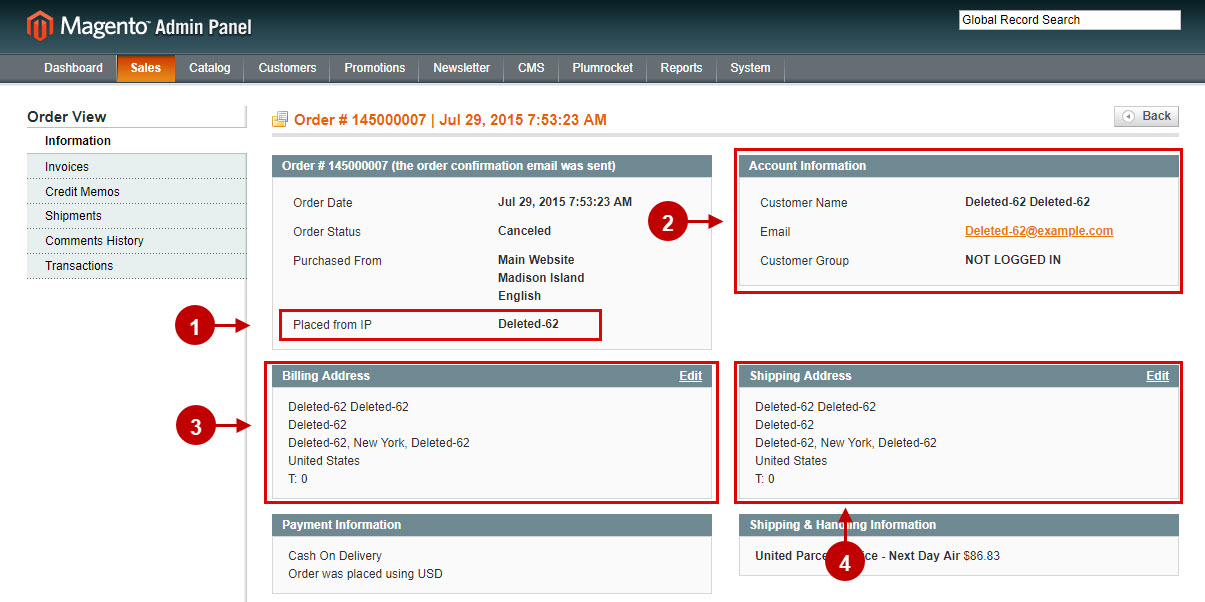
Magento GDPR on Order Page
The GDPR Magento extension will anonymize Magento Orders.
Step by Step Guide:
- The customer IP in Order will be anonymized.
- Customer account information will be anonymized. Customer will be assigned to the “Guest Customer” group.
- Billing address will be anonymized.
- Shipping address will be anonymized.
Magento GDPR FAQ Block
Step by Step Guide:
- Navigate to the “CMS” tab > select “Static Blocks”.
- Find “GDPR FAQ Block”.

Step by Step Guide:
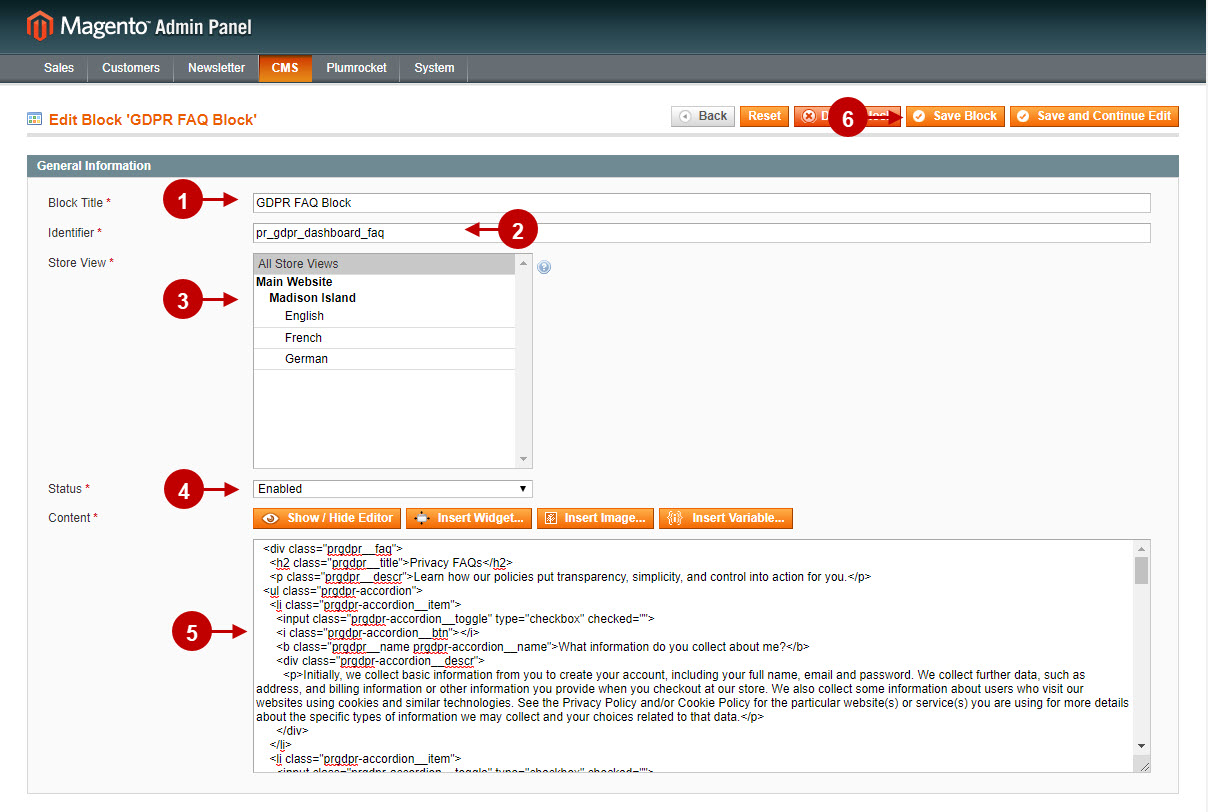
GDPR FAQ block
- “Block Title”: specify the title of the block.
- “Identifier”: add the identifier of your Magento GDPR FAQ block.
- “Store View”: select the store view the FAQ block will be displayed on.
- “Status”: enable or disable the FAQ block.
- “Content”: add the content of your FAQs.
- Press the “Save Block” to save your settings.