Configuring Magento 2 Splash Page v1.x Extension
General
Here you will learn how to configure Magento 2 Splash Page extension correctly. Follow the steps below.
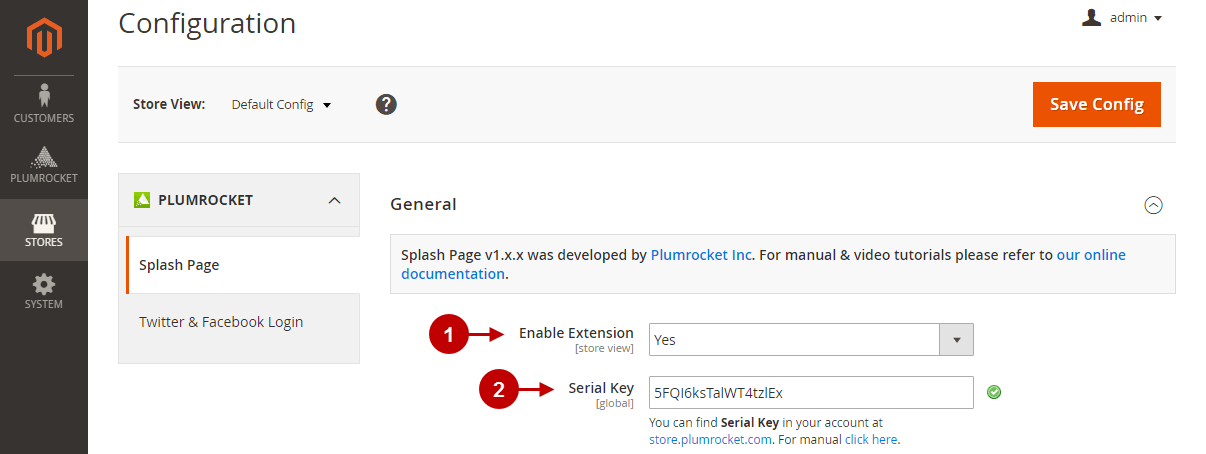
In the main menu go to “Plumrocket” tab > select “Splash Page” extension > navigate to “Configuration” section.
Step-by-Step actions:
- “Enable Extension”: this option allows you to enable or disable this Splash Page extension.
- “Enable Extension”: this option allows you to enable or disable this Splash Page extension.
- “Serial Key”: enter the unique serial key provided to you after purchasing the extension. Note: In most cases, this field will be pre-filled with a serial key automatically, and the green checkmark will be displayed. To find and paste your serial key manually, read the Serial Key Activation article.

Page Settings
In the main menu go to “Plumrocket” tab > select “Splash Page” extension > navigate to “Page Settings” section.
Splash Page
Configure the content of the Splash Page in this section. Follow the steps below to do it correctly.
Step-by-Step actions:
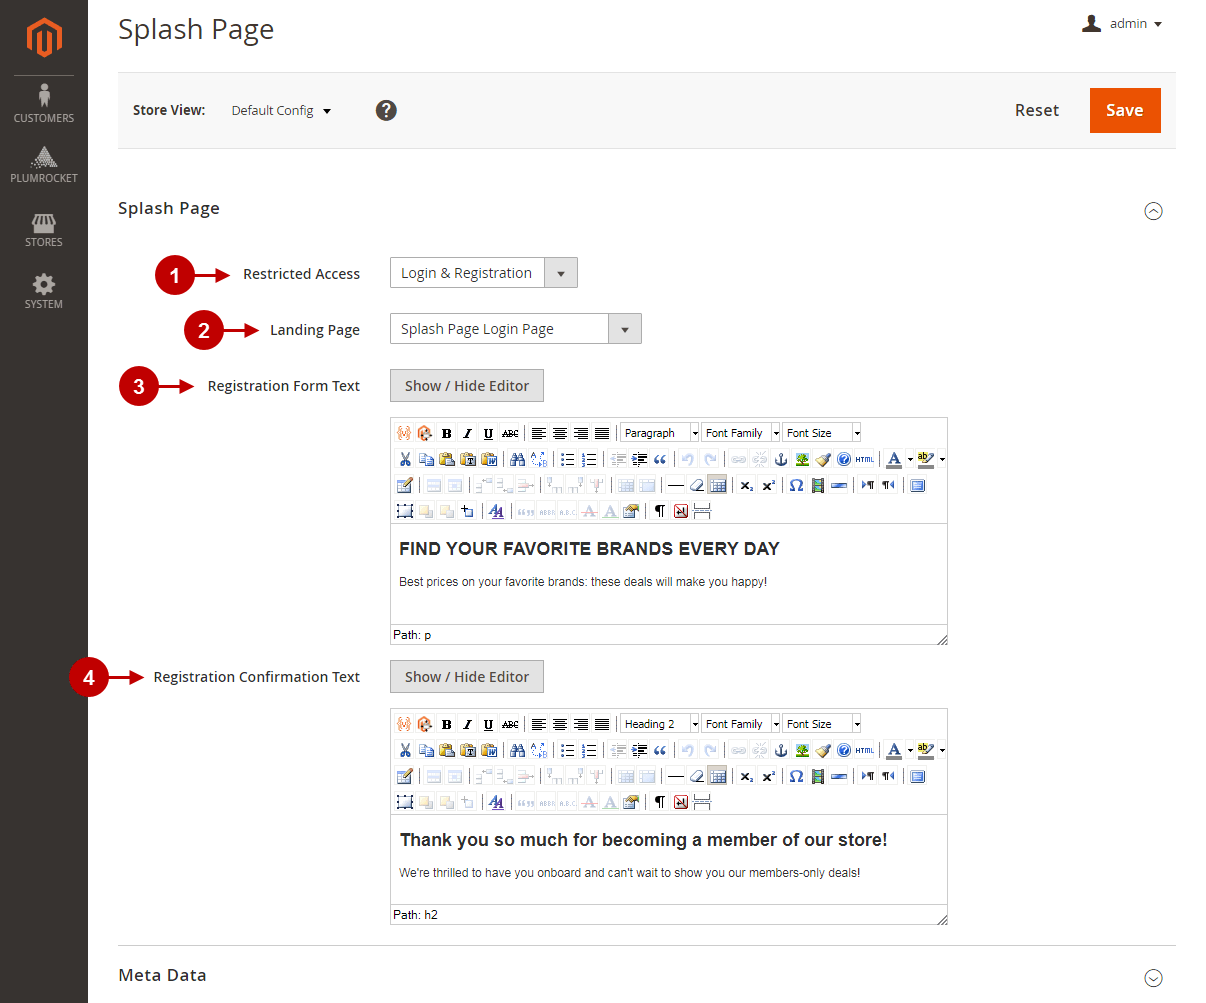
- “Restricted Access“: when non-registered users go to your website, they are limited in content. Select from a drop-down list these values:
- Enable the “Registration only” mode during the “Launching soon” phase of a private sale.
- “Login only” is often used at invitation-only membership websites.
- The “Login & Registration” mode is used on established stores.
Note: Magento 2 Splash Page Extension perfectly integrates with Twitter & Facebook Login Extension and Social Login Pro Extension. When integrated, visitors can log in through their social networking accounts quickly, in addition to email login.
- “Landing Page“: prevent unauthorized access to the website by redirecting to Splash Login Page, Splash Registration Page, Magento Login Page, or Magento Registration Page.
- “Registration Form Text“: use a user-friendly WYSIWYG HTML Text Editor to input text or embedded media to the text block that appears on the Registration Splash Page.
- “Registration Confirmation Text“: use a user-friendly WYSIWYG HTML Text Editor to input a text or embedded media to the block that will appear on the Login Splash Page.

Meta Data
In this section enter meta data for your Splash Page to make your website visible for SEO.
Step-by-Step actions:
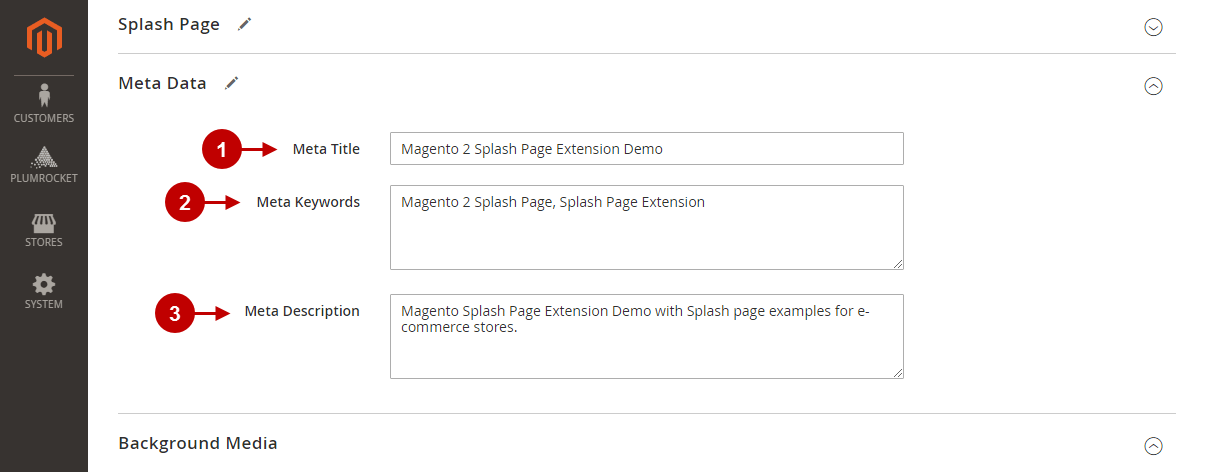
- “Meta Title“: enter a Meta-Title on your Splash Page.
- “Meta Keywords“: enter your Meta Keywords.
- “Meta Description“: enter a Meta Description here.

Background Media
Find out here how to upload and configure background images and videos on the Splash Page.
Step-by-Step actions:
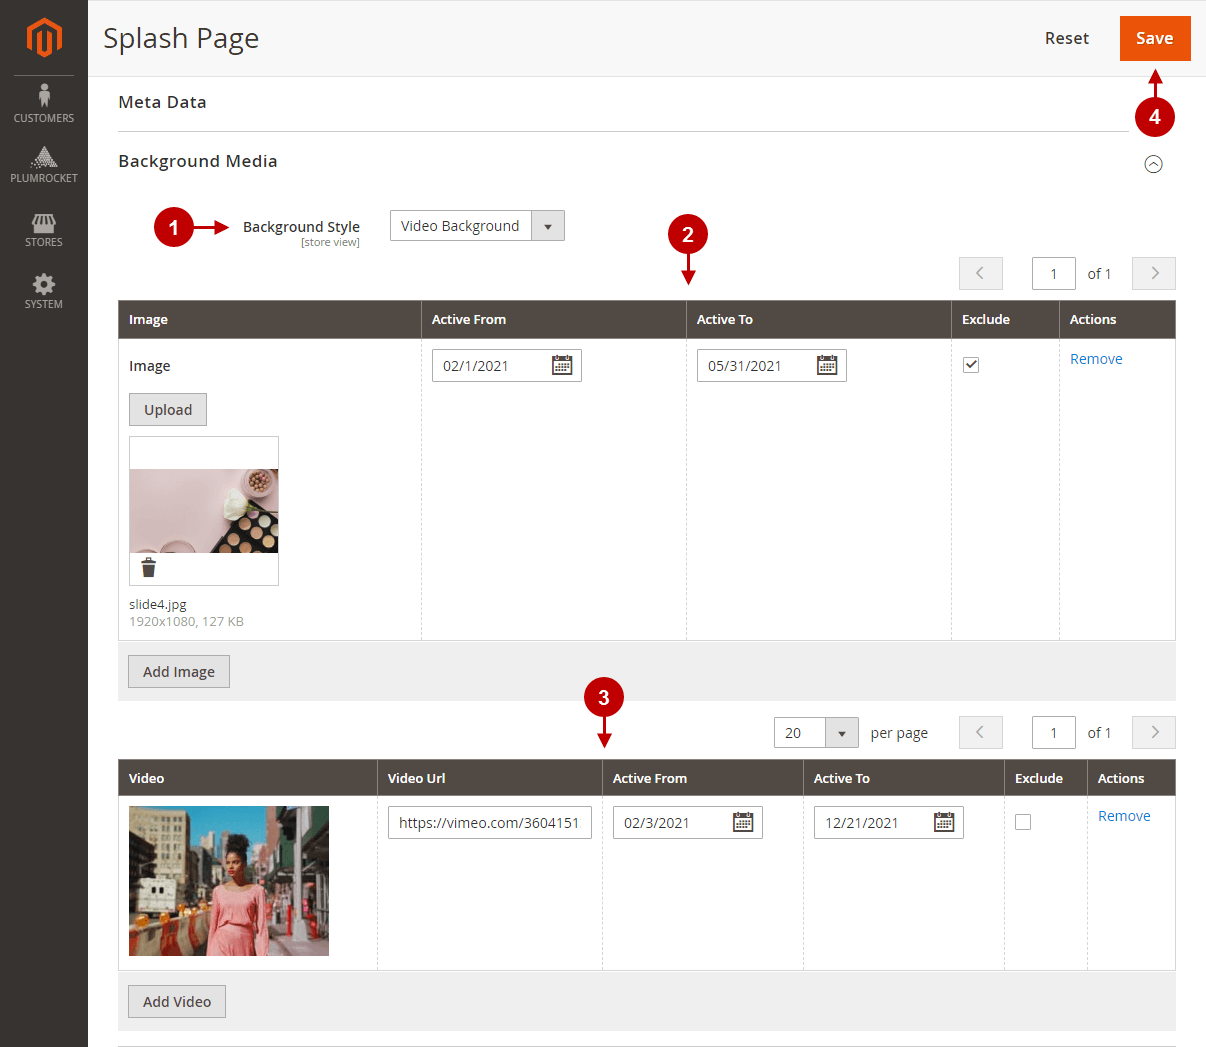
- “Background Media“: select your Splash Page background: video, single image, or slideshow.
- Image Upload Grid: when you decided on single image background or slideshow, use this grid to upload pictures and customize their display.
- “Image“: upload the background image here. This column displays a small preview icon, as well as the size and extension data.
- “Active From“: set the date when you want this image to start appearing on the Splash Page.
- “Active To“: set the date when you want this image to stop appearing on the Splash Page.
- “Exclude“: check the box here if you decided temporarily not to display this image. Uncheck it if you want it to appear on the Splash Page.
When choosing Slideshow mode, checked images will appear on the Splash Page.
- “Actions“: click on the “Remove” button to delete images from the list.
- Video Upload Grid: use this grid to configure Video Background Mode.
- “Video“: this column displays a video snapshot of the uploaded video. It is useful for quick navigation through videos when several are uploaded.
- “Video URL“: enter the video URL here to upload the video. Only YouTube.com and Vimeo.com videos are supported.
- The rest of the grid columns are the same as in the Image Upload Grid.
- Press the “Save” button to save and apply the configurations.

