Configuring Magento 2 SMTP 1.x Extension
General
Here you will learn how to configure Magento 2 SMTP 1.x extension correctly. Follow the steps below.
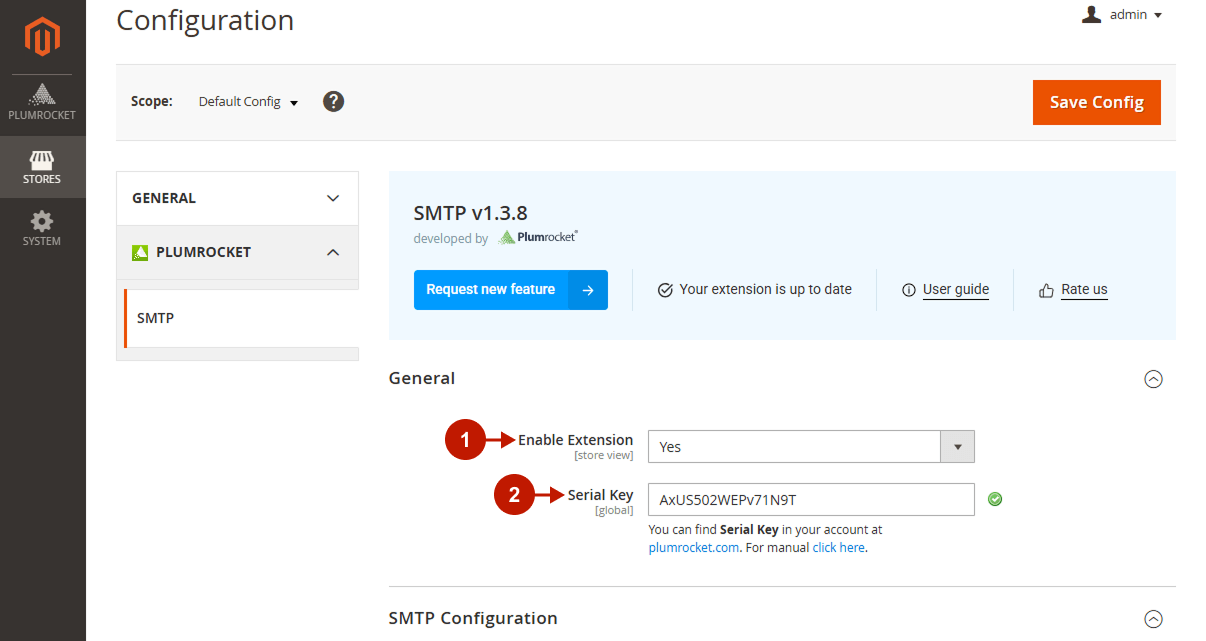
In the main Magento menu, go to “Plumrocket” tab > select “SMTP” extension > navigate to “Configuration” section.
Step-by-Step actions:
- “Enable Extension”: this option allows you to enable or disable this SMTP extension.
- “Serial Key”: enter the unique serial key provided to you after purchasing the extension. Note: In most cases, this field will be pre-filled with a serial key automatically, and the green checkmark will be displayed. To find and paste your serial key manually, read the Serial Key Activation article.
SMTP Configuration
Follow the steps below and configure your SMTP service providers in order to start sending emails to the customers.
Step-by-Step actions:
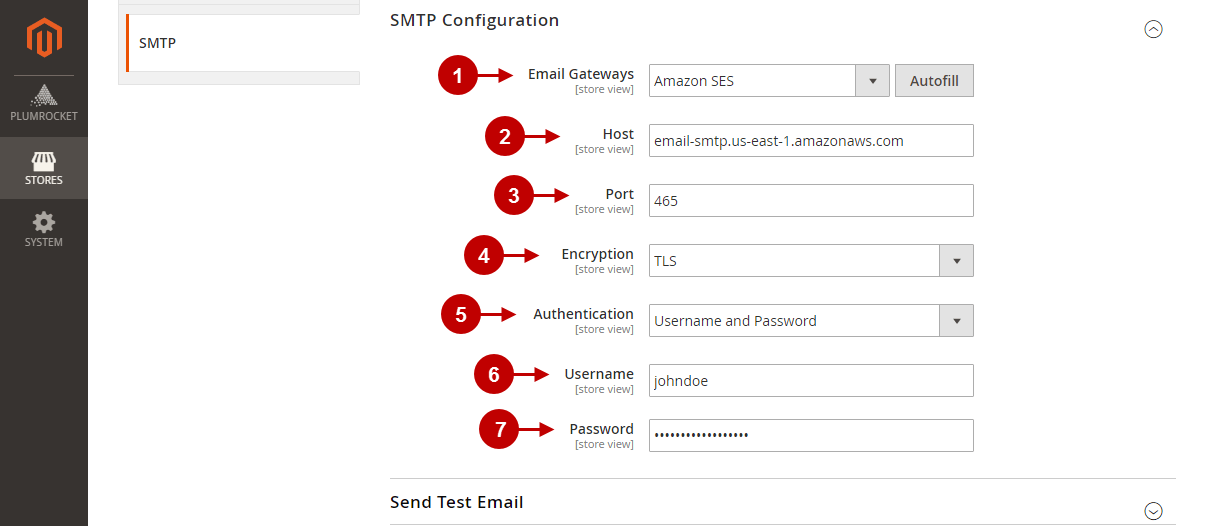
- “Email Gateways”: select the Gateway you want your emails to be sent from. You may choose one of 40+ supported providers or a custom one. Press the “Autofill” button to automatically fill in the remaining fields with the selected Gateway preset data.
- “Host”: enter the SMTP server name or IP address.
- “Port”: enter the port of your SMTP provider. Default ports are 25, 465, or 587.
- “Encryption”: select the encryption: TLS, SSL, or None. For most servers, SSL is the recommended option.
- “Authentication”: If your email gateway requires authentication, select “Username and Password”. Otherwise, select “None”.
- “Username”: enter your SMTP Username.
- “Password”: enter your SMTP Password.
Send Test Email
Before enabling the module on production server, learn how to send a test email in the following instruction.
Step-by-Step actions:
- “Select Email Template”: allows you to select an email template you want to send as a test email.
- “Send Email From”: allows you to select the sender’s name from Magento Store Email Addresses.
- “Send Email To”: allows you to enter a receiver’s email to which you want to send a test email.

Developer settings
Follow these actions to configure email delivery and email log.
Step-by-Step actions:
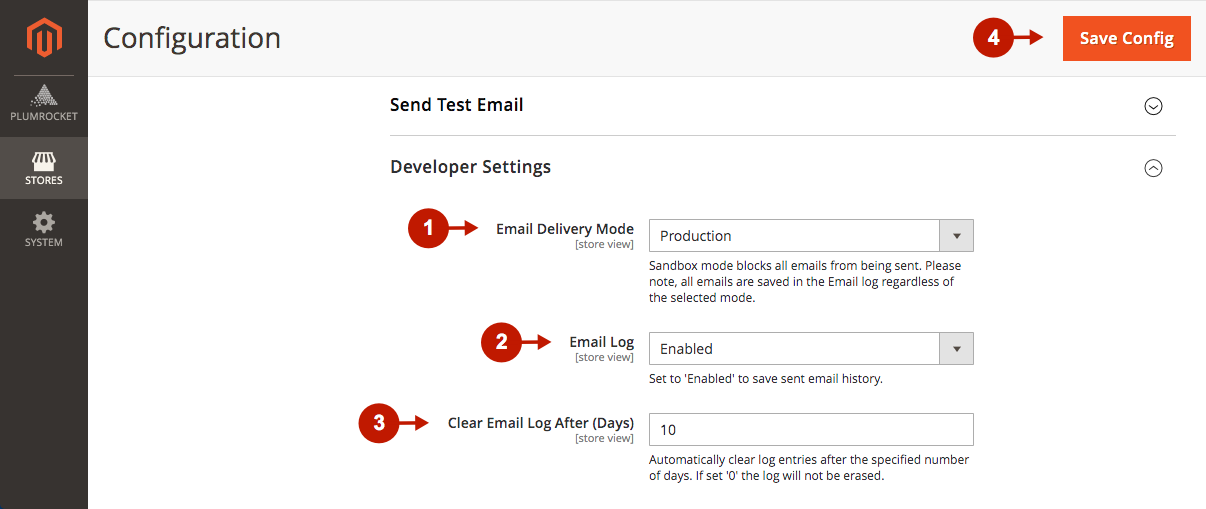
- “Email Delivery Mode”: This option is helpful for developers who work on local machines and development servers. You can select the Sandbox mode option to block all emails from being sent but store them in the Email Log. Otherwise, select the Production option to enable sending emails with SMTP. Please note, all emails are saved in the Email Log regardless of the selected mode.
- “Email Log”: set to ‘Enabled’ to save sent email history.
- “Clear Email Log After (Days)“: allows you to set the specified number of days after which you want to clear the log entries automatically. If set ‘0’, the log will not be automatically erased.
- Press the “Save Config” button to save the configurations.
Manage Email Gateways
Here you will learn how to manage 40+ supported Email Gateways presets or create a custom one.
Step-by-Step actions:
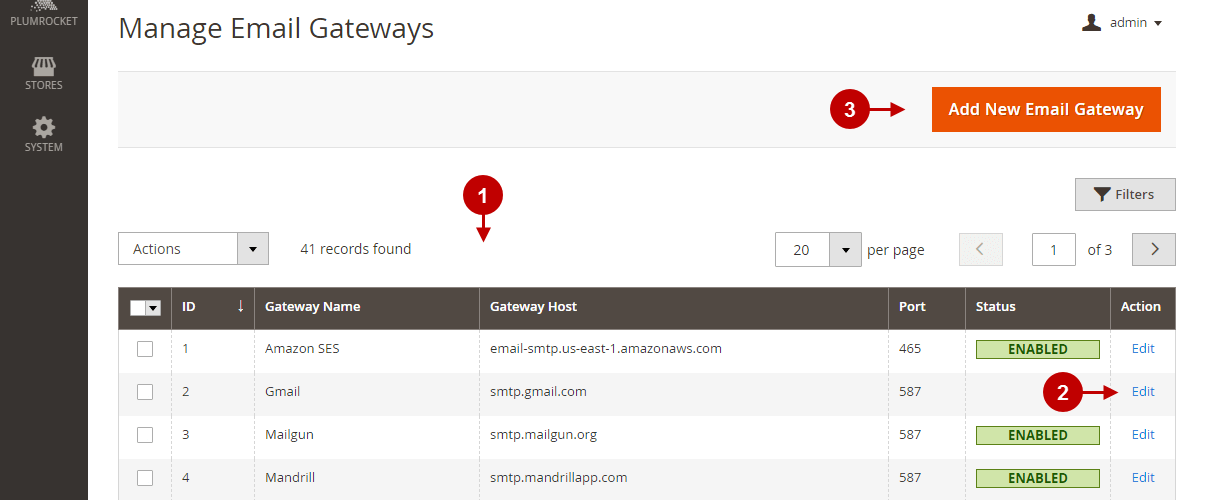
- This grid allows you to manage SMTP Gateways and see their brief information, including the Gateway Name, Gateway Host, Port, and Gateway status.
- “Edit”: allows you to change the settings of the Gateway.
- “Add New Email Gateway”: press this button if you want to create a new Magento 2 SMTP Gateway.
Add New Email Gateway
Follow these steps to create and configure New Email Gateway.
Step-by-Step actions:
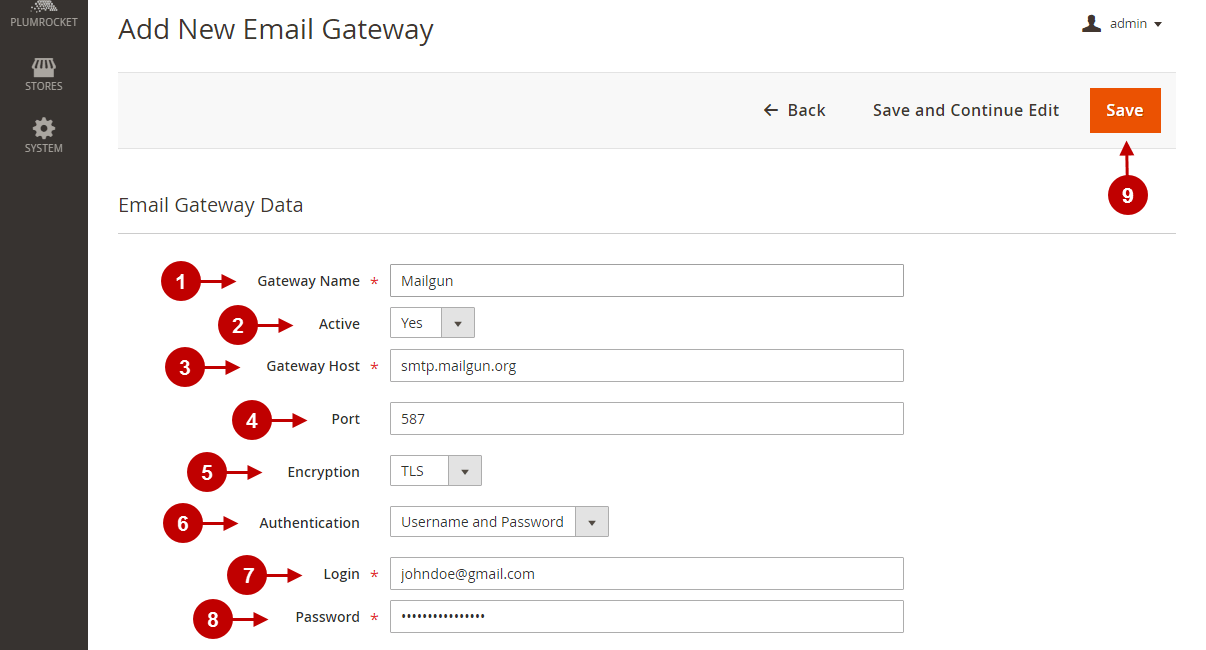
- “Gateway Name”: enter your own gateway name, so you can later see it in the “Manage Email Gateway” section.
- “Active”: set to “Yes” to enable SMTP Gateway. Thereafter, you will be able to select the Gateway in the SMTP Configuration section. Set to “No” to disable this Gateway.
- “Gateway Host”: enter the SMTP server name or IP address.
- “Port”: enter the port of your SMTP provider. Default ports are 25, 465, or 587.
- “Encryption”: select the encryption: TLS, SSL, or None. For most servers, SSL is the recommended option.
- “Authentication”: if your gateway requires authentication, select “Username and Password”. Otherwise, select “None”.
- “Login”: enter your SMTP Login for authentication.
- “Password”: enter your SMTP Password for authentication.
- “Save”: press the “Save” button to save your changes.
Email Log
The Email Log section allows you to keep track of all emails stored in the log. This section is useful for preventing or noticing any failures in sending emails, as well as preview and check your records.
Step-by-Step actions:
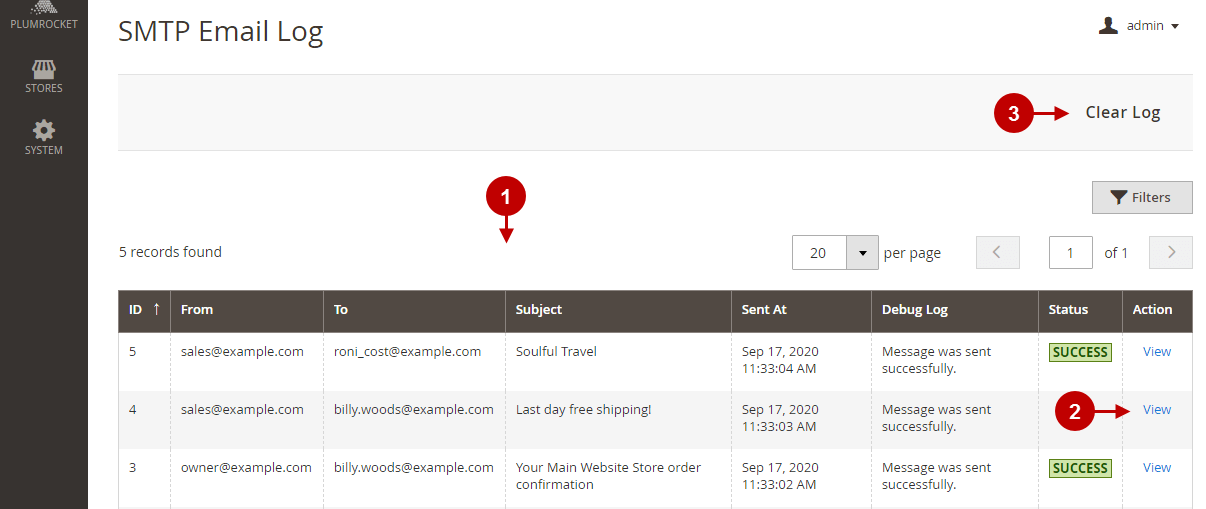
- This grid allows you to keep track of all sent emails and see details of each email sent to your customers.
- “View”: press the “View” button to preview the email’s content the way your customer sees it.
- “Clear Log”: press the “Clear Log” button to delete all records of sent emails manually.
