
UPS changed how API access works. Since June 3, 2024, every UPS API call requires OAuth 2.0 credentials, so the old Access Key you may have used before is no longer valid. Instead, you now create an app in the UPS Developer Portal and get a Client ID and Client Secret.
This guide walks you through the whole path: creating a UPS shipping account, creating the app, choosing the right API products, and connecting everything to Plumrocket Order Status & Shipping Tracking for Magento 2 so your customers can track their orders directly on your store.
Create a UPS Shipping Account
You need a shipping account before the Developer Portal will let you create an app. The app has to be linked to an account, and there is no way around this step. If you already have an account number, skip ahead.
Step-by-step guide:
- Go to ups.com and sign in, or create a UPS.com profile if you do not have one.
- Open the shipping account signup page.
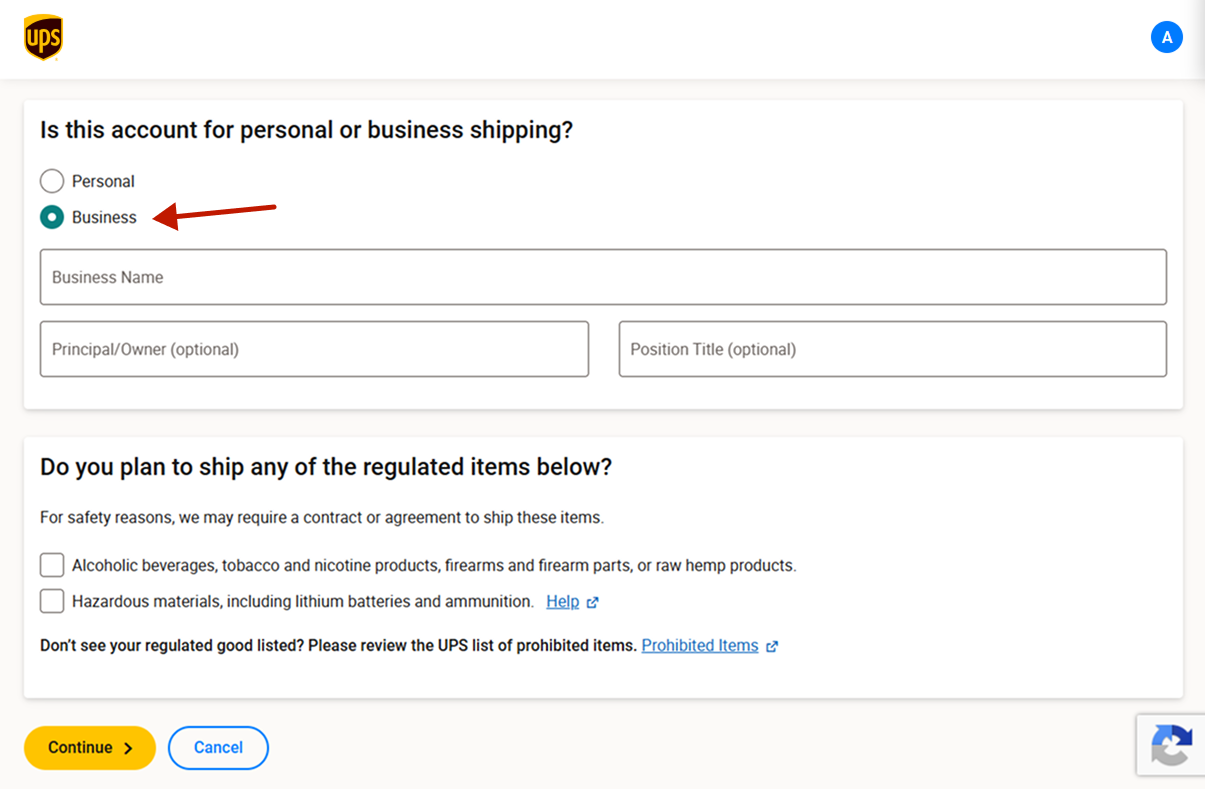
- When asked whether you’re creating the account for personal or business shipping, select Business.
- Specify any regulated items you ship. If none apply, skip this and click Continue.
- On the next page, fill out your billing address.
- Then, you need to verify your identity with a credit card or your EIN.
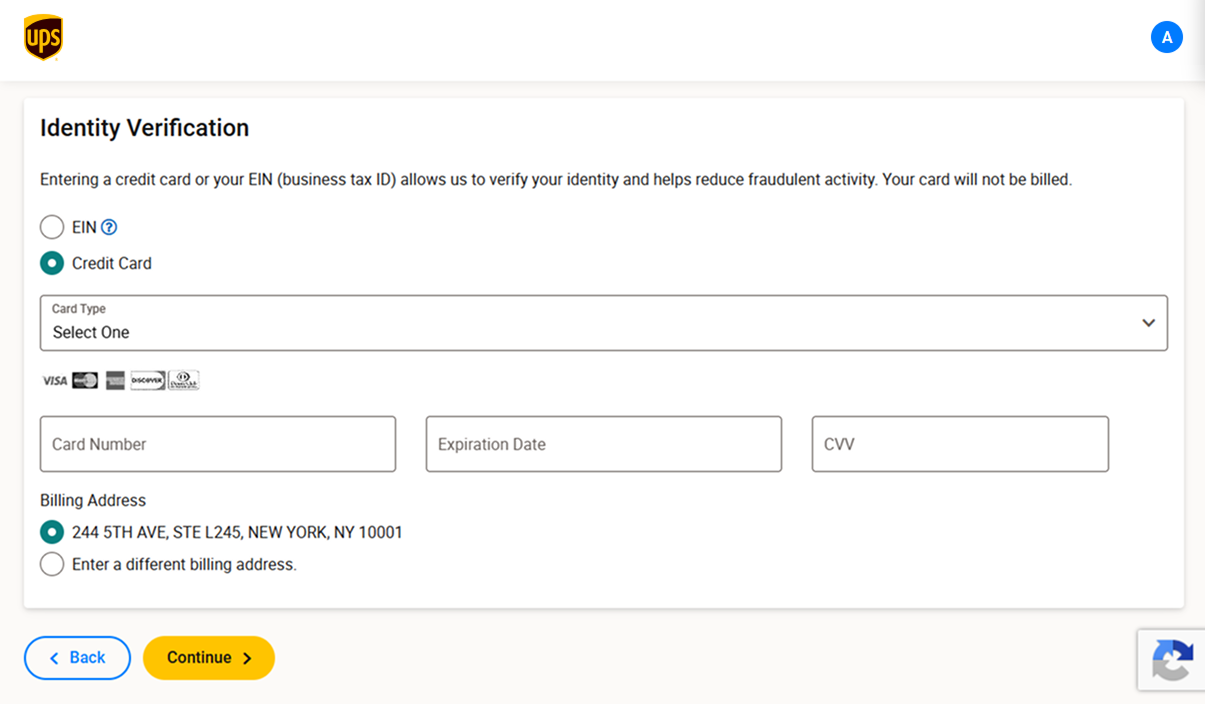
Your shipping account number is assigned once you finish.
Create an App in the UPS Developer Portal
This replaces the old Access Key request. No email, no waiting. Your credentials appear on screen the moment the app is created.
Step-by-step guide:
- Go to developer.ups.com and click Create Application.
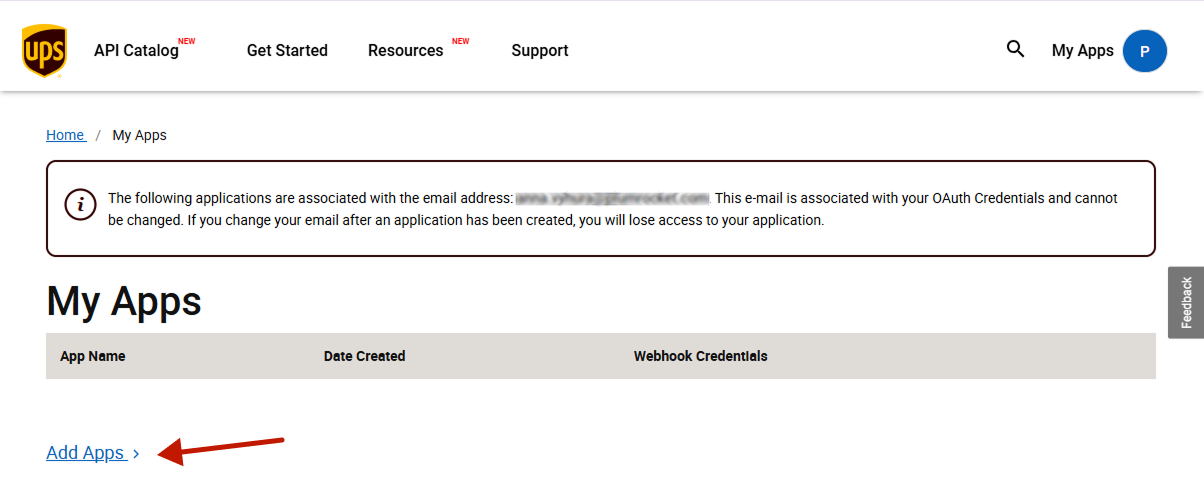
- Click Add Apps.
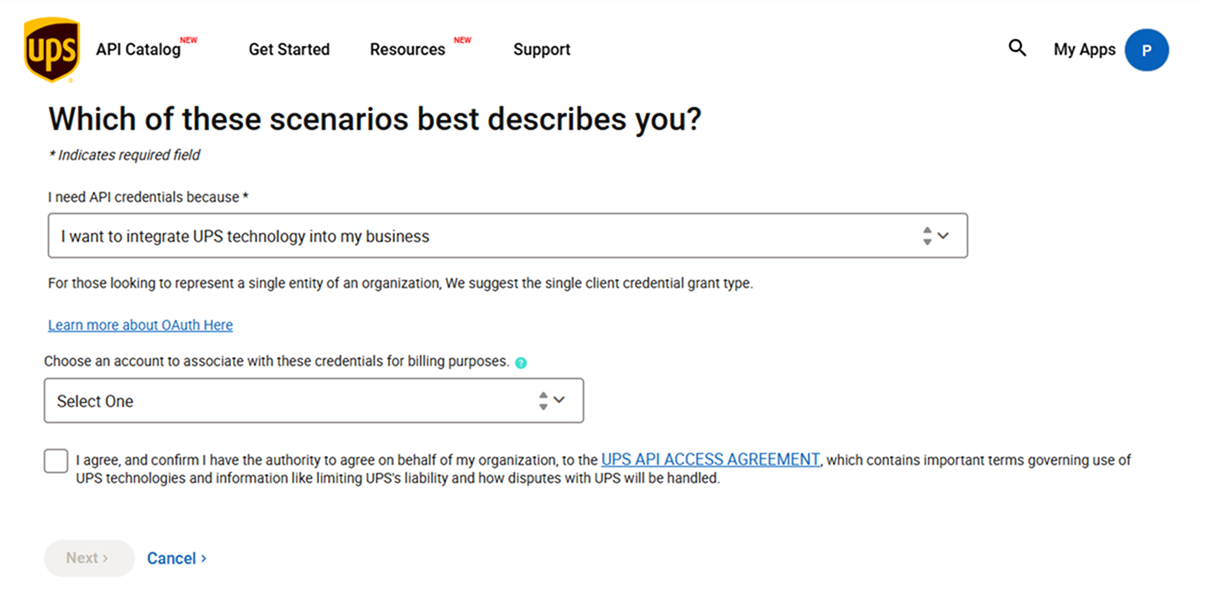
- For “I need API credentials because”, choose “I want to integrate UPS technology into my business“.
- On the next tab, select the UPS account you created above for billing purposes, or add a new one.
- Accept the terms and continue.
- On the next page, fill in your primary contact details: name, email, phone number, and the rest of the form. Click Next.
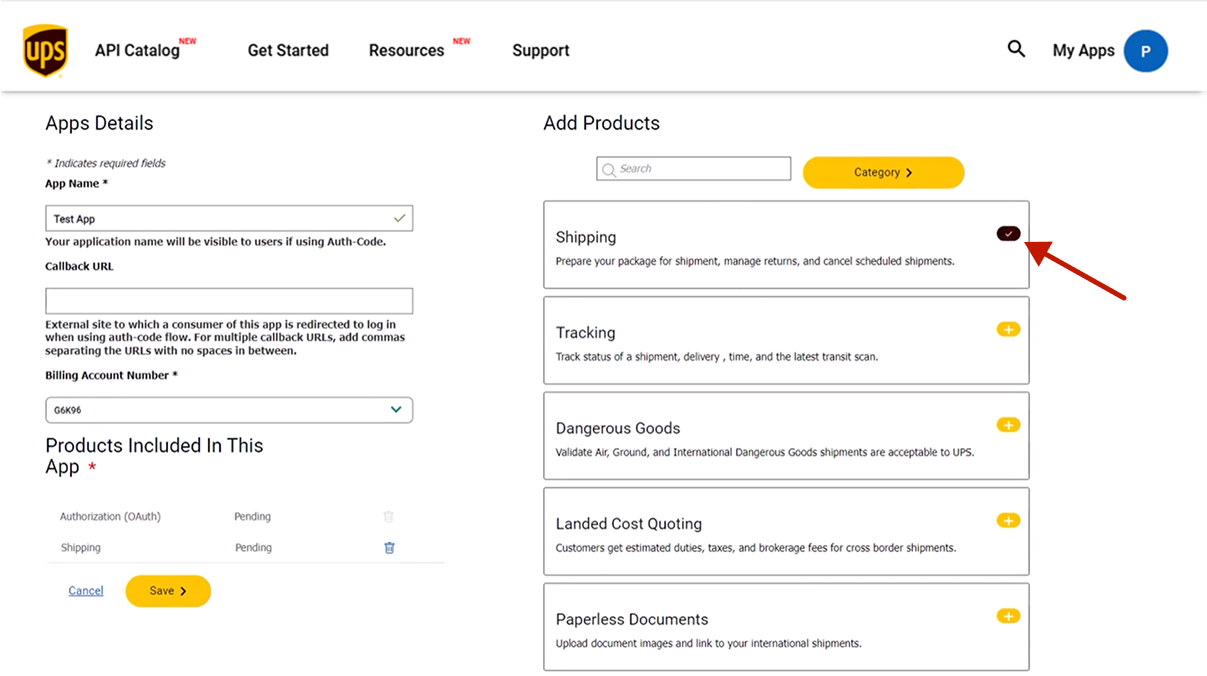
- On the App Details page, enter a name for the app. This name is for internal use only, so you can choose anything recognizable, such as “Magento Order Tracking”.
- Leave Callback URL blank. It only applies to three-legged OAuth flows, which this integration does not use.
- Select a Billing Account Number from your UPS shipper accounts.
- Under Add Products, enable:
- Authorization (OAuth) — usually preselected and non-removable
- Tracking — required for the extension to pull package status
- Click Save and accept the terms.
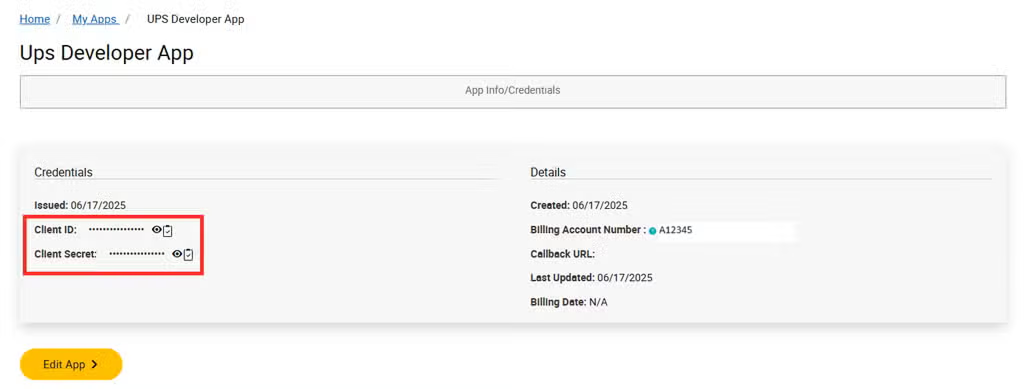
Your Client ID and Client Secret appear on the app page.
Set Up UPS Integration In Magento 2
Step-by-step guide:
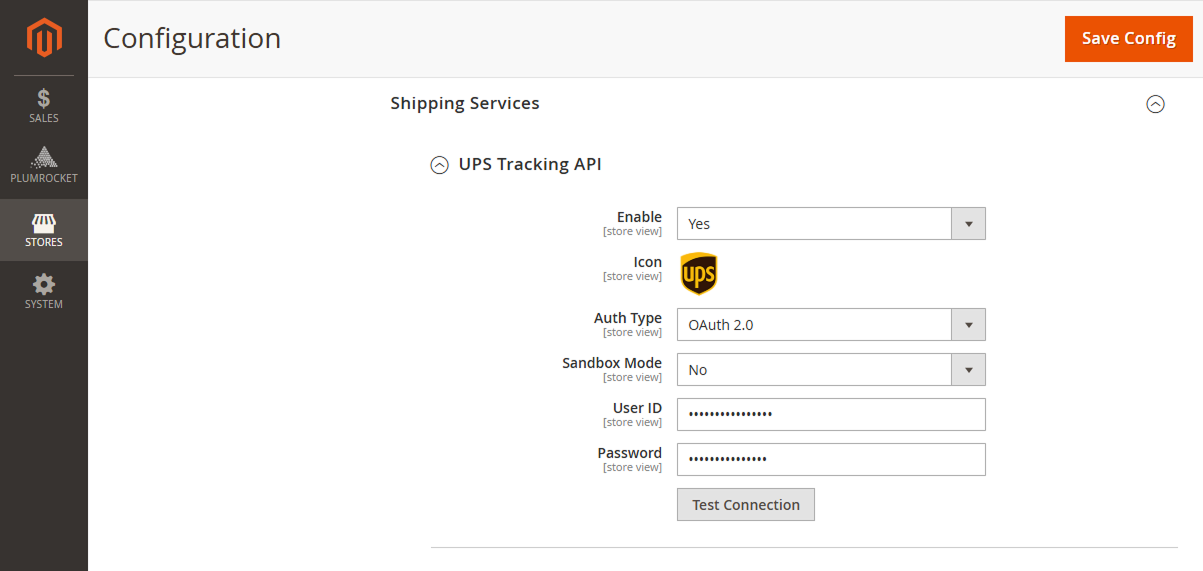
- “Enable“: set to Yes to turn on UPS tracking in your store.
- “Auth Type“: select OAuth 2.0.
- “Sandbox Mode“: set to Yes while you test. Sandbox calls the UPS test environment and returns sample data, not your real shipments.
- “User ID“: paste the Client ID from your UPS app. Despite the label, this field expects your Client ID when Auth Type is set to OAuth 2.0.
- “Password“: paste the Client Secret from your UPS app.
- Click Test Connection. A success message confirms the credentials are valid.
- Click Save Config.
- Once you have confirmed everything works, set Sandbox Mode back to No, save again, and you are live.
Stuck on any of these steps, or would rather not deal with UPS’s portal at all? Get in touch and we’ll set up your account and credentials for you.