How to Create Ontraport API for Magento 2
In this section, you will learn how to get your Ontraport API Key and set up Ontraport integration in the Magento 2 Newsletter Popup plugin. Please, follow the instructions below.
Step-by-Step actions:
- Log in to your Ontraport account.
Step-by-Step actions:
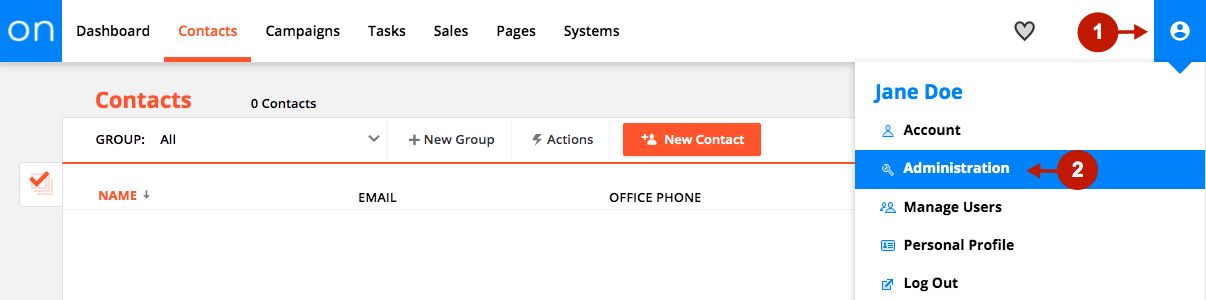
- Go to your user menu in the top right of the page.
- Select Administration.
Step-by-Step actions:
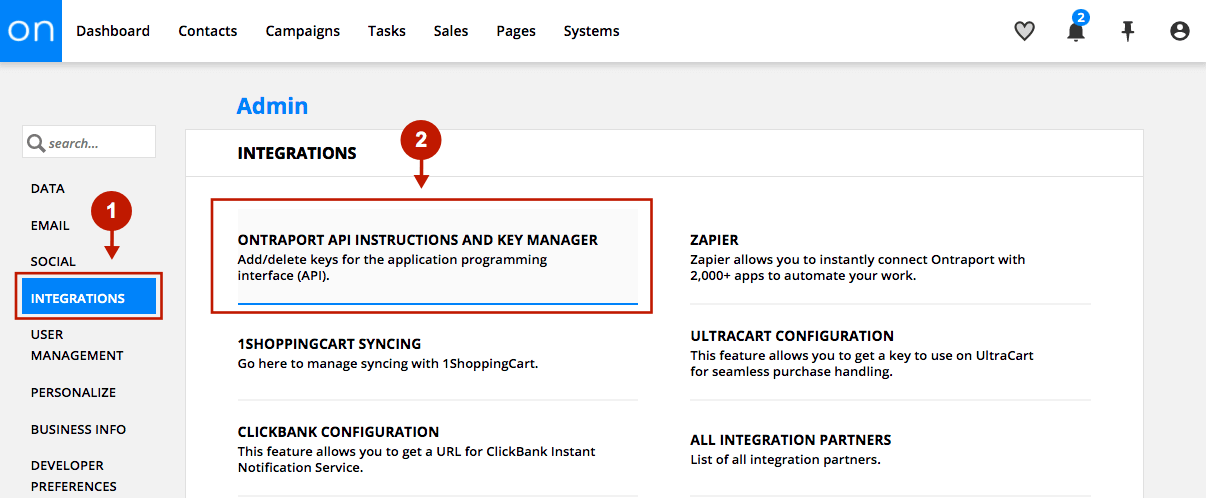
- Go to Integrations in the left-side navigation bar.
- Select Ontraport API Instructions and Key Manager.
Step-by-Step actions:
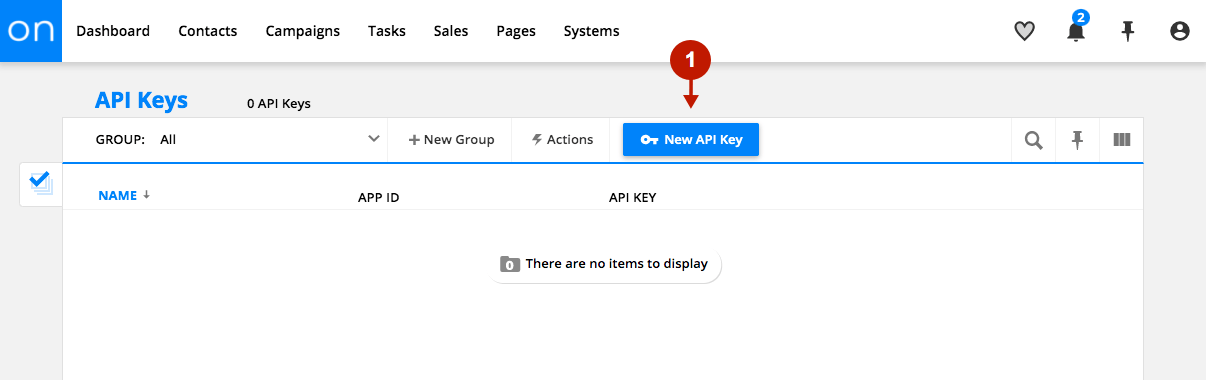
- Click on the New API Key button in order to generate your API key.
Step-by-Step actions:
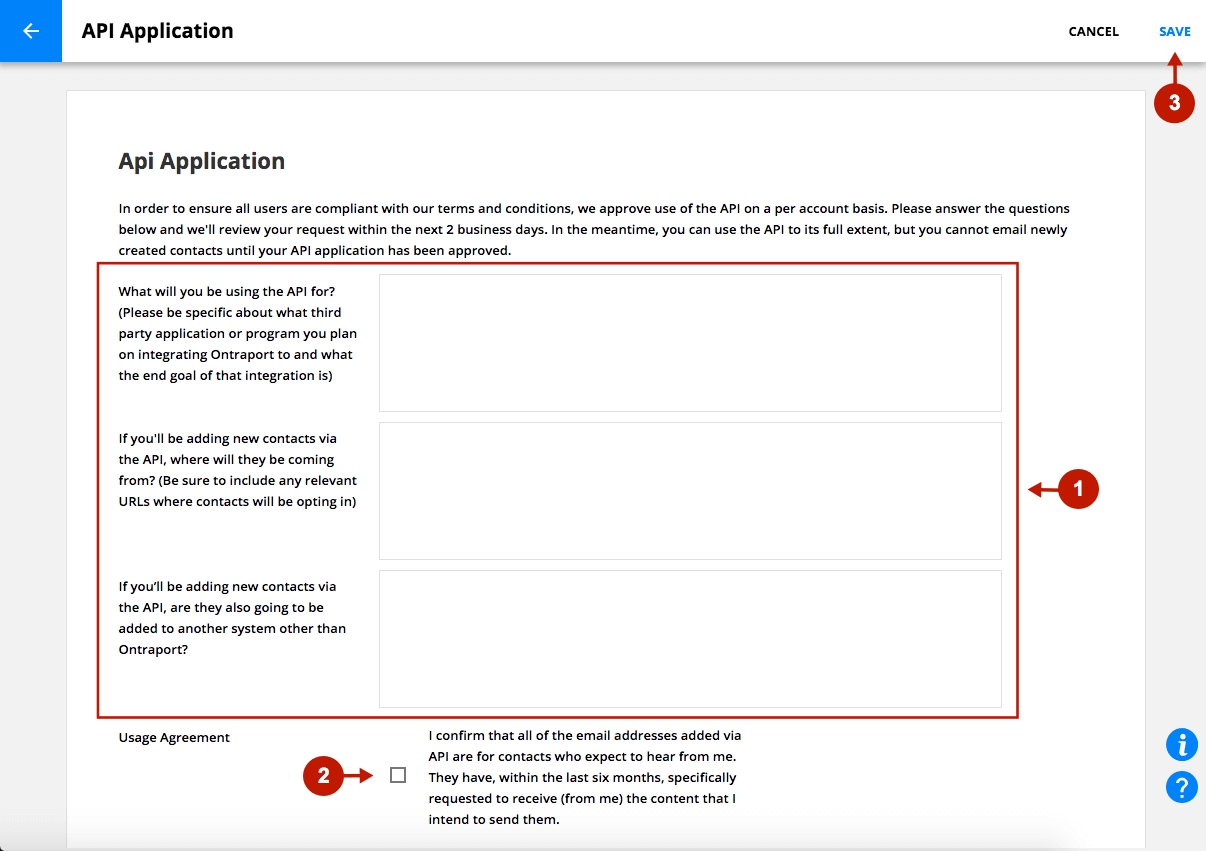
- Fill out the API Application form. Make sure to be specific and fully answer the questions in the form. Your request will be reviewed within the next 2 business days. Meanwhile, you can use your API to its full extent, except mailing newly created contacts.
- Read and check all the checkboxes in the Usage Agreement section.
- Press the Save button to submit the request.
Step-by-Step actions:
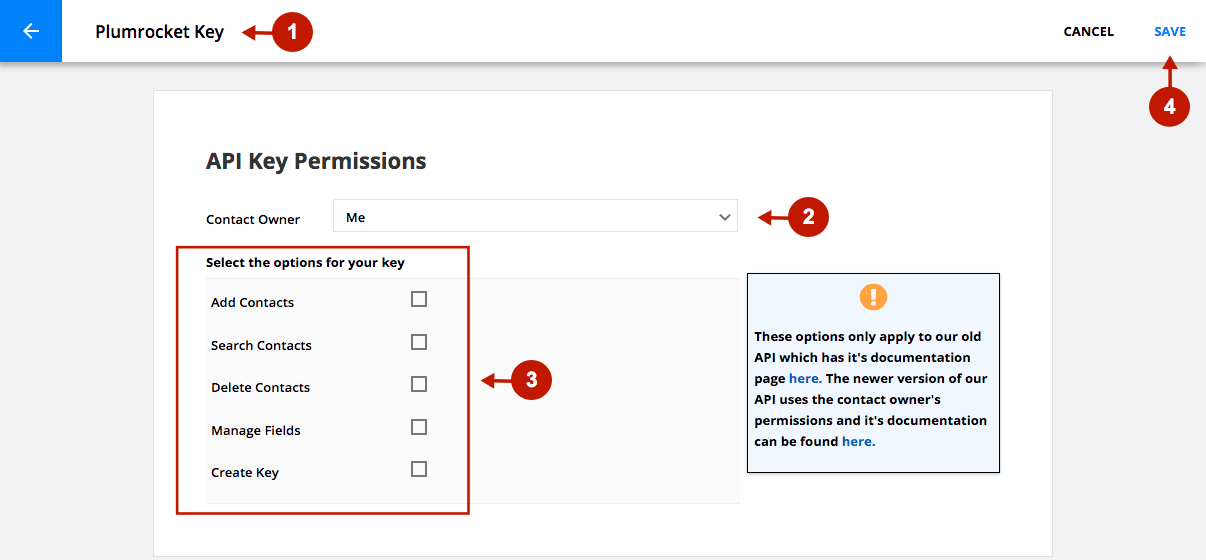
- Enter the Name for your API Key.
- In the API Key Permissions section, choose the Contact Owner from the drop-down menu.
- Check the checkboxes in order to select the options you need for your new API Key.
- Click on the Save button to submit your choice.
Step-by-Step actions:
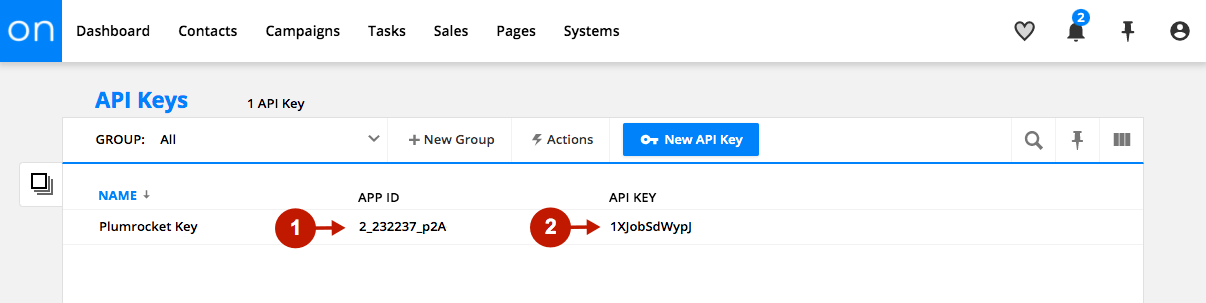
- Copy your newly created APP ID to the clipboard. (This Key will be required in the Magento backend > Newsletter Popup configuration > Ontraport Integration.)
- Copy your newly created API KEY to the clipboard. (This Key will be required in the Magento backend > Newsletter Popup configuration > Ontraport Integration.)
Configuring Ontraport API in Magento 2 Newsletter Popup Extension
In this section, you will learn how to configure Ontraport API in the Newsletter Popup extension on your Magento 2 store. Please, follow the step-by-step instructions in order to configure it correctly.
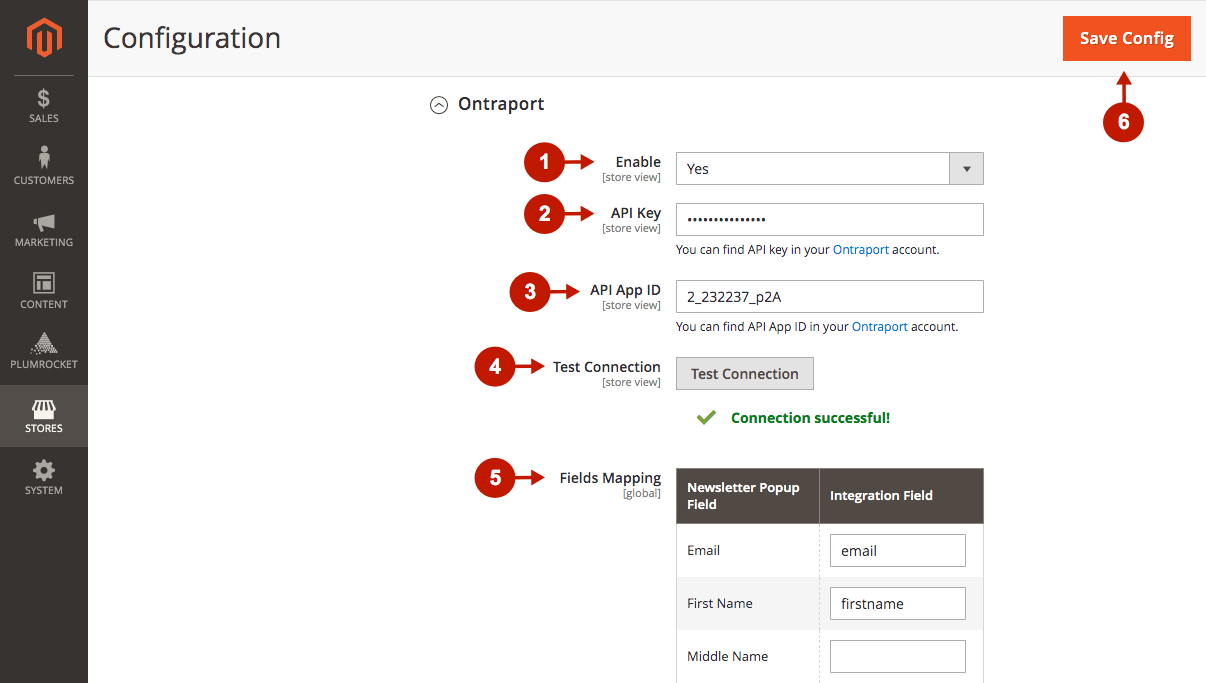
In the main Magento menu, go to the Plumrocket tab > Newsletter Popup > Configuration. Then, scroll down to the Integrations > select Ontraport.
Step-by-Step actions:
- “Enable“: in this field, you can enable or disable the Ontraport integration with your Magento store.
- “API Key“: paste the API Key you have received in the Ontraport account.
- “API App ID“: paste the API App ID from your Ontraport account.
- Click on the Test Connection button, and the green confirmation checkmark will be displayed if the connection is successful.
- “Fields Mapping“: this field lets you set up a relation between your Newsletter Popup Fields and Ontraport List Fields. This will allow you to save your newsletter subscribers’ additional data (including Coupon Codes) directly to your Ontraport account.
Please note, if the Integration Field is empty, then you are not able to save the corresponding Newsletter Popup Field information into your Ontraport account. You have to configure custom fields (please read the Ontraport instructions) and enter their names in the appropriate Integration Field in the Fields Mapping grid. - Press the Save Config button to save your settings.
Was this article helpful?