Newsletter Popup fields mapping In MailChimp
As you may already know, you can map any field from Newsletter Popup extension (for example “Country” , “Company Name” , “Zip Code” , etc.) with your MailChimp. In this article you will learn, how to correctly sync your Newsletter Popup login extension “Coupon Code” field with your MailChimp. Please follow the steps below.
Step-by-Step action:
- Please login to your account at MailChimp (https://login.mailchimp.com).
- Go to your Lists”.
- Select the needed list. Note: If you need to have different coupon codes running for different lists – the below procedure needs to be done for each list separately.
- In case you do not have any lists yet – please create one and then start editing it.

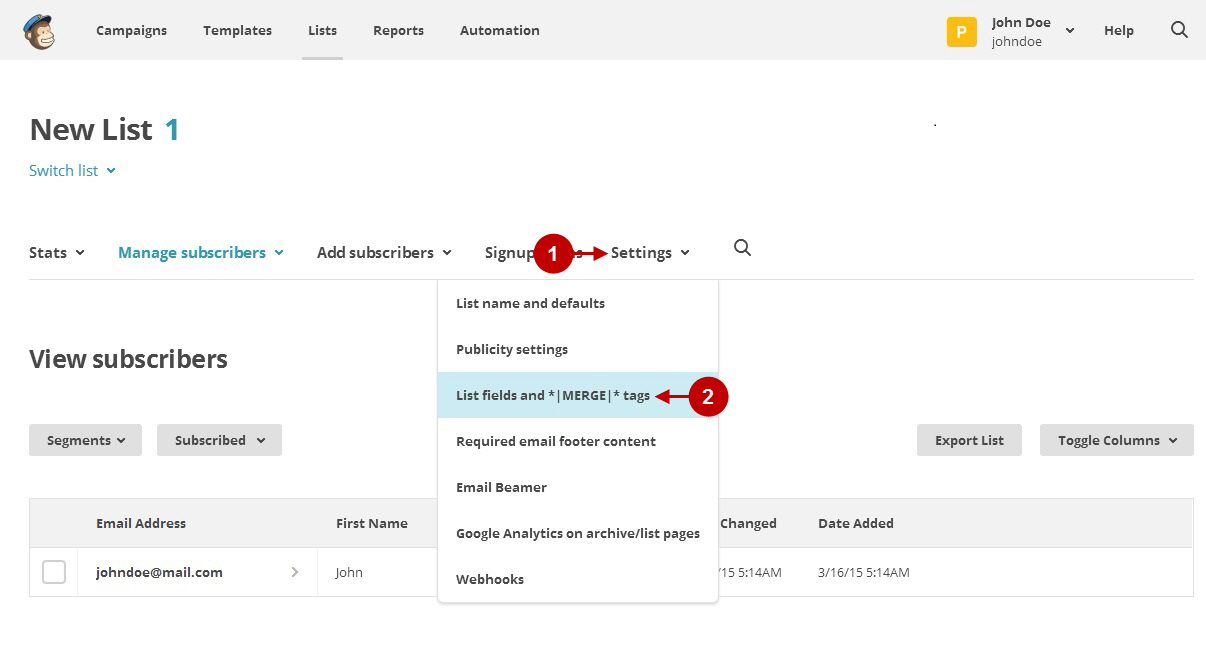
Step-by-Step action:
- Once in the list management, please go to “Settings”.
- Navigate to “List fields and *|MERGE|* tags” option.
Detailed Infortmation:
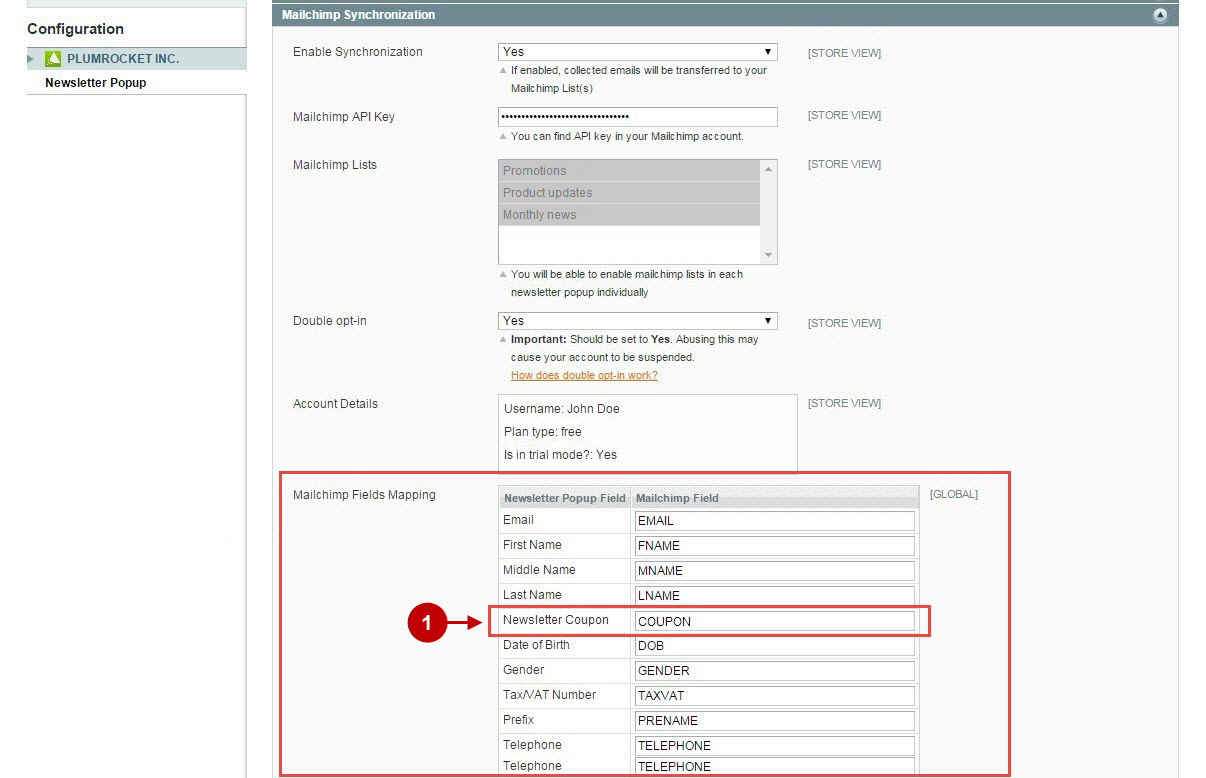
- From Newsletter Popup extension settings, copy the “COUPON” tag from the “MailChimp Field” column.
Step-by-Step action:
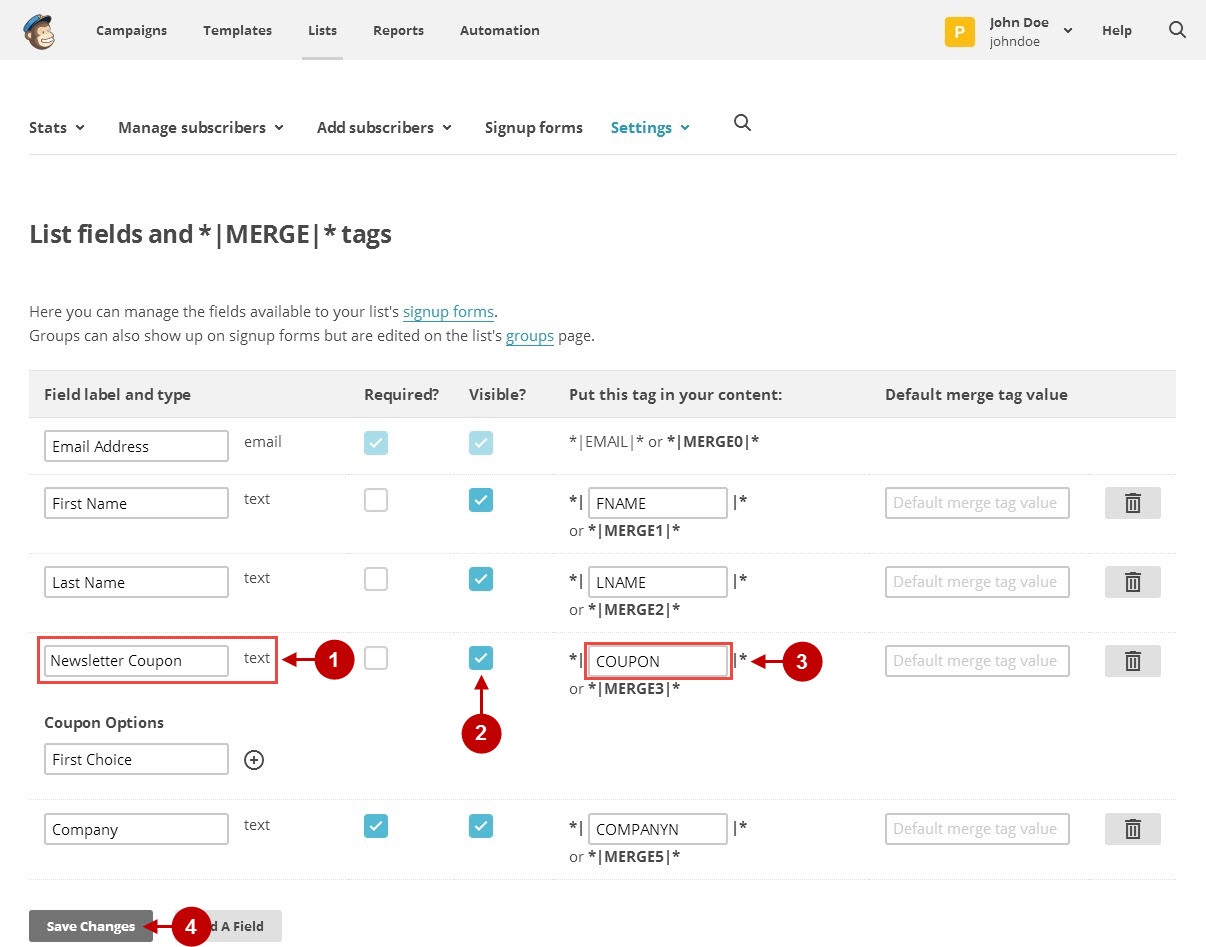
- Now in MailChimp account, please create a field label with the name e.g. “Newsletter Coupon”.
- Make sure it’s “Visible”.
- Paste the “COUPON” name you’ve previously copied from Newsletter Popup settings.
- Make sure to save your changes”.
Editing Welcome Email Template in MailChimp
Now proceed with editing the “Welcome” template. Please follow the steps below.
Step-by-Step action:
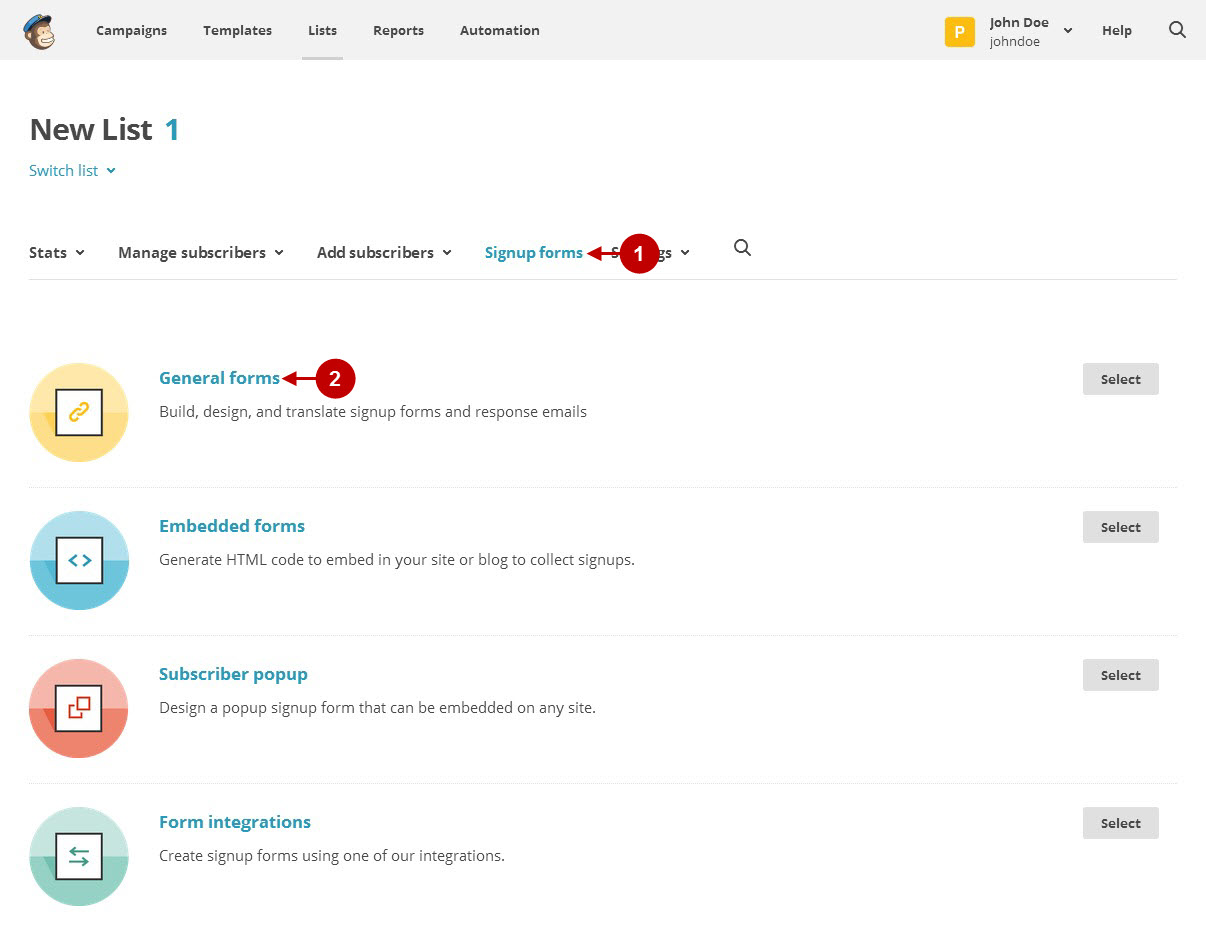
- In the list management, please navigate to Signup forms.
- Select “General forms”.
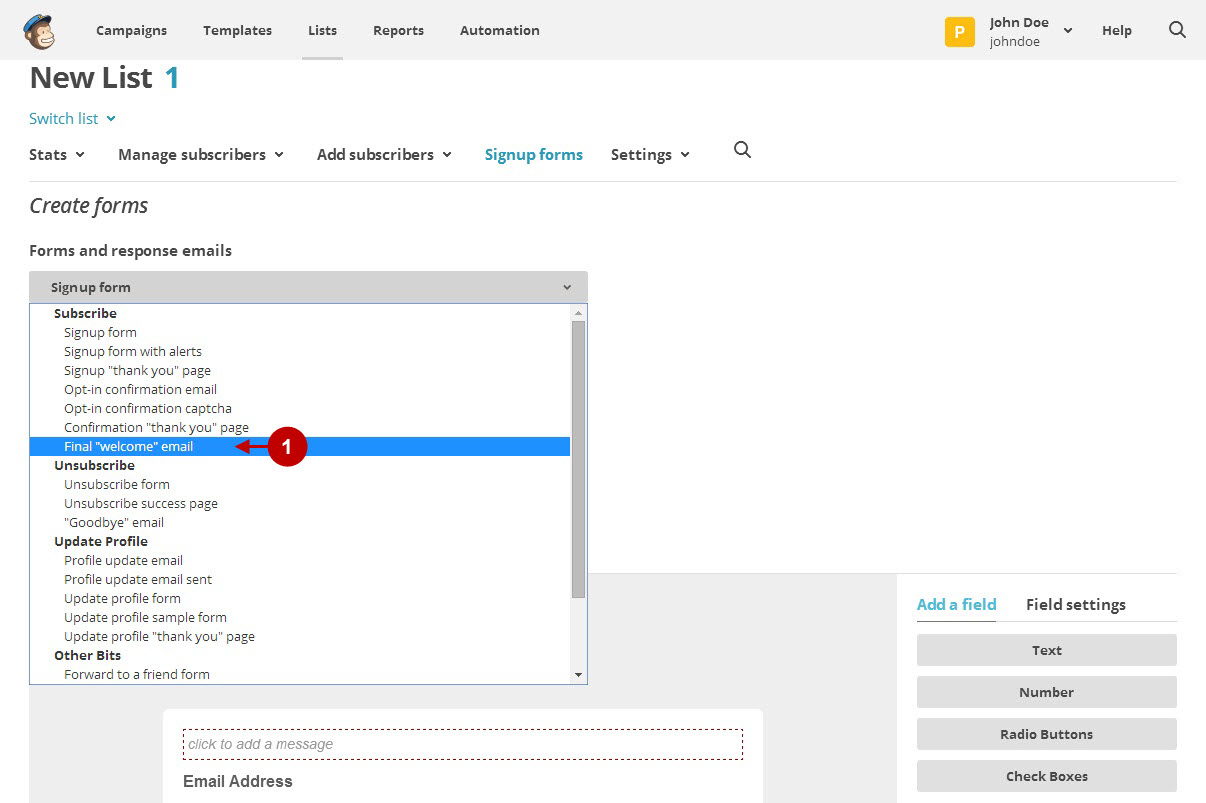
Step-by-Step action:
- From the “Forms and response emails” please select “Final “welcome” email” sign up form.
Step-by-Step action:
- Once the form template has loaded – please click on “Edit” button in order to make changes in this template.
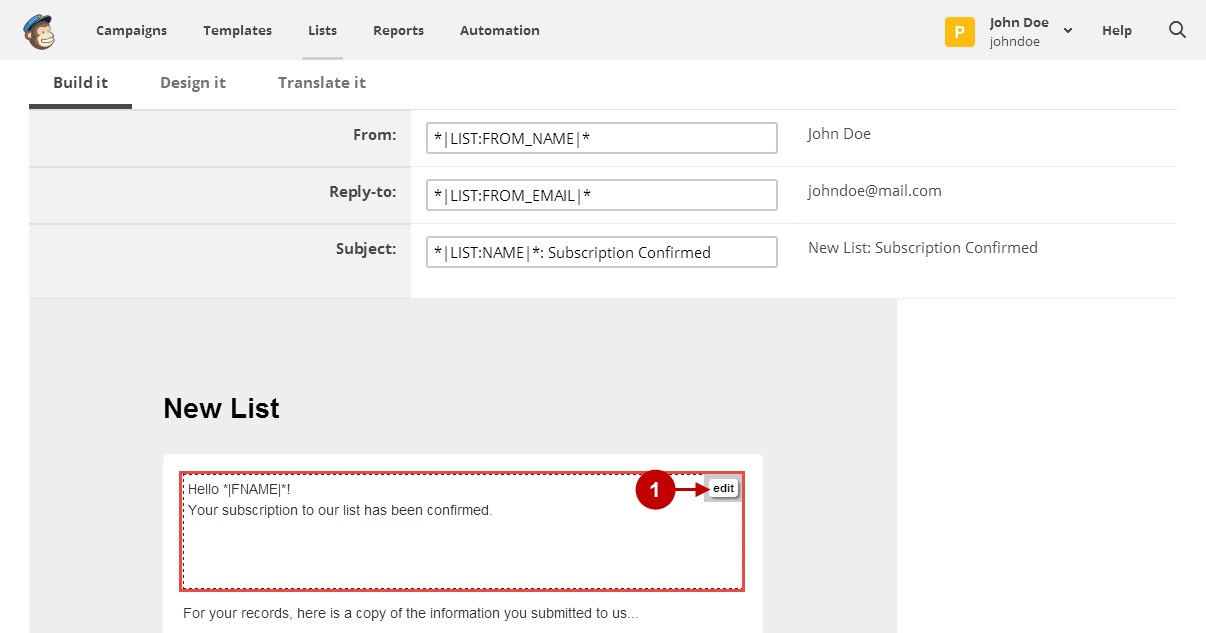
Step-by-Step action:
- The “Edit Your Content” form will appear.
- From the “Merge Tags” dropdown please select “Coupon” variable.
- The coupon merge tag will be placed into the template body.
- Don’t forget to save these changes by pressing the “Save & Close” button.

After you made these steps, please make sure to test by subscribing and receiving a proper discount code to your email inbox.
Was this article helpful?