How to Create iContact API for Magento 2
In this article, you will learn how to create your iContact API Key and set up iContact integration in the Magento 2 Newsletter Popup extension. Please, use the following step-by-step guide.
Step-by-Step actions:
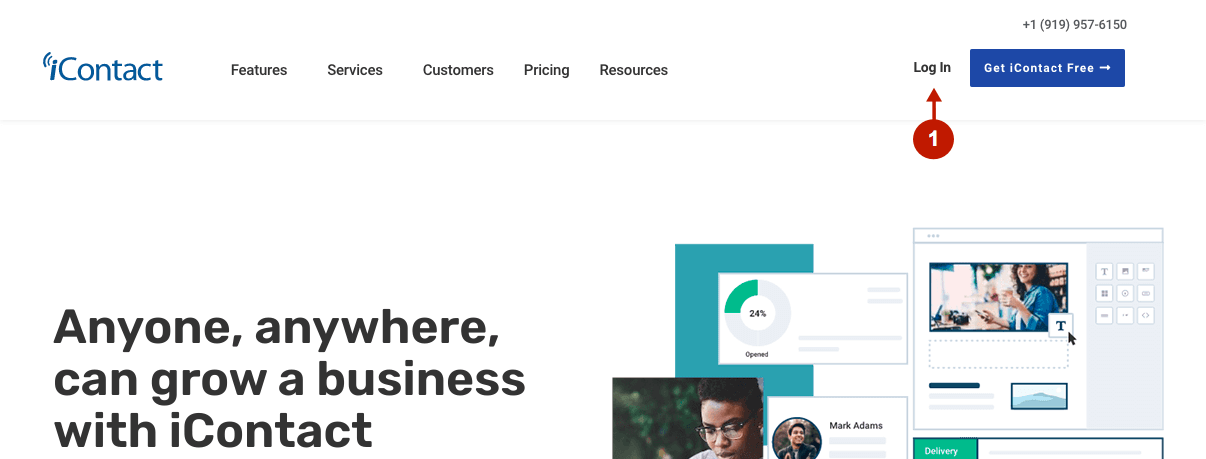
- Log in to your iContact account at www.icontact.com.
Step-by-Step actions:
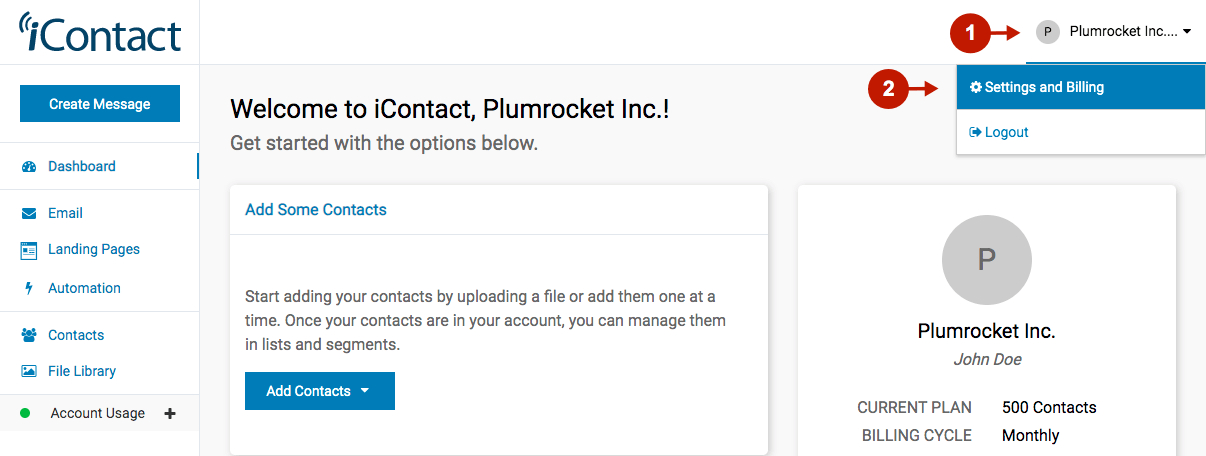
- In the upper right corner of the page, click on the user menu.
- Select Settings and Billing.
Step-by-Step actions:
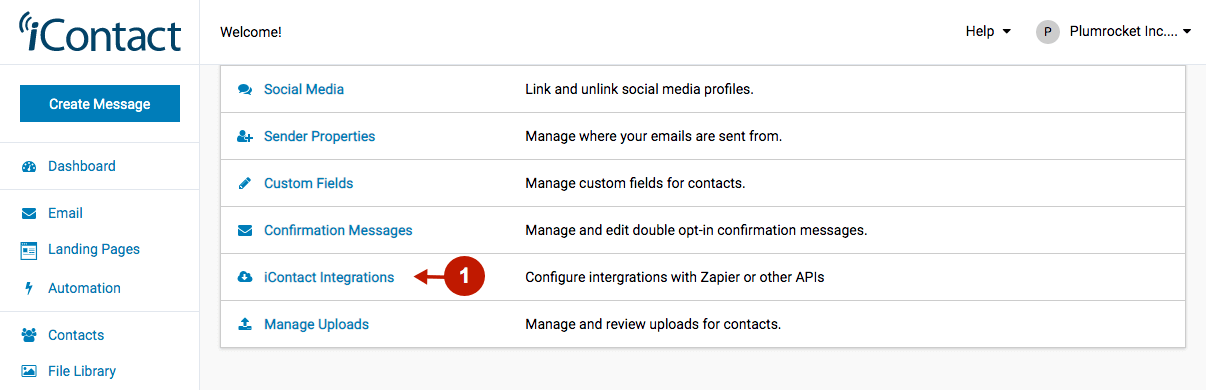
- go to iContact Integrations.
Step-by-Step actions:
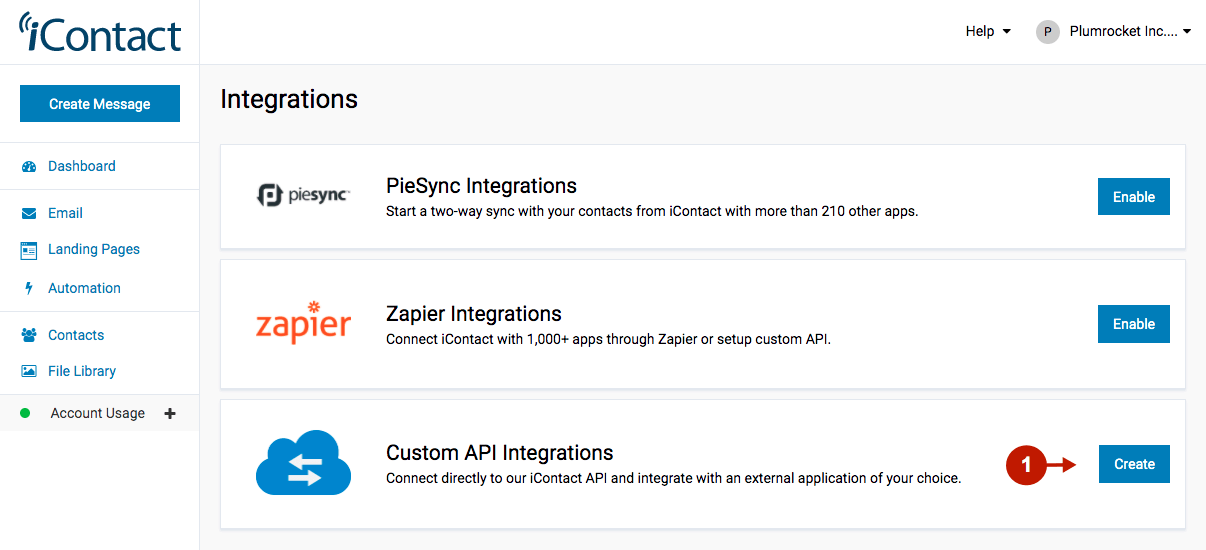
- Press the Create button opposite to Custom API Integrations section.
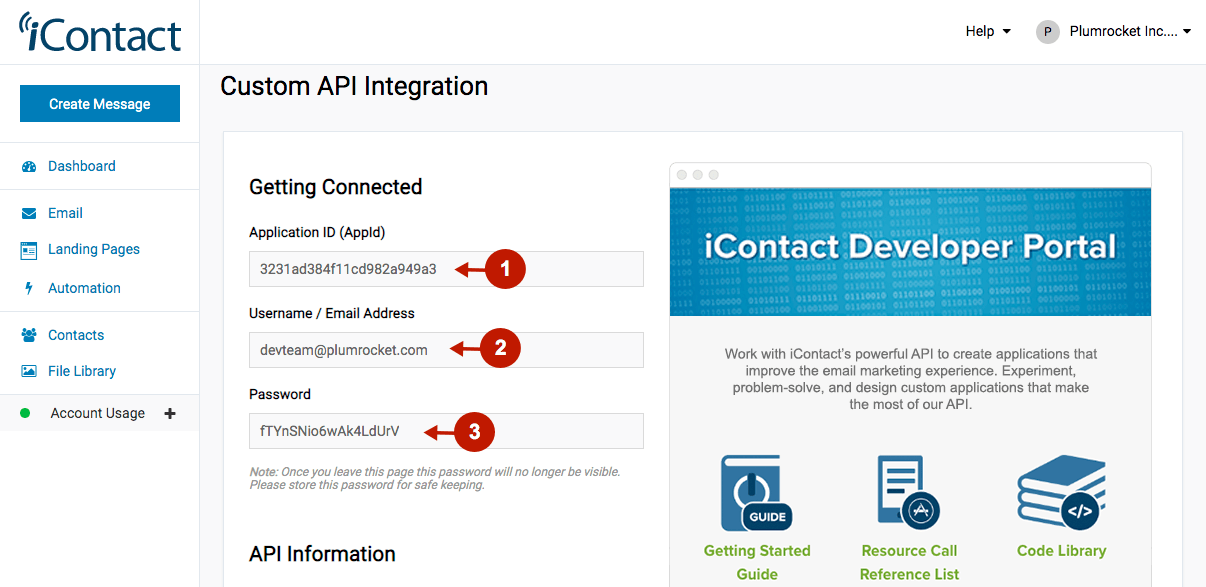
Step-by-Step actions:
- This is your API Application ID (App ID) required in the Magento admin panel > Newsletter Popup configuration > iContact Integration.
- This is your Username required in the Magento admin panel > Newsletter Popup configuration > iContact Integration.
- This is your Password required in the Magento admin panel > Newsletter Popup configuration > iContact Integration. Copy and save this password in a safe place, as it will no longer be visible for security reasons.
Step-by-Step actions:
- Specify the API Name in this field.
- Enter the API Description.
- This Account ID will be required in the Magento admin panel > Newsletter Popup configuration > iContact Integration.
- This is your Client Folder ID required in the Magento admin panel > Newsletter Popup configuration > iContact Integration.
- Press the Save Changes button to save your newly created API.

Step-by-Step actions:
- Following to the green checkmark display, click on the Back to Integrations button.

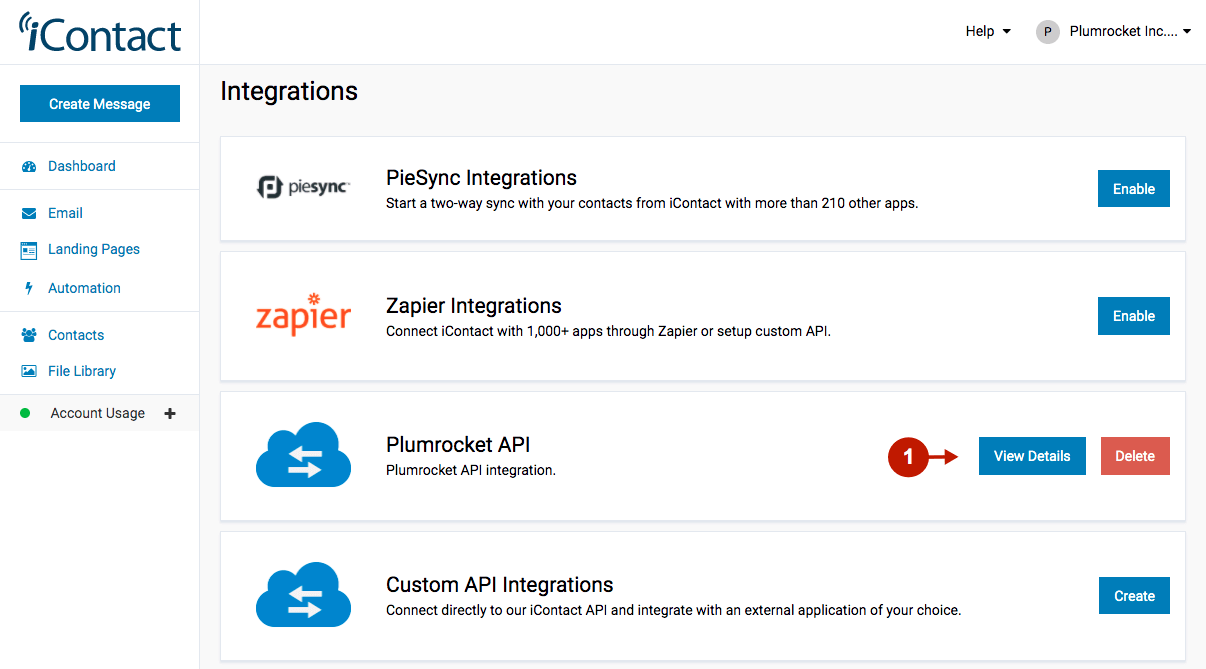
Step-by-Step actions:
- The created API will be displayed in the Integrations list. Click on the View Details button opposite to the created API to view its details or change the API name and description. You can also regenerate your password there.
Configuring iContact API in Magento 2 Newsletter Popup Extension
In this section of the article, you will learn how to configure iContact API integration in your Magento 2 Newsletter Popup extension. Please, check the following step-by-step guide.
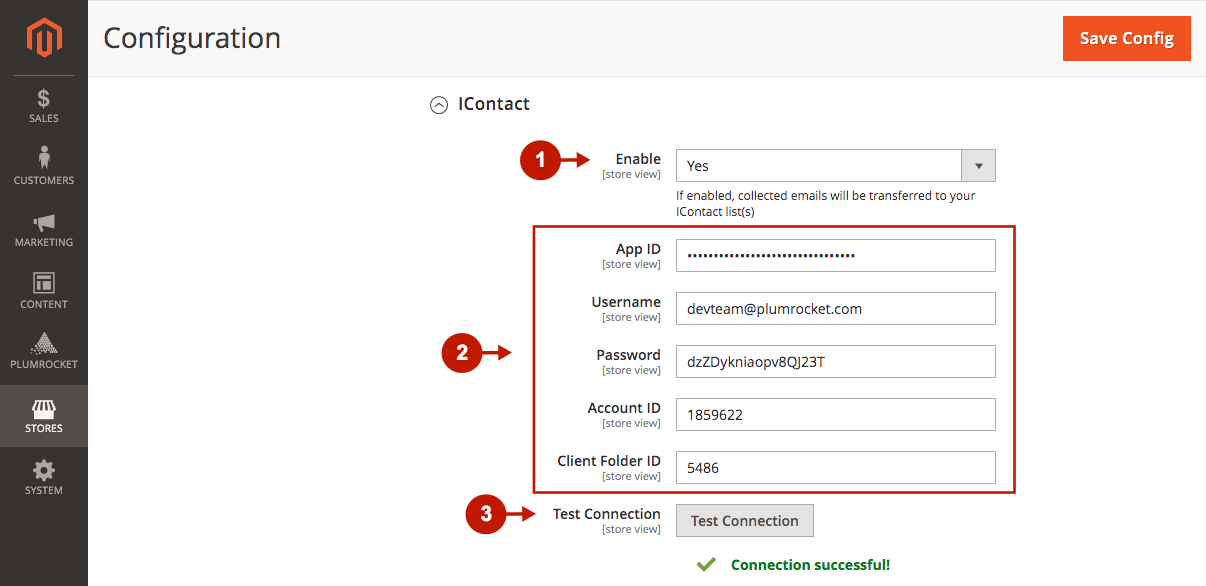
In the main Magento menu, go to the Plumrocket tab > Newsletter Popup > Configuration. Then, scroll down to the Integrations > select iContact.
Step-by-Step actions:
- “Enable“: this option allows you to enable the iContact integration.
- Paste your App ID, Username, Password, Account ID, and Client Folder ID received from your iContact account.
- Click on the Test Connection button to test the connection with iContact API. The green confirmation checkmark will be displayed if the connection is successful.
Step-by-Step actions:
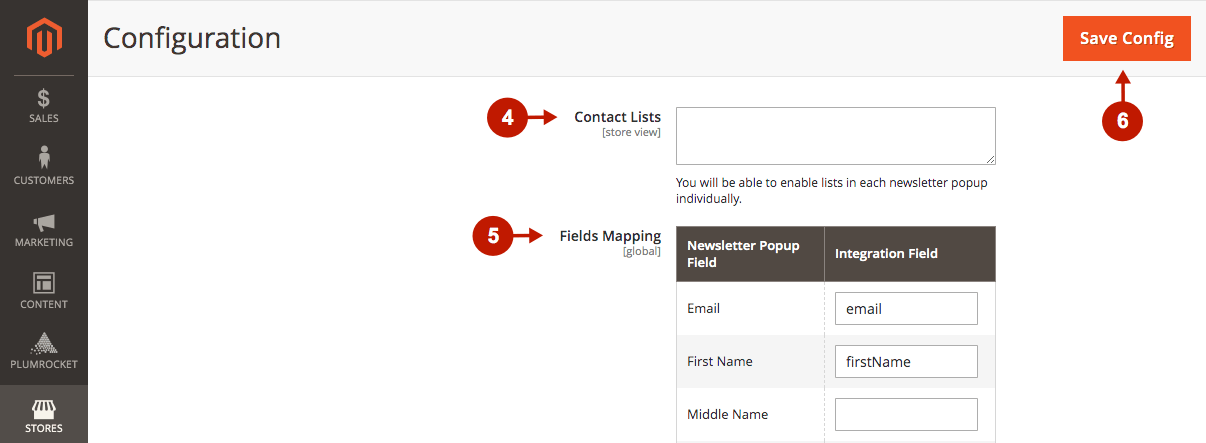
- “Contact Lists“: in this field, you can enable lists in each new popup individually.
- “Fields Mapping“: this field allows you to set up a relation between your Newsletter Popup Fields and iContact List Fields. This will allow you to save your newsletter subscribers’ additional data (including Coupon Codes) directly to your iContact account.
- Press the Save Config button to save your configurations.
Was this article helpful?