Configuring Magento 2 Auto Invoice and Shipment Extension
In this section you will learn how to configure Auto Invoice and Shipment Extension for Magento 2.
Important Information:
For the Magento 2 Auto Invoice & Auto Shipping Extension to function properly, make sure there is a Cron Job for Magento set up at your store. For more details how to configure Cron Job read article How to setup a Cron Job in Magento.
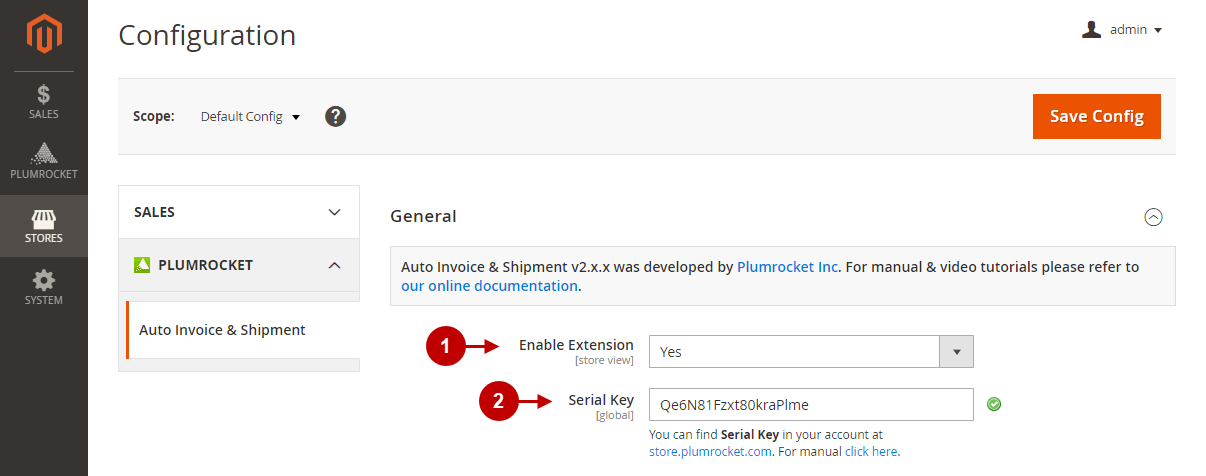
General
Step-by-Step action:
- Enable Extension: Select “Yes” to enable the extension or “No” to disable it.
- Option “Serial Key”: enter the unique serial key provided after the purchase for legitimate and proper functioning of your extension. Note: In most cases, this field will be pre-filled with a serial key automatically and the green check mark will be displayed. Otherwise please read article Serial Key Activation in order to find and paste your serial key manually.
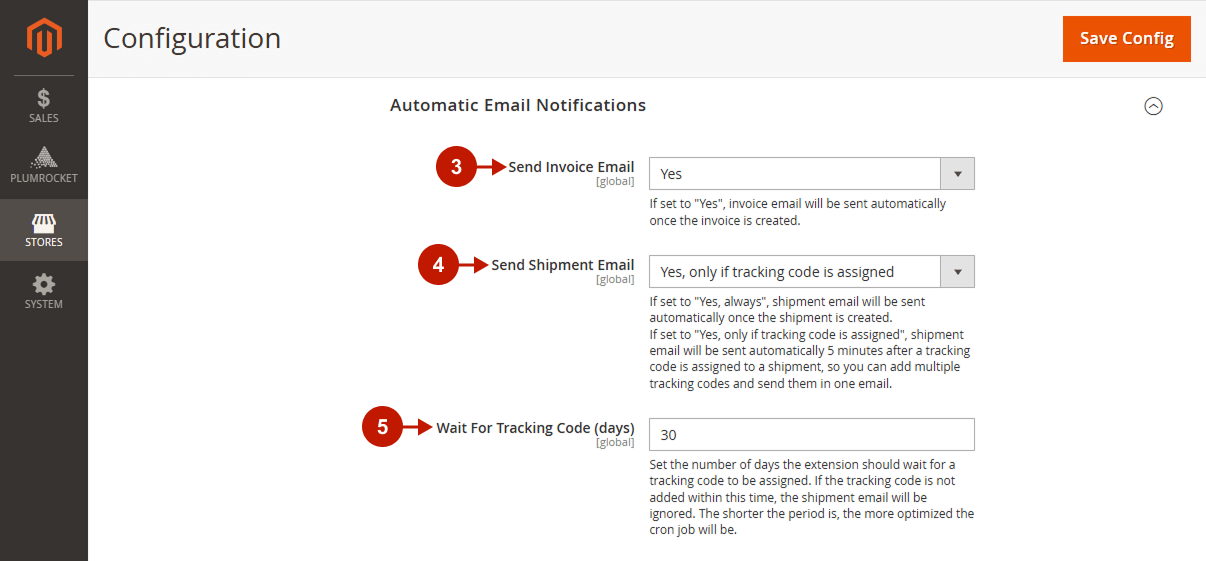
Step-by-Step actions:
- Option “Send Invoice Automatically”: if the option is set to “Yes”, the invoice email will be sent automatically once the invoice is created.
- Option “Send Shipment Email Automatically“: if it is set to “Yes, always”, the shipment email will be sent automatically once the shipment is created. If set to “Yes, only if tracking code is assigned”, a shipment email will be sent automatically 5 minutes after a tracking code is assigned to a shipment.
- Option “Wait For Tracking Code (days)”: set here the number of days the extension should wait for a tracking code to be assigned.
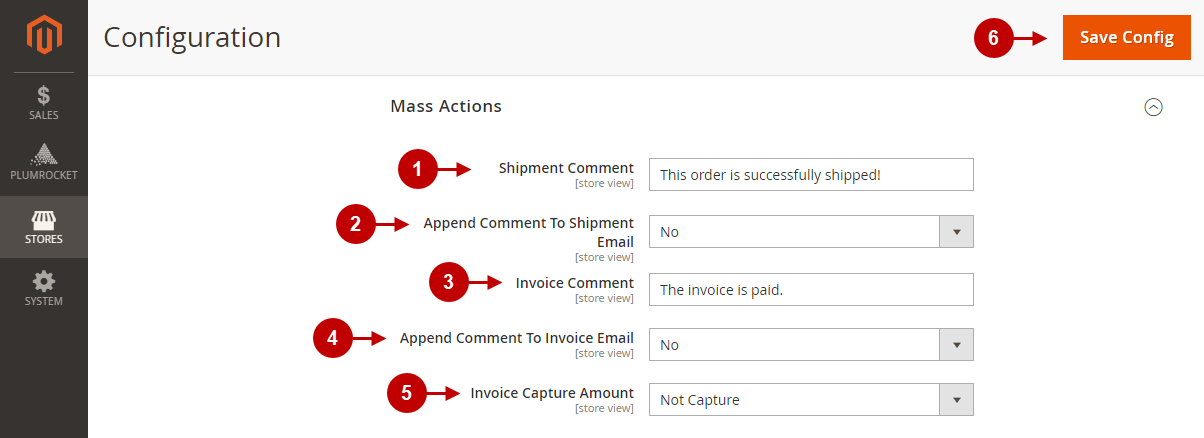
Mass Actions
In order to create shipment or invoice to multiple orders at once, follow the steps below. It can help decrease a significant amount of workload for admins.
Step-by-Step actions:
- “Shipment Comment“: enter the comment you want to add when applying the “Create Shipment” mass action. The comment will be added to the created shipment.
- “Append Comment To Shipment Email“: set to “Yes” to add the Shipment Comment to the Shipment Email sent to customers. If you do not want to add this comment, set it to “No”.
- “Invoice Comment“: enter the comment you want to add when applying the “Create Invoice” mass action. The comment will be added to the created invoice.
- “Append Comment To Invoice Email“: set to “Yes” to add the Invoice Comment to the Invoice Email sent to customers. If you do not want to add this comment, set it to “No”.
- “Invoice Capture Amount“: this option allows you to select payment actions according to your payment method. Please, click here to read more about payment actions.
- “Save Config“: press the Save Config button to save and apply all configurations.
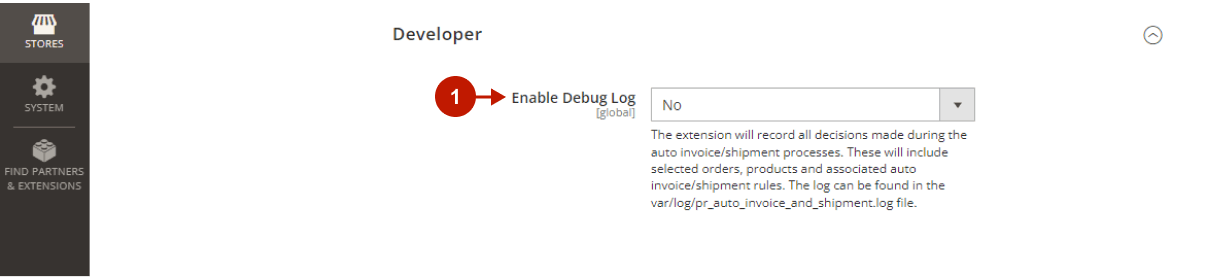
Developer
Step-by-step guide:
- “Enable Debug Log”: enable this option to make the extension log all actions taken during the automated invoice and shipment processes.
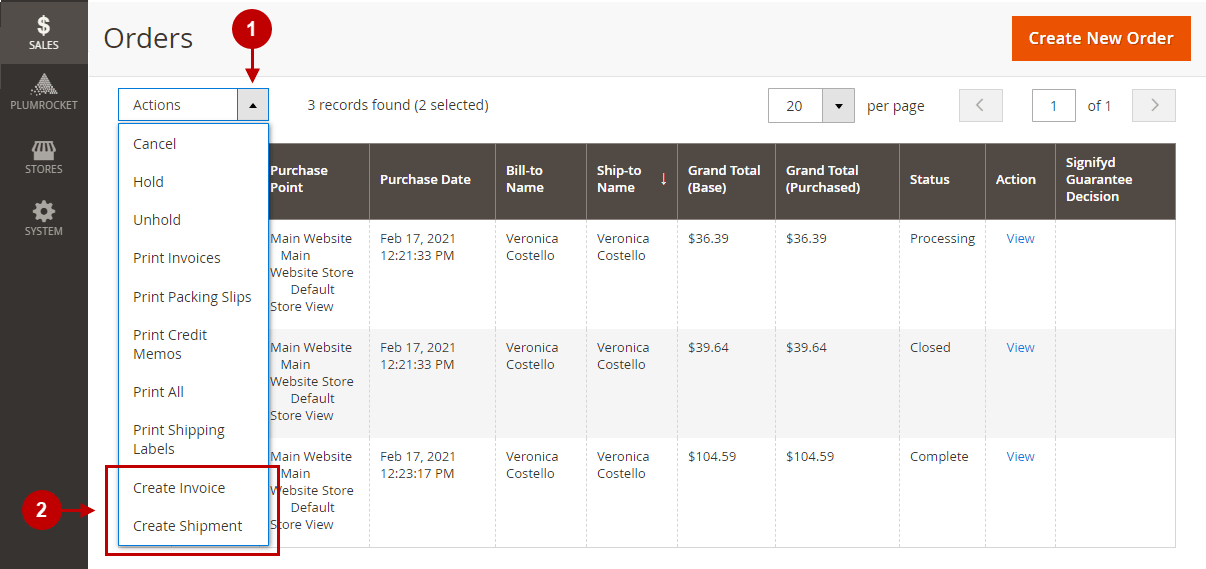
How to Create Magento Invoice and Shipment in Bulk
In the main Magento menu, go to the “Sales” tab > navigate to “Orders”.
Step-by-Step actions:
Select the orders to which you want to apply mass actions by checking the corresponding checkboxes in the Orders grid.
- “Actions“: click on “Actions” to open a mass actions menu.
- Click on the “Creare Invoice” or “Create Shipment” option to create an invoice or shipment for the selected orders.
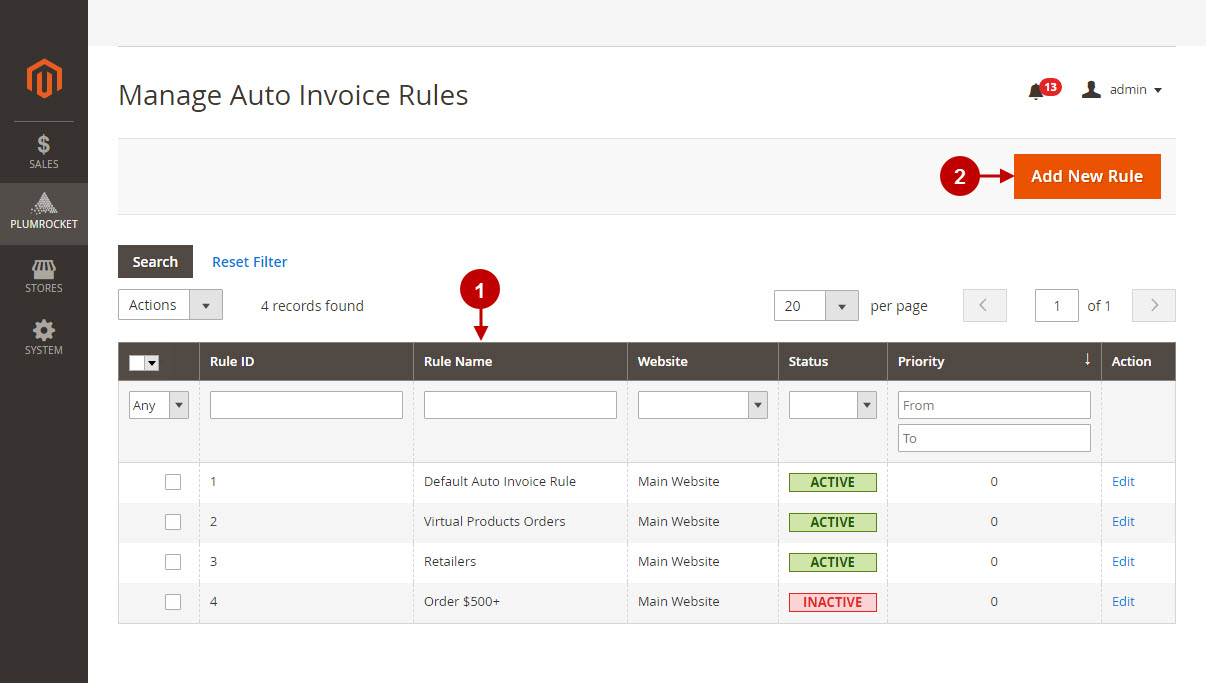
Managing Magento Auto Invoice Rules
In order to manage and configure Auto Invoice Rules, follow the instructions below.
Step-by-Step action:
- This grid allows to manage and search for Auto Invoice Rules.
- Press the “Add New Rule” button to create your new rule.
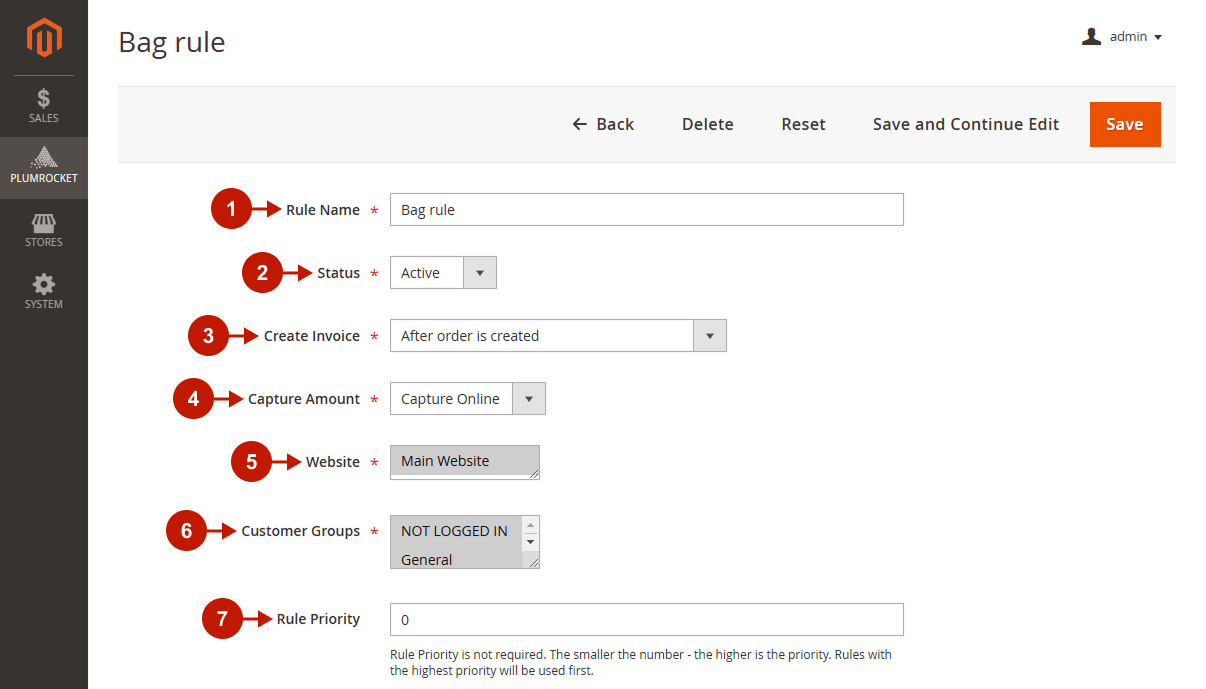
Step-by-Step action:
- Specify the Rule Name in this field.
- Option “Status”: enable or disable this rule using this option.
- Option “Create Invoice”: allows Admin to configure when an invoice should be created: “After order is created” or “After shipment is created”.
- Option “Capture Amount”: allows you to specify how you will capture payments from your customers. Magento has 3 capture methods. See full description below.
- Option “Website”: allows Admin to select the website where the rule will be applied on.
- Option “Customer Groups”: select the customer groups the rule will be applied to.
- Option “Rule Priority”: enter the rules priority. The smaller the number entered – the higher is the priority. Rules with the highest priority will be used first.
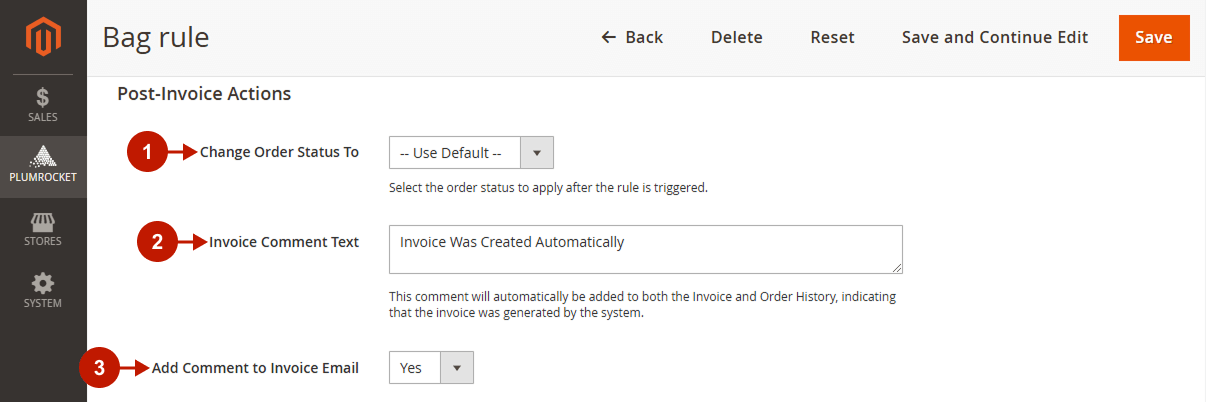
Post-Invoice Actions
Step-by-step guide:
- “Change Order Status To” option: select the order status that should be applied after the rule is triggered.
- “Invoice Comment Text” option: type the comment that should be added to the Invoice and Order History.
- “Add Comment to Invoice Email” option: specify whether or not the comment set above should be added to the Invoice email.
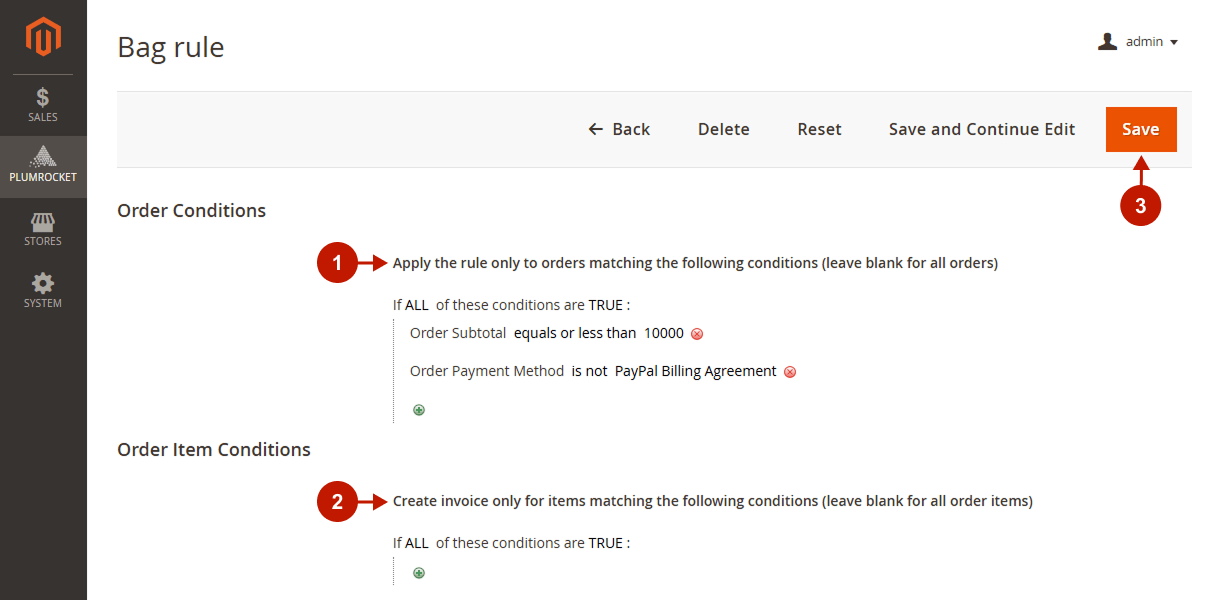
Conditions
In order to manage and configure Auto Invoice Rules conditions and actions, follow the instructions below.
Step-by-step guide:
- Add the special Oder Conditions for your rule, or leave it blank if you want the rule to be applied to all the orders.
- Add the special Order Item Conditions for your rule.
- Save the changes.
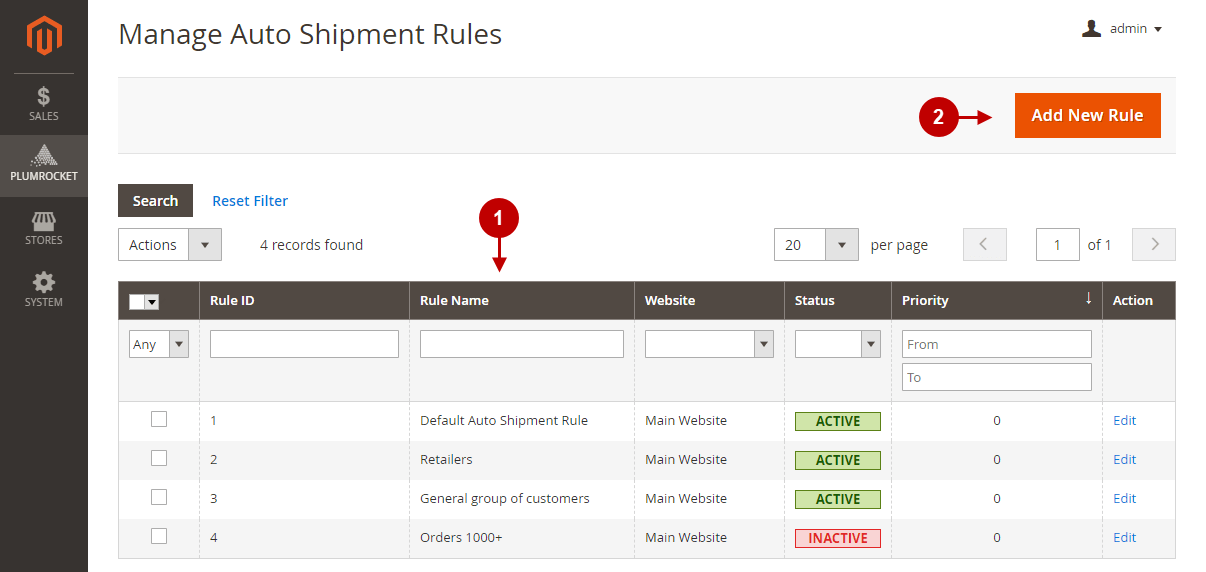
Managing Magento Auto Shipment Rules
In order to manage and configure Auto Shipment Rules, follow this guide.
Step-by-Step action:
- This grid allows you to manage and search for Auto Shipment Rules.
- Press the “Add New Rule” button to create your new rule.
In order to create new Magento Shipment Rule, follow the guide above describing how to create a Auto Invoice Rule.
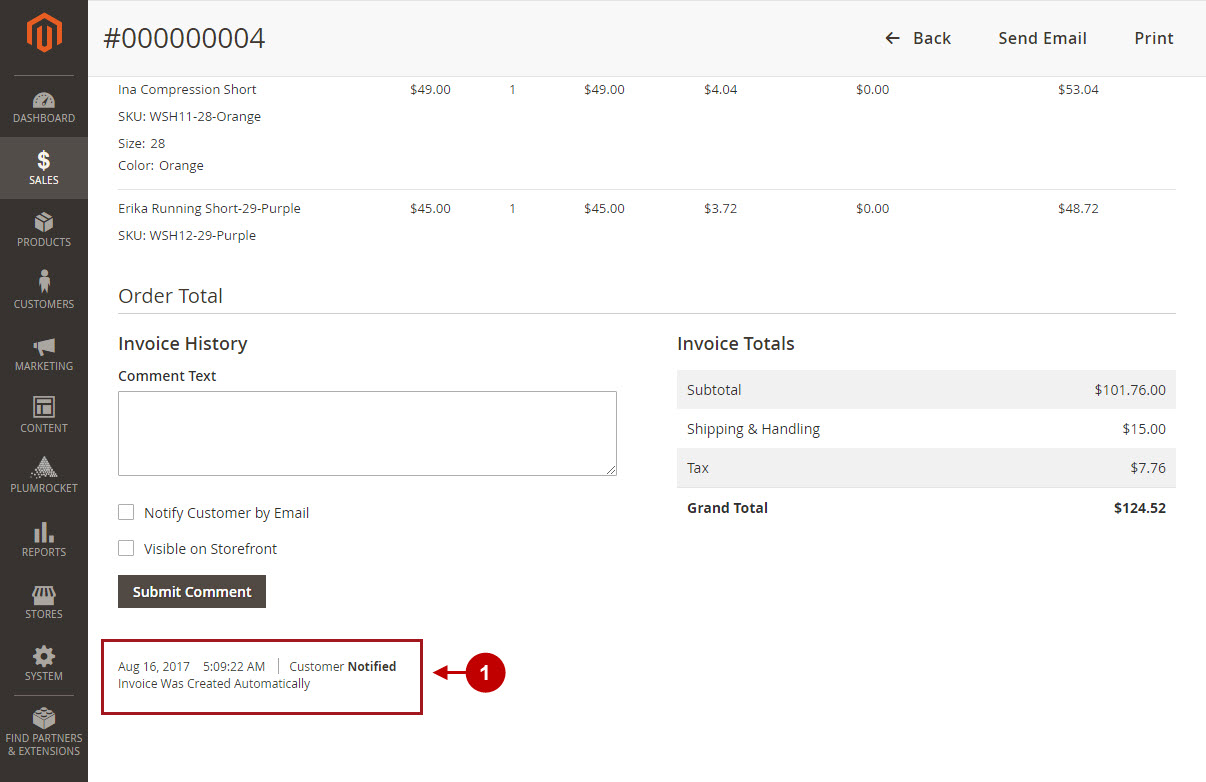
Invoice in the Order
The notification in the order can be viewed, if you go to Sales > Orders> Select the needed order > Navigate to the Invoice History section.
Step-by-Step action:
- Once the invoice is created, admin will see the notification in the Invoice History.
Important Information:
For the Magento 2 Auto Invoice & Auto Shipping Extension to function properly, make sure there is a Cron Job for Magento set up at your store. For more details how to configure Cron Job read article How to setup a Cron Job in Magento.