In this article, you will learn how to configure your Magento 2 Advanced Reviews & Reminders Extension correctly. Please follow the instructions below.
Configuring Advanced Reviews and Reminders Magento 2
Step by Step Guide:
General
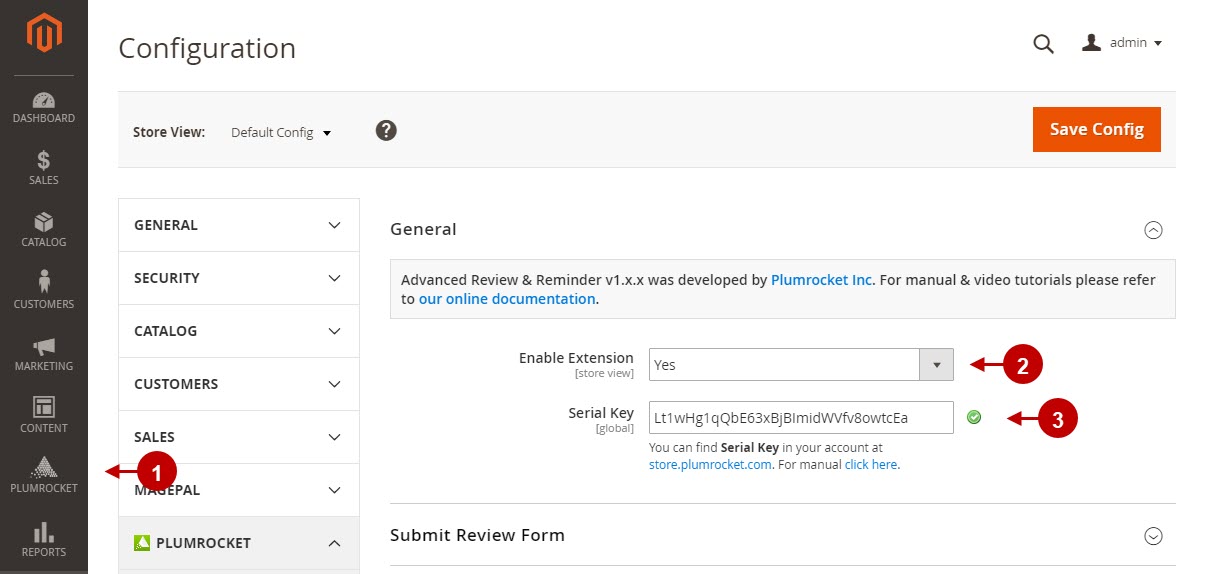
- Navigate to the Plumrocket tab > select Advanced Reviews and Reminders> Configuration.
- Enable Extension: Select “Yes” to enable the extension or “No” to disable it.
- Option “Serial Key”: enter unique serial key provided after the purchase for legitimate and proper functioning of your extension. Note: In most cases this field will be pre-filled with serial key automatically and the green check mark will be displayed. Otherwise please read article Serial Key Activation in order to find and paste your serial key manually.
Step by Step Guide:
Submit Review Form
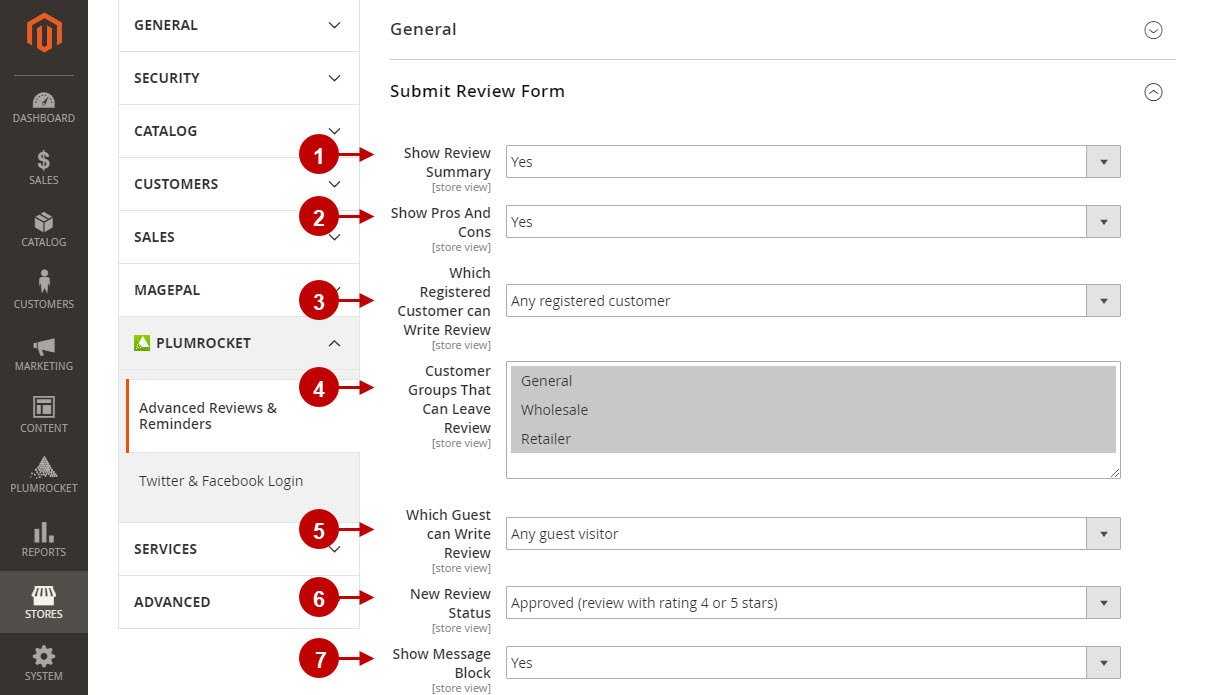
- Option “Show Review Summary”: allows you to display review summary input form. Possible options are: “Required”, “Yes”, “No”.
- Option “Show Pros And Cons”: lets you display pros and cons input forms in the review section. Possible options are: “Required”, “Yes”, “No”.
- Option “Which Registered Customer Can Write Review”: if enabled, this option will allow to select the type of customers who can leave reviews.
- Option “Customer Groups That Can Leave Review”: to select customer groups for customer who can leave reviews.
- Option “Which Guest Guests Can Write Review”: with this option enabled, you can choose the type of guests can who can leave reviews.
- Option “New Review Status”: here you can set the default status for the new reviews. Possible options are: “Pending”, “Approved”, “Approved (review with rating 4 or 5 stars)”.
- Option “Show Message Block”: allows you to display your custom message block.
Step by Step Guide:
Submit Review Form on the Magento 2 frontend
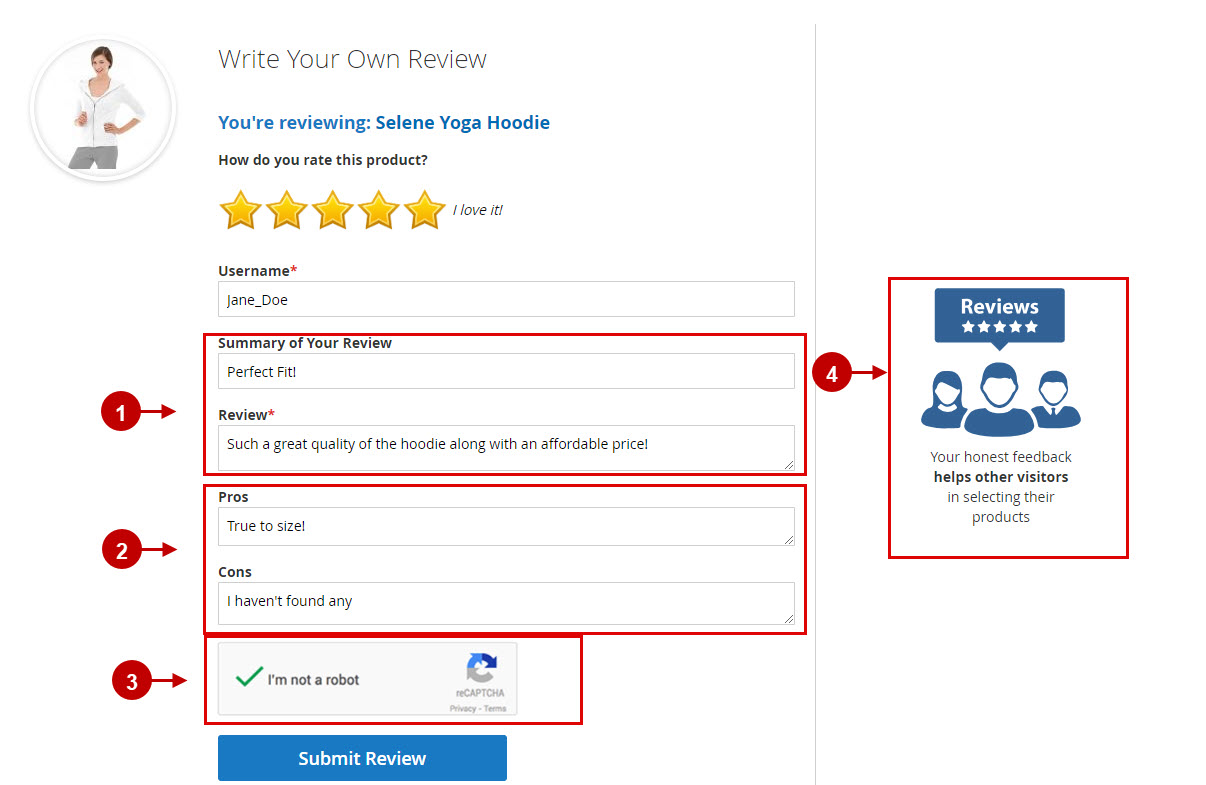
- Summery of review will look like this if enabled.
- Here’s how the pros and cons input forms will be displayed.
- If enabled, this is how Google reCAPTCHA form will look like.
- This is how your custom message block for ads or events at your store can look like.
Step by Step Guide:
Review List
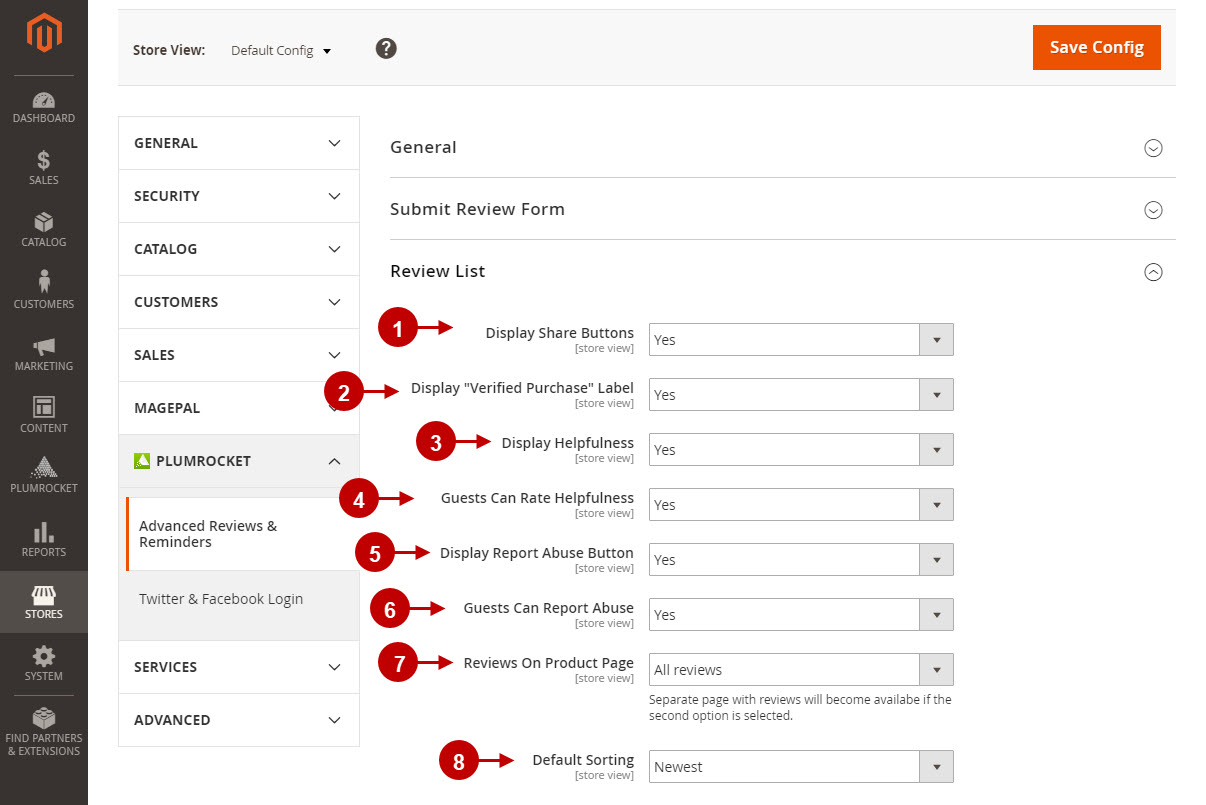
- Option “Display Share Buttons”: allows you to display social share buttons.
- Option “Display “Verified Purchase” Label”: allows to add “Verified Purchase” label to customer’s review.
- Option “Display Helpfulness”: lets you display “Review was helpful?” section.
- Option “Display Report Abuse Button”: allows you to display “Mark as Abuse” button.
- “Guests Can Report Abuse”: with this option enabled, both registered customers and guests can report abuse.
- Option “Reviews on Product Page”: allows you to select how reviews will be displayed in the review list. Possible options are:
“All reviews”, “Several reviews + link See all reviews”.Note: if second option is selected – separate page with the complete list of reviews will become available. - “Number of Reviews by Default”: allows you to specify how many reviews will be displayed in the product review list, if “Several reviews + link See all reviews” option is selected.
- Option “Default Sorting”: allows you to select the sort order of the reviews list. Possible options are: “Newest”, “Helpfulness”, “Best rating”.
Step by Step Guide:
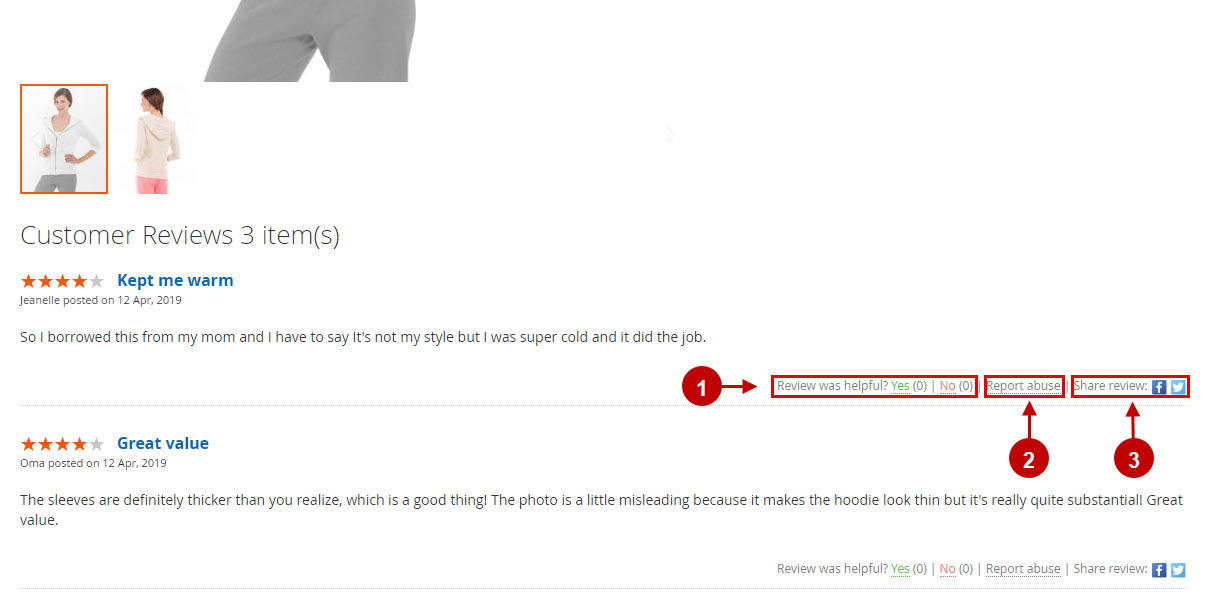
Review List on the Magento 2 frontend
- This is how “Helpfulness” section will be displayed if enabled.
- Here’s how the “Report Abuse” button will be displayed.
- If enabled this is how “Share Buttons” will look like.
Step by Step Guide:
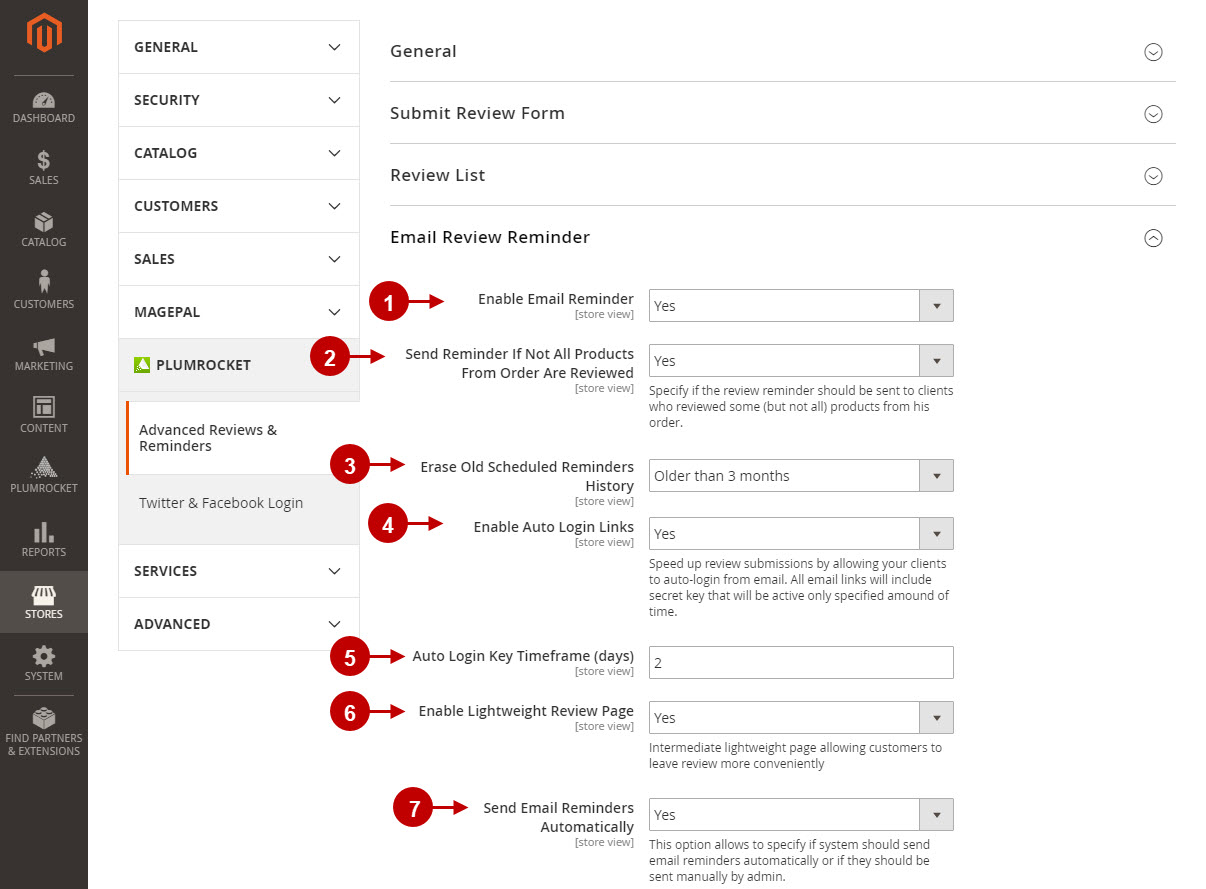
Email Review Reminder
- Option “Enable Email Reminder”: allows you to enable or disable email reminder.
- Option “Send Reminder If Not All Products From Order Are Reviewed”: here you can specify whether review reminder should be sent to customers who reviewed some (but not all) products from their orders.
- “Erase Old Scheduled Reminders History”: this option allows you to specify how often reminders history should be erased. Possible options are: “Older than 3 months”, “Older than 6 months”, “Older than 1 year”, ” Older than 2 years”, “Never”.
- Option “Enable Auto Login Links”: allows you to add auto login links to the email reminder. Note: email links will include secret key, that will be active only for specified number of days before it expires.
- Option “Auto Login Key Timeframe (days)”: here you can specify the amount of time auto login key will be active.
- Option “Enable Lightweight Review Page”: this intermediate lightweight page allows customers to leave reviews more conveniently.
- Option “Send Email Reminders Automatically”: allows you to specify whether the email reminders should be sent manually or automatically.
Step by Step Guide:
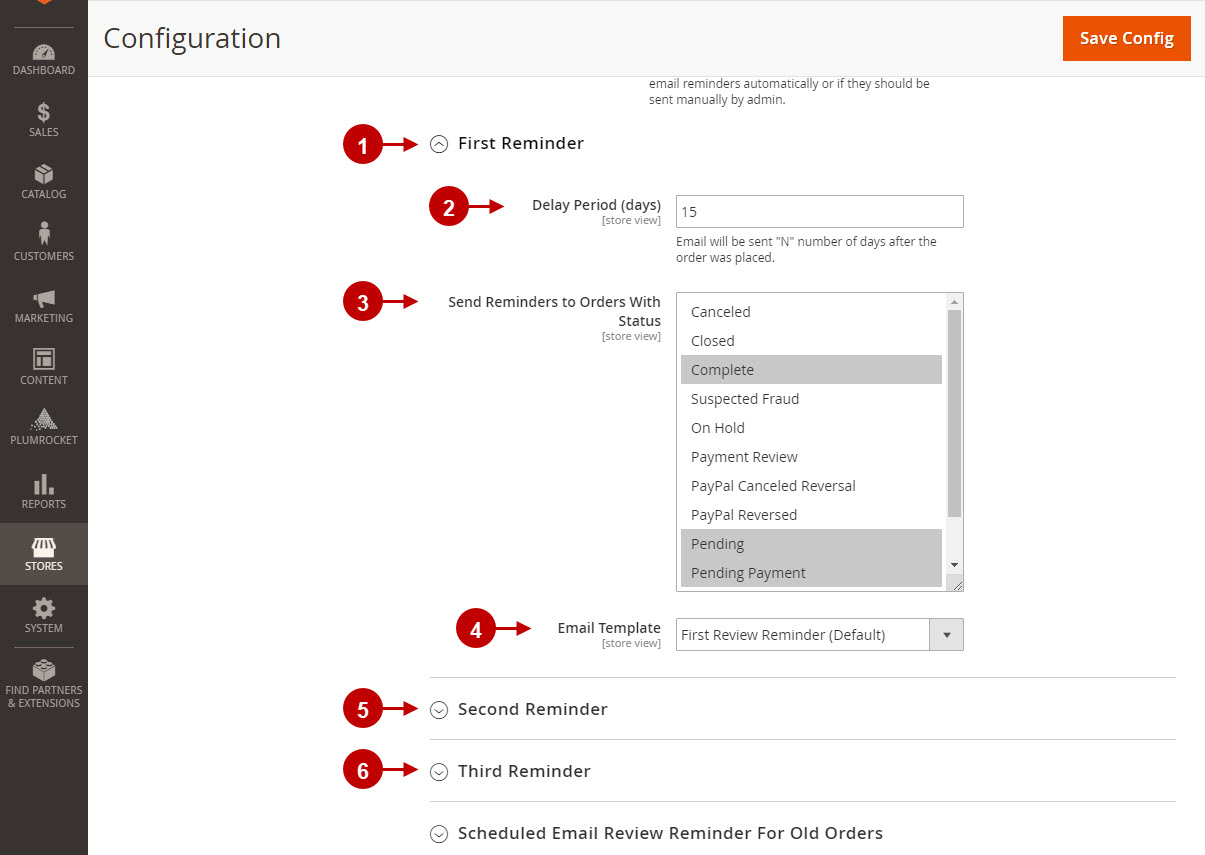
First, Second and Third Review Reminders
- “First Reminder”: navigate to the First Reminder to configure it.
- Option “Delay Period (days)”: here you can specify the delay time for the email reminder to be sent after the order was placed.
- “Send Reminders to Orders with Status”: this option allows you to select which customer order groups will get the email reminder.
- Option “Email Template”: allows you to choose the template that will generate review reminder email.
- “Second Reminder”: this option allows you to enable or disable the second review reminder, set the Delay Period and select the Email Template. Note: the second review reminder will be sent only if customer haven’t left any reviews by that time.
- “Third Reminder”: this option allows you to enable or disable the third review reminder, set the Delay Period and select the Email Template. Note: the third review reminder will be sent only if customer haven’t left any reviews by that time.
Step by Step Guide:
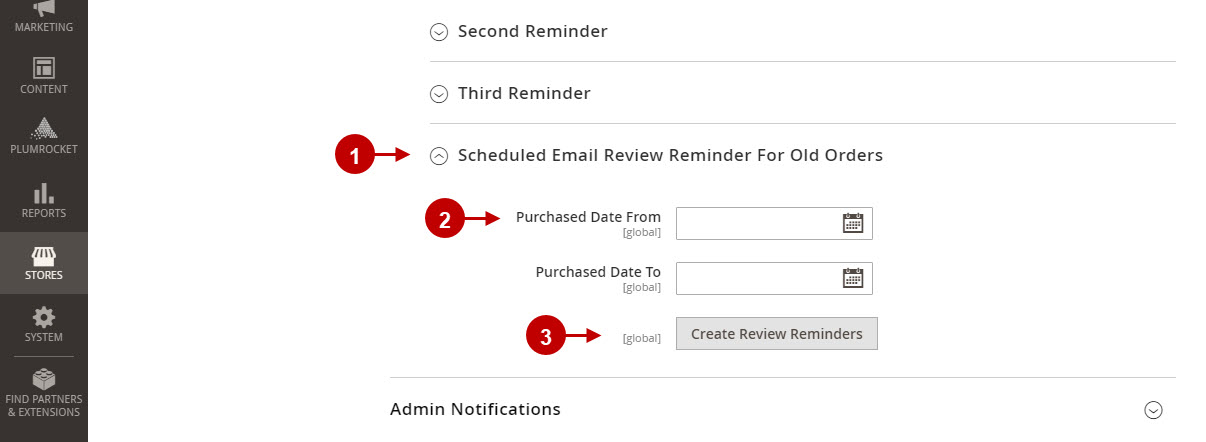
Scheduled Reminder For Old Orders
- Option “Scheduled Email Review Reminder For Old Orders”: allows you set up the Review Reminder functionality that will go through your old orders (created before Advanced Reviews & Reminders). In order to enable it – please indicate the “Purchased Date From” and “Purchased Date To”. Important: For this feature to function – please make sure that “Email Reminder” is enabled, and the order statuses are selected in “Send Reminders to Orders With Status”.
- “Purchased Date From“: indicate the purchase date of the oldest order the Review Reminder should take into account while sending the review reminder for old orders.
- “Purchased Date From“: select the most recent purchase date of the old order.
- “Create Review Reminders”: press the button to create the scheduled reminders.
Step by Step Guide:
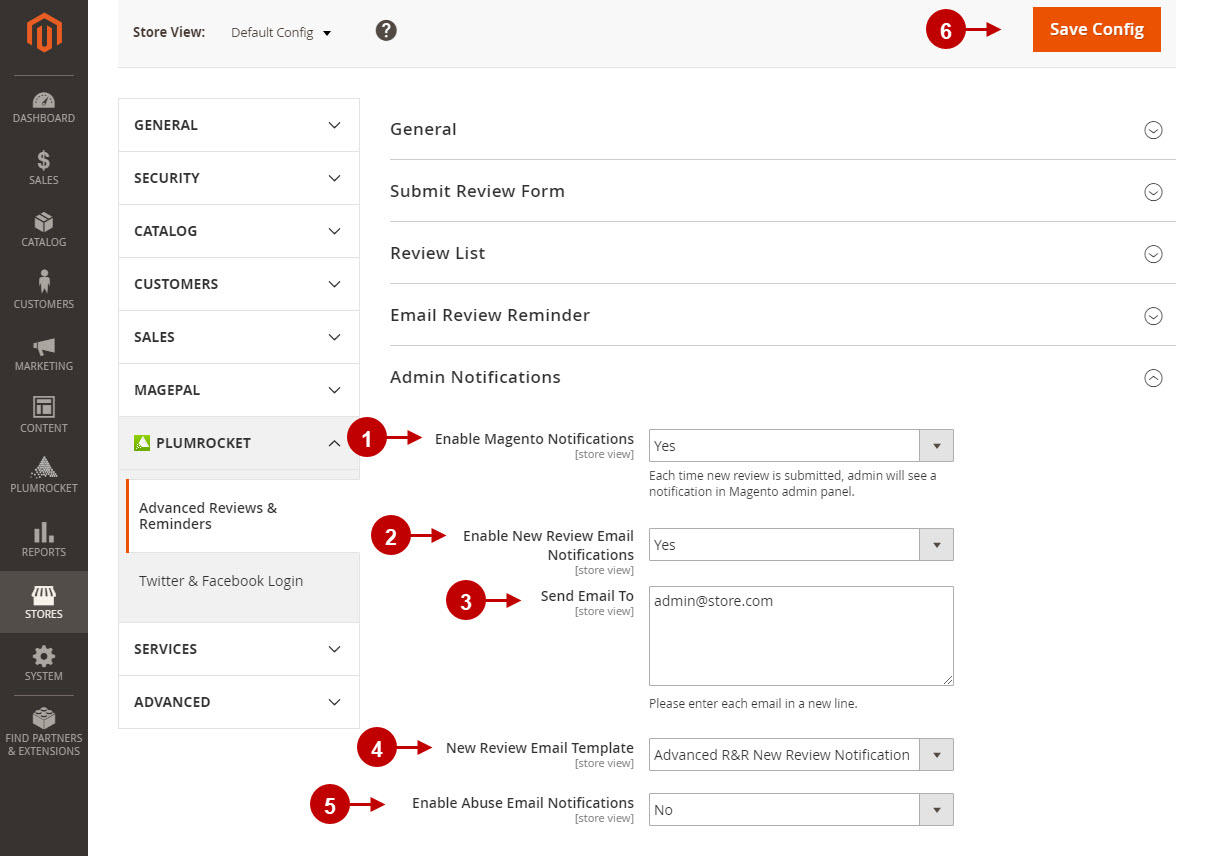
Admin Notifications
- Option “Enable Magento Notifications”: allows you to enable or disable magento notifications. If this option is enabled, admin will see a magento dashboard notification each time the new review is submitted.
- Option “Enable Email Notifications”: lets you enable or disable email notifications.
- “Sent Email To”: this option allows you to indicate the emails where the email notification will be sent to.
- Option “Email Template”: allows you to select the template for the review admin notification email.
- Option “Enable Abuse Email Notifications”: lets you enable or disable email notifications reporting of abuse.
- Once you finished configuring our advanced reviews & reminders extension – press “Save Config” button to save your changes.
Was this article helpful?