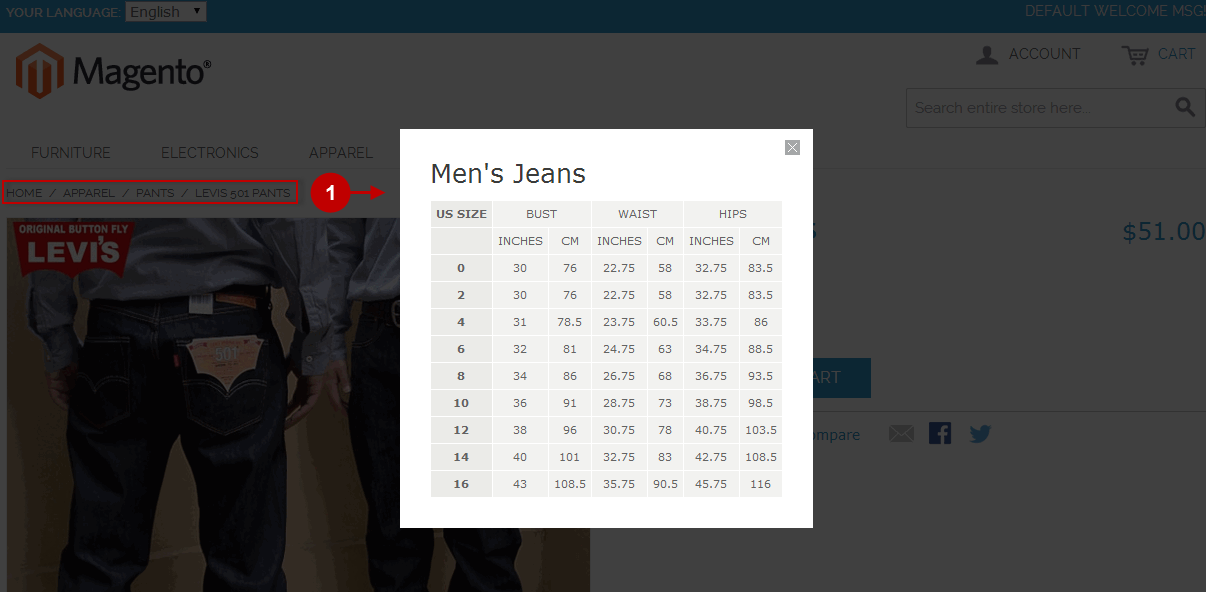
Configuring Size Chart Extension
Here you will learn how to correctly configure Plumrocket Magento Size Attribute extension. To do this, follow the instructions below.
Step-by-Step action:
- Press the “Plumrocket” tab in the menu.
- Select the “Size Chart” module.
- Press the “Configuration” button.

Step-by-Step action:
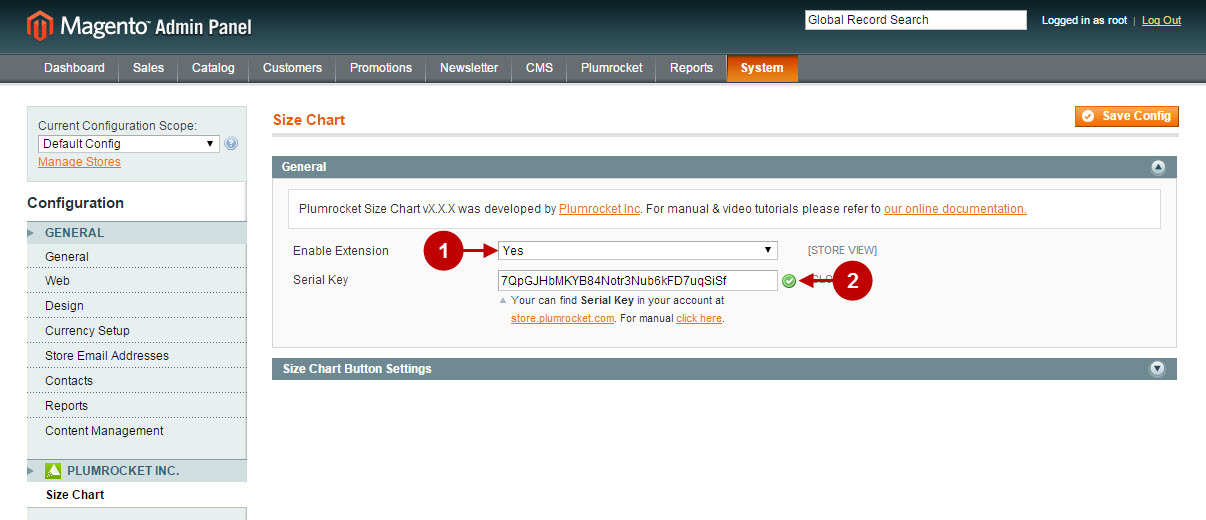
- Enable Extension: Select “Yes”, to enable the Size Chart module or “No” to disable it.
- Option “Serial Key”: enter unique serial key provided after the purchase for legitimate and proper functioning of your extension. Note: In most cases this field will be pre-filled with serial key automatically and the green check mark will be displayed. Otherwise please read article Serial Key Activation in order to find and paste your serial key manually.
- Press “Save Config” to save the changes.
Step-by-Step action:
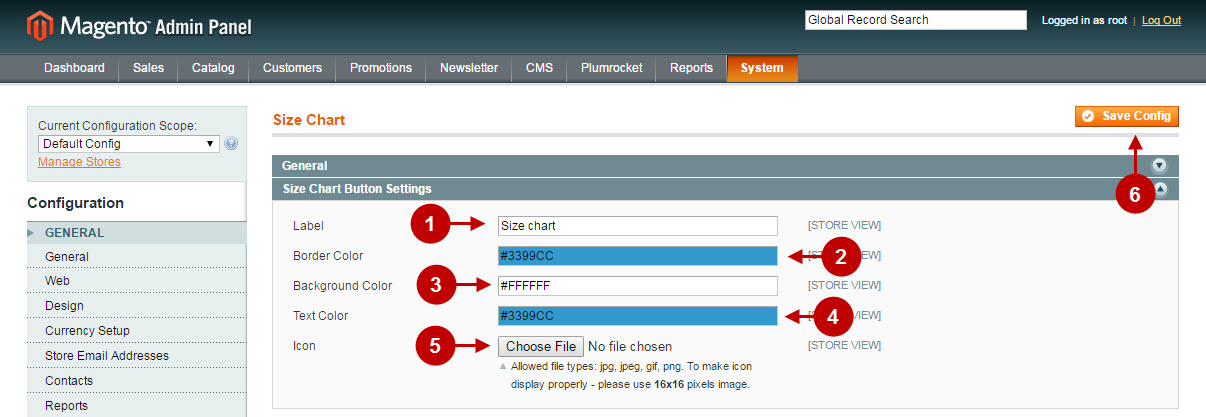
- Option “Label”: allows to specify the text that will be displayed on the size chart button.
- Option “Border Color”: allows to set the color of the button border.
- Option “Background Color”: allows to set the color of the button background.
- Option “Text Color”: allows to set the color of the text on the button.
- Option “Icon”: allows to upload the icon of size chart button.
Managing Size Charts
This tab allows you to preview and edit Size Charts. In order to access this management page, follow the steps as described below.
Step-by-Step action:
- Press the “Plumrocket” tab in the menu.
- Select “Size Chart”.
- Select “Manage Size Charts”.

Step-by-Step action:
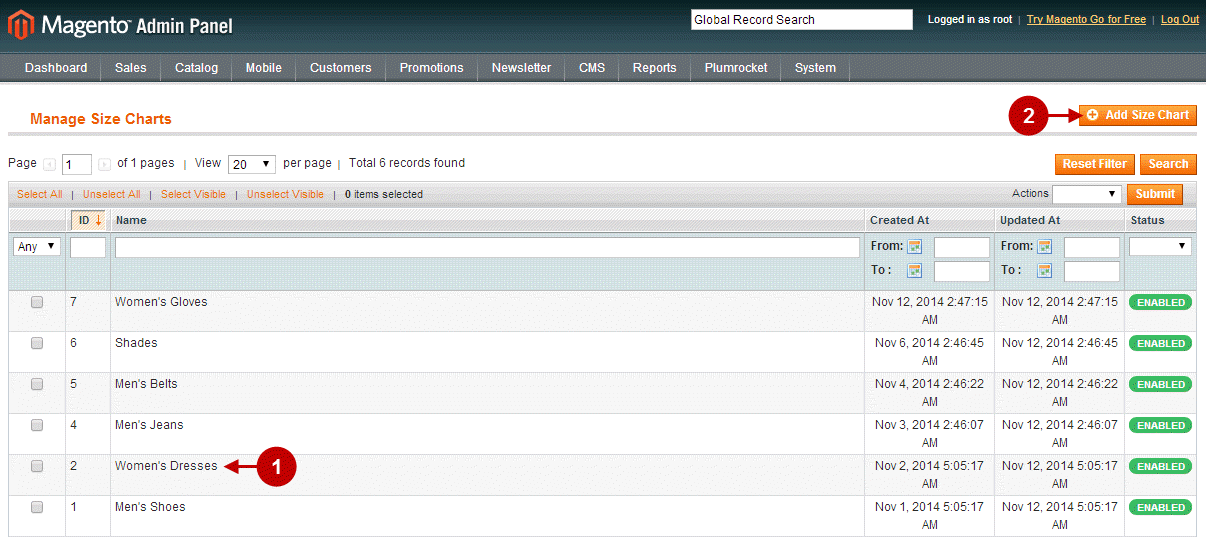
- Select the size chart you want to edit from the list. Note: by default this extension has 2 Size Charts (Men’s Shoes, Women’s Dresses) already setup. You can use them to copy content into your own new size chart or just change the content there as you need.
- In order to create a new size chart press the “Add Size Chart” button.
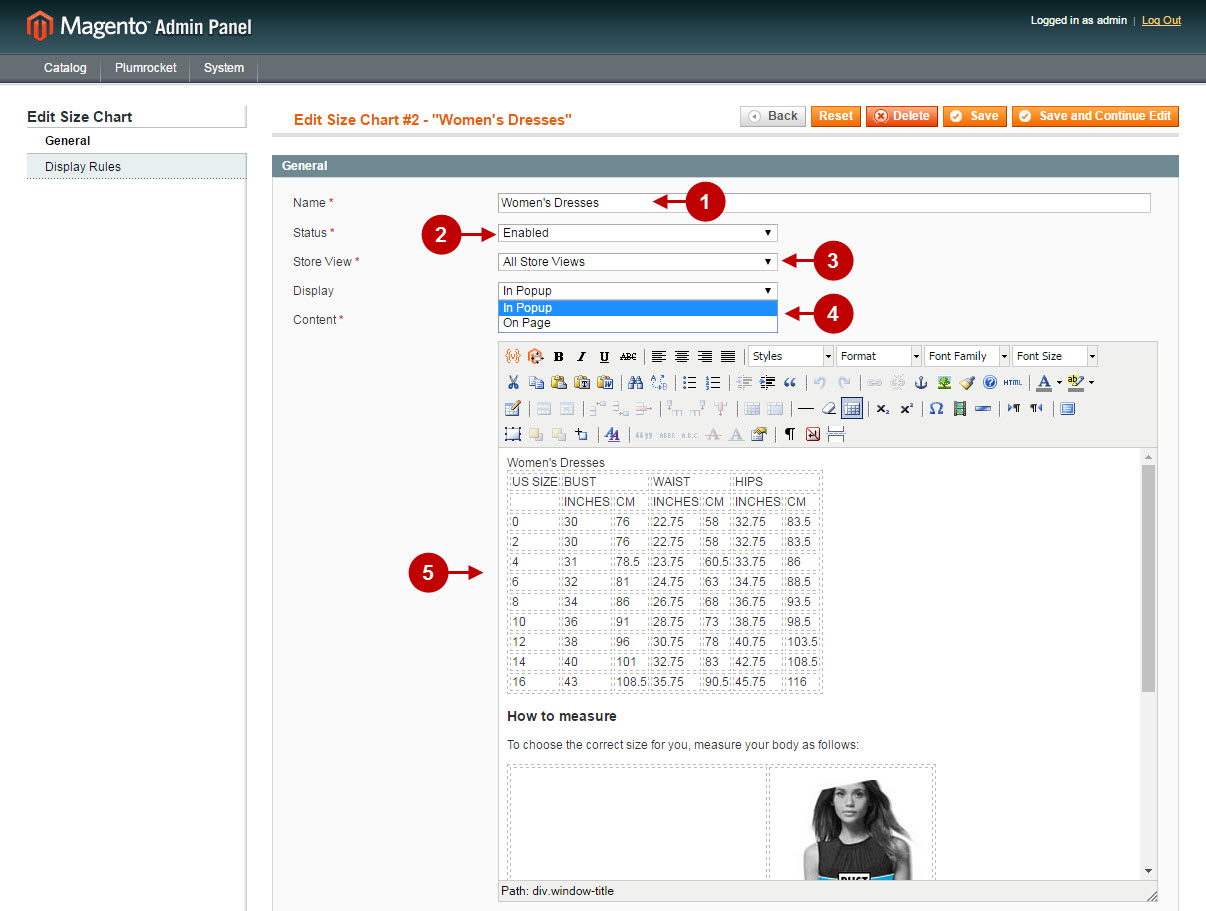
After you have chosen “Add Size Chart” action from the screenshot above you will see the size chart management page. The fields to be configured are given below.
Step-by-Step action:
- Name : indicate the name for your custom size chart.
- Status : allows to select if size chart state will be enabled or disabled.
- Store View: select the specific store view you need to assign the size chart to.
- Display : allows to indicate the appearance of size chart on product page. It can be “In Popup” or “On Page”.
- Content : lets you input your own content into that area (text, tables, images, etc) using the editor.
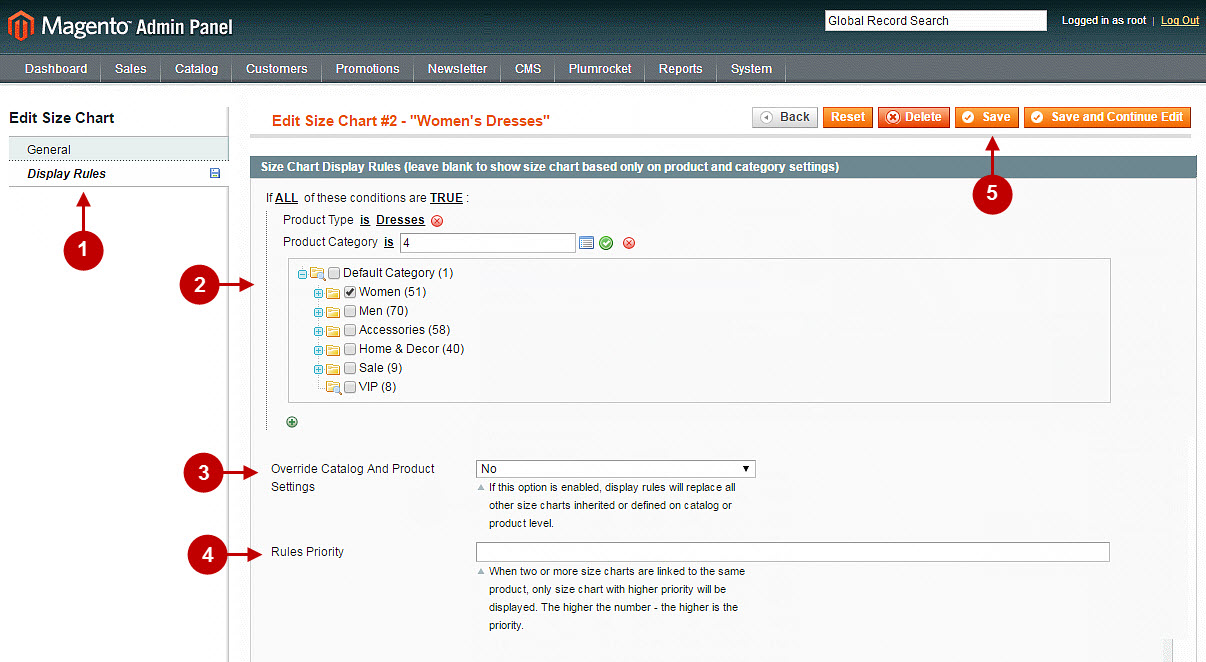
In the following configuration section you can define the special rules (conditions) for size chart display. This is not a required section, therefore, if you don’t want to set up the display rules – feel free to skip it. Otherwise, if you need to configure your own special size chart show conditions – please follow the steps below:
Step-by-Step action:
- Select “Display Rules” tab.
- Size chart will be displayed based on the conditions you specify in these fields.
- “Override Catalog and Product Settings”: if this option is enabled, display rules will replace all other size charts inherited or defined on catalog or product level.
- “Rules Priority”: specify rules priority in this field. When two or more size charts are linked to the same product, only the size chart with higher priority will be displayed. The higher is the number – the higher is priority.
- Once you’re done with creating your own size chart – don’t forget to save it by pressing the “Save” button.
Important Information:
After you make changes to size chart configuration – be sure to clear Magento cache.
Assigning Size Chart to products
In order to assign the size chart to specific product – please follow the steps below.
Step-by-Step action:
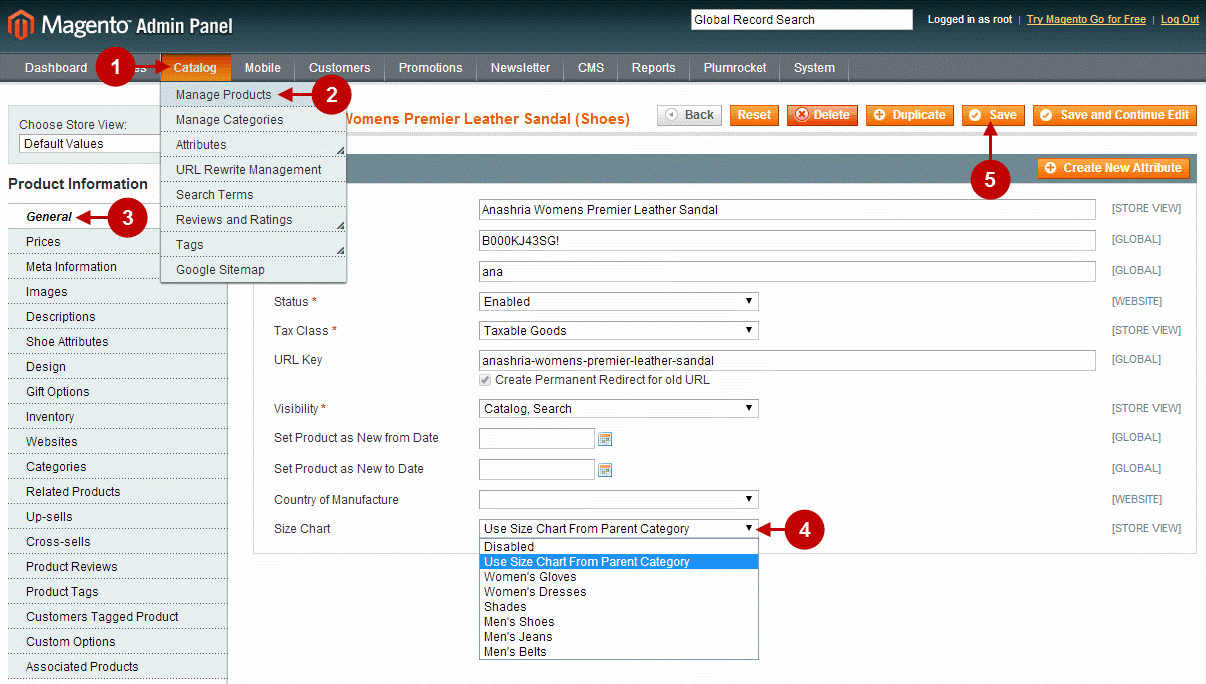
- Select the “Catalog” tab in the menu.
- Select “Manage Products” section and go to the needed product.
- Press tab “General” on the left.
- Locate the option “Size chart” and select the required size Chart. Note: You can select to use parent category size chart (more information on how to set size chat for specific category can be found below) or use personal size chart for this product.
- After you finish assigning size chart to the product – don’t forget to save your settings by pressing the “Save” button.
Step-by-Step action:
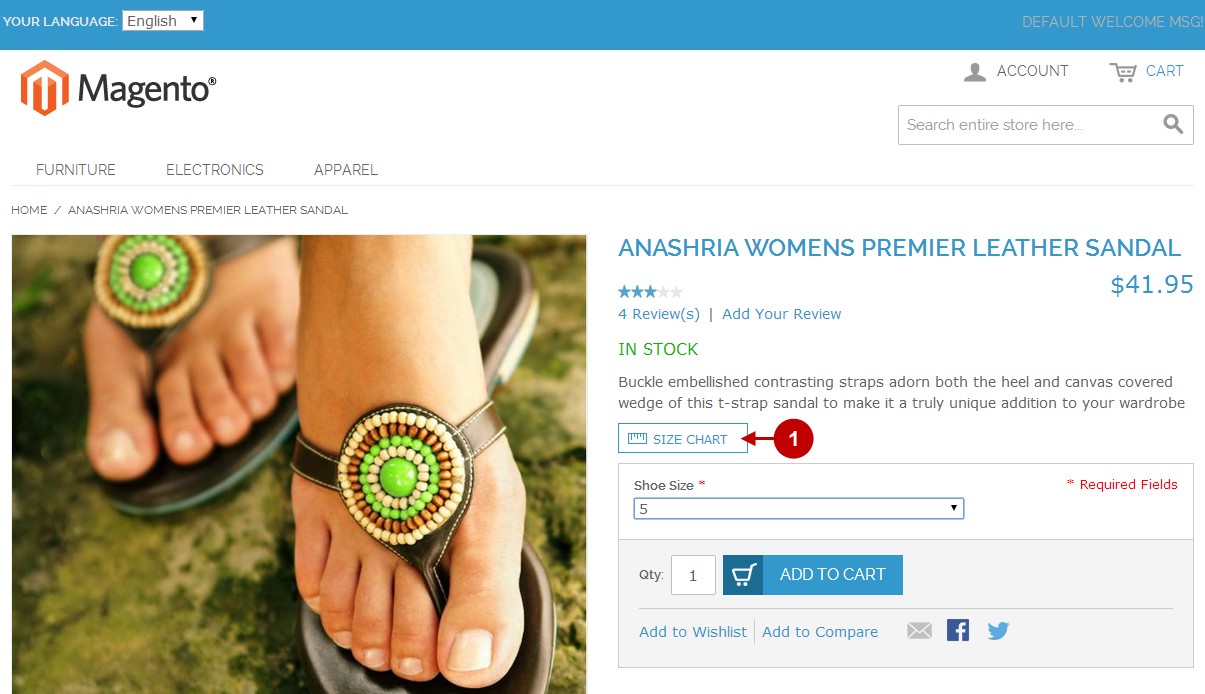
- The size chart button will appear on your front end (if for “Display option” of this size chart you’ve selected “In Popup”).
Step-by-Step action:
- After you click the size chart button – the assigned size chart will appear on your front end.
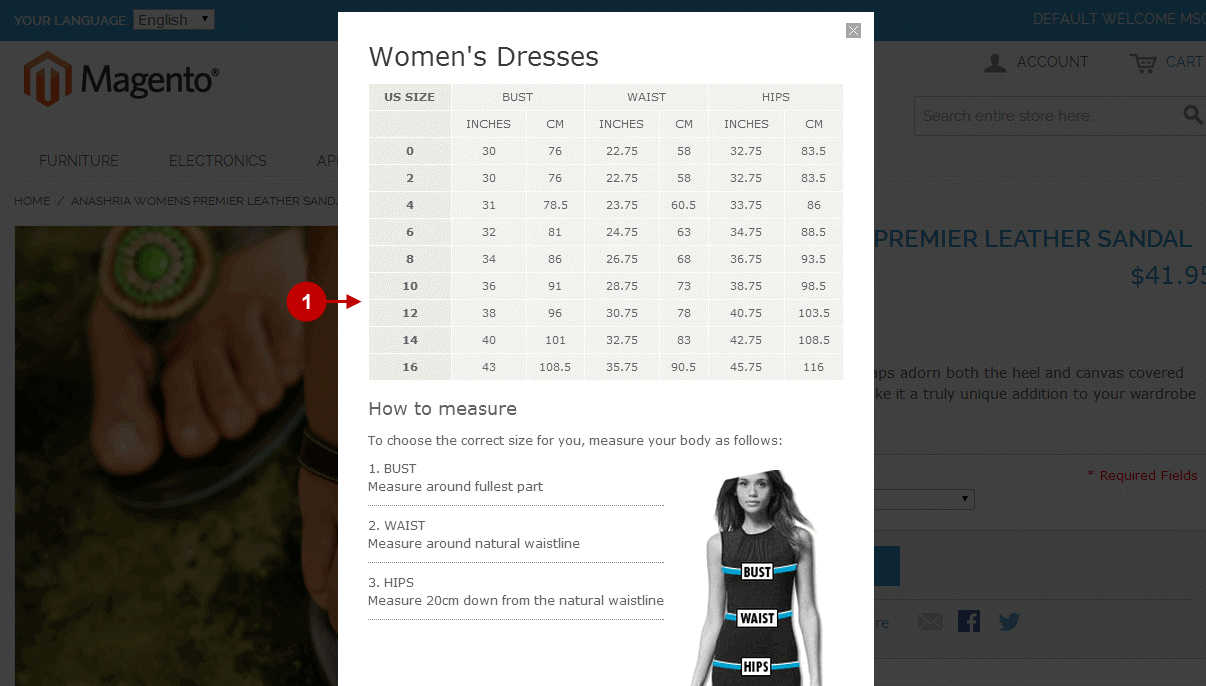
Step-by-Step action:
- Or, if you used option “On Page” in “Display” size chart setting of backend – it will appear straight on the page (without size chart button).
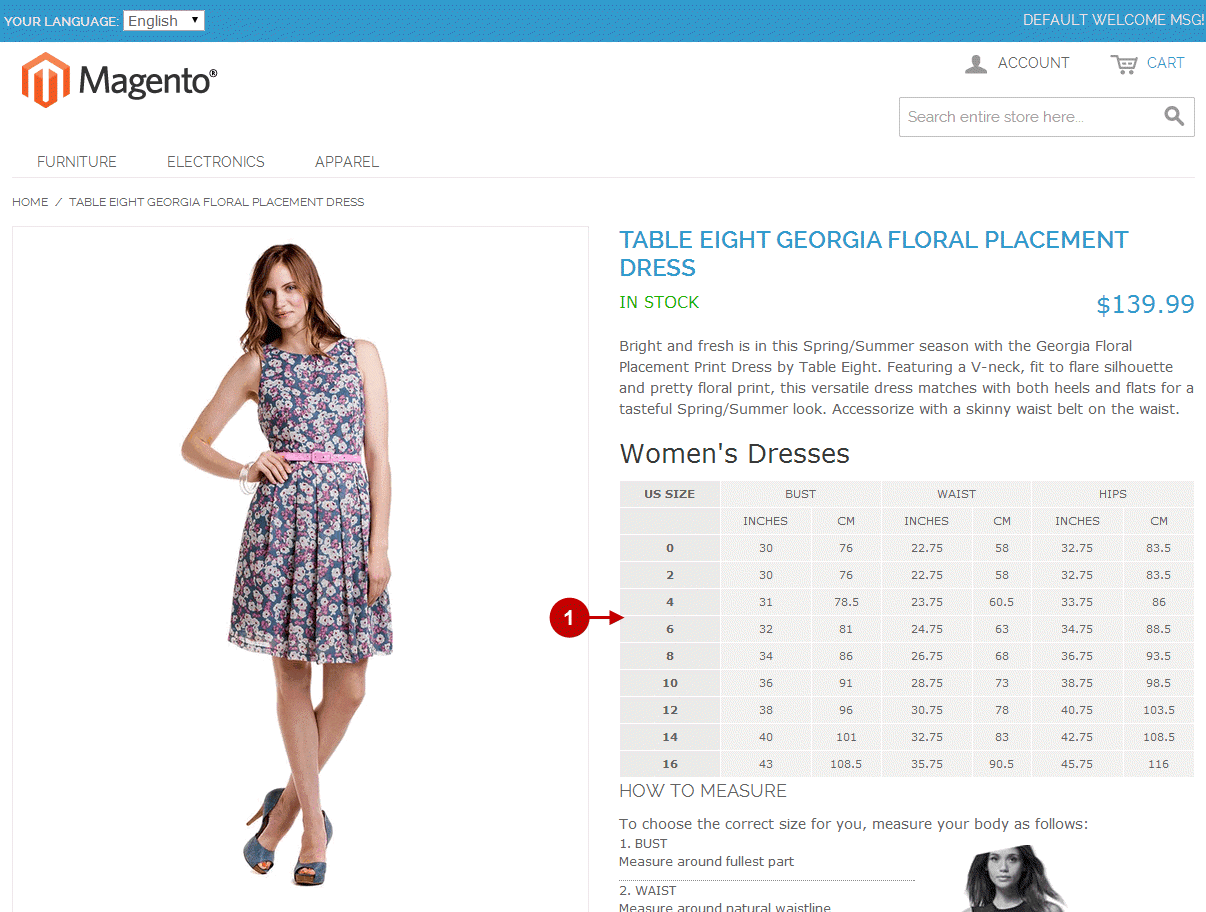
Assigning Size Chart to product categories
In order to assign the size chart to specific product categories – please follow the steps below.
Step-by-Step action:
- Select the “Catalog” tab in the menu.
- Select “Manage Categories” section.
- Click on the needed category.
- Locate the option “Size chart” and select the required size Chart. Note: You can select to use personal size chart or use parent category size chart (in this example “Apparel” is a parent category of “Pants”).
- After you finish assigning size chart to the category – don’t forget to save your settings by pressing the “Save Category” button.
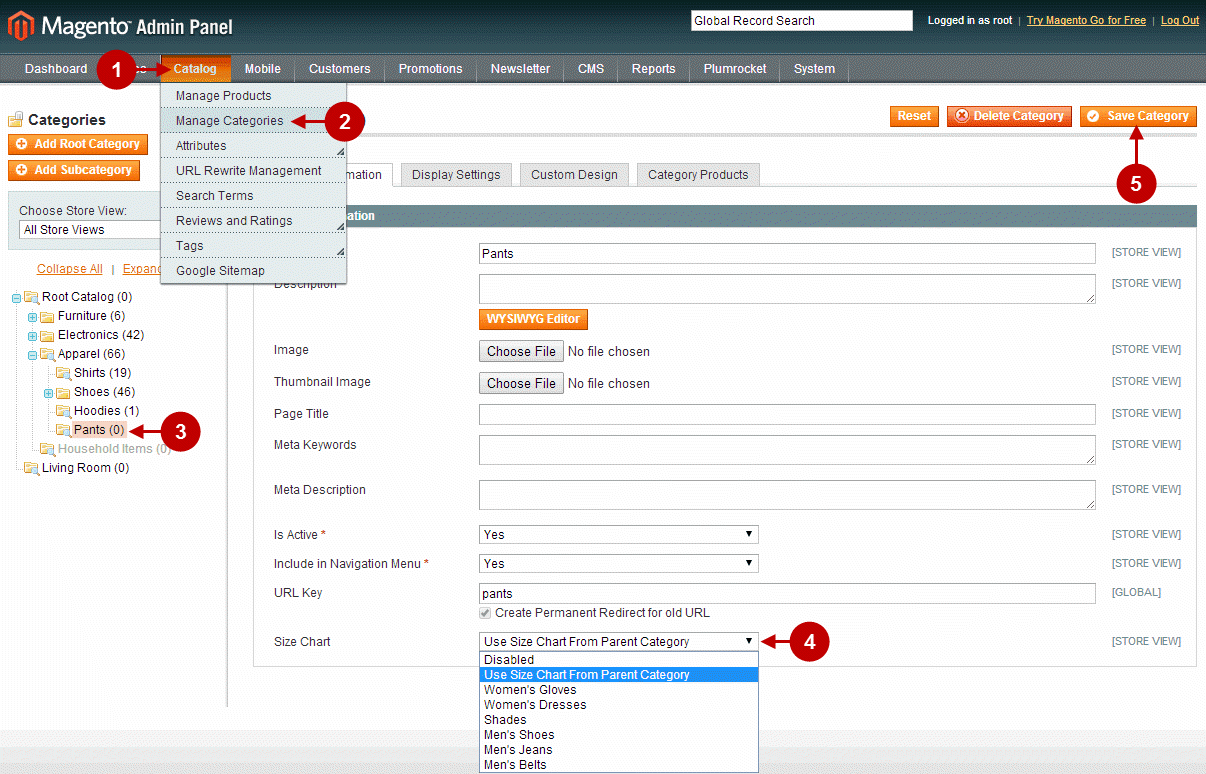
Step-by-Step action:
- The size chart button will appear for the product on your front end.
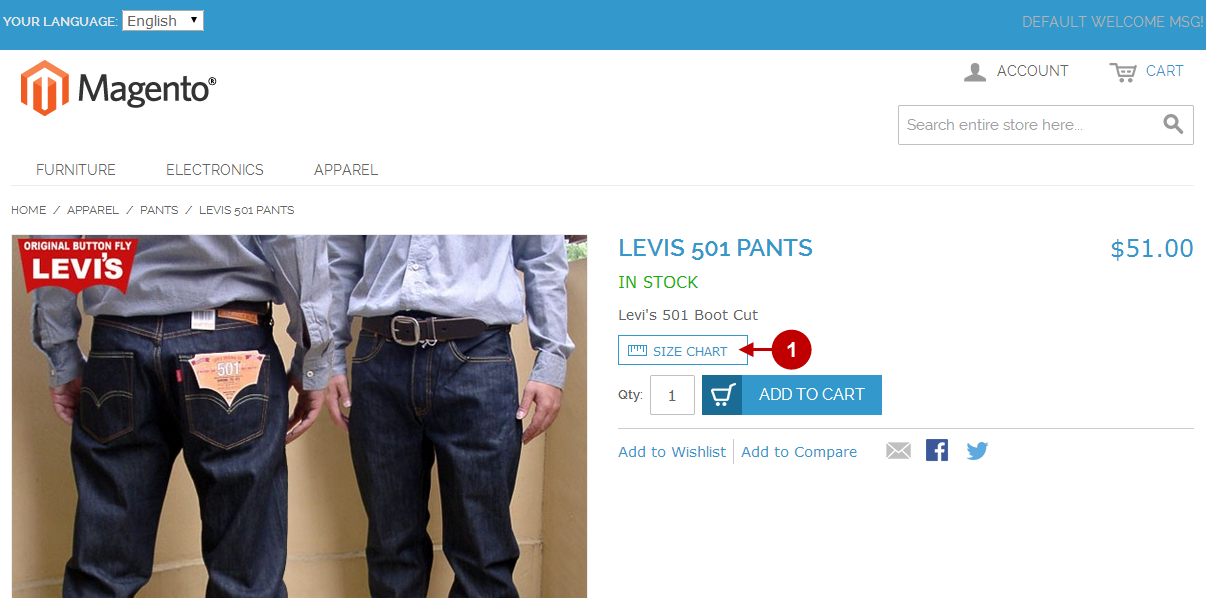
Step-by-Step action:
- Once you click on the size chart button – the according size chart of parent category will appear for the product on your front end. Otherwise (same as for size chart assigned to the product), if you used option “On Page” in “Display” size chart setting of backend – it will appear straight on the page.
