Configuring Shop by Brand Extension
Magento Shop by Brand Extension allows you to add information about the designer of the brand to any magento category (boutique in private sales stores).
In order to access the shop by brand module settings, follow the instructions below.
Step-by-Step action:
- Press the “Plumrocket” tab in the menu.
- Select “Shop by Brand”.
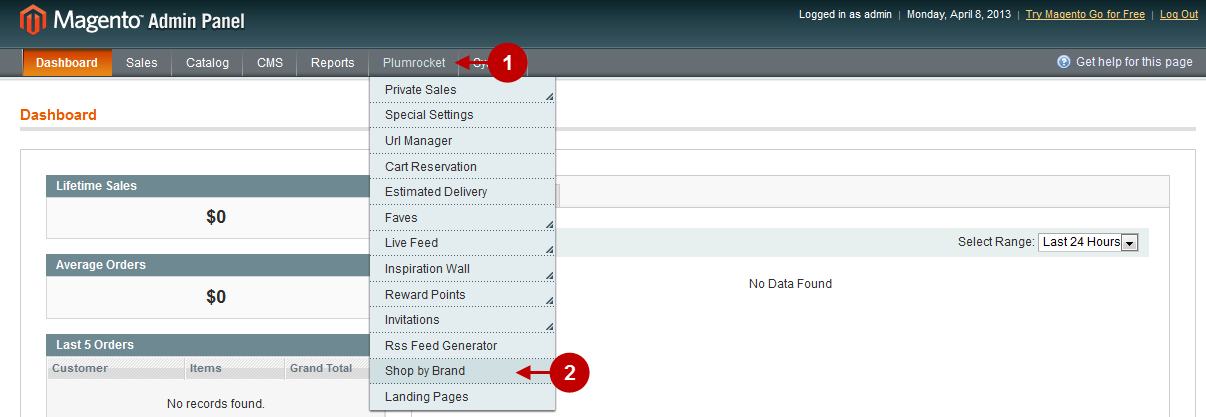
Step-by-Step action:
- Select “Shop by Brand” in the left menu.
- Option “Enable Extension”: Set “Yes” to enable the extension or “No” to disable it.
- Option “Serial Key”: enter unique serial key provided after the purchase for legitimate and proper functioning of your extension. Note: In most cases this field will be pre-filled with serial key automatically and the green check mark will be displayed. Otherwise please read article Serial Key Activation in order to find and paste your serial key manually.
- Press the button “Save Config” to save the settings.

Brand List Management
Step-by-Step action:
- Press the “Plumrocket” tab in the menu.
- Select “Shop by Brand”.
- Select “Manage Brand List”.

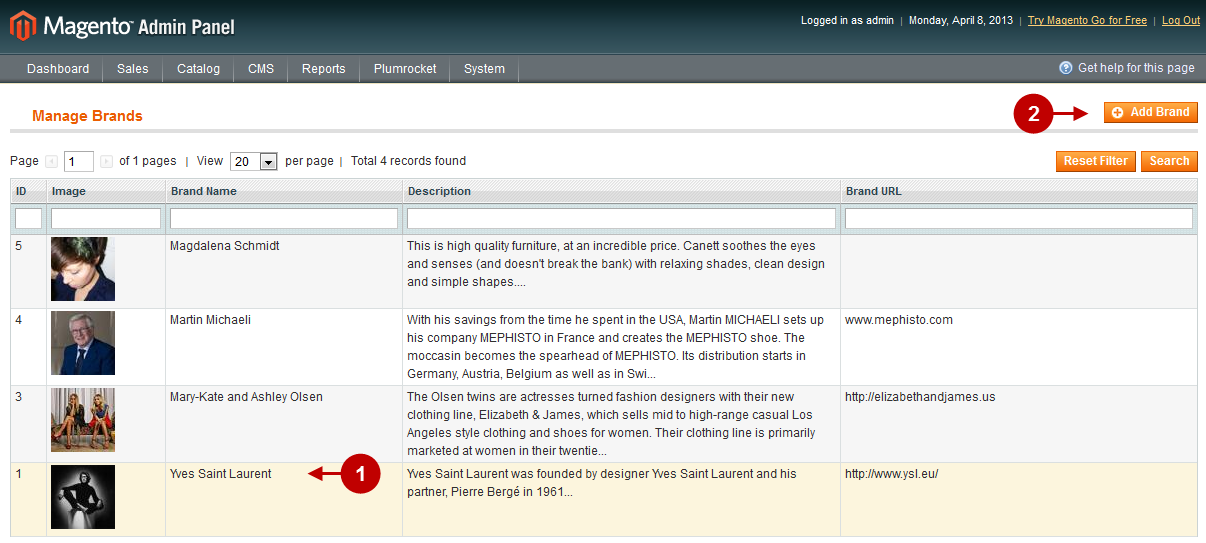
Select the brand designer you want to edit from the list and press the “Add Brand” button. This will let you add information about the new designer.
Step-by-Step action:
- Select the designer to edit the information.
- Press here to add information about the new designer.
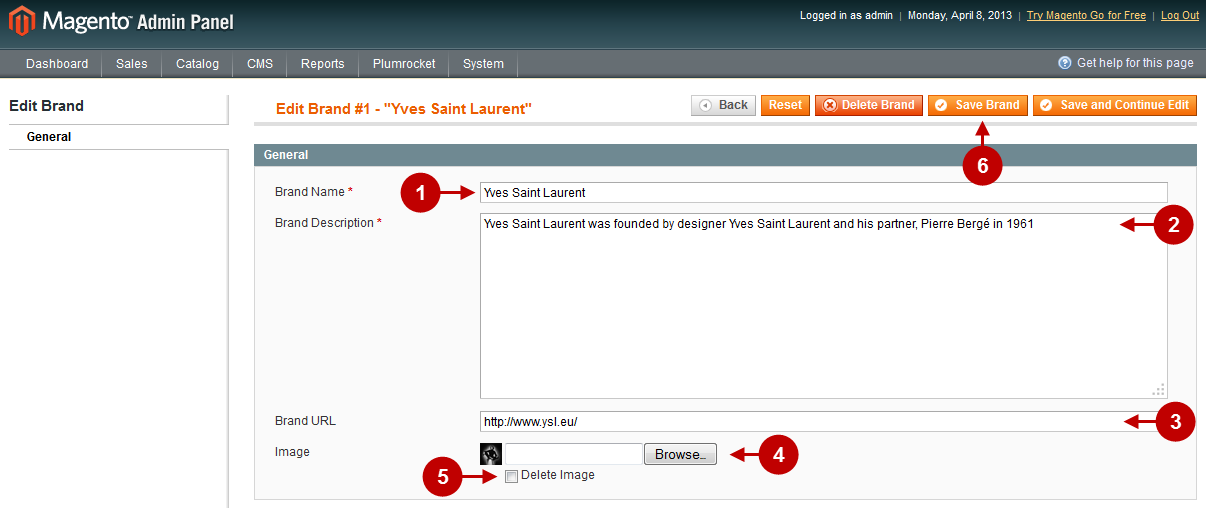
Depending on your choice you will be directed to the page allowing either to edit or create text about a designer. You can see all features of the editing page in the screenshot below.
Step-by-Step action:
- Option “Brand Name”: allows you to enter the name of the brand.
- Option “Brand Description”: allows you to add information about the designer or brand.
- Option “Brand URL”: allows you to enter the designer’s site URL.
- Option “Image”: allows you to select the image that will be displayed next to the information about the designer or brand. Recommended size of image: 113px*113px.
- Option “Delete Image”: allows you to delete the current image.
- Press “Save Brand” to save the changes.
Below you will find detailed information how to configure Shop by Brand extension for a particular category:
Step-by-Step action:
- Click on the “?atalog” tab in main menu.
- Select “Manage Categories”.

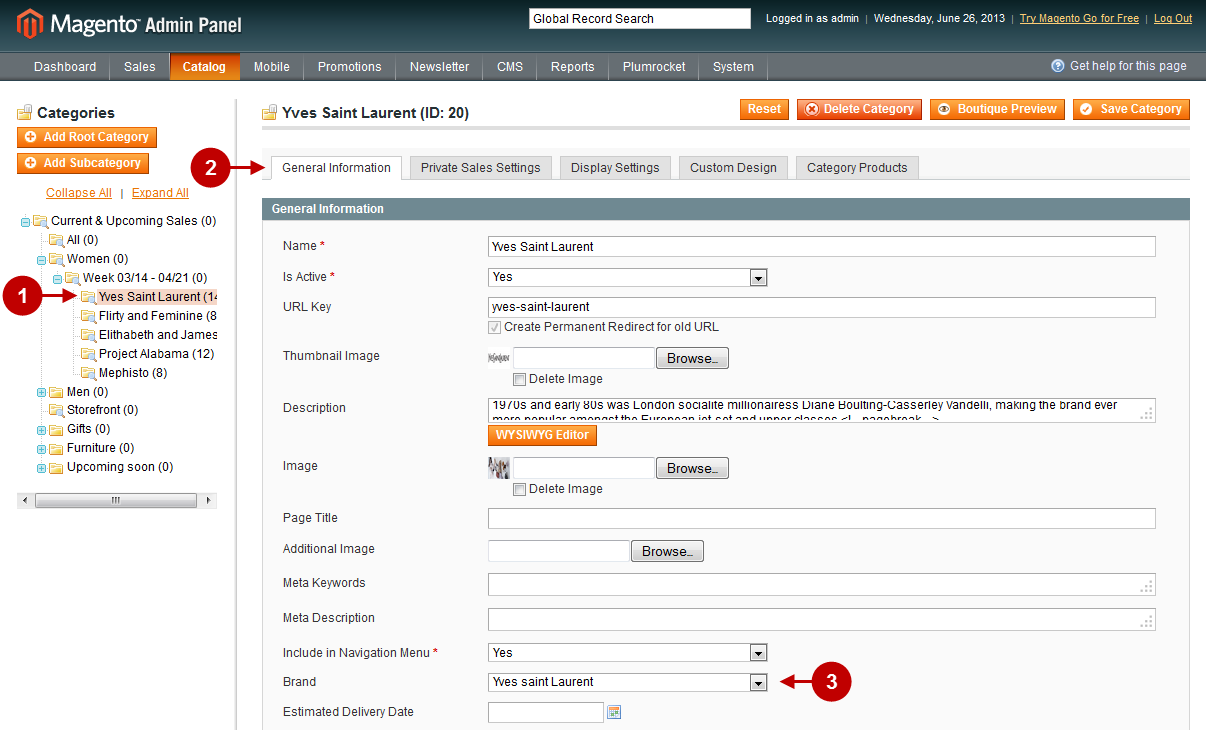
Detailed description:
- Select the category where the Brand should be displayed.
- Go to the tab “General Information”.
- Select the brand you need from the drop-down list in the field “Brand”.
Step-by-Step action:
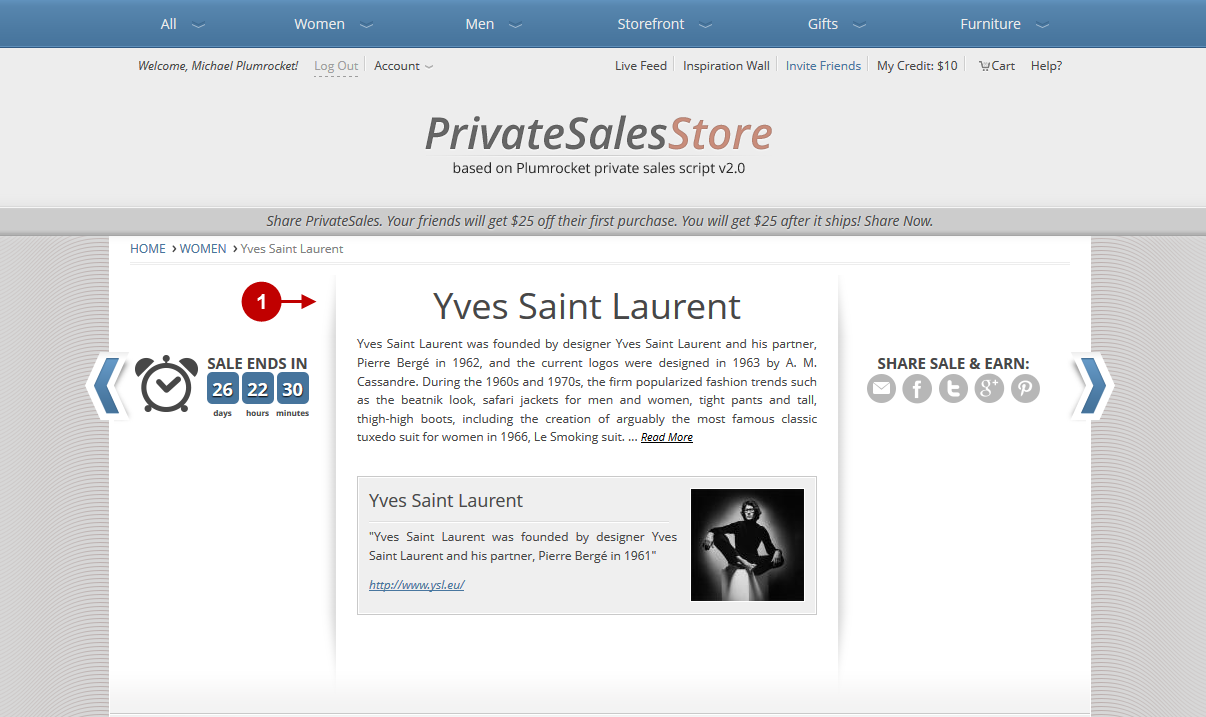
- This is how the Magento Shop by Brand is displayed in the front-end.
