Configuring Product Quick View Extension
Here you will learn how to correctly configure the Plumrocket Magento Ajax Product Quick View Popup extension. To do this, follow the instructions below.
Step-by-Step action:
- Press the “Plumrocket” tab in the menu.
- Select the “Product Quick View” module.

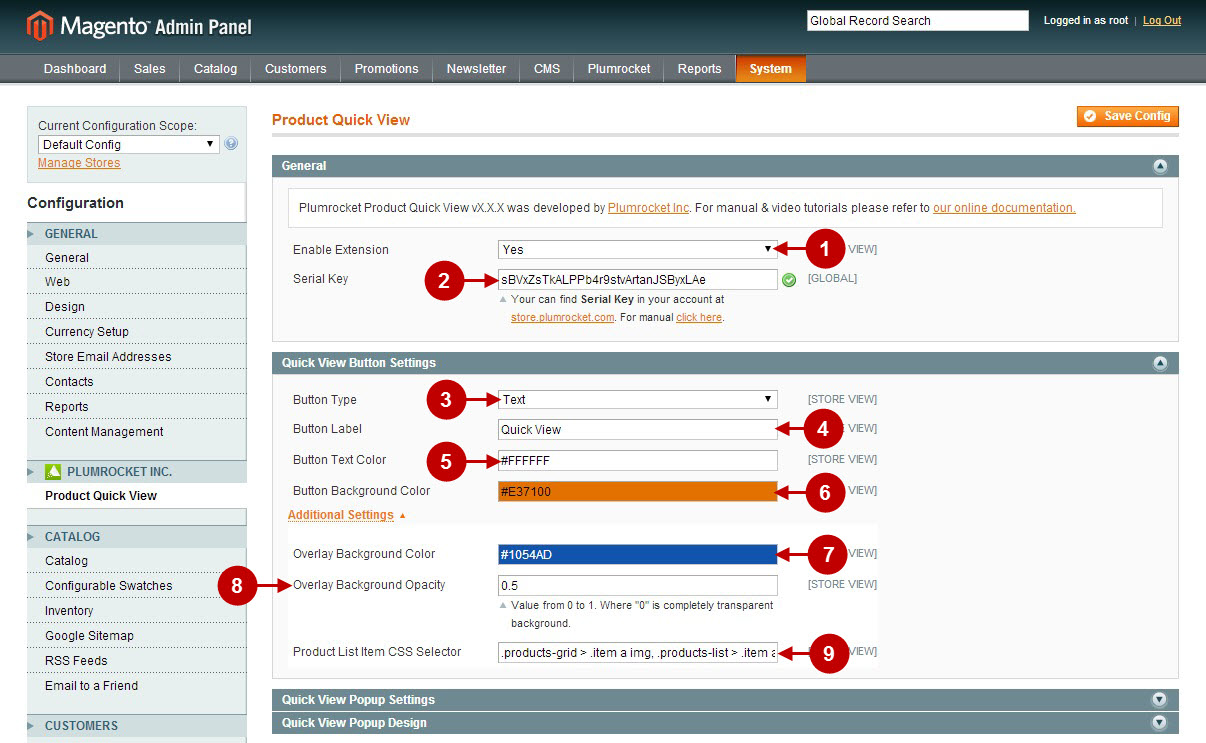
Here you will learn more about Quick View Button Settings.
Step-by-Step action:
- Enable Extension: allows you to enable or disable this ajax quick view extension.
- Option “Serial Key”: enter unique serial key provided after the purchase for legitimate and proper functioning of your extension. Note: In most cases this field will be pre-filled with serial key automatically and the green check mark will be displayed. Otherwise please read article Serial Key Activation in order to find and paste your serial key manually.
- Option “Button Type”: lets you select the type of button for product quick view. It can be “Text” or “Image”.
- Option “Button Label”: allows you to indicate your custom text label of button for product quick view.
- Option “Button Text Color”: lets you pick the custom color of quick view button text.
- Option “Button Background Color”: allows you to pick the custom background color of quick view button.
- Option “Overlay Background Color”: lets you select the overlay background of product quick view button.
- Option “Overlay Background Opacity”: allows you to select the overlay background opacity of product quick view button.
- Option “Product List Item CSS Selector”: is an option for developers. This option comes handy when you installed and enabled Product Quick View extension on your custom magento theme, but the “quick view” button does not show up. In such cases you can indicate the full hierarchy path of the CSS selector of your own product list items.
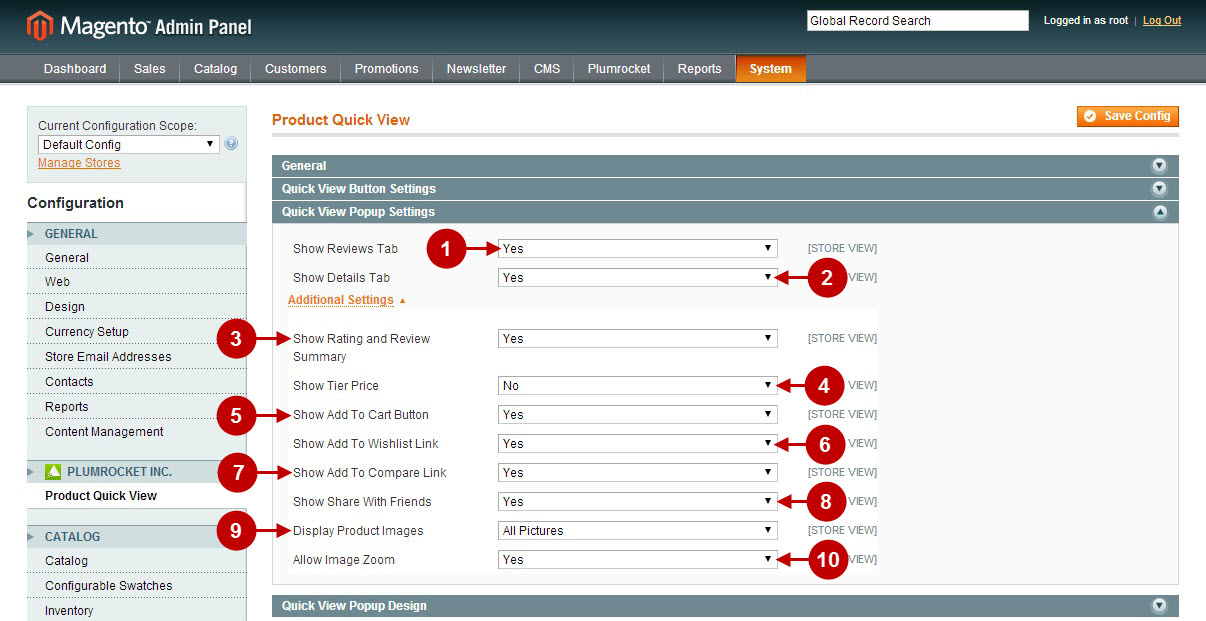
Now let’s proceed to Quick View Popup Settings.
Step-by-Step action:
- Option “Show Reviews Tab”: lets you show or hide the “Reviews” tab on product quick view popup.
- Option “Show Details Tab”: allows you to display or hide the “Details” tab on product quick view popup.
- Option “Show Rating and Review Summary”: allows you to show or hide the “Rating and Review Summary” tab on product quick view popup.
- Option “Show Tier Price”: lets you display or hide the “Tier Price” on quick view popup.
- Option “Show Add To Cart Button”: allows you to show or hide the “Add To Cart” button on quick view popup.
- Option “Show Add To Wishlist Link”: lets you show or hide the “Add To Wishlist” link on product quick view popup.
- Option “Show Add To Compare Link”: allows you to display or hide the “Add To Compare” link on quick view popup.
- Option “Show Share With Friends”: allows you to show or hide the Magento “Share with friends” buttons (e.g. Email, Facebook, Twitter share buttons) on quick view popup.
- Option “Display Product Images”: allows you to select which of the product images you want to display in quick view popup. Possible options are: “All Pictures”, “Main Product Picture Only”, or “Do Not Display Product Pictures” .
- Option “Allow Image Zoom”: lets you enable or disable image zoom on product quick view popup.
Please note, that it is not recommended to use zoom if you already have color swatches enabled, since they may have conflicts in some themes.
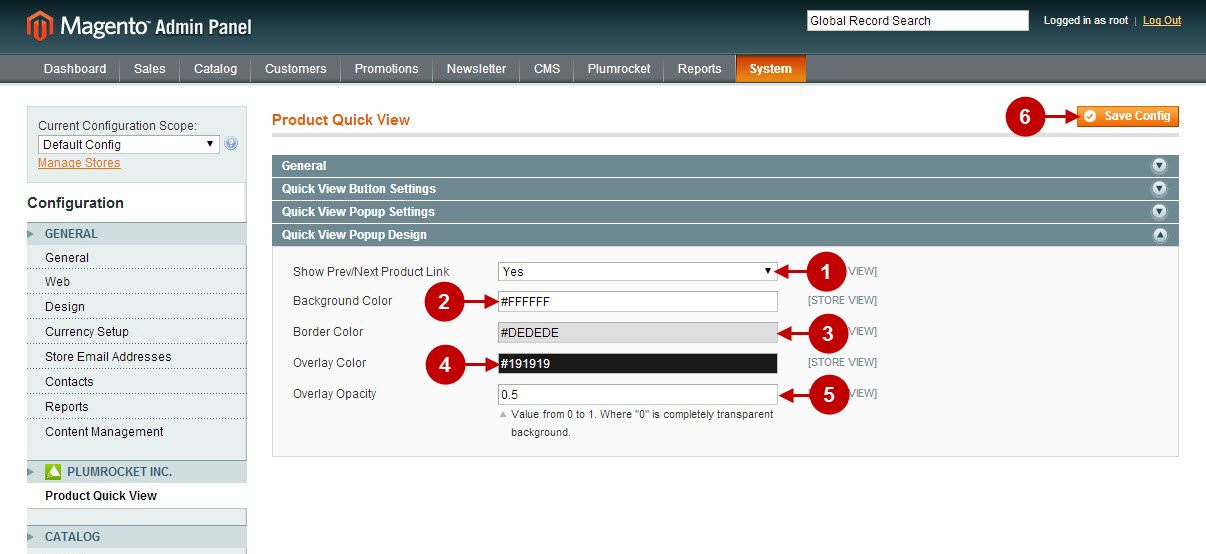
Now let’s move on to Quick View Popup Design settings.
Step-by-Step action:
- Option “Show Prev/Next Product Link”: lets you show or hide the “Next” and “Previous” arrows responsible for switching products in this ajax product view popup accordingly.
- Option “Background Color”: allows you to select the color of the background for your popup.
- Option “Border Color”: lets you select the color of the border for your popup.
- Option “Overlay Color”: lets you select the color of the overlay behind the popup.
- Option “Overlay Opacity”: lets you select the opacity level of the overlay for your popup.
- Once you’re finished with configuring this quick product view extension – press “Save Config” button to save your changes.
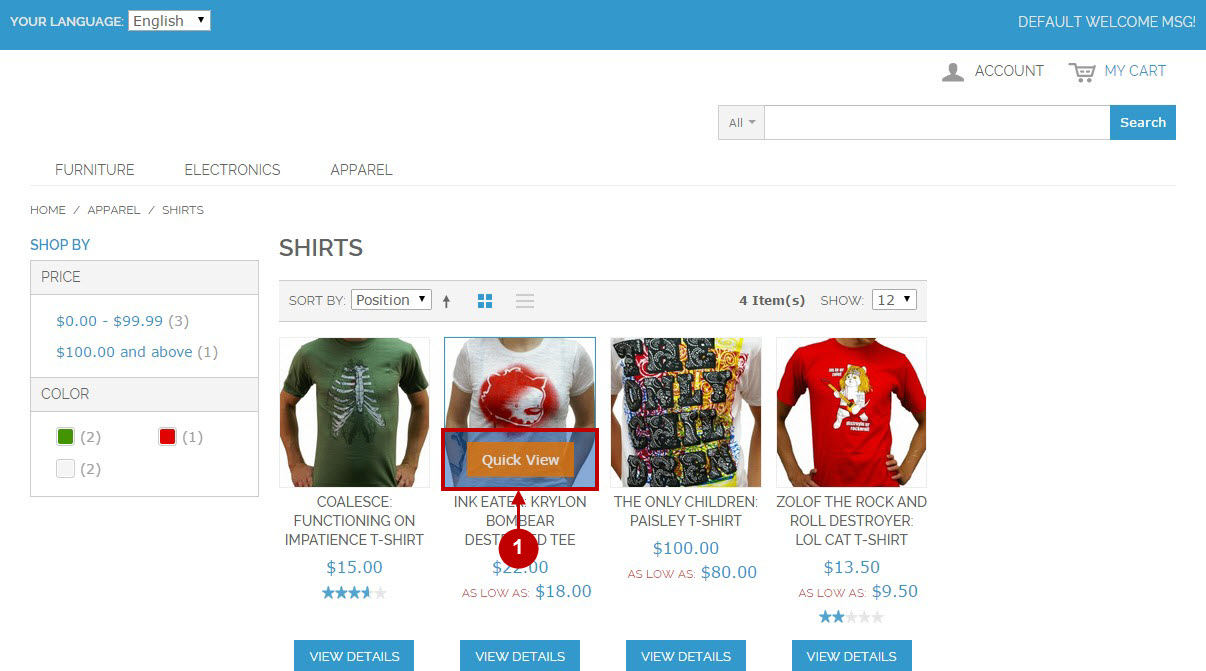
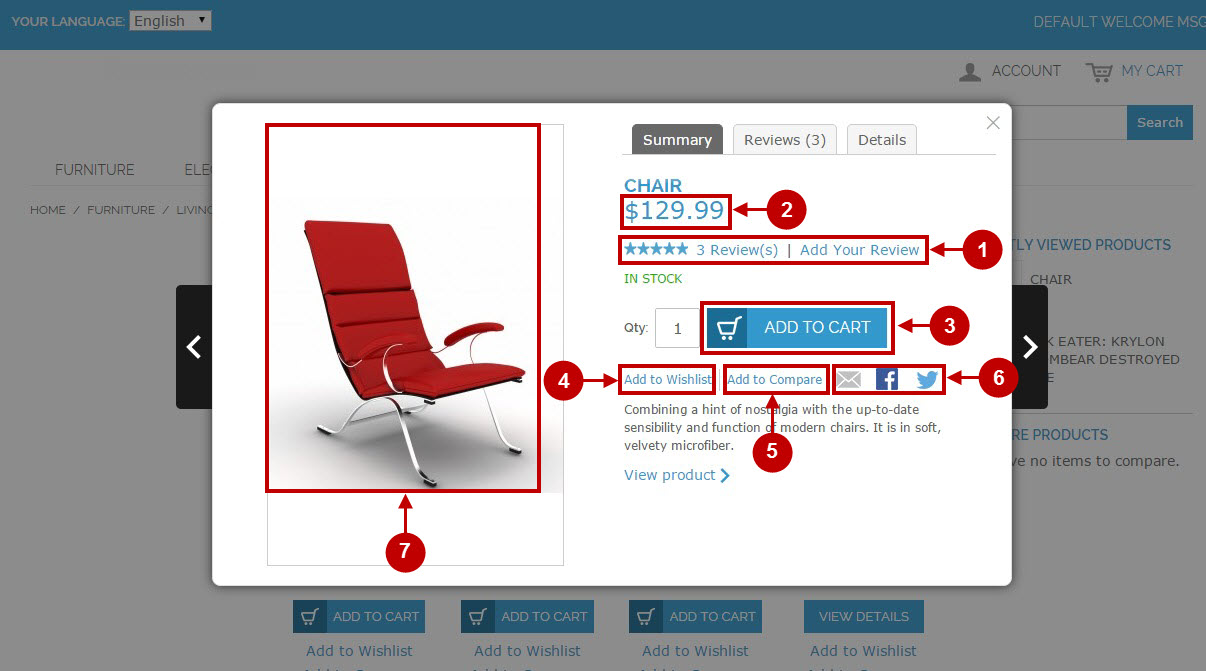
Here’s how the product quick view sections will look like on your frontend once enabled.
Step-by-Step action:
- This is how quick view button will look like.
Step-by-Step action:
- If enabled, this is how the rating and review summary section will look like.
- This is how the tier price section will be displayed.
- Here’s how the add to cart button will look like.
- If enabled, this is how the add to wishlist link will be displayed.
- This is how the add to compare link will look like.
- Here’s how the share with friends section will be displayed.
- This is where product images will be displayed.
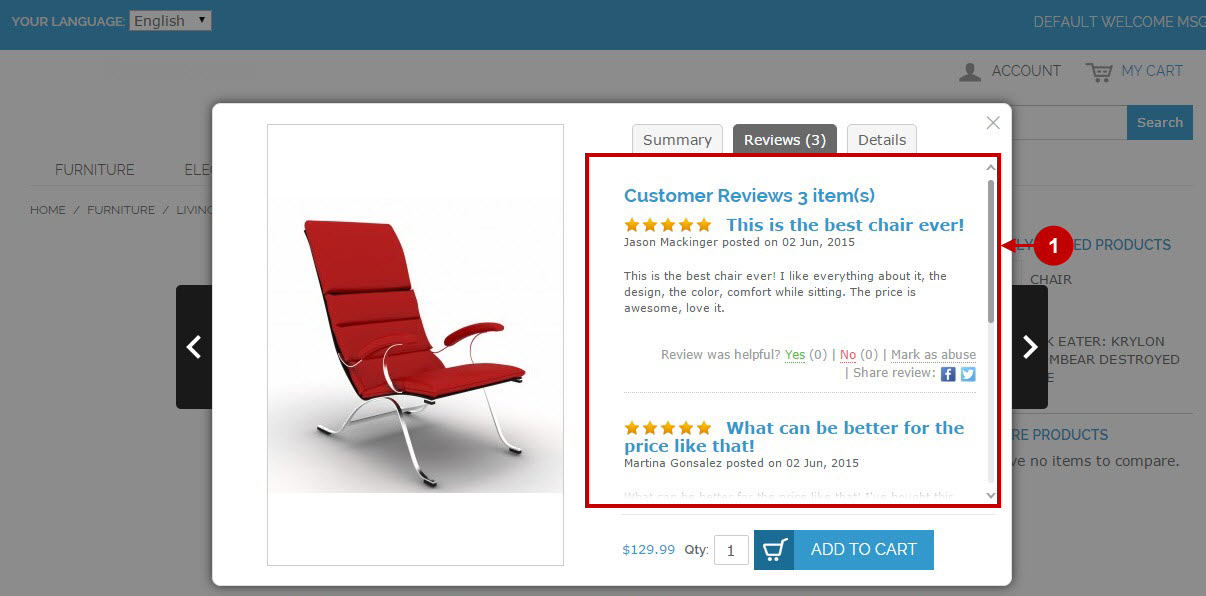
Step-by-Step action:
- If enabled, this is how the reviews section will look like.
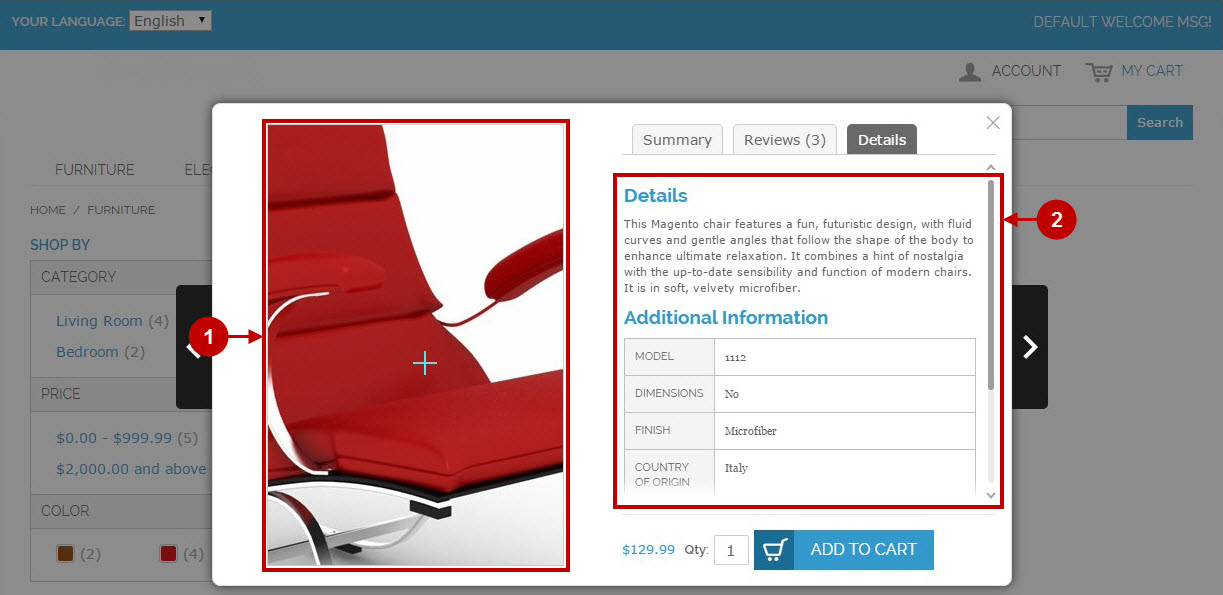
Step-by-Step action:
- Here’s how the image zoom section will look like.
- If enabled, this is how the details section will be displayed.
Was this article helpful?