Configuring Live Feed Extension
In this article, you will learn how to configure the Magento Live Feed extension correctly. Please follow the instructions below.
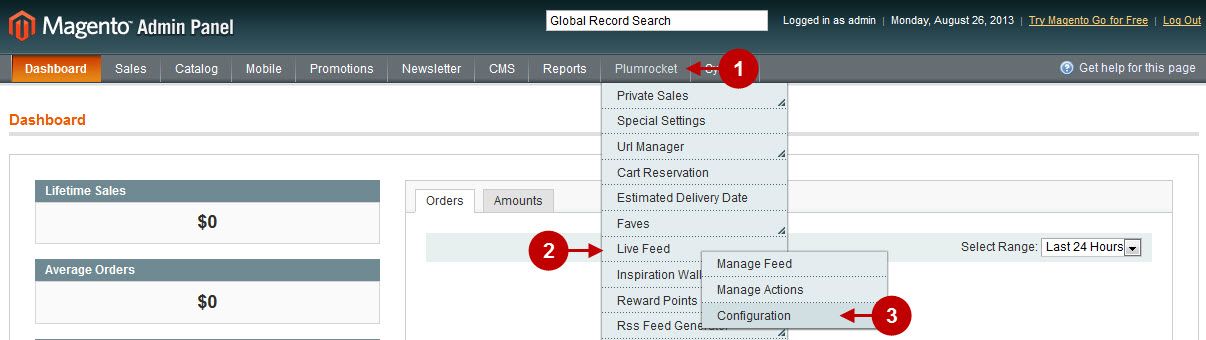
Step-by-Step action:
- Select “Plumrocket”.
- Select “Live Feed”.
- Select “Configuration”.
The screenshot below shows the options that will be set on default for the categories without custom settings.
Detailed description:
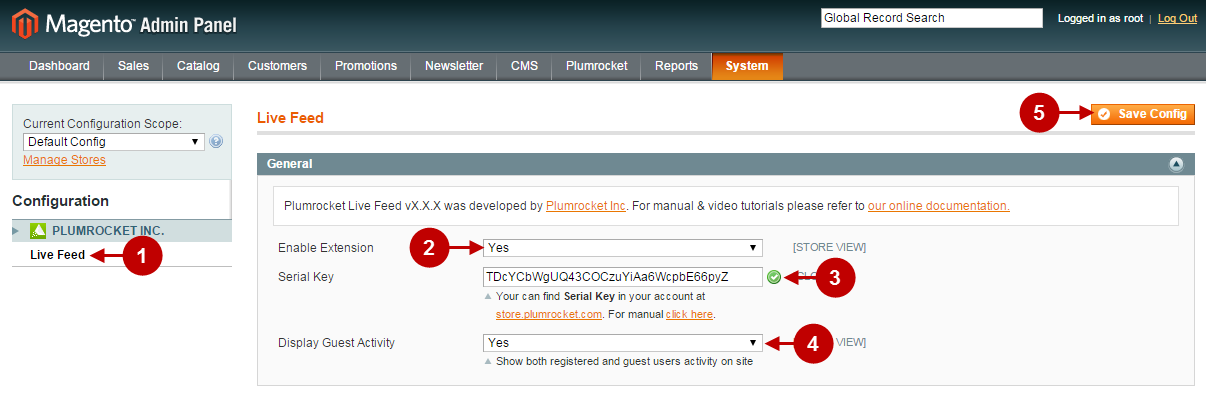
- Select “Live Feed”.
- Option “Enable Plumrocket Live Feed”: allows you to enable or disable the module.
- Option “Serial Key”: enter unique serial key provided after the purchase for legitimate and proper functioning of your extension. Note: In most cases this field will be pre-filled with serial key automatically and the green check mark will be displayed. Otherwise please read article Serial Key Activation in order to find and paste your serial key manually.
- Option “Display Guest Activity” : when enabled, it allows to show both registered and guest users activity on the site.
- Press “Save Config” to save changes.
Manage Feed
The page “Manage Feed” allows you to manage the content (events) generated by our Magento Live Feed Extension. To access this page follow the instructions below.
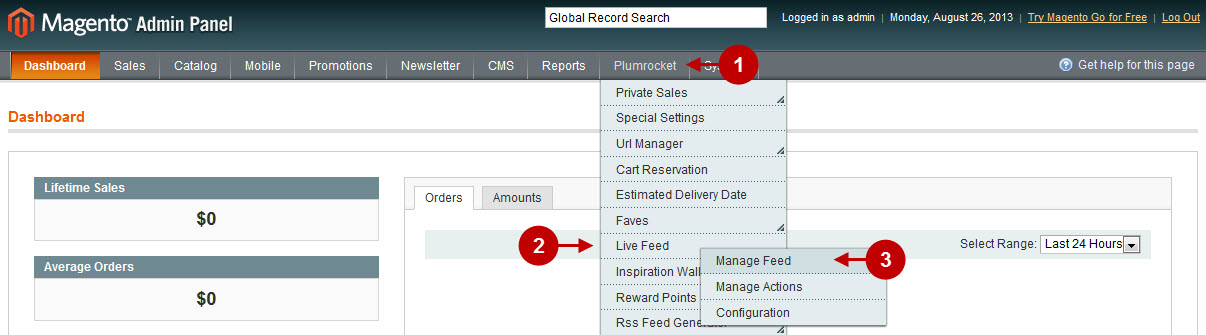
Step-by-Step action:
- Press the “Plumrocket” tab in the menu.
- Select “Live Feed”.
- Select “Manage Feed”.
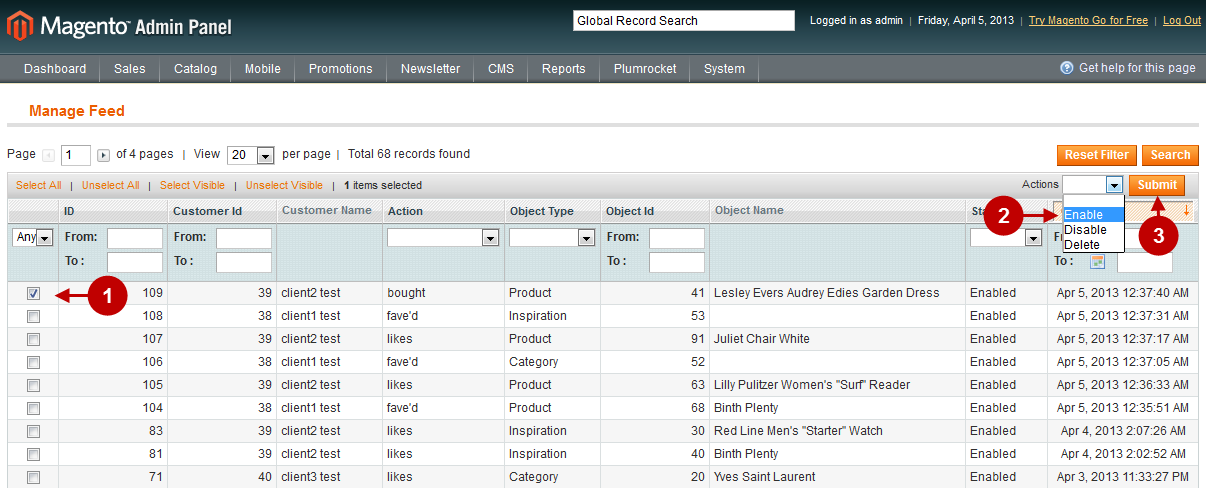
You will see that this page represents a standard Magento grid containing information on events: customer name, the page a particular event deals with, event status and date. In order to change the status of event (events) or disable / delete the event from Feed, follow the instructions below.
Step-by-Step action:
- Select item from the list to apply actions for it.
- Select the type of action you want to enable.
- Click on the “Submit” button to save changes.
Manage Actions
The page “Manage Actions” allows you to manage the actions that can be displayed in Feed. To access this page, follow the instructions below.
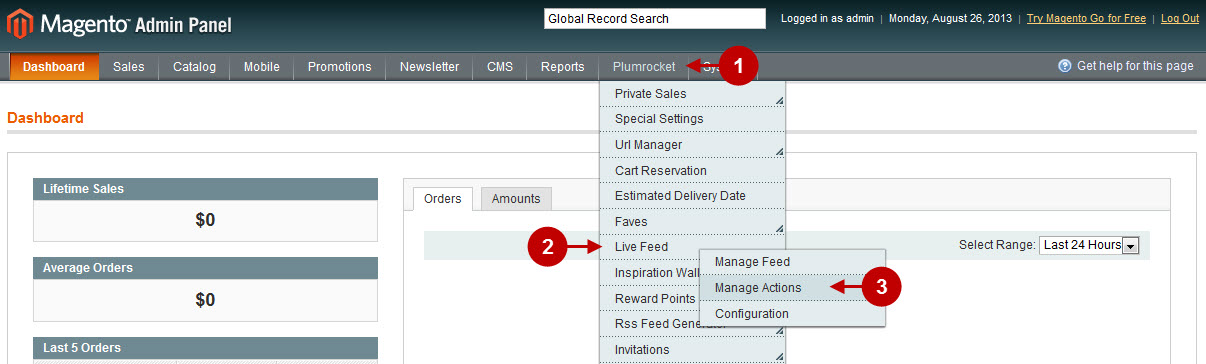
Step-by-Step action:
- Press the “Plumrocket” tab in the menu.
- Select “Live Feed”.
- Select “Manage Actions”.
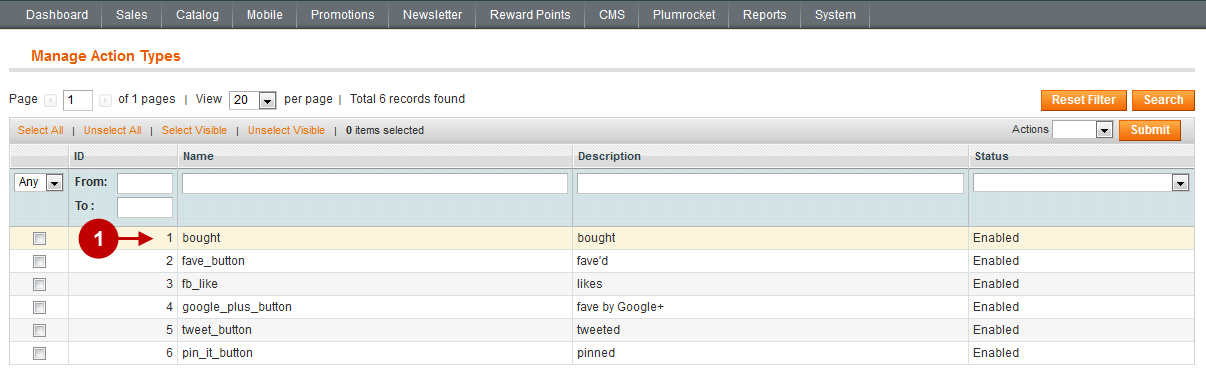
You will see that this page represents a grid containing the list of Action types. The website administrator can see the title of event, its description and action status.You can either change the status of action or choose another Action type if you click to edit it. – If the status is disabled, all the events dealing with this action will not be displayed in the front-end of Live Feed page.
Step-by-Step action:
- Select random item from the list to edit it
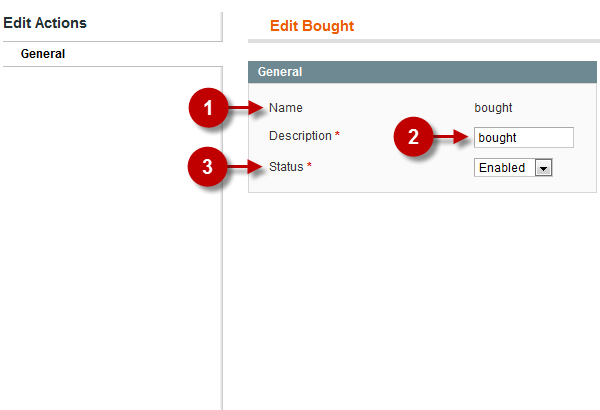
If you choose any action type from the list, you will see a page like in the screenshot below. Then you will be able to enable changes.
You will be able to change description and status. Note, you will not be able to change the name, since it is the system name. In order to change the status and description of the event (events) in the Feed, follow the instruction below.
Detailed description of functionality:
- Option “Name” : cannot be changed. It is a system name.
- Option “Description” : This is the text that will be displayed in Live Feed in the front-end.
- Option “Status” : allows you to enable or disable the action.
Magento Admin Panel
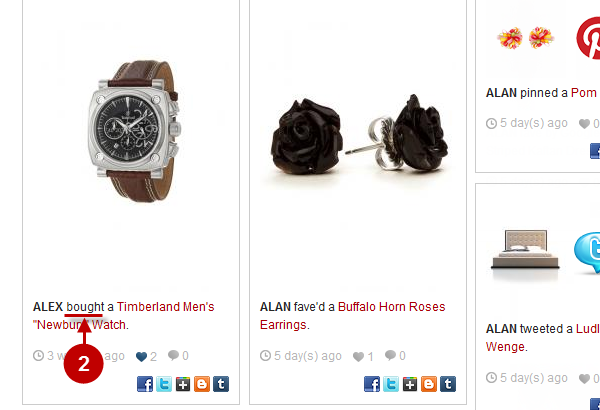
Website Frontend